These zucchini fritters are made with wholesome ingredients, making them perfect for anyone following a vegan diet or wanting to enjoy a guilt-free snack.
Estimated reading time: 5 minutes
- Ingredients You’ll Need
- How To Make Vegan Fritters
- Serving Suggestion
- My Tried and True Tips
- Vegan Zucchini Fritters Recipe
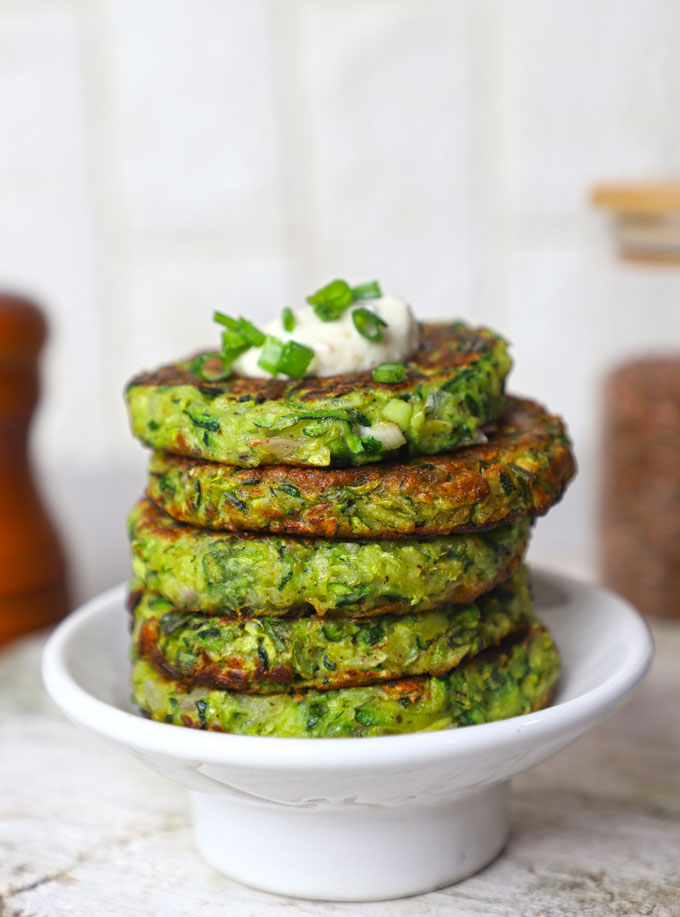
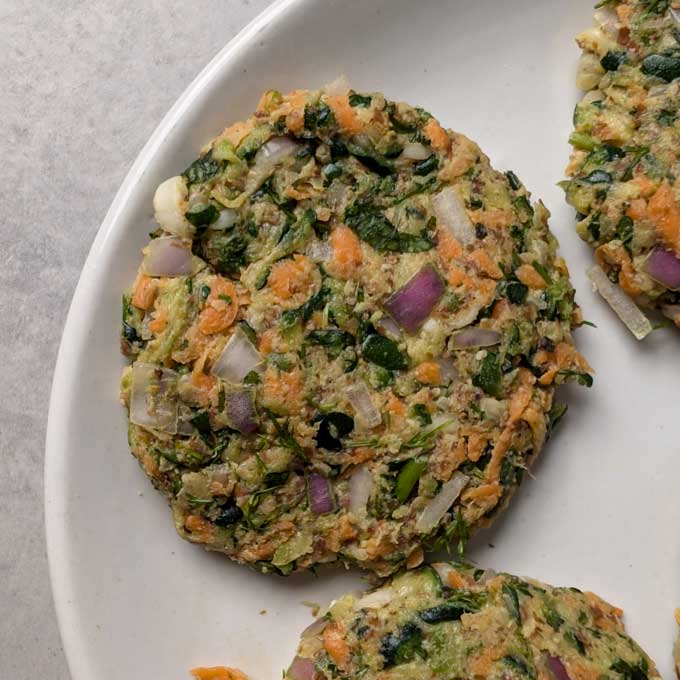
Zucchini Fritters are a perfect go-to vegan recipe if you craving something light, crispy, and flavorful. Plus, they’re an excellent way to use up those extra zucchini from your garden apart from making soup !
Why You’ll Love These Vegan Zucchini Fritters
- Healthy & Nutritious: Packed with fibre, vitamins, and plant-based protein, these fritters make for a balanced and healthy snack.
- Crispy & Flavorful: Thanks to the combination of chickpea flour and spices, these zucchini fritters are crispy on the outside and tender on the inside.
- Vegan & Gluten-Free: Whether you’re vegan, gluten-sensitive, or just looking for a wholesome dish, these zucchini fritters cater to a variety of dietary preferences.
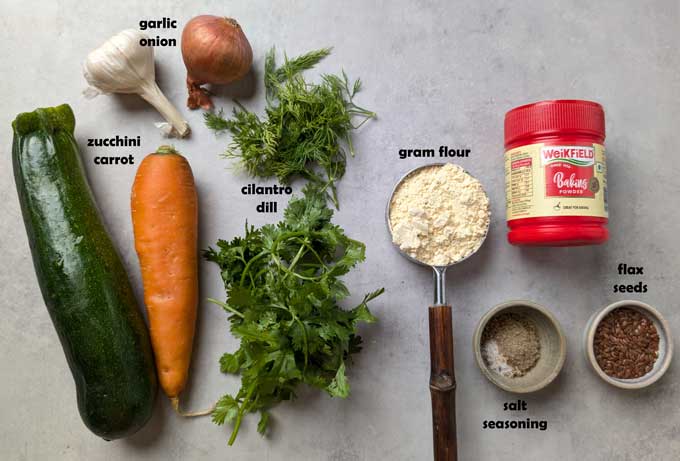
Ingredients You’ll Need
Why Zucchini? Zucchini is an incredibly nutritious vegetable. It’s low in calories but rich in essential vitamins and minerals like Vitamin C, potassium, and fibre. Plus, zucchini has a high water content, making it an ideal ingredient for achieving a crispy yet tender texture in fritters without using too much oil.
- Chickpea Flour also known as gram flour or besan, adds protein and helps bind the fritters.
- Ground Flax seed is a plant-based best substitute for egg.
- Carrot is an optional ingredient, but I like the flavour and taste.
- Fresh Herbs: Use a mix of cilantro, parsley, dill, green onion or chives.
- Seasoning is a mix of salt, pepper, oregano, thyme, cumin powder, and chilli flakes.
- Minced Garlic or powder , either of them is fine.
- Baking Powder gives fluffiness and even cooking.
- Olive Oil to pan fry the fritters.
Optional Add-ins:
- Finely chopped red onion for the taste and crunch
- Nutritional Yeast for a cheesy flavour
- Green Chilli or Jalapeno if you like the spicy kick.
How To Make Vegan Fritters
1.Prepare the Zucchini
- Grate the zucchinis using a coarse or bigger hole in the grater. Similarly, grate the carrots.
- Place the grated vegetables in a bowl and sprinkle with a generous pinch of salt. Cover and let them sit for 10 – 15 minutes to release the water.
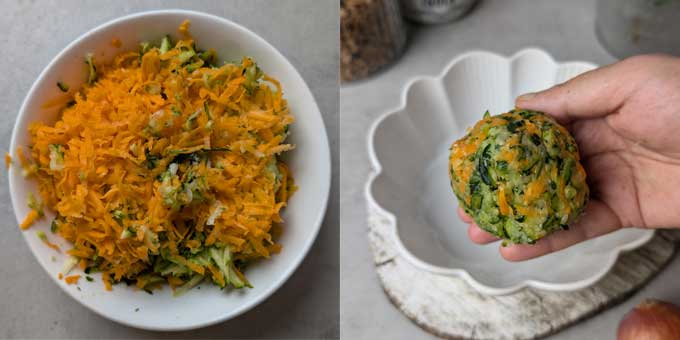
- After 10 – 15 minutes, use your hands or a clean muslin towel to squeeze out as much water as possible from the vegetables. This step is crucial to avoid soggy fritters. You’ll be amazed at how much liquid comes out!
2.Mix the Batter
- In a large mixing bowl, combine the squeezed-out vegetables, chopped herbs, onion, minced garlic, spices and seasoning.
- Add in the chickpea flour and ground flax. Mix everything together until well combined.
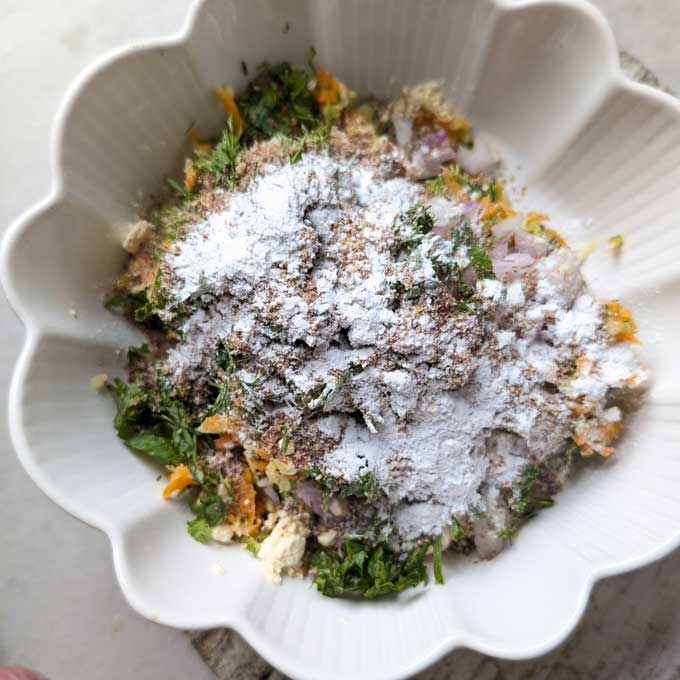
- If the mixture feels too wet, add an extra tablespoon of chickpea flour or corn starch (optional).
3.Shape the Fritters
- Scoop out small portions of the mixture (about 2 tablespoons per fritter) and form them into small patties with your hands. You can flatten them slightly to ensure they cook evenly.
4.Cook the Fritters
- Heat 2-3 tablespoons of olive oil in a large skillet over medium heat.
- Once the oil is hot, place the fritters in the pan, leaving some space between each one.
- Cook for 3-4 minutes on each side or until they are golden brown and crispy. Be gentle when flipping to avoid breaking them apart.
- Once cooked, place the fritters on a plate lined with paper towels to absorb excess oil.

Serving Suggestion
- With Vegan Tzatziki: Serve these fritters with tangy vegan tzatziki made from coconut yoghurt, garlic, cucumber, and dill .
- In a Wrap: Use the fritters as the base of a veggie wrap with lettuce, avocado, and your favourite vegan sauce .
- With a Salad: Pair the fritters with a light green salad like fattoush or a couscous salad for a complete meal.
- As an Appetizer serve them with a dipping sauce like spicy vegan mayo or salsa .
My Tried and True Tips
- The key to crispy fritters is to squeeze out water thoroughly from the vegetables. If your mixture is too wet, the fritters will fall apart or become soggy when cooked.
- Adjust the Seasoning: Don’t hesitate to taste the batter before cooking. Adjust salt, pepper, and spices according to your preference.
- Cooking Temperature: Cook the fritters on medium heat. Too high a temperature will burn the outside while leaving the inside raw, and too low won’t give you that desired crispy crust.
More Fritters and Cutlets
- Oats Cutlet
- Vegetable Cutlet
- Paneer Corn Cutlet
- Cheese Rava Cutlet
- Potato Cheese Balls

Ingredients
- ▢ 2 medium size zucchini
- ▢ 1 large size Carrot
- ▢ 1 small size onion, finely chopped
- ▢ ¼ Cup gram flour (besan)
- ▢ 1 tablespoon ground flax (flaxseeds)
- ▢ 1 tablespoon minced garlic
- ▢ ½ teaspoon dried oregano
- ▢ ½ teaspoon fresh thyme or dried thyme
- ▢ ½ teaspoon salt or to taste
- ▢ ½ teaspoon baking powder
- ▢ ¼ teaspoon red pepper flakes
- ▢ ¼ teaspoon crushed black pepper or to taste
- ▢ 4 sprigs dill leaves, finely chopped
- ▢ 2 sprigs spring onion, finely chopped
- ▢ Handful of cilantro, roughly chopped
- ▢ 4 tablespoon olive oil
Instructions
- Grate the zucchini and carrot using a coarse or bigger hole in the grater. you can do the same using a food processor also.
- Place the grated vegetables in a bowl and sprinkle with a generous pinch of salt. Cover and let them sit for 10 – 15 minutes to release the water.
- After 10 – 15 minutes, use your hands or a clean muslin towel to squeeze out as much water as possible from the vegetables. This step is crucial to avoid soggy fritters. You’ll be amazed at how much liquid comes out!
- In a large mixing bowl, combine the squeezed-out vegetables, flour, ground flax, chopped herbs, onion, minced garlic, spices and seasoning. Mix everything together until well combined. If the mixture feels too wet, you can add an extra tablespoon of chickpea flour or corn starch (optional).
- Scoop out small portions of the mixture (about 2 tablespoons per fritter) and form them into small patties with your hands. You can flatten them slightly to ensure they cook evenly.
- Heat 2-3 tablespoons of olive oil in a large skillet over medium heat.
- Once the oil is hot, place the fritters in the pan, leaving some space between each one.
- Cook for 3-4 minutes on each side or till they are golden brown and crispy. Be gentle when flipping to avoid breaking them apart.
- Once cooked, place the fritters on a plate lined with paper towels to absorb excess oil.
- Serve vegan zucchini fritters with a dip or salad of choice.
Recipe Notes:
- Refrigerate: Store any leftover fritters in an airtight container in the refrigerator for up to 3-4 days. They may soften in the fridge, but you can re-crisp them by reheating them in a pan or air fryer.
- Freeze: These fritters freeze well. Once cooked, let them cool completely, then place them in a single layer on a baking sheet to freeze. Once frozen, transfer them to a freezer-safe container or bag. They’ll keep for up to 3 months. Reheat them directly from frozen in a skillet or oven.
Nutrition
We follow a strict NO SPAM Policy

Vegan Zucchini Fritters Recipe
Equipment
- Food Processor or Grater
- Mixing Bowl
- Frying Pan
Ingredients
- 2 medium size zucchini
- 1 large size Carrot
- 1 small size onion, finely chopped
- ¼ Cup gram flour (besan)
- 1 tablespoon ground flax (flaxseeds)
- 1 tablespoon minced garlic
- ½ teaspoon dried oregano
- ½ teaspoon fresh thyme or dried thyme
- ½ teaspoon salt or to taste
- ½ teaspoon baking powder
- ¼ teaspoon red pepper flakes
- ¼ teaspoon crushed black pepper or to taste
- 4 sprigs dill leaves, finely chopped
- 2 sprigs spring onion, finely chopped
- Handful of cilantro, roughly chopped
- 4 tablespoon olive oil
Instructions
- Grate the zucchini and carrot using a coarse or bigger hole in the grater. you can do the same using a food processor also.
- Place the grated vegetables in a bowl and sprinkle with a generous pinch of salt. Cover and let them sit for 10 – 15 minutes to release the water.
- After 10 – 15 minutes, use your hands or a clean muslin towel to squeeze out as much water as possible from the vegetables. This step is crucial to avoid soggy fritters. You’ll be amazed at how much liquid comes out!
- In a large mixing bowl, combine the squeezed-out vegetables, flour, ground flax, chopped herbs, onion, minced garlic, spices and seasoning. Mix everything together until well combined. If the mixture feels too wet, you can add an extra tablespoon of chickpea flour or corn starch (optional).
- Scoop out small portions of the mixture (about 2 tablespoons per fritter) and form them into small patties with your hands. You can flatten them slightly to ensure they cook evenly.
- Heat 2-3 tablespoons of olive oil in a large skillet over medium heat.
- Once the oil is hot, place the fritters in the pan, leaving some space between each one.
- Cook for 3-4 minutes on each side or till they are golden brown and crispy. Be gentle when flipping to avoid breaking them apart.
- Once cooked, place the fritters on a plate lined with paper towels to absorb excess oil.
- Serve vegan zucchini fritters with a dip or salad of choice.
Video
Notes
- Refrigerate: Store any leftover fritters in an airtight container in the refrigerator for up to 3-4 days. They may soften in the fridge, but you can re-crisp them by reheating them in a pan or air fryer.
- Freeze: These fritters freeze well. Once cooked, let them cool completely, then place them in a single layer on a baking sheet to freeze. Once frozen, transfer them to a freezer-safe container or bag. They’ll keep for up to 3 months. Reheat them directly from frozen in a skillet or oven.
Nutrition
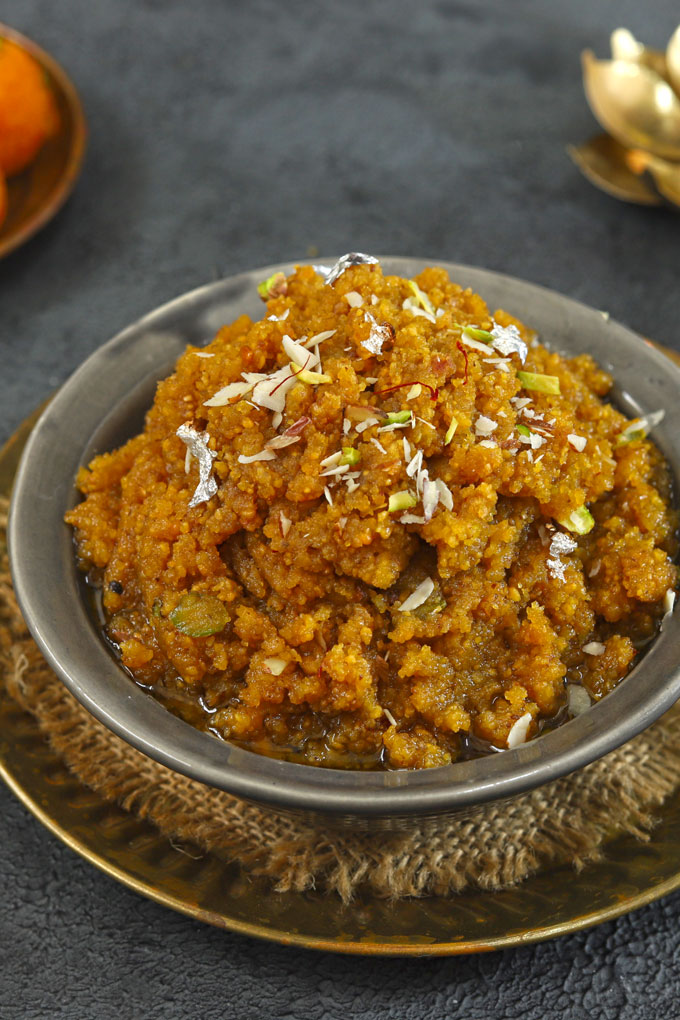
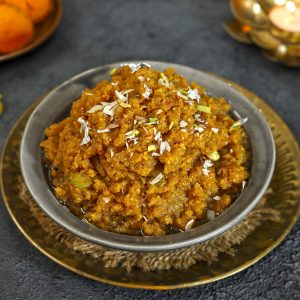
Here is an easy moong dal halwa recipe you can make from scratch without spending hours in the kitchen. Be sure to watch the video!
Estimated reading time: 4 minutes
- What is ‘Moong Dal Halwa’?
- Ingredients You’ll Need
- Watch Dal Halwa Video
- My Tried and True Tips
- Moong Dal Halwa Recipe
What is ‘Moong Dal Halwa’?
Halwa is an Indian sweet dish. It is an eggless, purely vegetarian sweet pudding. The dish is inspired by the Persian dessert called halvah . There are a variety of halwa variants popular across the Indian subcontinent. Moong Dal halwa is one of them.
The two words that come to my mind while talking about dal halwa are – patience and practice.
It is one of those Indian desserts that require a lot of patience to make and a fair understanding of the cooking process.
My Dal Badam Halwa Recipe is perfect for home cooks to make a delicious bowl of dessert without sweating in the kitchen for hours or ending up with a sore arm.
- perfect dessert for festive occasions
- protein-rich and gluten-free
- no artificial colours/flavours
- easy-to-follow halwa recipe
- requires pantry staples
- meal prep friendly
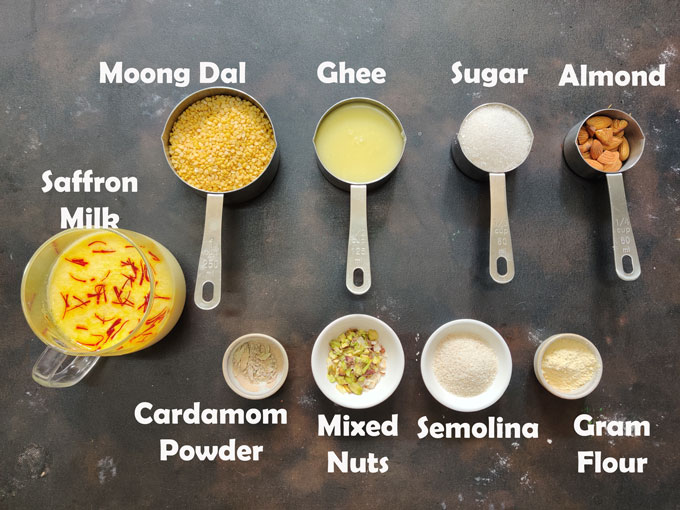
Ingredients You’ll Need
A few Indian pantry staples required for the dal halwa recipe are:
- Dal: The yellow mung (moong) dal is the key ingredient. Use dry, uncooked moong dal for this halwa recipe.
- Ghee: It is the soul of moong dal halwa. The good fat of ghee balances the protein of lentils. There is no way to skim or skip ghee in the halwa recipe.
- Almond: It gives a nutty and delicious mouth feel to the halwa. Plus increases its protein value.
- Gram Flour and Semolina: One tablespoon of each gives a perfect texture to the halwa and makes it easy to roast the dal powder.
- A full-fat milk , preferably with cream (malai) is the ideal choice. While slow roasting, the full cream milk turns into khoya (mawa).
- Granulated white sugar to sweeten the halwa. The brown sugar or jaggery powder does not do justice to the dal halwa taste and texture.
- Saffron and Green Cardamom
There are two ways of making this moong dal halwa.
Method 1 – make a wet paste of dal
- My Verdict: I find this method a bit tedious, time taking, and tricky. The wet paste took one hour to reach the desired texture and colour before adding milk. Plus, continuously frying wet paste requires a lot of muscle power. Hence, I am not a big fan of spending nearly 2 hours in the kitchen for a single dessert bowl.
Method 2 – make a dry powder of dal
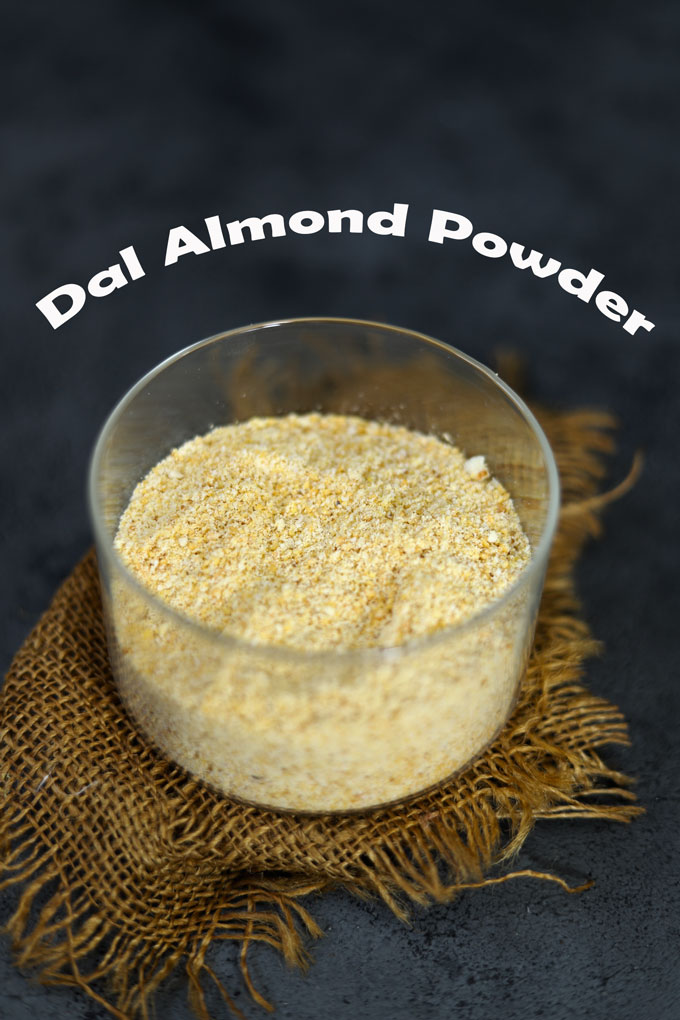
- My Verdict: This is my favourite way to make dal halwa. It requires less time and muscle power. The roasted dal powder is meal-prep friendly. You can store it for 1 – 2 weeks at room temperature. No need to start each time from scratch by soaking the dal and making a paste. Simply grab the dal powder and start making halwa.
Watch Dal Halwa Video
My Tried and True Tips
- Be Patient : Moong Dal Halwa is a labour of love and patience. Be patient while dry roasting the dal until it gets a light brown colour. Similarly, fry the halwa till the ghee starts oozing from the sides.
- Add Ghee in Batches : Moong Dal absorbs a lot of ghee. Hence, while making halwa, the ghee is added in different phases of the cooking process. Add the first batch in phase 1. The second batch is added in small quantities throughout the process till the halwa is ready.
- Full Fat Milk : Avoid using skimmed or toned milk for making dal badam halwa. Many dal halwa recipes use khoya (mawa) instead of milk.
- Tested Signals : The best signal of halwa being ready is the ghee oozing from the corners of the halwa after adding sugar. The moong dal halwa always has a fat-dripping, moist surface. It is never dry or hard.
More Indian Halwa Recipes
- Suji Ka Halwa
- Aate Ka Halwa
- Gajar Ka Halwa
- Pineapple Halwa
Ingredients
- ▢ 1 Cup yellow moong dal (mung bean)
- ▢ ¼ Cup almonds
- ▢ ½ Cup ghee
- ▢ 1 tablespoon gram flour (besan)
- ▢ 1 tablespoon semolina (rava/suji)
- ▢ 2 Cup full fat milk clarified butter
- ▢ ½ teaspoon saffron (kesar)
- ▢ 1 teaspoon green cardamom powder
- ▢ ⅓ Cup granulated white sugar
- ▢ 2 tablesponn almonds + pistachio, sliced
Instructions
- Rinse moong dal until water runs clear. Soak for 1 hour.
- After 1 hour, drain all the water from the dal. Transfer it to a colander to drain all the liquid. Spread it in a single layer on a baking tray lined with a kitchen towel. Put this tray under the fan or sun for 10 – 15 minutes for dal to dry completely.
- Once dal is dry to touch, transfer it to a wide pan. Dry roast over low to medium heat till it is light brown in color (refer to image/video). Keep stirring while roasting. Transfer to a blender. In the same pan, dry roast the ¼ cup almonds for 2 – 3 minutes. Transfer to the same blender as dal.
- Grind roasted dal and almonds to a slightly coarse powder. Transfer to an airtight container to store or use immediately.
- Next, soak saffron and cardamom powder in hot milk. Stir, and keep aside until ready to use.
- To make halwa, heat ¼ cup of ghee in a heavy bottom wide pan/kadhai/casserole
- Add gram flour, semolina, and roast for 2 – 3 minutes or till a sweet, nutty aroma is released.
- Next, add dal badam powder. Mix nicely with ghee. Start roasting it over low to medium flame. After 5 minutes, it starts oozing ghee in the pan and turns deep brown in color. That is your cue to add milk.
- Add in saffron infused milk, and 1 tablespoon of ghee. Continuously stir the halwa to avoid any lump formation and to make sure milk is absorbed by the dal paste. If there is spluttering and bubbling, cover the pan with a lid. Keep it that way for 1 – 2 minutes or till bubbling is settled.
- Once the milk is absorbed by the halwa, add the leftover ghee, and the sliced nuts. Continuously stir and roast the halwa till ghee starts oozing from the sides. This is the signal that moong dal halwa is ready.
- Garnish moong dal halwa with sliced almonds, pistachio, saffron, and edible silver leaf. Serve warm.
Recipe Notes:
- Divide the ghee into two equal portions to be used at two different stages of cooking halwa.
- Combine hot milk, saffron, and cardamom powder. Do this step at the beginning itself so that the color of saffron is combined with the milk.
- Use fine rava (chiroti rava) and gram flour for this halwa. If you want to keep it gluten-free, skip adding semolina.
- ⅓ – ½ Cup of white sugar is enough for dal halwa. It’s best to taste after adding sugar and if required, add more.
- Use a combination of sliced almonds and pistachio for garnishing the dal halwa. If you prefer, you can ghee roast the nut as well before slicing and adding to the ghee.
- The moong dal halwa tastes best warm straight out of the pan. It remains fresh at room temperature for 4 – 5 hours. Store the leftover in an airtight container in the refrigerator for 1 week. Reheat in a microwave for 5 minutes. This helps melt the solidified ghee. Or you can reheat in a pan with a few full-fat milk or water splashes.
Nutrition
We follow a strict NO SPAM Policy
