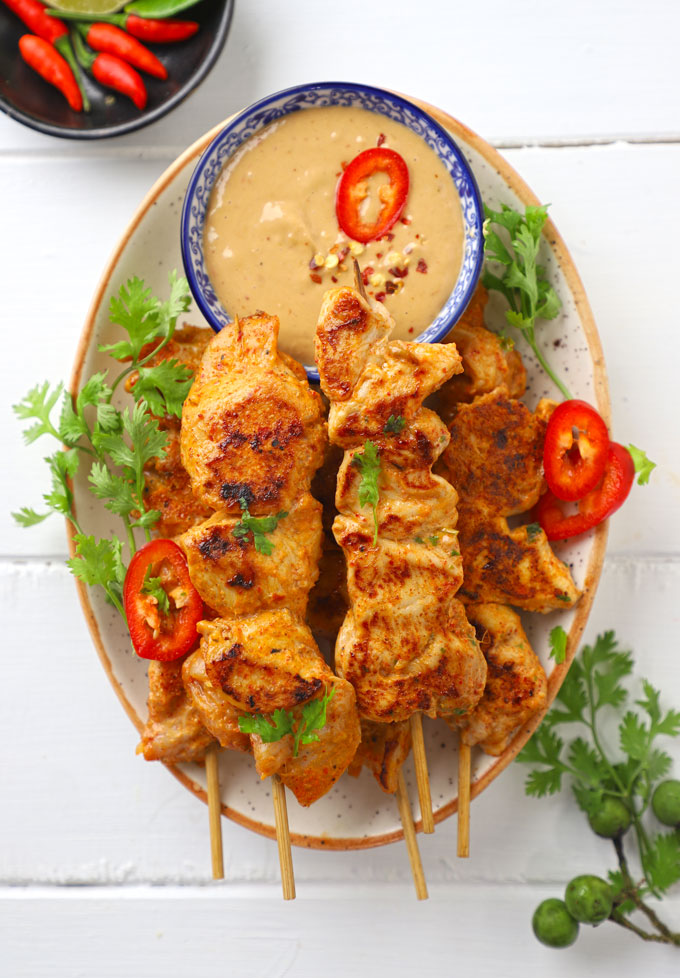
Chicken Satay is a delicious grilled chicken skewer served with a peanut dipping sauce. Here is a Thai-style, easy, and tasty satay recipe.
Estimated reading time: 5 minutes
- About Satay
- Ingredients You’ll Need
- How To Make Satay
- How To Grill Satay
- My Tried and True Tips
- Chicken Satay Recipe
About Satay
The word Satay is used in South East Asia for marinated and grilled meat/seafood served on skewers. It is one of the most convenient and healthy ways to enjoy grilled food while on the go.
If you visit Singapore , Indonesia, Thailand, or Malaysia , satay is one of the most common street food dishes you will come across. When it comes to satay, one is spoiled for choices. From flavour to type of meat, there are so many options.
It is grilled manually over a coal or wood fire. Brushed with oil while grilling and served with a dipping sauce.
I am sharing an easy, flavoursome Thai-style chicken satay recipe that is surely bookmark-worthy for the grilling season.
Ingredients You’ll Need
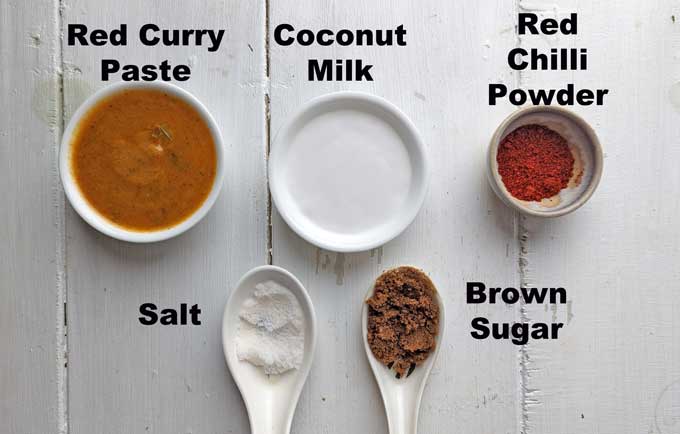
You need only 5 ingredients to marinate the chicken.
- Chicken: Use a combination of boneless chicken breasts and chicken thighs. Cut each piece of the chicken meat into uniform, tiny, bite-size pieces.
- Red Curry Paste: The star ingredient of my chicken satay marinade is Thai red curry paste . You can use homemade or readymade curry paste.
- Coconut Milk: It helps in softening the meat and gives it a deliciously creamy texture.
- Other Ingredients: Red Chilli Powder, Salt, Brown Sugar, Coconut or Sesame Oil
How To Make Satay
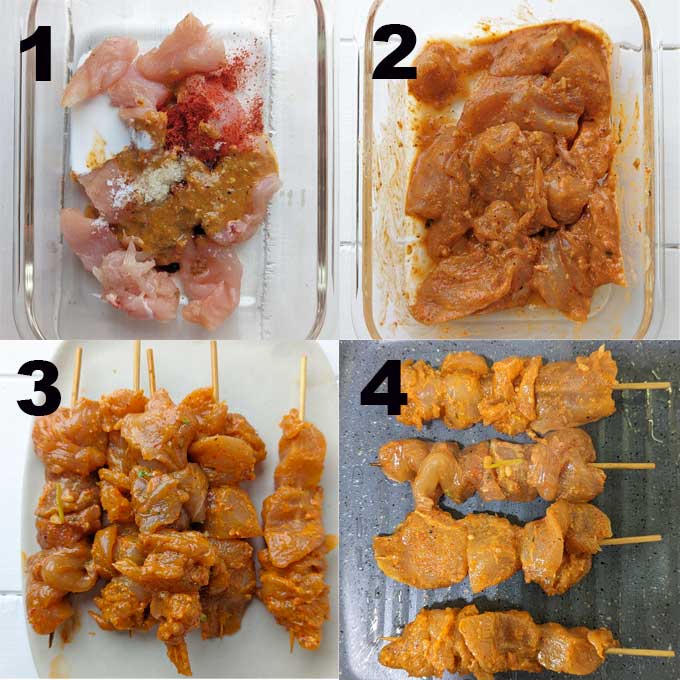
Step 1) Clean, wash, and cut the chicken meat into equal, bite-size pieces.
Step 2) Combine Thai red curry paste, coconut milk, salt, sugar, and red chilli powder in a bowl. Mix nicely. Taste, and add more seasoning if required.
Sept 3) Add chicken pieces to the marinade. Mix to coat each piece with the marinade. Cover and keep in the refrigerator. For satay, it is best to marinate the meat pieces overnight or for at least 4 to 5 hours.
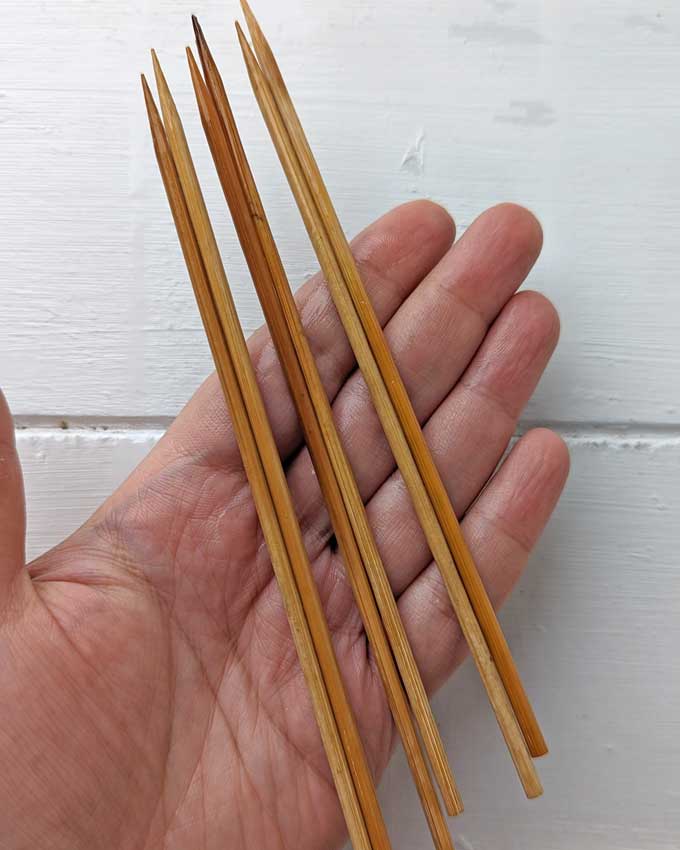
Step 4) Soak the bamboo skewers in water for at least one hour. This will prevent the bamboo skewers from burning on the grill.
Step 5) Once ready to grill, thread 3-4 pieces of marinated chicken meat onto the bamboo skewers. Similarly, prepare all the skewers.
Step 6) Grill the chicken satay skewers for 5 minutes on each side until the meat is fully cooked and the surface is nicely charred on both sides. Baste and brush with oil to keep the meat moist while grilling.

How To Grill Satay
The best way to grill chicken satay is on a charcoal BBQ or wood fire.
But don’t worry, you can grill them on good quality, heavy-duty cast iron or grilling pan over the stovetop. Or use an indoor, electric BBQ for the purpose.
You can use the grill mode of the oven or microwave for this purpose.
Serving Suggestion
Chicken Satay is served with a sweet and spicy peanut dipping sauce . However, you can serve it with Thai sweet chilli sauce , spicy mango dipping sauce , or any other dip you choose.
I love serving them with a bowl of smashed cucumber salad or Chinese Coleslaw .

My Tried and True Tips
- The key to the best chicken satay is the tender and juicy meat. I prefer using boneless thigh meat for making satay. Second, marination is the key step in making a flavoursome satay.
- Marinate the meat for at least 4 to 5 hours or, at best, overnight. The meat needs to absorb the marinade’s flavour, so it does not taste bland underneath.
- Customize your marinade. Add a teaspoon of soy sauce, fish sauce or red chilli sauce to the marinade mix. Or skip the sugar if you don’t want the notes of sweetness in your chicken satay.
- Chicken skewers take 10 minutes over medium heat on a bbq/grill pan. And it is surely a crime to overcook the chicken pieces because it makes them dry and chewy.
More Thai Recipes
- Thai Red Curry
- Chicken Pad Thai
- Green Curry Soup
- Thai Coconut Soup
- Green Papaya Salad
- Pineapple Fried Rice
- Pineapple Chicken Curry

Ingredients
- ▢ 500 gram boneless chicken pieces
Ingredients for Chicken Satay Marinade
- ▢ ¼ Cup Thai Red Curry paste ( get recipe )
- ▢ ½ teaspoon red chili powder
- ▢ 4 tablespoon coconut milk
- ▢ ½ teaspoon salt or to taste
- ▢ 1 tablespoon dark brown sugar
- ▢ 4 tablespoon sesame oil
- ▢ a few lemon wedges
Instructions
- Clean, wash and cut the chicken meat into equal, bite-size pieces.
- Soak the bamboo skewers in water for at least one hour. This will prevent the bamboo skewers from burning on the grill.
- Combine Thai red curry paste, coconut milk, salt, sugar, and red chilli powder in a bowl. Mix nicely. Taste, and add more seasoning if required.
- Add chicken pieces to the marinade. Mix to coat each piece with the marinade. Cover and keep in the refrigerator. For satay, it is best to marinate the meat pieces overnight or for at least 4 to 5 hours.
- Once you are ready to grill, thread 3-4 pieces of marinated chicken meat onto the bamboo skewers. Make sure to tighly pack the chicken pieces on the skewer without leaving space in between. Similarly, prepare all the skewers.
- The best way to grill chicken satay is on a charcoal BBQ or wood fire. You can grill them on good quality, heavy-duty cast iron or grilling pan over the stovetop. Or use an indoor, electric BBQ for the purpose.
- Cook till chicken pieces are tender and get charred from the outside.
- Keep turning the skewers while grilling for even cooking, and baste them with the leftover marinade and sesame oil.
- Sprinkle chopped cilantro, green onion, and lime juice.
- Serve Chicken Satay with peanut dipping sauce.
Recipe Notes:
- Use chicken thigh or breast meat for the satay. Ensure the pieces are tiny bite-size so that they are easy to grill.
- I highly recommend marinating the meat overnight for the chicken satay.
- You can use readymade Thai Red Curry paste for the marinade.
Nutrition
We follow a strict NO SPAM Policy

Chicken Satay Recipe
Equipment
- Mixing Bowl
- Bamboo Skewers
- BBQ or Grill
Ingredients
- 500 gram boneless chicken pieces
Ingredients for Chicken Satay Marinade
- ¼ Cup Thai Red Curry paste ( get recipe )
- ½ teaspoon red chili powder
- 4 tablespoon coconut milk
- ½ teaspoon salt or to taste
- 1 tablespoon dark brown sugar
- 4 tablespoon sesame oil
- a few lemon wedges
Instructions
- Clean, wash and cut the chicken meat into equal, bite-size pieces.
- Soak the bamboo skewers in water for at least one hour. This will prevent the bamboo skewers from burning on the grill.
- Combine Thai red curry paste, coconut milk, salt, sugar, and red chilli powder in a bowl. Mix nicely. Taste, and add more seasoning if required.
- Add chicken pieces to the marinade. Mix to coat each piece with the marinade. Cover and keep in the refrigerator. For satay, it is best to marinate the meat pieces overnight or for at least 4 to 5 hours.
- Once you are ready to grill, thread 3-4 pieces of marinated chicken meat onto the bamboo skewers. Make sure to tighly pack the chicken pieces on the skewer without leaving space in between. Similarly, prepare all the skewers.
- The best way to grill chicken satay is on a charcoal BBQ or wood fire. You can grill them on good quality, heavy-duty cast iron or grilling pan over the stovetop. Or use an indoor, electric BBQ for the purpose.
- Cook till chicken pieces are tender and get charred from the outside.
- Keep turning the skewers while grilling for even cooking, and baste them with the leftover marinade and sesame oil.
- Sprinkle chopped cilantro, green onion, and lime juice.
- Serve Chicken Satay with peanut dipping sauce.
Notes
- Use chicken thigh or breast meat for the satay. Ensure the pieces are tiny bite-size so that they are easy to grill.
- I highly recommend marinating the meat overnight for the chicken satay.
- You can use readymade Thai Red Curry paste for the marinade.
Nutrition
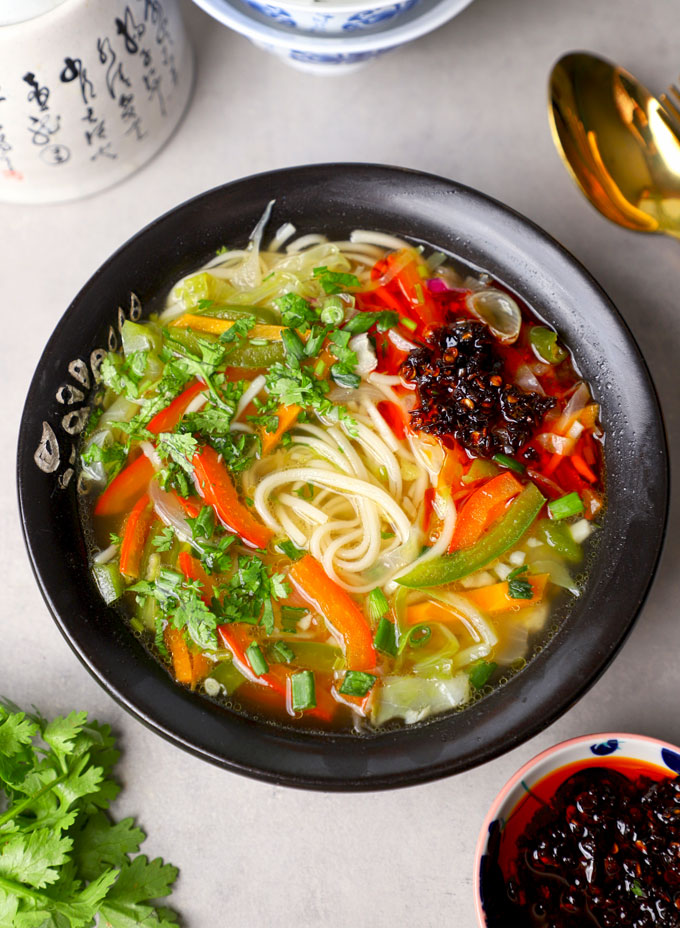
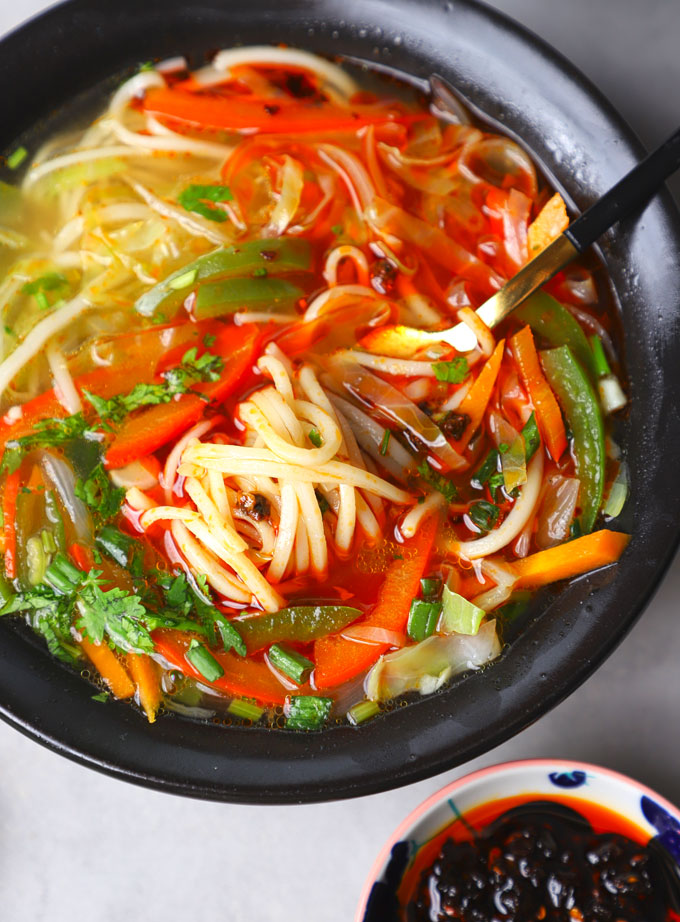
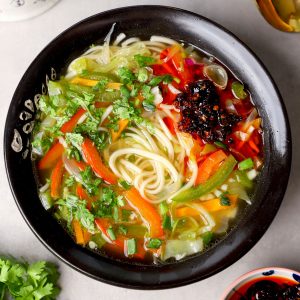
Thukpa is a comforting Tibetan noodle soup. Here is a one pot, veg thukpa recipe to warm you up on cold days.
Estimated reading time: 6 minutes
- The Cultural Essence of Thukpa
- The Secret of Thukpa: Fresh Ingredients
- How To Make Veg Thukpa
- My Tried and True Tips
- Veg Thukpa Recipe
The Cultural Essence of Thukpa
Thukpa, which translates to “noodle” in Tibetan, is a staple dish in the Himalayan regions, including Tibet, Nepal, Bhutan, and parts of India like Sikkim, Uttarakhand, and Arunachal Pradesh. In some regions including Nainital, we call it – Thuppa or Thupka.
In the harsh, cold climates of the Himalayas, Thukpa with meat provides the necessary warmth and sustenance. It’s often enjoyed as a hearty, one pot meal after a long day of hard work.
Thukpa is more than just food; it’s a reflection of the region’s history, climate, and way of life.
This veg Thukpa recipe from Uttarakhand is an easy, one pot version of the dish with loads of vegetables that you can easily make at home in 30 minutes.
Recipe Highlights
- vegan
- one pot meal
- easy to customize
- gets ready in 30 minutes
- wholesome and nourishing
- does not require too many ingredients
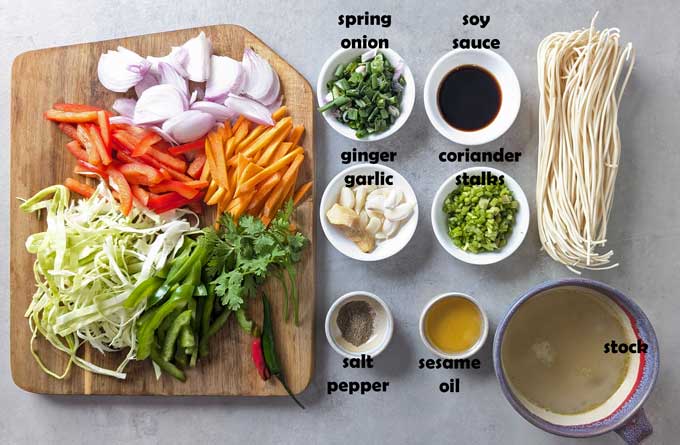
The Secret of Thukpa: Fresh Ingredients
The beauty of Thukpa lies in its simplicity and the use of fresh, wholesome ingredients.
- Noodles: Traditionally, Thukpa is made with hand-pulled noodles, but store-bought Hakka or ramen noodles can also be used. Rice noodles or egg noodles work particularly well.
- Vegetables: The veg Thukpa includes a variety of seasonal vegetables such as onion, carrots, bell peppers, cabbage, and mushrooms. These vegetables add vibrant colours and a range of textures to the soup.
- Broth: A flavoursome vegetable stock forms the base of the soup.
- Aromatics: Ginger, Garlic, Green Chilli, and Coriander Stalks are the three holy grail of veg Thukpa recipe. I highly recommend not missing out either of them.
- Seasoning: Tibetan cuisine is known for its subtle yet impactful flavours. I use medium soy sauce, black pepper, green chilli, and salt to season the thukpa.
- Fresh coriander and spring onion are two essential herbs for Thukpa.
- Proteins: While the focus here is on the vegetables, tofu can be added for an extra protein boost, making it a well-rounded meal.
How To Make Veg Thukpa
Prepare Soup Base:
- Heat oil in a large saucepan or stockpot over medium heat.
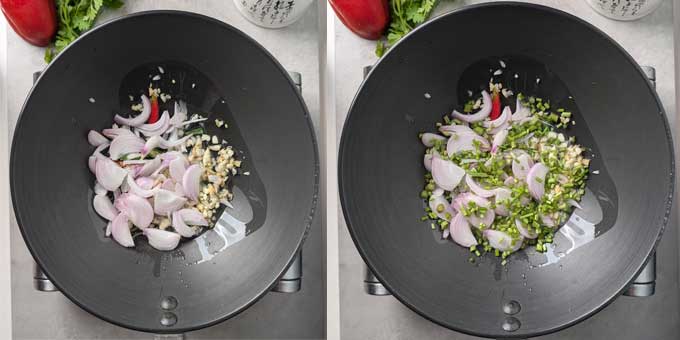
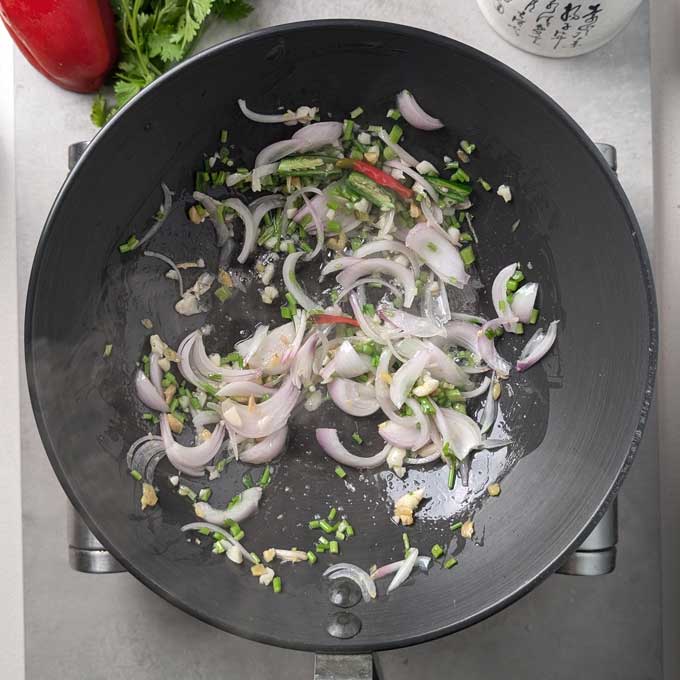
- Add the minced garlic, ginger, coriander stalks, green chilli, and onion.
- Saute for one minute or until aromatic. No need to brown them.
Cook the Noodles and Vegetables:
- Pour in the vegetable stock and bring Thukpa to a gentle boil.
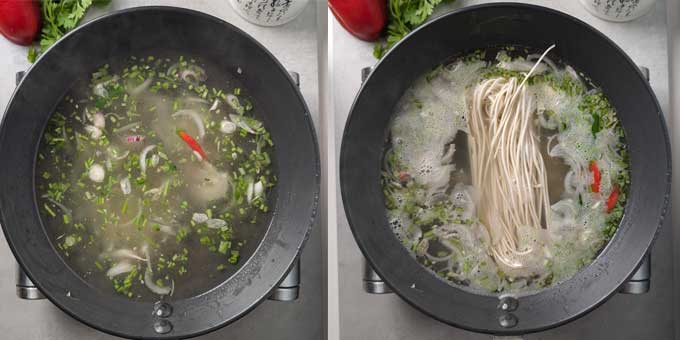
- Add the noodles, julienned vegetables, shredded cabbage, salt, pepper, and soy sauce.
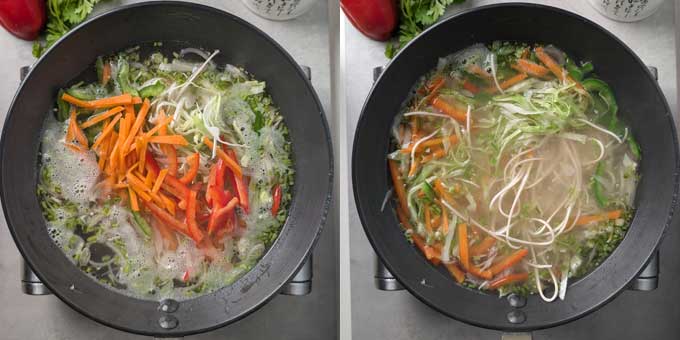
- Simmer over high heat till noodles are cooked and vegetables soften.
Finishing Touch:
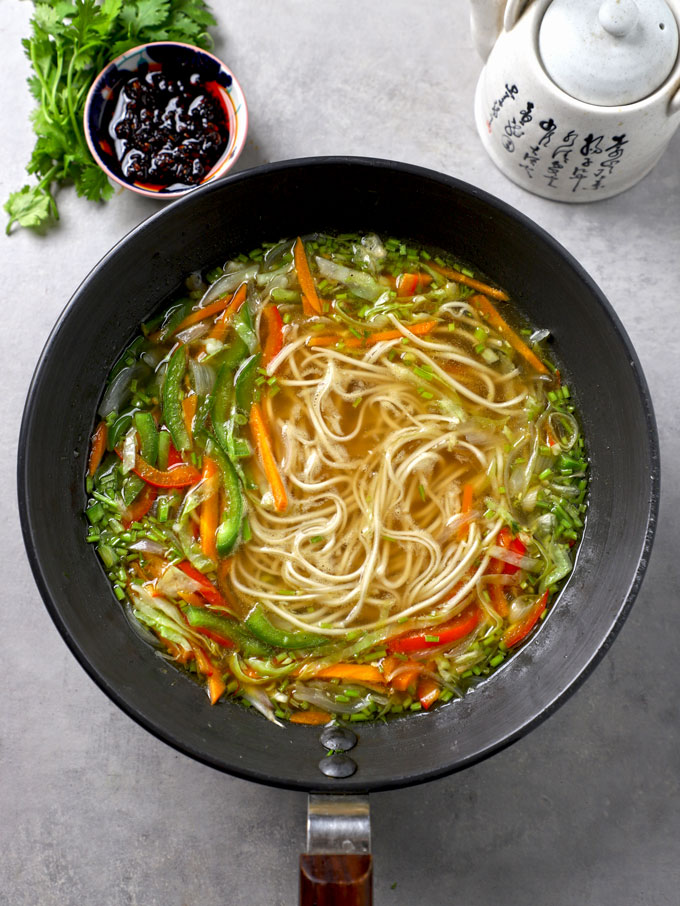
- Add finely chopped spring onion and coriander leaves.
- Taste, and if required add more salt or soy sauce.
- Veg Thukpa is ready to serve.
Serving Suggestion
Thukpa is served piping hot then only it tastes best.
Ladle the Thukpa into bowls and add a handful of fresh coriander and green onions in each bowl. Serve it with chilli oil for that garlicky and spicy kick or a squeeze of lemon juice.
Momo – the Tibetan dumpling is one of the best side dishes to serve with Thuppa to make it a complete meal.
My Tried and True Tips
- Not too many sauces. Thukpa is not the kind of noodle soup that requires lot of processed sauces. Hence, for an authentic flavour avoid adding them. I add medium soy sauce for that delicious umami flavour.
- Without stock Thukpa will have no depth of flavour. The original recipes requires meat cooked with hand pulled noodles. Without meat, you need a flavoursome vegetable stock or broth to prepare the base of soup.
- Keep it soupy. Do not add corn starch or any other thickening agent to Thupka. It is supposed to be slurpy and soupy and rustic.
- Too much noodles . Thukpa has the perfect harmony of soup, veggies and the noodles. Hence, do not get carried away and add too much of noodles. They absorb all the soup after a few hours of cooking and you’ll end up with soup noodles not thukpa.
- Cooking noodles separately. Many Thuppa recipes suggest cooking noodles separately and then serving in the bowl. I prefer cooking them in the soup base for an additional layer of flavour and convenience.
- Not a freezer friendly meal. Thukpa is the kind of dish that tastes best fresh and hot. It doesn’t taste good after freezing or storing or reheating.
More Vegetable Soup Recipes
- Oats Soup
- Mushroom Soup
- Green Peas Soup
- Cauliflower Soup
- Minestrone Soup
- Broccoli Almond Soup
- Vegetable Barley Soup
- Tomato Couscous Soup
Ingredients
- ▢ 150 gram Hakka noodles (uncooked)
- ▢ 2 tablespoon vegetable refined oil
- ▢ 1 tablespoon minced garlic
- ▢ 1 tablespoon minced ginger
- ▢ 1 tablespoon coriander stalks, finely chopped
- ▢ 1 medium size red onion, sliced
- ▢ 2 green chillies, sliced
- ▢ ½ Cup cabbage shredded
- ▢ ½ Cup thinly sliced red bell pepper
- ▢ ½ Cup thinly sliced capsicum
- ▢ ½ Cup thinly sliced carrot
- ▢ 1 tablespoon dark soy sauce
- ▢ 1 teaspoon black pepper powder
- ▢ ½ teaspoon salt or to taste
- ▢ 4 Cup vegetable stock ( see recipe )
- ▢ 2 spring onion, finely chopped
- ▢ handful of fresh coriander leaves, chopped
Instructions
- Heat oil in a large saucepan or stockpot over medium heat.
- Add the minced garlic, ginger, green chilli, coriander stalks, and onion. Saute for one minute or until aromatic. No need to brown them.
- Pour in the vegetable stock and bring Thukpa to a gentle boil.
- Add the noodles, julienned vegetables, shredded cabbage, salt, pepper, and soy sauce.
- Simmer over high heat till noodles are cooked and vegetables soften.
- Once noodles are cooked, add finely chopped spring onion and coriander leaves. Taste, and if required add more salt or soy sauce.
- Veg Thukpa is ready to serve.
Recipe Notes:
- Thukpa is not the kind of noodle soup that requires lot of processed sauces. Hence, for an authentic flavour avoid adding them. I add medium soy sauce for that delicious umami flavour.
- Without stock Thukpa will have no depth of flavour.
- Keep it soupy. Do not add corn starch or any other thickening agent to Thupka. It is supposed to be slurpy and soupy and rustic.
- Too much noodles . Thukpa has the perfect harmony of soup, veggies and the noodles. Hence, do not get carried away and add too much of noodles. They absorb all the soup after a few hours of cooking and you’ll end up with soup noodles not thukpa.
- After noodles are cooked do not simmer the soup for too long. Else, it will become more thick.
Nutrition
We follow a strict NO SPAM Policy
