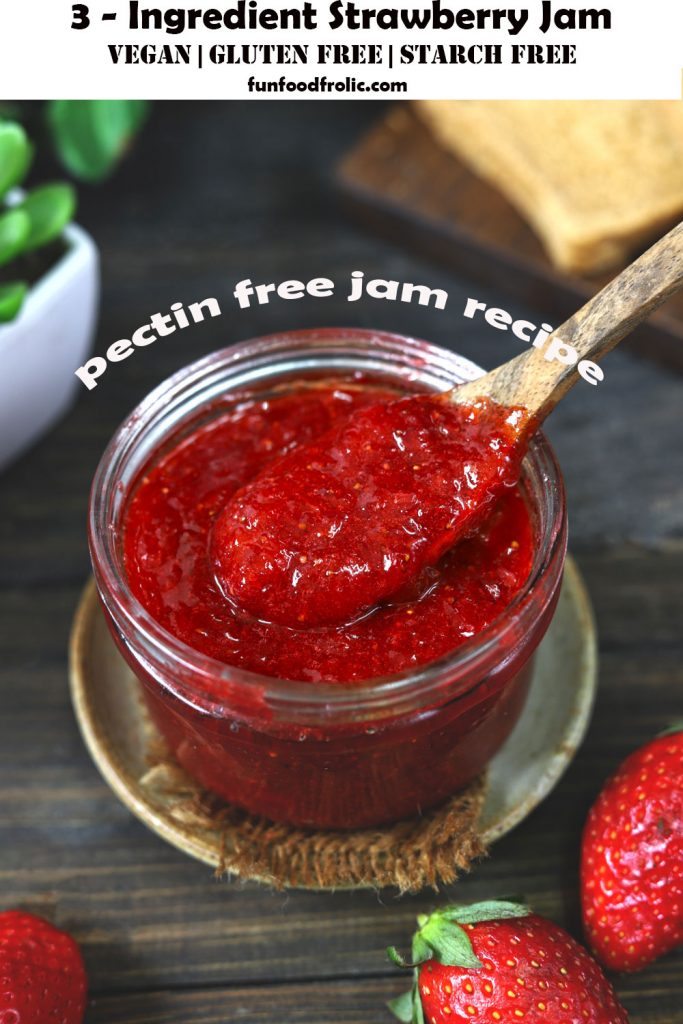
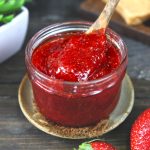
This is an easy 3-ingredient strawberry jam recipe. It is gluten-free, vegan, and free of added pectin. This homemade jam recipe is worth bookmarking.
Reasons to LOVE Homemade Jam
Since I started making fresh strawberry jam or mango jam at home, I have not been going back to readymade ones.
I will give you more than one reason to LOVE homemade strawberry jam.
- gluten-free & vegan
- 3-ingredient recipe
- no added pectin
- one-pot recipe
- zero thickening agent
- natural colour & flavour
- chemical preservative free
- easy to make and store
Ingredients Required
Only 3 ingredients, a chopping knife, a saucepan, and a clean jar are required for this strawberry jam recipe.
- Strawberry: The fresh, ripe, sweet-tasting strawberries work best for making jam. Frozen strawberries work too.
- Sugar: Granulated fine-quality white sugar always works best for making any fruit jam.
- Lemon Juice: It balances the sweet flavour and is a natural preservative.
Saucepan: Use a non-stick, ceramic, or stainless steel saucepan to make the jam. Cast iron and other reactive metals alter the colour and taste of the strawberry jam.
Jar: Use a sterilized glass jar to store the strawberry jam. The glass is a non-reactive metal. Hence, best for storing perishable relish such as jam.
Strawberry to Sugar Ratio
The traditional strawberry jam recipes recommend following an equal 1:1 (fruit to sugar) ratio. Usually, it is always best to taste the strawberries to check their sweetness and tartness. Then add sugar accordingly.
I add 1 to 1 ¼ cups of sugar to one kilogram of fresh strawberries .
Always remember that a fruit jam with slight tartness is more delicious than one tastes like a sugar syrup with no original fruit flavour.
How To Make Jam
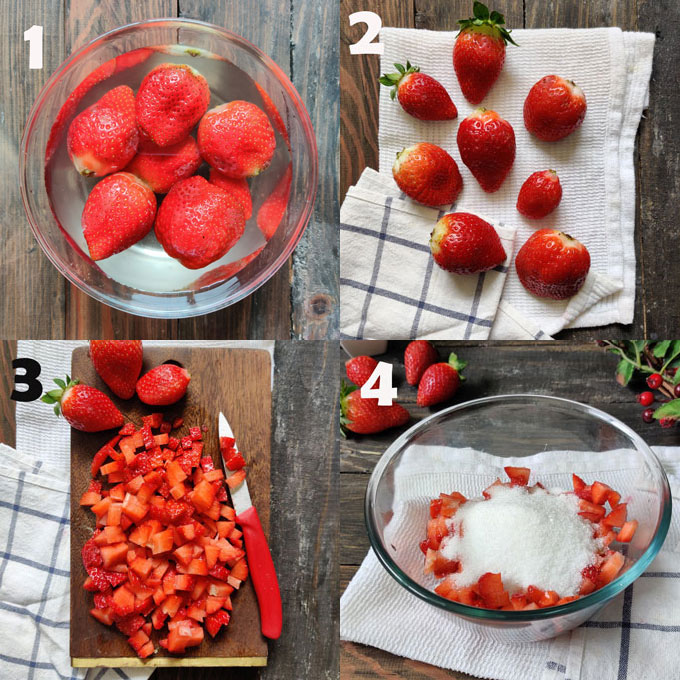
Step 1) Wash the fresh strawberries. Remove the green top (crown). Wipe clean and pat dry with a kitchen towel. Ensure they are not wet or moist ( images 1 & 2 ).
Step 2) Next, finely chop the strawberries. Cut and discard the inner white part of the strawberries ( Image 3 ).
Step 3) Transfer chopped strawberries to a wide mixing bowl. Add granulated white sugar. Mix nicely. Cover and set aside for 20 – 30 minutes.
Step 4) After 20 – 30 minutes, sugar granules will be completely dissolved with the berry, and pink juice will be released. Do not rush this process ( image 5 ).
Step 5) Add lemon juice and mix nicely. Transfer the strawberries along with all the pink liquid to a saucepan. Turn on the stovetop heat to low.
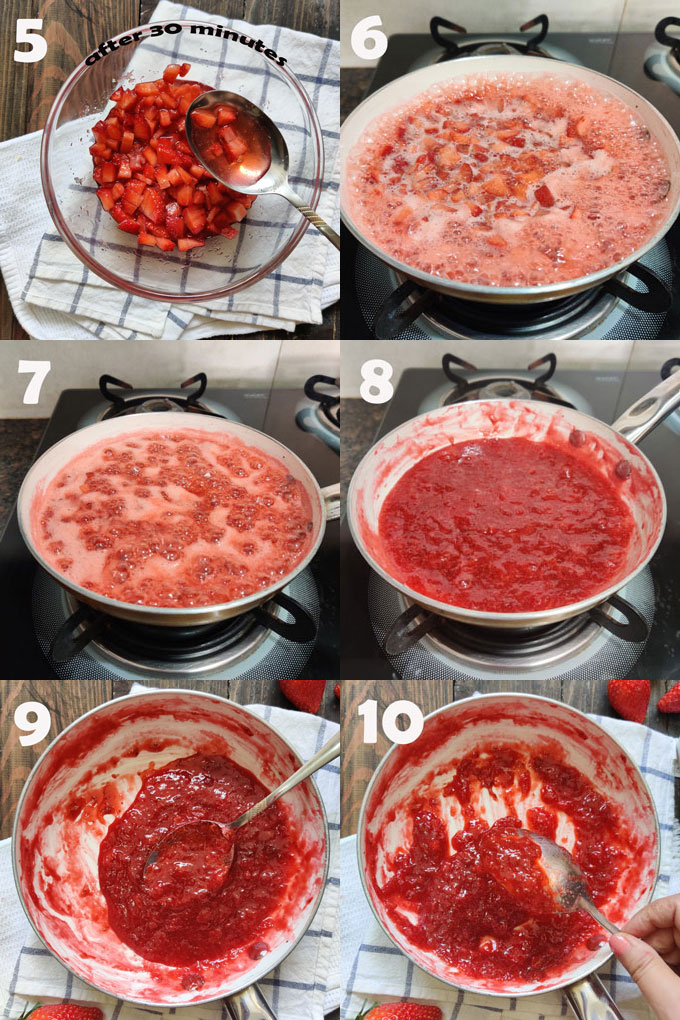
Start cooking the jam. In Stage 1 , the jam will be watery, with big chunks of strawberry and white foam on top ( images 6 & 7). Keep cooking on low heat while stirring at regular intervals.
Slowly, the white foam will start reducing, and the texture of the jam will thicken a bit. This is Stage 2. Use a potato masher or a ladle to mash the strawberries gently. Keep stirring at regular intervals.
After 15 – 20 minutes on low heat, the white foam on top will disappear, the strawberries will mash up, and the jam will start sticking to the spoon ( images 8 & 9 ). Turn off the heat.
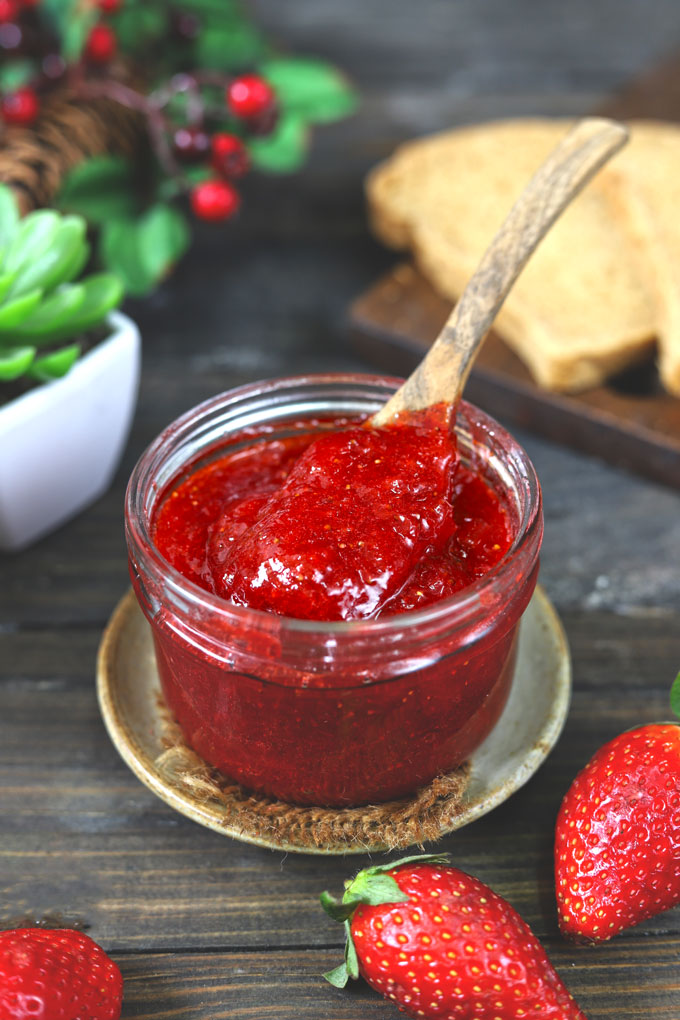
To check the consistency of the jam, spread a big tablespoon of strawberry jam on a metal plate. The strawberry jam should be thick, don’t drop off easily, and would stick to the plate. Else continue to cook further.
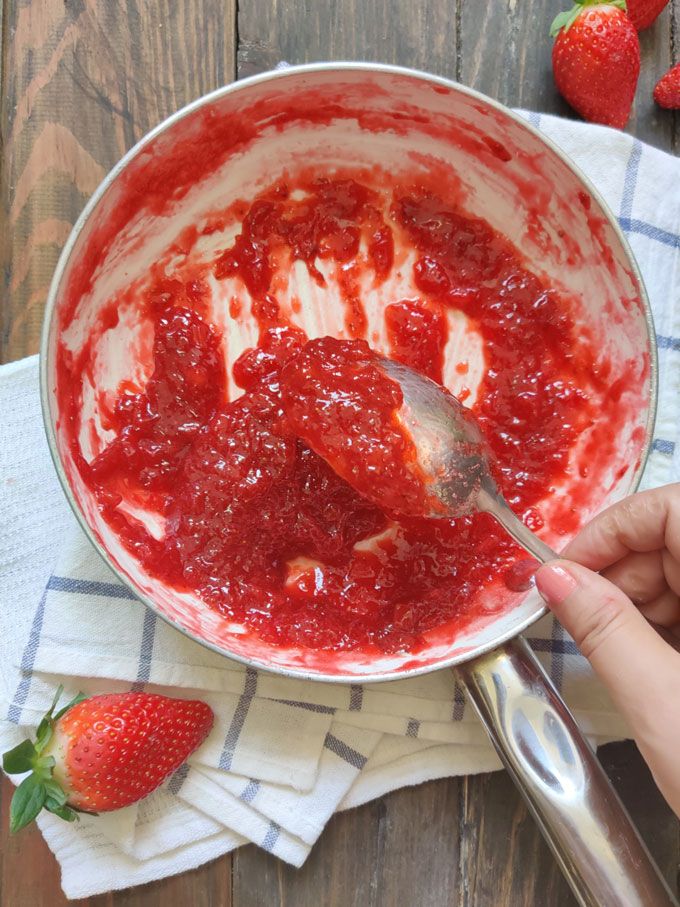
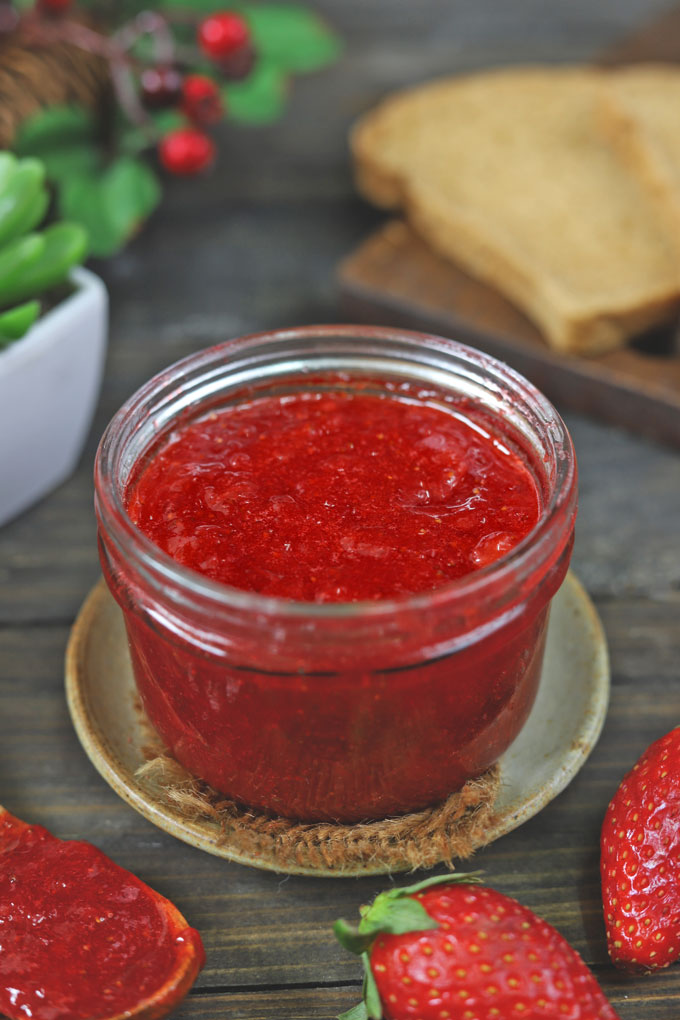
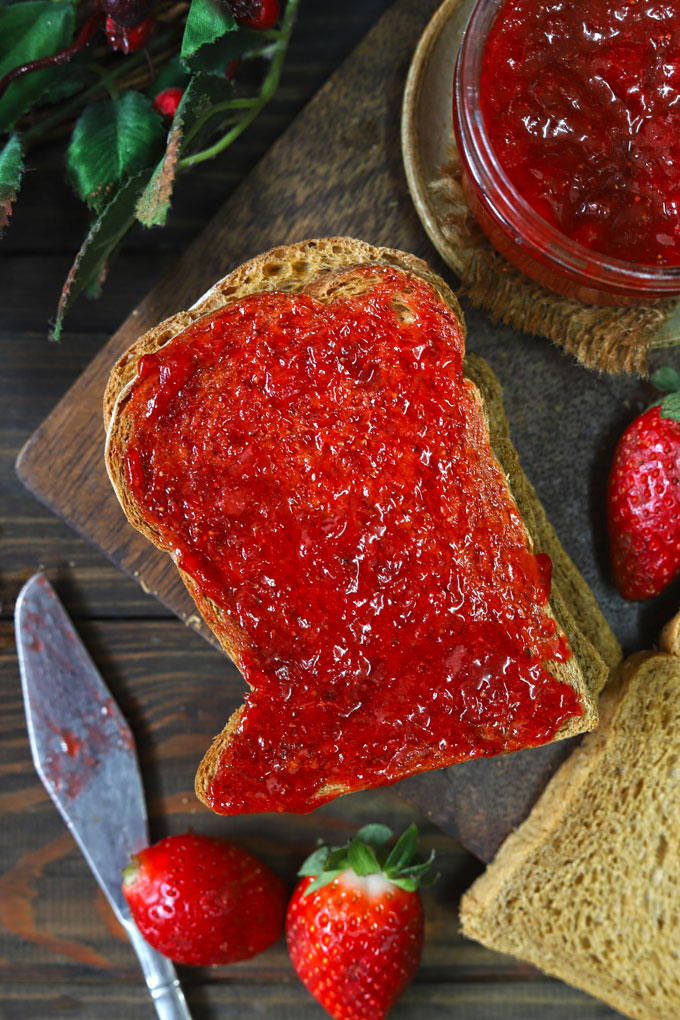
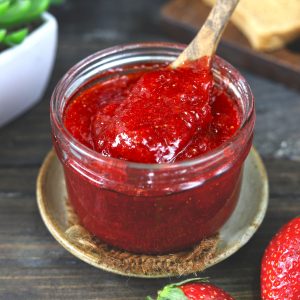
Allow the strawberry jam to cool completely at room temperature before serving or storing.
Storing Suggestion
Most of the time, homemade jams get spoiled because of the wrong storage.
I highly recommend storing strawberry jam in a glass jar rather than a plastic or metal container to avoid flavour alteration.
Use a clean, dry, sterilized jar for storing the fruit jam. Dirt or junk in the jar lid will also spoil your strawberry jam.
Store strawberry jam in the refrigerator. It remains fresh and tasty for 3 – 6 months.
Use a clean and dry spoon to scoop out the jam. Keep homemade jam away from moisture and water.

A fruit jam is made by heating cut fruits with sugar. While you do this, a fibre called pectin from the cut fruits is released into the jam mixture. The jam will not bind together unless you add an acidic agent like lemon juice. The other reason is lemon juice prevents bacterial growth in a jam by acting as a natural preservative.
There is no added pectin or starch in this strawberry jam recipe. Only the natural pectin of the fruit is used to thicken the jam.
Most importantly, if you use jars with rubber seals, remove them before sterilizing the bottles and lids. Stove method: First, wash the lids and jars in hot water with some soap, and rinse well. Now place only the jars in a pot of boiling water upside down. Boil for 10 minutes, then reduce the heat and simmer until ready to use. Meanwhile, you can put the lids and bands in a separate saucepan of simmering water but do not boil them. After sterilizing, dry the bottles nicely before transferring the jam.
More Strawberry Recipes
Teatime Strawberry Cake
No-Bake Strawberry Cheesecake
If you try this recipe and love it, please leave a comment and a rating. This helps us grow and reach other food lovers like you.
Ingredients
1 Cup = 250 ml
- ▢ 2 Cup chopped strawberry (approx 500 gram)
- ▢ 1 Cup granulated white sugar
- ▢ 2 tablespoon lemon juice
Instructions
- Wash the fresh strawberries. Remove the green top (crown). Wipe clean and pat dry with a kitchen towel. Make sure they are not wet or moist.
- Next, finely chop the strawberries. Cut and discard the inner white part of the strawberries. This step of removing the white part is called ‘Hulling Strawberries.’ If there is no white part inside the strawberries, no need to hull them.
- Transfer chopped strawberries to a wide mixing bowl. Add granulated white sugar. Mix nicely. Cover and set aside for 20 – 30 minutes.
- After 20 – 30 minutes, sugar will be completely dissolved with the fruit and a pink color juice will be released. Do not rush this process.
- Add lemon juice and mix nicely. Transfer the strawberries along with all the pink liquid to a saucepan. Turn on the stovetop heat to low.
- Start cooking the jam. Stage 1, the jam will be watery, with big chunks of strawberry, and white foam on top. Keep cooking on low heat, while stirring at regular intervals.
- Slowly, the white foam will start reducing, the texture of the jam would thicken a bit. Use a potato masher or a ladle to gently mash the strawberries. Keep stirring at regular intervals.
- After 15 – 20 minutes on low heat, the white foam on top will disappear, strawberries mashed nicely, and the jam will start sticking to the spoon. Turn off the heat.
- To check the consistency of the jam, spread a big tablespoon of strawberry jam on a metal plate. The strawberry jam should be thick, doesn’t drop off easily, and will stick to the plate. Else continue to cook further.
- Allow the strawberry jam to cool down completely at room temperature. Store the cooled strawberry jam in a clean, sterlisied glass jar with a tight fitting lid.
- Serve strawberry jam immediately or store in the refrigerator.
Recipe Notes:
- You can use frozen strawberries as well for this jam recipe. Thaw them at room temperature before combining them with the sugar.
- Use fine granulated white sugar for this strawberry jam recipe. And not powdered sugar, icing sugar, or big crystals of sugar.
- Make sure to use an enamel coated ceramic or non stick saucepan for making the strawberry jam rather than the cast iron pan, aluminum, or any other reactive metal cookware.
- Until and unless the white foam from the strawberry jam disappears keep cooking it.
- Do not add any water or strawberry juice/syrup while cooking the jam. The strawberries need to cook in their own natural juices and sugar.
Nutrition
We follow a strict NO SPAM Policy
Strawberry Jam Recipe
Equipment
- Mixing Bowl
- Saucepan
- Spatula or Wooden Spoon
Ingredients
1 Cup = 250 ml
- 2 Cup chopped strawberry (approx 500 gram)
- 1 Cup granulated white sugar
- 2 tablespoon lemon juice
Instructions
- Wash the fresh strawberries. Remove the green top (crown). Wipe clean and pat dry with a kitchen towel. Make sure they are not wet or moist.
- Next, finely chop the strawberries. Cut and discard the inner white part of the strawberries. This step of removing the white part is called ‘Hulling Strawberries.’ If there is no white part inside the strawberries, no need to hull them.
- Transfer chopped strawberries to a wide mixing bowl. Add granulated white sugar. Mix nicely. Cover and set aside for 20 - 30 minutes.
- After 20 - 30 minutes, sugar will be completely dissolved with the fruit and a pink color juice will be released. Do not rush this process.
- Add lemon juice and mix nicely. Transfer the strawberries along with all the pink liquid to a saucepan. Turn on the stovetop heat to low.
- Start cooking the jam. Stage 1, the jam will be watery, with big chunks of strawberry, and white foam on top. Keep cooking on low heat, while stirring at regular intervals.
- Slowly, the white foam will start reducing, the texture of the jam would thicken a bit. Use a potato masher or a ladle to gently mash the strawberries. Keep stirring at regular intervals.
- After 15 - 20 minutes on low heat, the white foam on top will disappear, strawberries mashed nicely, and the jam will start sticking to the spoon. Turn off the heat.
- To check the consistency of the jam, spread a big tablespoon of strawberry jam on a metal plate. The strawberry jam should be thick, doesn’t drop off easily, and will stick to the plate. Else continue to cook further.
- Allow the strawberry jam to cool down completely at room temperature. Store the cooled strawberry jam in a clean, sterlisied glass jar with a tight fitting lid.
- Serve strawberry jam immediately or store in the refrigerator.
Notes
- You can use frozen strawberries as well for this jam recipe. Thaw them at room temperature before combining them with the sugar.
- Use fine granulated white sugar for this strawberry jam recipe. And not powdered sugar, icing sugar, or big crystals of sugar.
- Make sure to use an enamel coated ceramic or non stick saucepan for making the strawberry jam rather than the cast iron pan, aluminum, or any other reactive metal cookware.
- Until and unless the white foam from the strawberry jam disappears keep cooking it.
- Do not add any water or strawberry juice/syrup while cooking the jam. The strawberries need to cook in their own natural juices and sugar.
Nutrition
This is a detailed guide on how to freeze peas. From shelling, and blanching, to freezing, learn the correct way to freeze fresh green peas.
About Green Peas
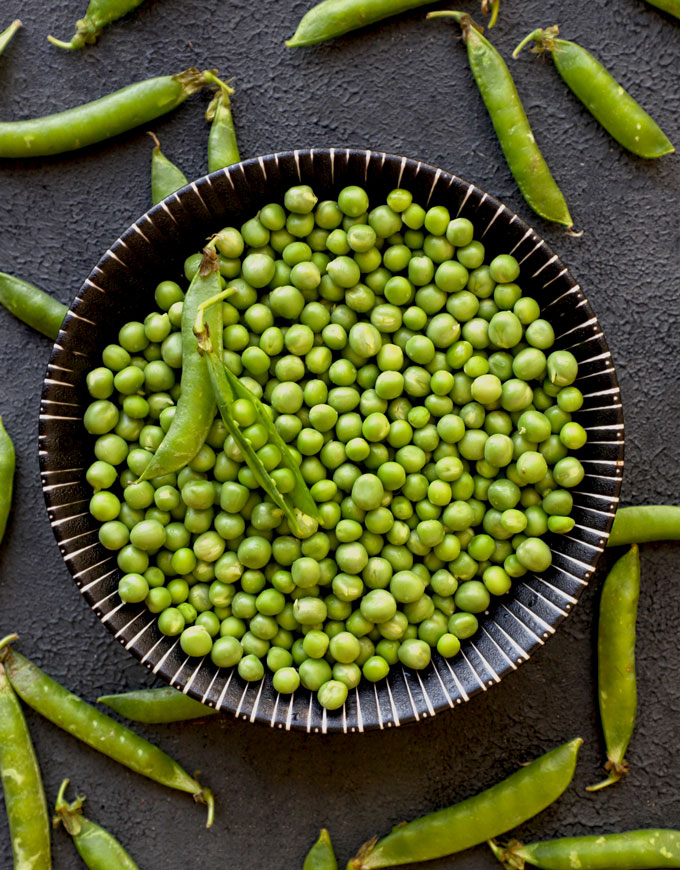
Fresh green peas are one of my favourite vegetables. They add so much flavour and texture to a dish. Besides, green peas are high in fibre, vitamins, minerals, and proteins . It’s a green vegetable, after all.
In India, green peas are an integral part of everyday comfort food. There are many Indian dishes made only during the winter season using fresh green peas.
Across India, fresh green peas are abundant from October to February. They are a widely popular winter vegetable.
Why Freeze Peas?
The freezing process increases the shelf life of fresh green peas, and you can use them even months later or during the season when fresh green peas are unavailable.
Fresh peas are one of the most easily frozen vegetables. Although they may take some time to shell, the freezing process is relatively easy to follow.
The thawed peas do not lose much flavour, texture, or nutrient content. Hence, they are perfect for cooking a variety of dishes.
Homemade vs Readymade
I think homemade frozen peas are always healthier and budget-friendly than readymade ones.
The homemade frozen peas are guaranteed chemical and harmful-preservative-free . In addition, they are all natural without any artificial colour or flavour.
For freezing, you can use organic and pesticide-free green peas from the local farmer’s market.
How To Freeze Peas
Freezing green peas is an easy, straightforward, fuss-free process. You need only sugar, water, ice cubes, and green peas. So let’s get started!
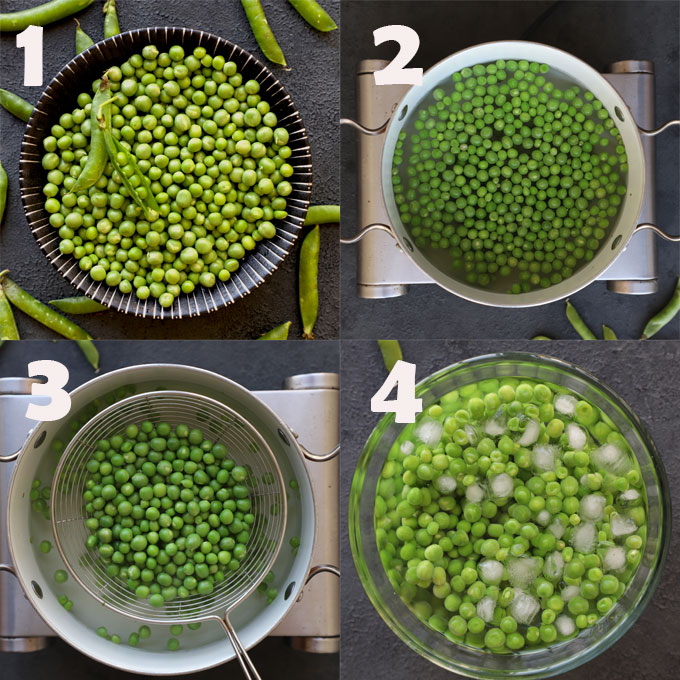
Step 1) Shelling. Shell the green peas and take out all the kernels in a bowl. Discard the shells and spoilt/rotten/yellow kernels.
Step 2) Boiling. For blanching green peas, heat water in a large pot. Once the water starts boiling, add a teaspoon of sugar to it. Stir to combine water and sugar.
Step 3) Blanching . Add the shelled peas. Stir. Cook for exactly 5 minutes ( image 2 ). If you have a lesser quantity of green peas, cook them only for 2 – 3 minutes. If the quantity is more like 2 – 5 kilograms of green peas, cook them in small batches of 5 minutes each.
Step 4) Ice Bath. Meanwhile, keep a bowl half-filled with ice-cold water ready next to the stovetop. Transfer the blanched green peas to the ice-cold water to stop the cooking process and retain their bright green colour ( image 4 ). Let the green peas sit in ice-cold water till they cool down completely. It takes less than 5 minutes.
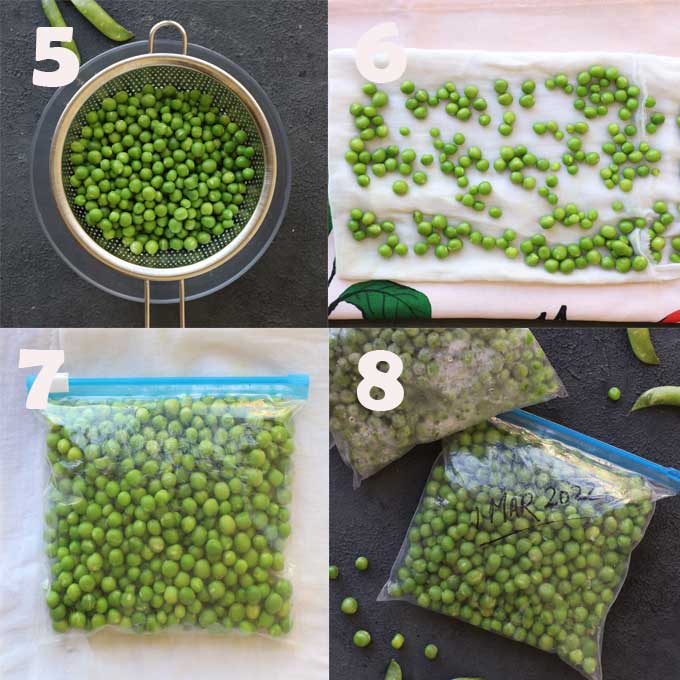
Step 5) Drying. Drain all the cold water and transfer the blanched green peas to a colander ( image 5 ). Next, spread the peas on a clean kitchen towel in a single layer ( image 6 ). And let them air dry for 1 hour. I usually dry them under the fan to speed up the process.
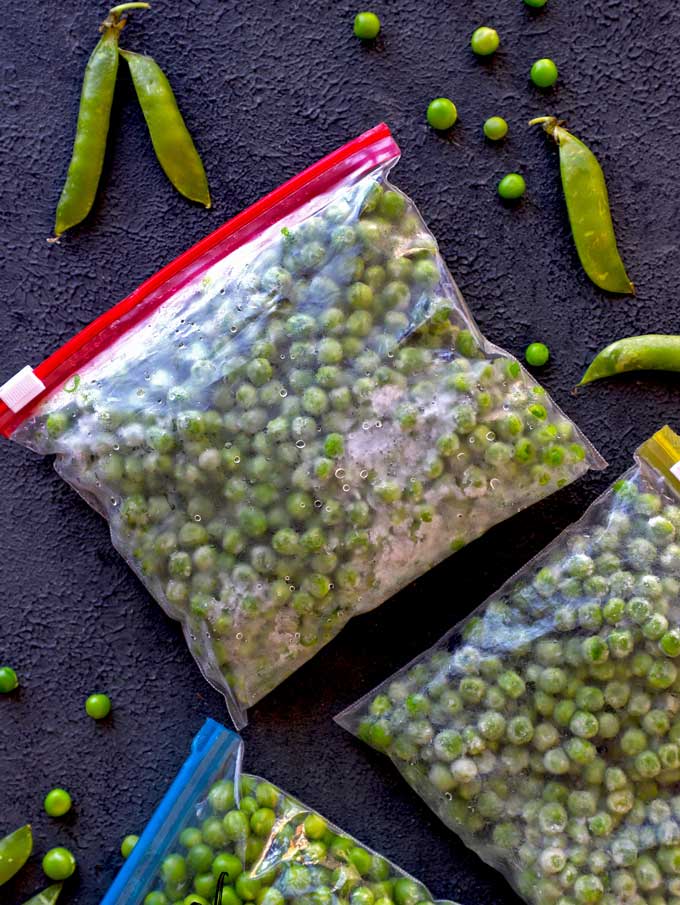
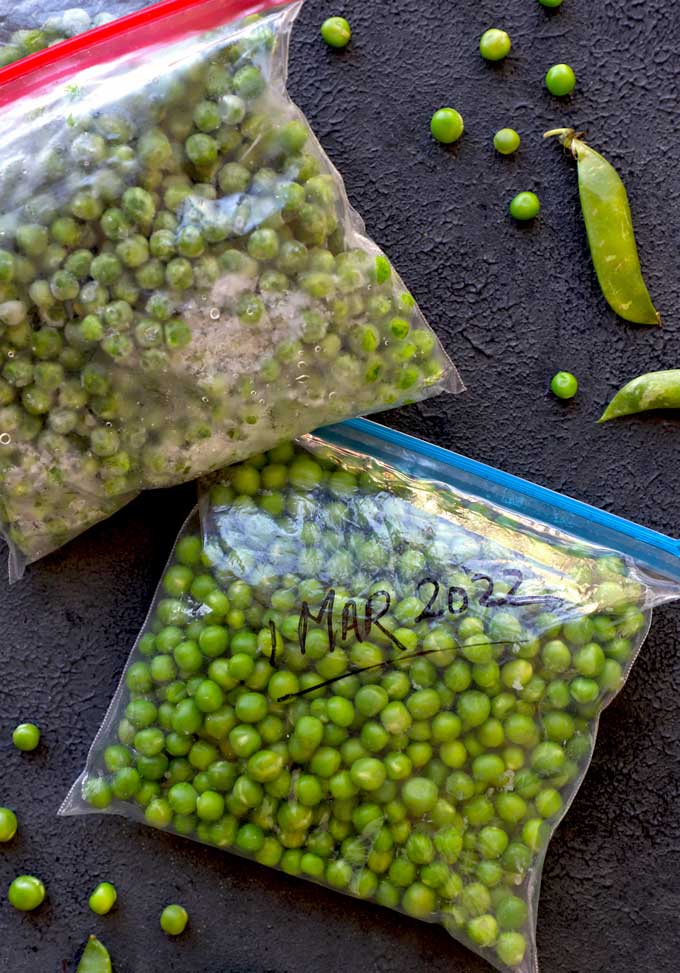
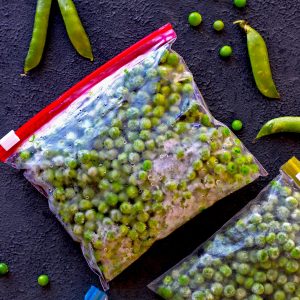
Step 6) Storing. Once the green peas are dry and not moist, transfer them to ziplock freezer-friendly bags or containers. Seal, write the freezing date and store them in the freezer.
My Tried and True Tips
Discard the yellow, rotten, or sprouted green peas. They are not fit for freezing and spoil the entire batch.
Do not add too much sugar. A teaspoon is sufficient for one kilogram of green peas. It only helps to sweeten the taste of green peas.
Do not cook the green peas for too long. We want to soften the fresh green peas and not make them mushy. They should have a crunch to them.
Do not overcrowd the pan while blanching. Otherwise, you will end up with unevenly cooked green peas.
Do not sun dry the blanched green peas. Always air dry them to get rid of excess moisture. If the green peas are wet while freezing, they will stick to each other, and there will be a lot of ice crystallization.
Do not forget to mark the dates on each packet of frozen green peas. This helps you to know the expiry dates of frozen peas. You can use them for between 3 – 6 months.
Green Pea Recipes
- Matar Poha
- Matar Pulao
- Matar Paneer
- Matar Ghugni
- Matar Kachori
- Matar Paratha
- Green Pea Soup
- Mushroom Methi Matar Malai
If you try this recipe and love it, please leave a comment and a rating. This helps us grow and reach other food lovers like you.
Ingredients
- ▢ 1 kilogram fresh green peas
- ▢ 1 teaspoon granulated white sugar
- ▢ 1 litre water
- ▢ ice cubes
Instructions
- Shell the green peas and take out all the kernels in a bowl.
- For blanching green peas, heat water in a large pot. Once the water starts boiling, add a teaspoon of sugar to it. Stir to combine water and sugar.
- Add the shelled peas. Stir. Cook for exactly 5 minutes. Turn off the heat.
- Meanwhile, keep a bowl half-filled with ice-cold water ready next to the stovetop. Transfer the blanched green peas to the ice-cold water to stop the cooking process and retain their bright green color.
- Let the green peas sit in ice-cold water till they cool down completely. It takes less than 5 minutes.
- Drain all the cold water and transfer the blanched green peas to a colander. Next, spread the peas on a clean kitchen towel in a single layer. And let them air dry for 1 hour.
- Once the green peas are dry and not moist, transfer them to ziplock freezer-friendly bags or containers. Seal, write the freezing date and store them in the freezer.
- Use frozen green peas to make a variety of dishes. Thaw them at room temperature before using.
Recipe Notes:
- Discard the yellow, rotten, or sprouted green peas for freezing.
- Use a wide, deep saucepan or casserole for evenly boiling the green peas. If the pan is small or the quantity of peas is large, complete the process in batches rather than over crowding the pan.
- Do not sun dry the blanched green peas. Always air dry them to get rid of excess moisture.
- You can use frozen green peas for 3 – 6 months.
- Some recipes suggest adding a teaspoon of salt along with sugar while boiling the peas. I do not find reason to do so. If you want you can give it a try.
Nutrition
We follow a strict NO SPAM Policy
