Sookhi Urad Dal is a delicious Punjabi-style dal recipe. It is a lunchtime staple in every Punjabi household. I am sharing my mother-in-law’s special sookhi urad dal recipe that we all love in the family.

About Urad Dal
Urad Dal is rich in fibre, good for bone health, and has many other nutritional benefits. It is widely used in Indian Cuisine to make a variety of dishes. But there is a variety of urad available in the market.
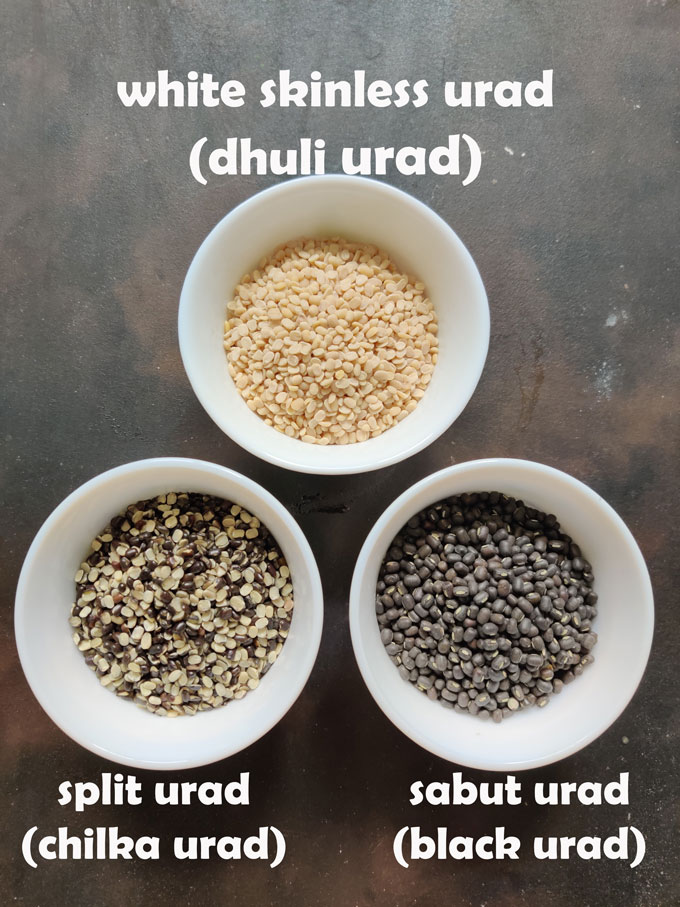
Difference between sabut urad, dhuli urad and chilka urad
Whole Black Urad (sabut urad) is also known as black urad dal. The husk is attached to the grain; it is used for making the famous Dal Makhani . The Split Urad (chilka urad) is black and white. It has a removable husk attached to the grain. After soaking the lentil, this husk is easily removable. The White Urad (dhuli urad) is pale white and has no husk attached to the grain.
You need skinless white urad dal (split urad dal without skin) or dhuli urad to make this Punjabi sookhi dal.
Do you need to soak urad before cooking?
Yes, all types of urad require 5 – 6 hours of pre-soaking before cooking. Otherwise, it takes a longer time to cook. Hence, soaking helps reduce the cooking time and makes it easier to digest.
What to make with urad dal?
Here are some Indian dishes you can make using a variety of urad.
- Shahi Urad Dal
- Urad Dal Khichdi
- South Indian Medu Vada
- Urad Dal Vada (Pahadi Bada)
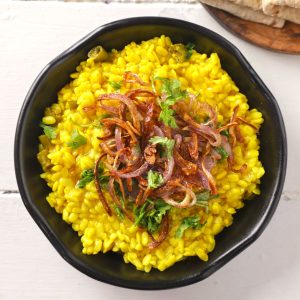
Punjabi Sookhi Urad Dal
Sookhi Urad Dal Recipe is an easy and tasty everyday Indian dal to serve with chapati or paratha. It is a unique, gluten-free, wholesome urad dal recipe.
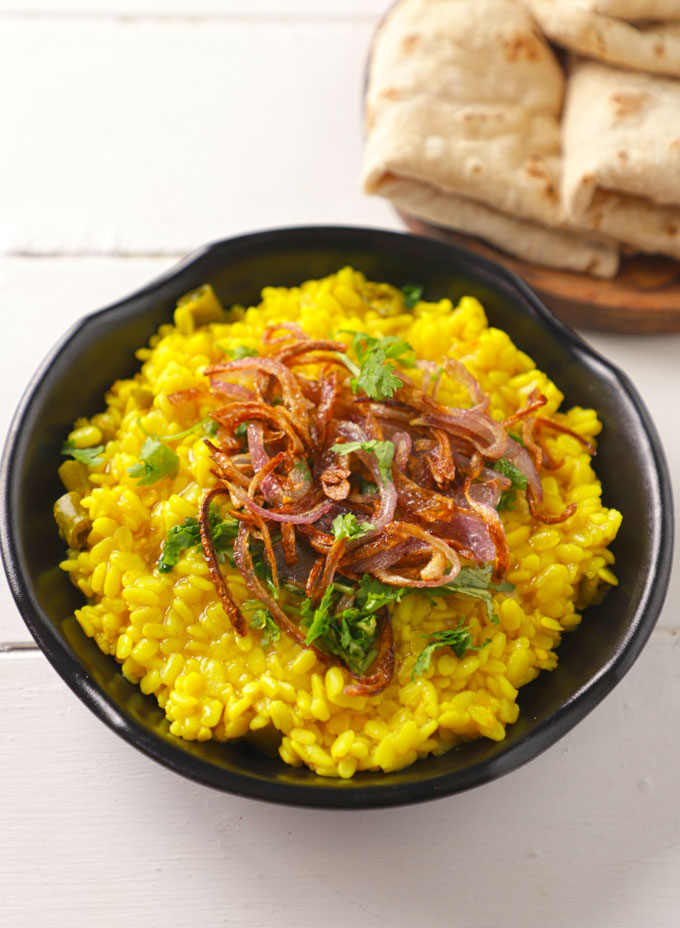
The word ‘Sookhi’ in Hindi and Punjabi means dry. Unlike other Indian dal recipes, this urad dal preparation is dry, like a sabzi or stir fry.
Sookhi Urad Dal is a virtual treat with perfectly golden fried onions embellished on top. This urad dal recipe adds variety to your daily meal menu.
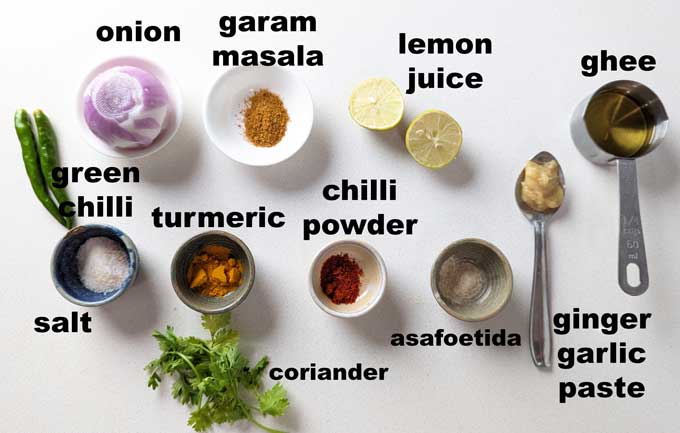
Ingredients Required
Oil: I use ghee for frying onion, but you can use refined or flavourless vegetable oil.
Spices: Turmeric Powder, Chilli Powder, Garam Masala , Asafoetida
Onion, Green Chilli, Ginger Garlic Paste , Salt, Coriander, Water
How To Make
Step 1: For this urad dal recipe, clean, rinse and soak the urad in enough water for 5 – 6 hours or, best, overnight.
Step 2: In a pressure cooker, add soaked urad along with water, salt, asafoetida, chopped green chilli, and ginger garlic paste. Stir to combine.
Step 3: Pressure Cook over low heat for 3 whistles. Allow the steam to release naturally.
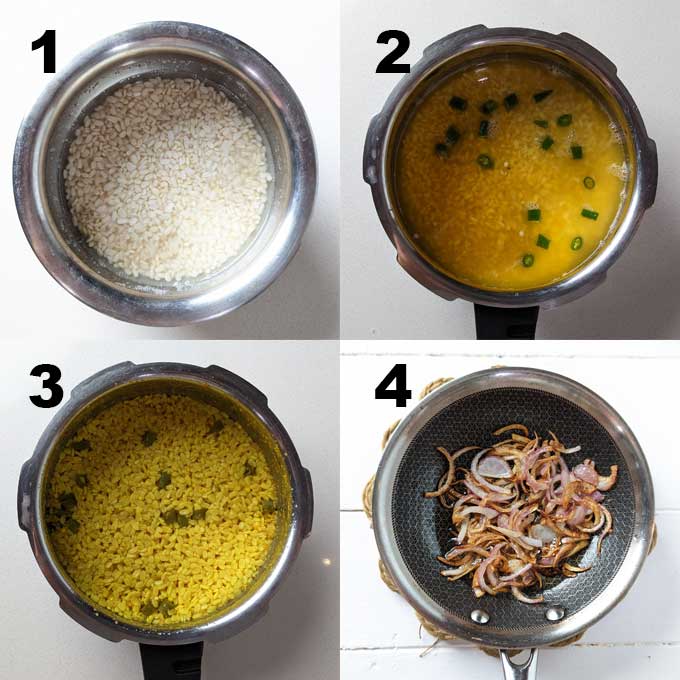
Step 4: Heat ghee or oil in a small pan, and fry the sliced onion until golden.
Step 5: Open the lid of the pressure cooker, and check dal for doneness. Add chilli powder, garam masala, and mix nicely. At this stage, taste and add more spices and salt if required.
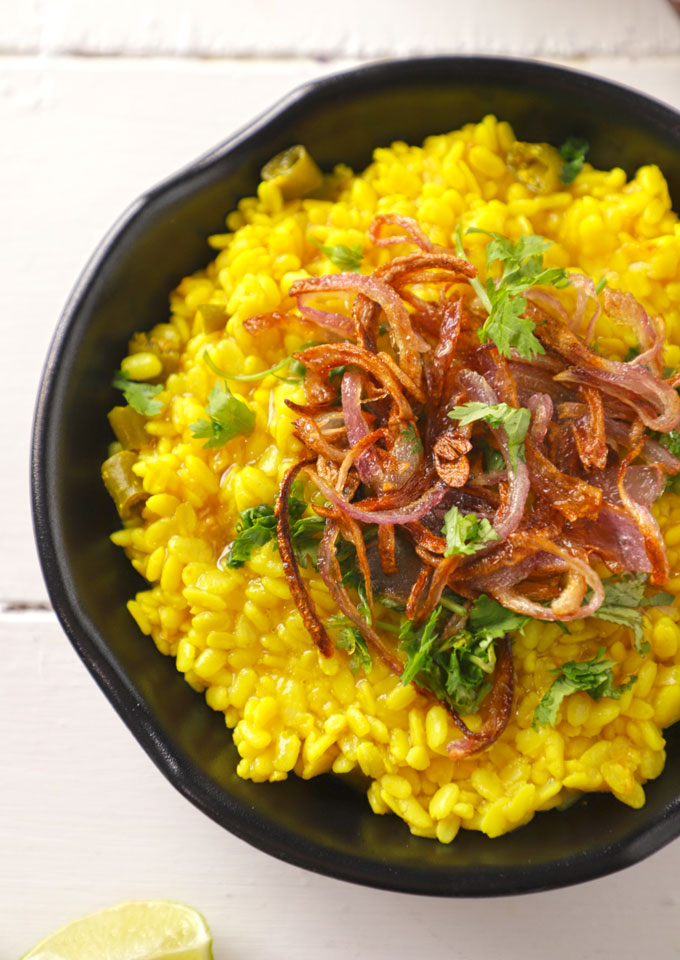
Step 6: Transfer urad dal to a serving platter. Add a layer of fried onions, chopped coriander, and a drizzle of lemon juice. Urad Dal is ready to serve.
Serving Suggestion
Punjabi Sookhi Urad Dal is one of our lunchtime favourites.
The day Sookhi Urad Dal is prepared, the lunch table is lined with coriander chutney , piping hot ghee, kachumber salad , and boondi raita .
The air surrounding the dining table is undoubtedly luring and full of unsaid excitement; jittery fingers are visibly eager to dive into sookhi urad dal along with piping hot phulkas.
You can serve it with paratha or plain chapati also.
More Dal Recipes
- Dal Khichdi
- Arhar Dal Fry
- Panchmel Dal
- Palak Chana Dal
- Pahadi Gahat Ki Dal
- Moradabadi Moong Dal
If you try this recipe and love it, please leave a comment and a rating. This helps us grow and reach other food lovers like you.
Ingredients
- ▢ 1 Cup skinless white urad dal (dhuli urad)
- ▢ 2 green chili, finely chopped
- ▢ 1 teaspoon turmeric powder
- ▢ 1 teaspoon ginger garlic paste ( see recipe )
- ▢ 1 teaspoon salt or to taste
- ▢ ¼ teaspoon asafoetida (hing)
- ▢ 2 Cup water
- ▢ 1 teaspoon red chili powder
- ▢ ½ teaspoon garam masala see recipe here
Ingredients For Tadka (Tempering):
- ▢ ¼ Cup ghee
- ▢ 1 Cup sliced onion
- ▢ 1 tablespoon lemon juice
- ▢ 2 tablespoon chopped coriander leaves
Instructions
- For this urad dal recipe, clean, rinse and soak the urad in enough water for 5 – 6 hours or, best, overnight.
- In a pressure cooker, add soaked urad along with water, salt, asafoetida, chopped green chilli, and ginger garlic paste. Stir to combine.
- Pressure Cook over low heat for 3 whistles. Allow the steam to release naturally.
- Heat ghee or oil in a small pan, and fry the sliced onion until golden.
- Open the lid of the pressure cooker, and check dal for doneness. Add chilli powder, garam masala, and mix nicely. At this stage, taste and add more spices and salt if required.
- Transfer urad dal to a serving platter. Add a layer of fried onions, chopped coriander, and a drizzle of lemon juice.
- Serve Sookhi Urad Dal warm with chapati for lunch.
Recipe Notes:
- Ensure the urad is soaked for at least 5 hours, or it will not cook properly.
- Do not add too much water to cook the dal. It is a semi-dry dal. Hence, we do not need too much liquid.
- 2 – 3 whistles over low heat on a stovetop pressure cooker are enough to cook the dal. Cooking for too long will make it mushy. In an electric pressure cooker, it takes 5 – 6 minutes.
- Make sure onions are golden fried before pouring over the dal.
- Vegan Dal: You can make vegan urad dal by skipping ghee in the tempering. Instead of ghee, use coconut oil.
Nutrition
We follow a strict NO SPAM Policy

Punjabi Urad Dal Recipe
Equipment
- Pressure Cooker
- Heavy Bottom Kadhai
Ingredients
- 1 Cup skinless white urad dal (dhuli urad)
- 2 green chili, finely chopped
- 1 teaspoon turmeric powder
- 1 teaspoon ginger garlic paste ( see recipe )
- 1 teaspoon salt or to taste
- ¼ teaspoon asafoetida (hing)
- 2 Cup water
- 1 teaspoon red chili powder
- ½ teaspoon garam masala see recipe here
Ingredients For Tadka (Tempering):
- ¼ Cup ghee
- 1 Cup sliced onion
- 1 tablespoon lemon juice
- 2 tablespoon chopped coriander leaves
Instructions
- For this urad dal recipe, clean, rinse and soak the urad in enough water for 5 – 6 hours or, best, overnight.
- In a pressure cooker, add soaked urad along with water, salt, asafoetida, chopped green chilli, and ginger garlic paste. Stir to combine.
- Pressure Cook over low heat for 3 whistles. Allow the steam to release naturally.
- Heat ghee or oil in a small pan, and fry the sliced onion until golden.
- Open the lid of the pressure cooker, and check dal for doneness. Add chilli powder, garam masala, and mix nicely. At this stage, taste and add more spices and salt if required.
- Transfer urad dal to a serving platter. Add a layer of fried onions, chopped coriander, and a drizzle of lemon juice.
- Serve Sookhi Urad Dal warm with chapati for lunch.
Notes
- Ensure the urad is soaked for at least 5 hours, or it will not cook properly.
- Do not add too much water to cook the dal. It is a semi-dry dal. Hence, we do not need too much liquid.
- 2 - 3 whistles over low heat on a stovetop pressure cooker are enough to cook the dal. Cooking for too long will make it mushy. In an electric pressure cooker, it takes 5 - 6 minutes.
- Make sure onions are golden fried before pouring over the dal.
- Vegan Dal: You can make vegan urad dal by skipping ghee in the tempering. Instead of ghee, use coconut oil.
Nutrition
Coconut chutney is a traditional South Indian side dish packed with the flavour of coconut. It is a fabulous gluten-free and vegan-friendly Indian chutney recipe.
In South Indian Cuisine, the coconut is abundantly used. The reason is the tall, handsome coconut trees standing by the sea coast with utmost pride.
From curries, chutney to poriyal , and desserts , the coconut is omnipresent in the local South Indian and Coastal dishes.
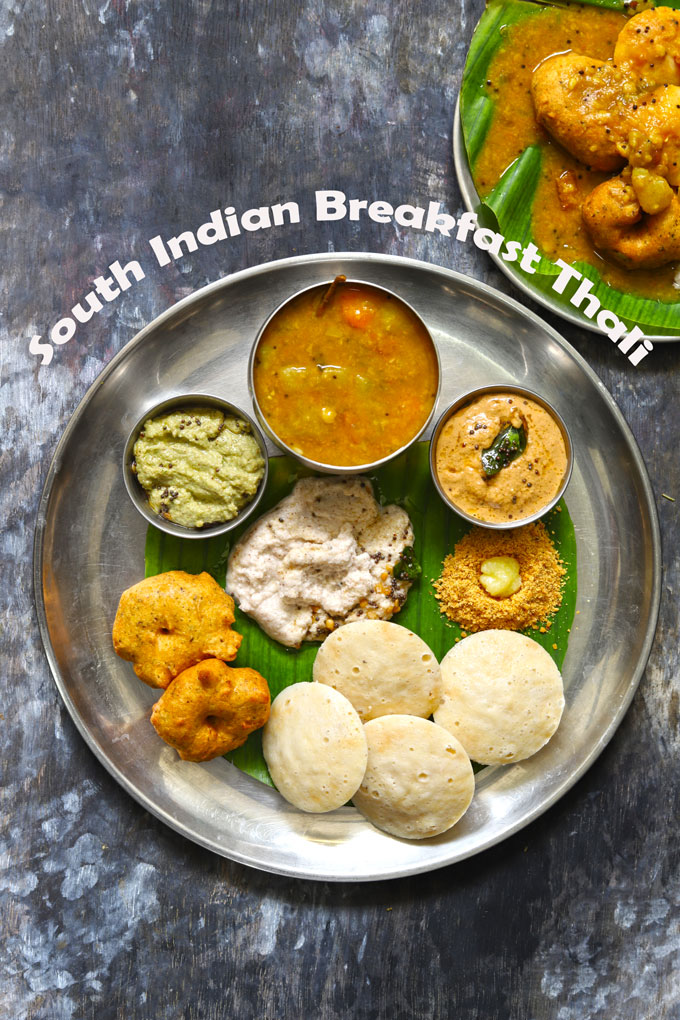
Coconut Chutney is one of the most popular South Indian side dishes . It tastes fabulous with the deep-fried snacks and the South Indian breakfast such as idli, vada, dosa, etc.
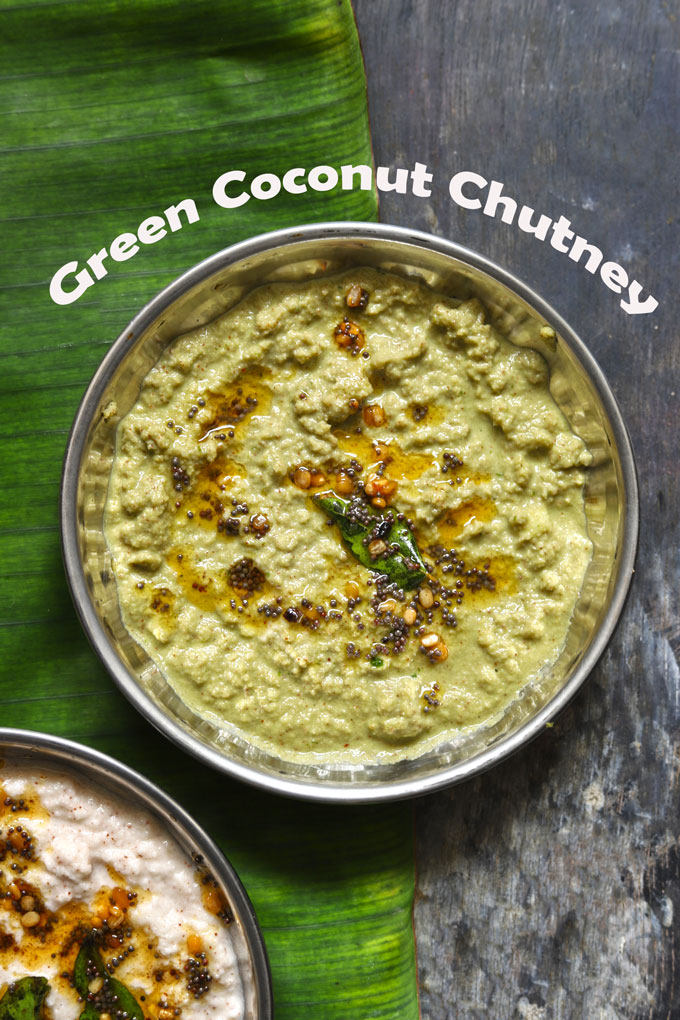
My Green Coconut Chutney
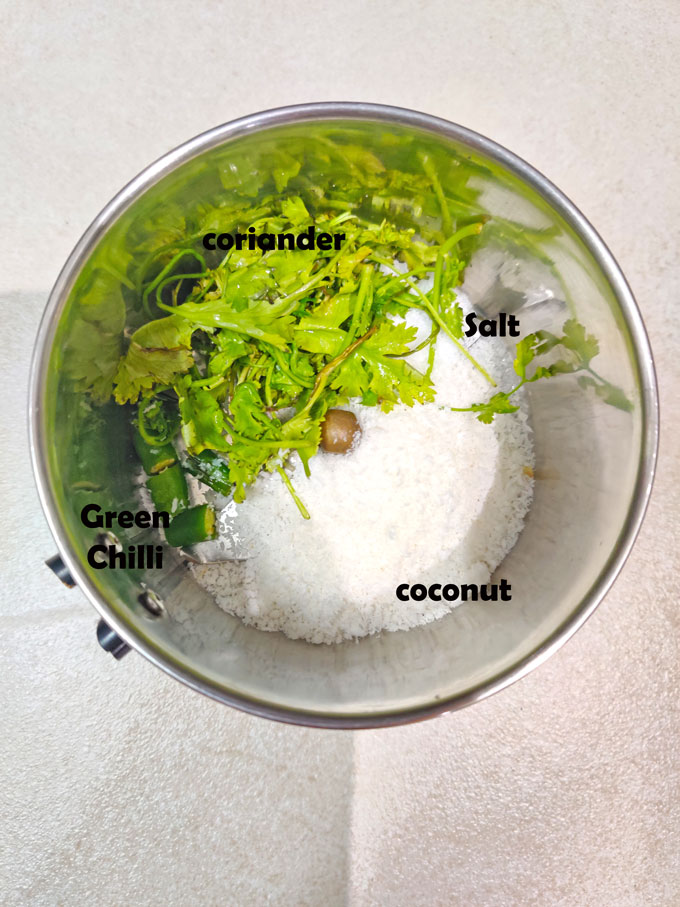
I love the splash of green colour and freshness in my chutney. Hence, I add fresh coriander leaves along with coconut, salt, green chilli, and water while blending. The addition of fresh coriander leaves and green chilli makes this chutney unique.
Unlike North Indian-style coriander chutney , this green chutney is tempered.
The fresh coriander leaves give the chutney a bright green colour, making it taste refreshing and rich in anti-oxidant.
Coconut Chutney Recipe Variations
There are many variations of nariyal chutney followed across South India.
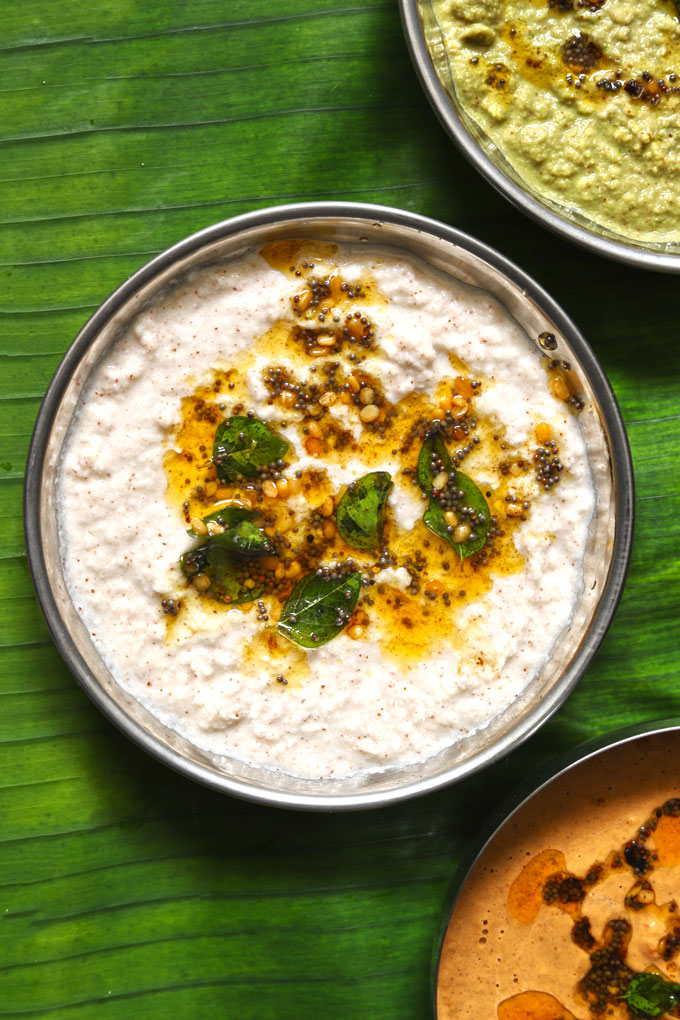
- Traditional Chutney: Blend coconut, green chilli, salt, and water to a smooth paste. Later, temper with whole red chillies, mustard seeds, urad dal, and curry leaves fried in ghee. This is the simplest and the easiest South Indian chutney recipe.
- Red Chutney : Fry onion and tomato in ghee. Blend with the remaining ingredients for the chutney.
- Peanut Chutney: Replace half the coconut with skinned, roasted peanuts for a nutty taste.
- Garlic Chutney: Add garlic cloves according to taste preference while blending the ingredients to give the chutney a garlicky flavour.
The Tadka (Tempering)
The tadka of a South Indian chutney is mainly – ghee, black mustard seeds (rai), white urad dal, curry leaves, and dry red chillies.
The simple but aromatic tempering complements the mild flavour of the chutney and adds a crunchy layer on top.
To make a vegan chutney, you can use coconut, groundnut, or any other vegan oil to fry the tempering ingredients.

How do you store coconut chutney?
Transfer the chutney to a container with a tight-fitting lid and store it in the refrigerator. It remains fresh for 4 – 5 days easily. For freezing the chutney, use a freezer-friendly container or zip lock bag for storing it. You can freeze it for 1 – 2 months. Avoid leaving chutney at room temperature for too long, especially during summer.
Can I use frozen or packaged desiccated coconut?
You can use frozen or packaged desiccated coconut for making the chutney. Defrost the frozen coconut as per packet instructions before making the chutney.
Serving Suggestion
I LOVE coconut chutney with everything and anything. But a few of my favourite combinations are:
- Rava Idli
- Medu Vada
- Moong Dal Chi ll a
- Mix Veg Uttapam
- Rava Paniyaram
- Masala Khara Bath
If you try this recipe and love it, please leave a comment and a rating. This helps us grow and reach other food lovers like you.

Ingredients
- ▢ 1 Cup fresh grated coconut
- ▢ 1 Cup fresh coriander leaves
- ▢ 1 – 2 green chilies or to taste
- ▢ Salt to taste
Ingredients For Tempering:
- ▢ 1 tablespoon ghee or coconut oil
- ▢ 1 – 2 dry red chili, broken into halves
- ▢ 2 tablespoon curry leaves
- ▢ 1 teaspoon mustard seeds (rai)
Instructions
- To prepare the Coconut Coriander Chutney, chop the coconut scrapping into bite-size pieces, or grate the coconut. You can use the readymade desiccated coconut as well.
- Add coconut, coriander, green chili, and salt in a blender and grind till smooth. Add approximately ¼ cup of water to get the smooth consistency of the chutney. Transfer chutney to a bowl.
- To temper the chutney, heat ghee or oil in a tadka pan over medium flame.
- Add mustard seeds. When the seeds crackle, add red chili and curry leaves.
- Once the curry leaves start changing color and the aroma of red chilies is released turn off the heat. Make sure not to heat the tempering for too long else curry leaves and chilies will turn bitter.
- Pour the tempering over the prepared coconut coriander chutney.
- Serve Coconut Coriander Chutney with dosa, idli or pongal.
Recipe Notes:
- If you do not have fresh coconut available, use dried desiccated coconut.
- For a vegan chutney, replace ghee with coconut oil or any other vegan oil.
- Many recipes suggest combining curd or roasted chana dal or peanuts in the coconut chutney. You can try these combinations as well.
- If the coconut chutney seems too thick, add more water while blending.
- You can store this chutney in the refrigerator for 1 week. Or freeze it for a month.
Nutrition
We follow a strict NO SPAM Policy
