This is a tried and tested Pahadi style pua recipe from my mom’s kitchen. And till date, it never fails to yield perfectly moist gulgule.
Estimated reading time: 3 minutes
- What is Pua?
- Ingredients You’ll Need
- My Tried and True Tips
- Pua (Gulgule) Recipe
Looking for more festive recipes? Try my 50+ Traditional Diwali Recipe Ideas , or 12+ Best Indian Kheer Recipes . We have 10 Indian thali festive thali meals that will make your festive feast one of the best.
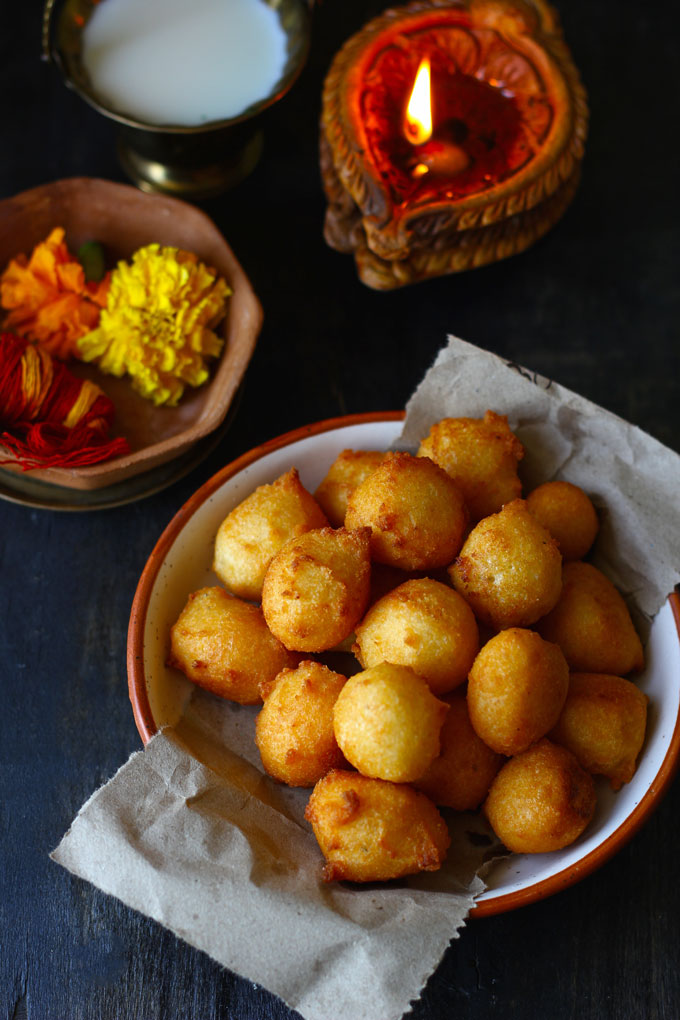
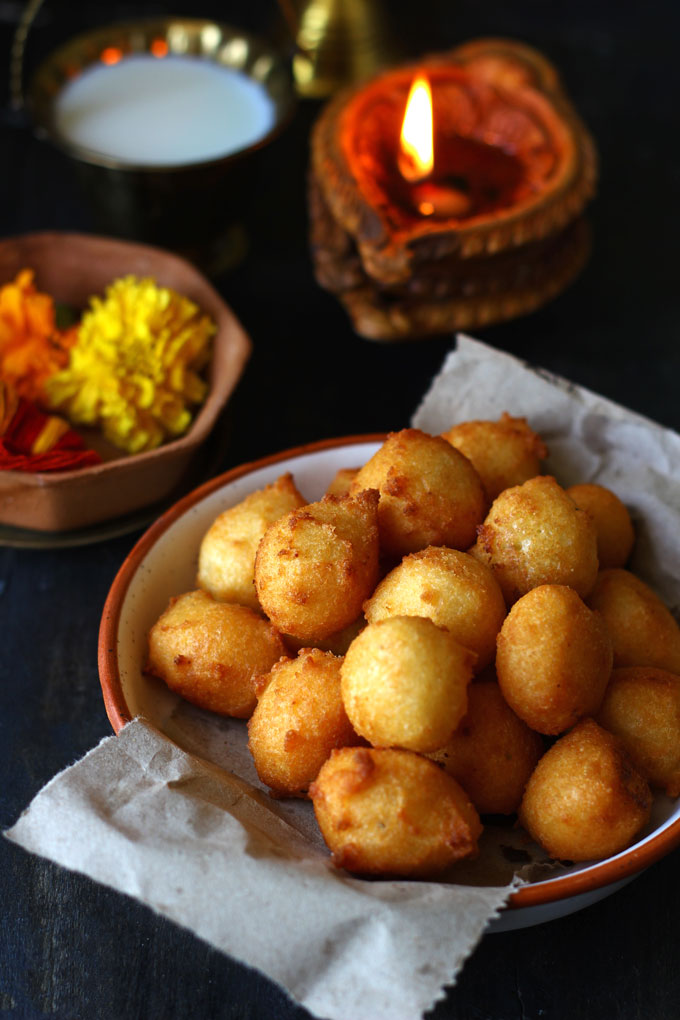
What is Pua?
Pua can also be defined as an eggless Indian doughnut. It is made with semolina (suji), banana, ghee, and sugar. Pua is a crispy, mouth-melting traditional North Indian sweet dish. It is also known as Gulgula. In North India, mainly Uttar Pradesh, Uttarakhand, Bihar, pua is a widely popular sweet dish.
It is considered an auspicious sweet to prepare for festivals such as – Karwa Chauth, Chath Pooja, or Sankranti. Pua is offered as a sacred prasad to God.
In Kumaoni Culture (Uttarakhand) no festive feast is complete without crisp, mouth melting, sweet and simple – Pua.
Whether it is birthday, marriage, festivals, fast or feast, we always cook – Kumaoni Bada , Meetha Pua (Gulgula), Aloo Ke Gutke , Kheere Ka Raita and tons of poori .

Ingredients You’ll Need
- Semolina: In Kumaoni style Pua, semolina (suji) is the key ingredient. Use fine rava (suji) rather than a coarse one. In many pua recipes, whole wheat flour is used.
- Curd : It softens the semolina (suji). If the curd is not available use thick, flavorless yogurt.
- Ghee: It gives a rich and intense taste to the gulgula. For deep frying the pua also ghee is used.
- Sugar: This pua recipe requires granulated white sugar. You can use jaggery powder or light brown sugar.
- Banana: I add an over-ripe mashed banana in the batter. Why? It gives softness, great taste, and aroma to the pua. It is an optional ingredient. Otherwise, you can add 4 tablespoon milk to soften the batter.
- Cardamom Powder: It is added for the sweet taste and aroma.
My Tried and True Tips
- Soak semolina (suji) in curd overnight. But if you are in a hurry then 2 – 3 hours is a good enough time. Why? The semolina turns soft and absorbs the moisture of curd. It has no grainy texture.
- If you are adding banana , make sure it is over-ripe, mushy, and is nicely mashed so that no lumps remain in the pua batter.
- Whisk the batter till it doubles in volume, turns light and airy. I use a hand mixer for the purpose but my mom does it manually. So depending upon the process you choose, the whisking time may vary between 5 – 15 minutes.
- Last but not the least, always fry pua over low or medium heat. On high heat, it might turn crisp from the outside but remain uncooked from the inside. Slow frying gives it a beautiful golden color, crisp exterior, and fluffy interior.
More Traditional Indian Dessert Recipes
- Bhapa Doi
- Lauki Kheer
- Prasad Panjiri
- Sattu Ke Laddu
- Chikoo Ka Halwa
- Paneer Gulab Jamun

Ingredients
- ▢ 1 Cup semolina (suji/rava)
- ▢ 1 Cup curd
- ▢ 2 tablespoon ghee
- ▢ ¼ Cup granulated white sugar or to taste
- ▢ ¼ Cup ripe banana, mashed
- ▢ ½ teaspoon cardamom powder
- ▢ Ghee to deep-fry
Instructions
- Combine rava, curd, sugar and ghee in a bowl. Whisk nicely. Soak overnight or for 2 – 3 hours.
- Next, add the mashed banana (if using) and cardamom powder to the soaked semolina. Whisk the batter manually or using a hand blender until it is light and airy. The batter doubles in volume and becomes fluffy if whisked nicely.
- Heat ghee in a frying pan to deep-fry the pua.
- Pinch a small lemon size portion from the batter using your fingers and drop it in hot ghee.
- Similarly, add few more pua in the ghee. Do not over-crowd the pan.
- Fry the pua over medium heat till turns crisp and brown from the outside. Do not fry the pua over high heat as it might remain uncooked from the inside.
- Pua is best enjoyed when it is warm.
Recipe Notes:
- If you are using milk instead of banana, start with one tablespoon and add more if required. The batter should not be too thin otherwise you will not be able to get a round shape pua.
- Do not add an unripe banana.
- The consistency of the batter is like a vada batter, thick, light, and airy.
- Use a wide, and heavy bottom pan for frying the pua.
- Transfer the leftover pua in an airtight container. Store them in the refrigerator for 2 – 3 days. Or at room temperature for a day. After 2 days they start tasting sour.
- The best way to reheat pua is in a microwave or air-fryer.
Nutrition
We follow a strict NO SPAM Policy

Pua (Gulgule) Recipe
Equipment
- Mixing Bowl
- Heavy Bottom Kadhai
Ingredients
- 1 Cup semolina (suji/rava)
- 1 Cup curd
- 2 tablespoon ghee
- ¼ Cup granulated white sugar or to taste
- ¼ Cup ripe banana, mashed
- ½ teaspoon cardamom powder
- Ghee to deep-fry
Instructions
- Combine rava, curd, sugar and ghee in a bowl. Whisk nicely. Soak overnight or for 2 - 3 hours.
- Next, add the mashed banana (if using) and cardamom powder to the soaked semolina. Whisk the batter manually or using a hand blender until it is light and airy. The batter doubles in volume and becomes fluffy if whisked nicely.
- Heat ghee in a frying pan to deep-fry the pua.
- Pinch a small lemon size portion from the batter using your fingers and drop it in hot ghee.
- Similarly, add few more pua in the ghee. Do not over-crowd the pan.
- Fry the pua over medium heat till turns crisp and brown from the outside. Do not fry the pua over high heat as it might remain uncooked from the inside.
- Pua is best enjoyed when it is warm.
Notes
- If you are using milk instead of banana, start with one tablespoon and add more if required. The batter should not be too thin otherwise you will not be able to get a round shape pua.
- Do not add an unripe banana.
- The consistency of the batter is like a vada batter, thick, light, and airy.
- Use a wide, and heavy bottom pan for frying the pua.
- Transfer the leftover pua in an airtight container. Store them in the refrigerator for 2 - 3 days. Or at room temperature for a day. After 2 days they start tasting sour.
- The best way to reheat pua is in a microwave or air-fryer.
Nutrition
My easy-to-follow tips take this vegetarian minestrone soup up a notch and get it ready in under 30 minutes.
- Ingredients You’ll Need
- Instant Pot Method
- Watch Pasta Soup Video
- My Tried and True Tips
- Frequently Asked Questions
- Minestrone Soup Recipe
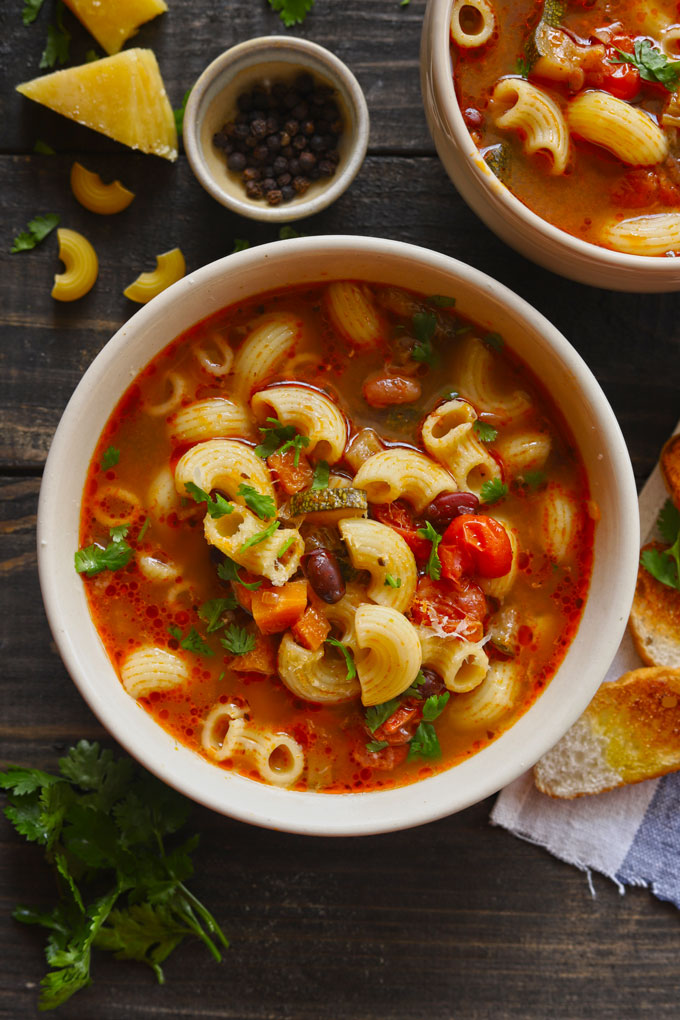
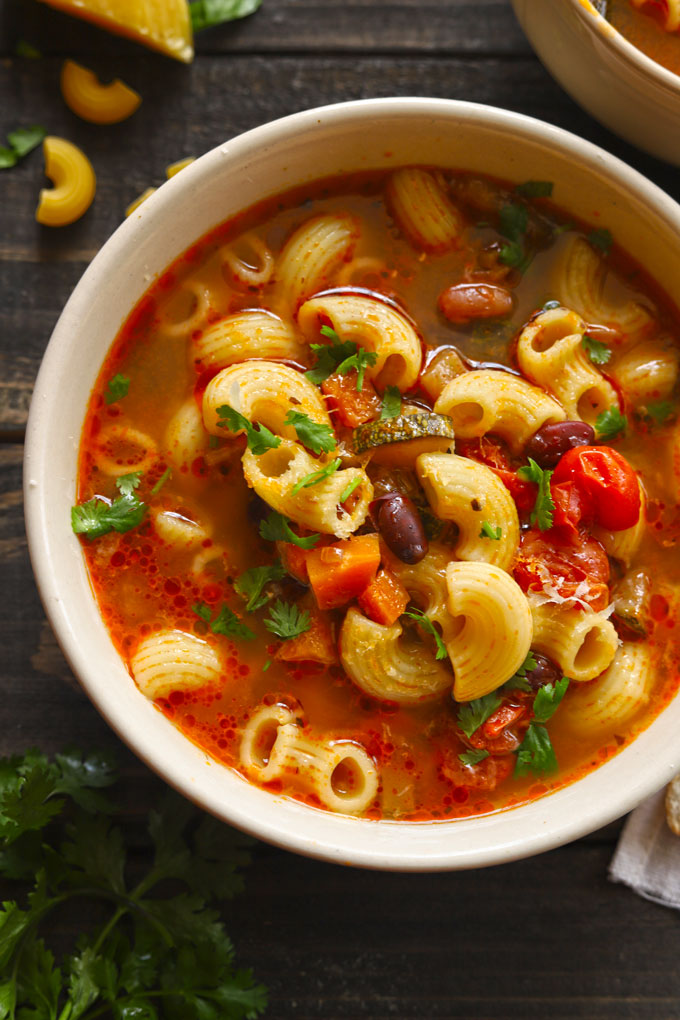
Minestrone Soup is a classic Italian pasta soup. This soup recipe will work with almost any combination of pasta, vegetables, beans, or meat .
There is something utterly comforting about the minestrone. When it is made right, you’ll go back for seconds and thirds, slurp big bowls of it for dinner, and happily have it for lunch the next day.
Why You’ll Fall in Love with This Pasta Soup
- It freezes and defrosts well.
- It takes only 30 minutes to get ready
- It is wholesome, fulfilling and nutritious.
- It is so easy to customize and adapt as per the local produce.
- It can be done in a stovetop, pressure cooker, or an instant pot .

Ingredients You’ll Need
- Pasta: Tiny shape pasta like macaroni , elbow, gnocchi, or shells are the best in a soup.
- Red Beans: You can use canned or pre-cooked beans for this pasta soup recipe. I use uncooked beans and cook them from scratch in the stock for making minestrone.
- Vegetables: Feel free to add your favourite vegetables like carrot, spinach, snow peas, fresh peas, kale, spinach, basil , and so on to create a hearty bowl of minestrone.
- Tomato Pasta Sauce, pizza sauce , or tomato paste works miraculously in this soup recipe. So I highly recommend adding them to build layers of flavour in the soup.
- Stock: If you do not have vegetable stock , use 1 bouillon cube or stock cube dissolved in 1 litre of hot water.
- Other Ingredients: Olive Oil, Garlic, Onion, Bay Leaf, Celery, Salt, Pepper, Thyme, Oregano, Italian Basil, Parsley, and Parmesan Cheese
Instant Pot Method
- Set the SAUTE mode for 8 minutes . Start with sauteing bay leaf, garlic, celery, onion, beans, and vegetables. Add stock or water.
- PRESSURE COOK Soup for 20 minutes (if you use uncooked beans).
- Add elbow pasta, herbs, and PRESSURE COOK for 5 minutes.
- Stir in the fresh herbs or the green leafy vegetables. Taste and adjust the seasoning.
- Serve Instant Pot Pasta Soup warm with toasted garlic bread.
Watch Pasta Soup Video
My Tried and True Tips
- Use vegetable or chicken stock as the base for this soup. The soup made with plain water lacks the depth of flavour.
- The second magical tip is to use tomato pasta sauce to flavour the soup. Don’t bother about the tomato puree or any other fancy sauce; add the best pasta/pizza sauce on hand to the soup. Trust me; you will end up with the finger-licking good minestrone.
- You can make this pasta soup with both canned beans and uncooked beans. If you are using uncooked beans like me, soak them in water for 6 hours, and cook them in the soup for 20 – 35 minutes before adding pasta.
- Do not cook the pasta too long. 5 – 6 minutes in an instant pot is a good enough time.
Tiny shape pasta like macaroni, elbow, or shells are the best in a soup and compliments small diced vegetables. You can also use spaghetti or angel hair pasta if you enjoy slurping noodles in soup.
Pasta, when overcooked, always turns mushy. Always stir the pasta at the end and cook for 5 to 6 minutes. Since pasta absorbs a lot of liquid, it is always best to serve soup hot and fresh without letting it rest for too long after adding pasta.
Minestrone is a one-pot soup. No need to cook the pasta separately. All the ingredients are cooked together, including beans, vegetables, and pasta.
Yea, you can use canned or pre-cooked beans. In that case, you can cook beans, vegetables, and pasta together for 5 minutes.
You can easily make a minestrone on a stovetop. Use a heavy-duty casserole, a dutch oven, or a pressure cooker. However, the cooking time may vary on a stovetop.
What other vegetarian Italian recipes you are looking for? Try my Gnocchi Soup , Fusilli Pasta Caprese , Basil Pesto , or Summer Pasta Salad .
follow me on Youtube or Instagram for latest recipes.

Ingredients
- ▢ 1 Cup elbow pasta
- ▢ 4 tablespoon olive oil
- ▢ 1 tablespoon chopped garlic
- ▢ 1 tablespoon chopped celery stalk
- ▢ 1 bay leaf
- ▢ ½ Cup chopped onion
- ▢ ½ Cup chopped zucchini
- ▢ ½ Cup chopped carrot
- ▢ ¼ Cup cherry tomato cut into halves
- ▢ ¼ Cup tomato pasta/pizza sauce ( get recipe )
- ▢ 1 tablespoon red wine vinegar (optional)
- ▢ ½ Cup red kidney beans (rajma) (see NOTE 1)
- ▢ 6 Cup vegetable stock ( Get Recipe )
- ▢ Salt and black pepper to taste
- ▢ 1 teaspoon Italian herbs (oregano, thyme, sage etc)
- ▢ ¼ Cup fresh basil leaves roughly torn
- ▢ 2 tablespoon flat parsley, roughly chopped
- ▢ 2 Tablespoon grated parmesan cheese
Instructions
- Rinse the red beans until the water runs clear. Soak them in water for 5 to 6 hours.
- Set the SAUTE mode of an instant pot for 6 minutes. Add olive oil to the inner pot along with garlic, celery, bay leaf, and onion. Saute for a minute to release the aroma of the ingredients. No need to brown the onion or garlic.
- Next, add the red wine vinegar (optional), tomato paste or sauce, vegetables, and soaked beans. Saute for a minute.
- Add vegetable stock, salt, and stir to combine. Seal the lid of the instant pot. PRESSURE COOK for 20 minutes or till red beans is al dente. Skip this step if you are using canned or pre cooked beans.
- After 20 minutes, release the steam manually. Add pasta, thyme, oregano, pepper, and stir. Seal the lid of the instant pot. Once again, PRESSURE COOK the soup for 5 minutes.
- Release the steam manually so the pasta doesn’t soak up all the liquid. Add fresh herbs, and grated cheese.
- Serve Minestrone Soup warm with the slices of toasted bread.
Recipe Notes:
- Feel free to use red beans, white beans, cannellini beans, or other kinds of beans.
- You can use cherry tomato or 1 Cup of chopped tomato .
- Pasta tends to absorb liquid. Hence, after adding pasta, if required, add more stock to get the desired consistency of the soup. Also, do not cook the soup for too long. Serve it warm and fresh.
- This is a vegan soup if you skip adding cheese in the last. Or if we use gluten-free pasta, this soup turns into a gluten-free dish .
- Add salt cautiously according to the taste of your stock.
- Store the leftover pasta soup in the refrigerator for 1 week. While reheating, add more stock to get the desired consistency.
Nutrition
We follow a strict NO SPAM Policy
