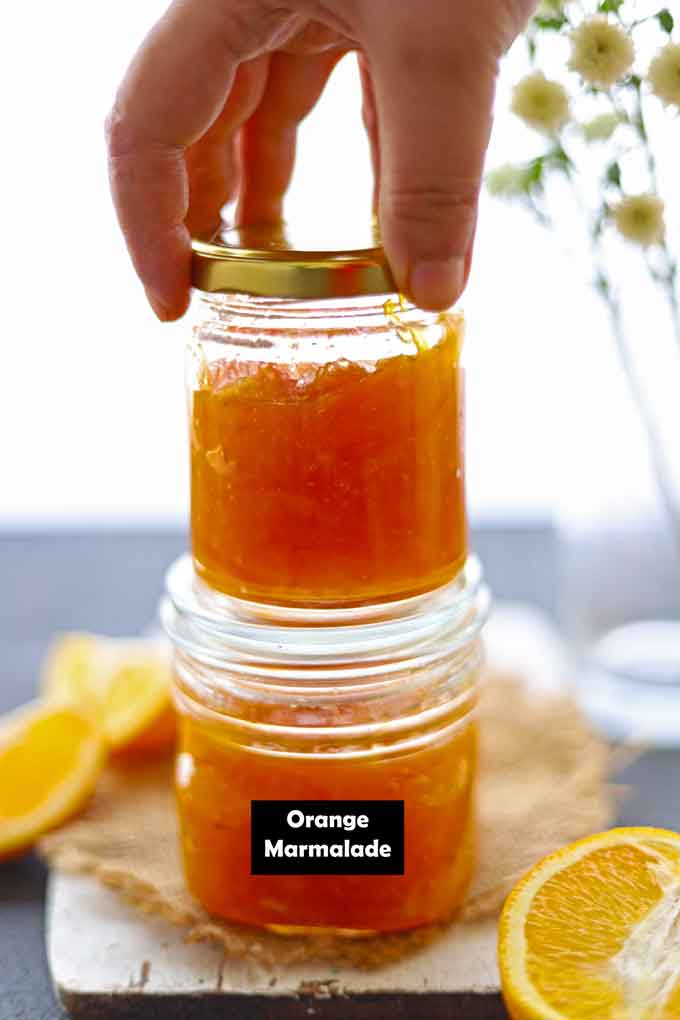
This is a Grandma-style orange marmalade recipe. You need only 3 ingredients to make this marmalade at home. Be sure to watch the video!
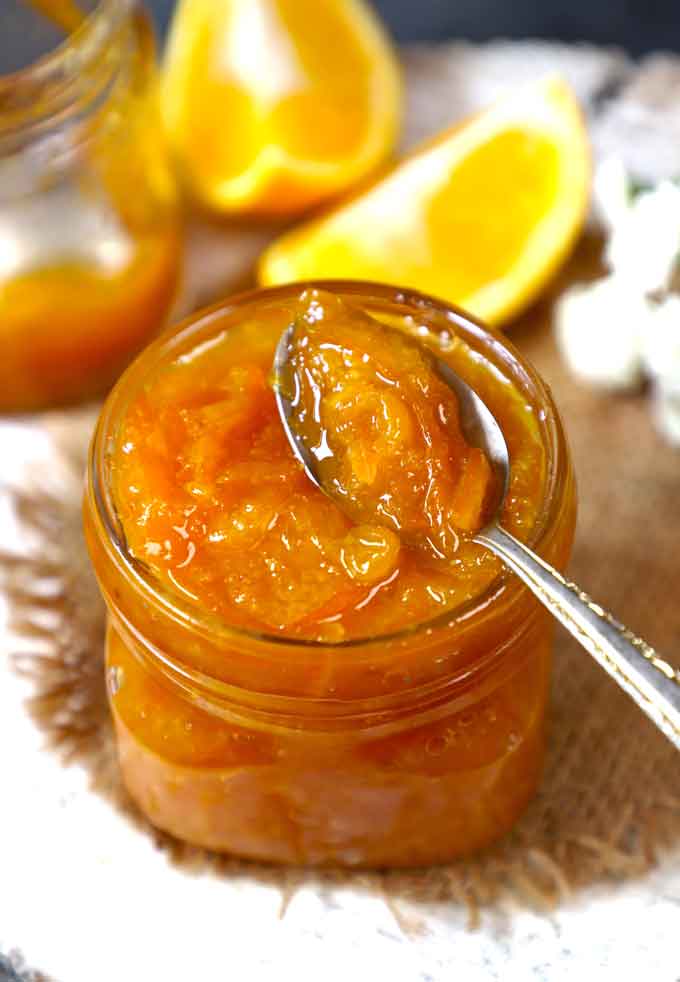
Making your marmalade at home cannot be easier. You need only 3 ingredients!
And in my opinion, it is undoubtedly wiser! Aside from enjoying it in various delicious ways, such as orange cakes , yoghurt, ice cream, and bread toast, here are more reasons to LOVE this fruit preserve.
- It is so easy to make! You only need three ingredients, a juicer, and one pan to make this orange marmalade from scratch.
- Vegan and Gluten-Free – so it can be enjoyed by almost everyone! And unlike store-bought marmalades, this recipe is certified free of preservatives, additives, and chemicals. So even kids and toddlers can enjoy this all-natural treat without any worries!
- Customizable – another perk of making from-scratch recipes is your control over the ingredients used. Make it as sweet or as tangy as you like it to be. Mix it with other citruses like bergamots, mandarins, and grapefruits, or add ginger or cinnamon. Whatever takes your fancy!
- Budget Friendly – Lastly, making it yourself would cost less than buying branded, organic marmalades off the shelves. So next time you see those plump, juicy oranges in the farmer’s market, buy them in bulk and make a delicious citrus preserve at home!
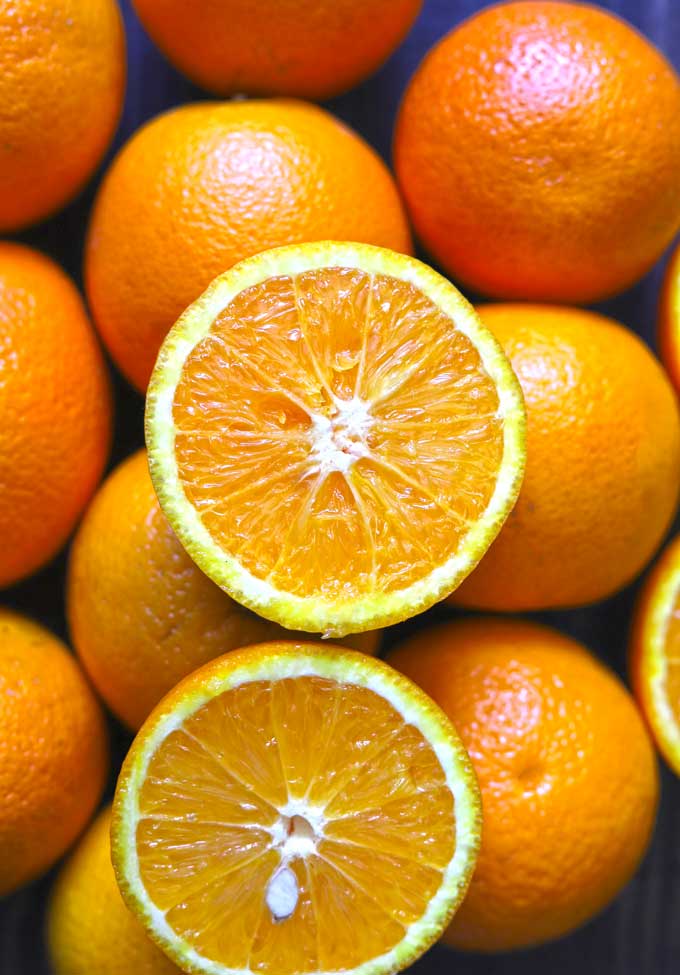
What type of oranges to use for marmalade?
The most common type used when making marmalade is Spanish Seville . These are favoured over other oranges because they naturally contain a high amount of pectin.
Pectin is a fibre found in most fruits that acts as a natural thickener essential in making marmalades. However, Australian Orange, Tangerines, Mandarin Orange, or Naval are great options.
In India, Kinnow Oranges are the best for making marmalade . They are available during the winter season from December to February. Do not use regular oranges or santara .
Marmalade
Marmalades VS Jams- What is the difference?
Some might think that marmalades are just a fancy term for jams. But these two are different from each other. They differ in process, fruits used, and outcome regarding flavour and texture.
Fruit used
- Jam- any fruit or berries can be used to make one.
- Marmalade – is usually made of citruses only.
Process
- Jam- fruit flesh is chopped or crushed, then boiled with fruit juice and sugar.
- Marmalade- the citrus juice, pulp, and peel/ rind are boiled with sugar.
Texture
- Jam- thick and spreadable with tiny bits of fruits in it.
- Marmalade- jelly-like and sticky with noticeable chunks of peel/ rind.
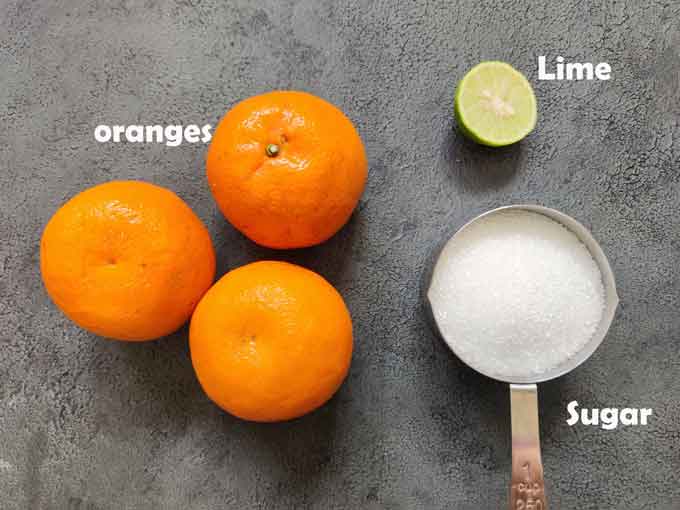
Ingredients Required
Orange: Juice, pulp, and the orange rind are all used to make marmalade.
Sugar: Granulated white sugar works best for making any fruit preserve.
Lime Juice balances the sweet flavour and acts as a natural preservative.
Juicer: You need a citrus juicer (electric or manual) to squeeze out all the juice from the oranges.
Saucepan: Use a non-stick, ceramic, or stainless steel saucepan to make a jam. Cast iron and other reactive metals alter the colour and taste of the marmalade.
Orange to Sugar Ratio
Usually, it is always best to taste citrus fruits to check their sweetness and tartness. Then add sugar accordingly.
I follow a thumb rule of 2:1 (orange to sugar ). So, for example, if you have 200 grams of orange pulp and juice, add 100 grams of granulated white sugar.
Remember that a citrus marmalade with slight tartness and bitterness is more delicious than one that tastes like a sugar syrup with no original fruit flavour.
My Tried & True Tips
Baking Soda and water solution helps clean the orange skin and eliminate chemicals/dirt/germs.
Use refined granulated white suga r for this marmalade recipe. Powdered sugar or icing sugar dissolves more quickly than granulated sugar.
Stay away from reactive metal cookware. Instead, make sure to use an enamel-coated ceramic or non-stick saucepan for making the marmalade rather than the cast iron pan or aluminium cookware.
Trust the process until and unless the white foam from the top disappears. Keep cooking the orange marmalade.
Do not add any water while cooking the orange marmalade. It needs to cook in its natural juices and sugar.
To check if the marmalade is done , take a big spoonful and spread it on a plate. It should be sticky with a sheen to it and not watery. Usually, any jam or fruit preserve thickens more after cooling down. Hence, do not cook them for too long to get the right consistency.
How To Store
- Always start with a clean, sterilized glass jar. Soak the jar and lid in hot water for a few minutes, then let them dry naturally.
- Once the marmalade has cooled down at room temperature, you can transfer it into the jar. Note: fill the jar almost to the brim to prevent bacteria build-up and early spoilage.
- Seal the jar tightly, place it in a cool area, or let it chill in the refrigerator. It should last for a couple of weeks to a month. Note: Always use a clean spoon when scooping portions from the jar to keep it fresh longer!
Watch Orange Marmalade Video
More Fruit Preserve Recipe
Mango Jam
Apple Chutney
Strawberry Jam
Raw Mango Chutney (Chundo)
If you try this recipe and love it, please leave a comment and a rating. This helps us grow and reach other food lovers like you.
Ingredients
- ▢ 300 ml orange juice (approx 5 Kinnow Oranges)
- ▢ 200 gram orange pulp
- ▢ 60 gram orange rind, julienned
- ▢ 250 gram granulated white sugar
- ▢ 1 tablespoon lime juice
Ingredients To Clean Oranges:
- ▢ 1 teaspoon baking soda
- ▢ water
Instructions
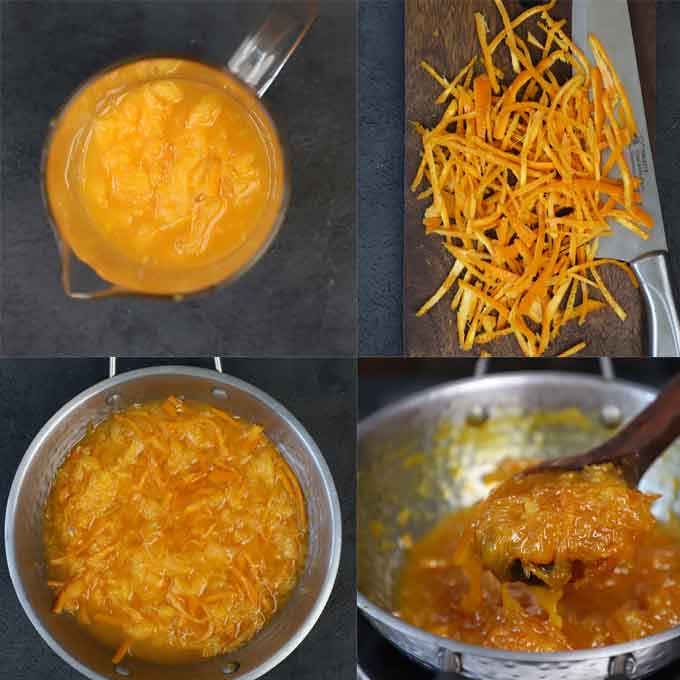
- Add a teaspoon of baking soda to water. Wash the oranges with the skin in baking soda water. Pat dry with a clean kitchen towel.
- Cut the oranges in half. Using a sharp fruit knife remove seeds from oranges.
- Using a citrus juicer squeeze out the juice from the oranges. Scoop out the pulp in a separate bowl. Discard white pith, seeds, or transparent skin covering the pulp. Combine juice and pulp. Total they should be 500 gram (300 ml Juice + 200 gram Pulp).
- Using a spoon remove the white pith inside the rind. It tastes bitter and spoils the marmalade. Now, julienne the orange rind or cut it into thin strips. It should be 60 gram. I use the rind of two oranges.
- Add sugar, line juice, and mix. Cover and keep aside. After 15 minutes, sugar will be completely dissolved with the fruit. Do not rush this process.
- Start cooking the marmalade in a heavy-duty ceramic, enamel, steel, or glass saucepan.
- Stage 1, the marmalade will be watery, and white foam on top. Keep cooking on low heat, while stirring at regular intervals.
- Slowly, the white foam will start reducing, the texture of the marmalade would thicken a bit. Use a potato masher or a ladle to gently mash the pulp and orange rind.
- After 20 minutes on low heat, the white foam on top will disappear, pulp mashed nicely, and the marmalade will start sticking to the spoon. Turn off the heat.
- Take a big spoonful of marmalade and spread it on a plate. It should be sticky and not watery with a sheen to it. That is the signal that marmalade is ready!
- Allow the marmalade to cool down completely at room temperature. Store the cooled marmalade in a clean, sterilised glass jar with a tight-fitting lid.
Recipe Notes:
- Use fine granulated white sugar for this recipe. And not powdered sugar, icing sugar, or big crystals of sugar.
- Make sure to use an enamel-coated ceramic or non-stick saucepan for making the marmalade rather than the cast iron pan, aluminum, or any other reactive metal cookware.
- Until and unless the white foam from the top disappears keep cooking it. Please note the cooking time may vary according to the quantity and type of oranges.
- Do not add any water while cooking the marmalade. It needs to cook in its own natural juices and sugar.
Nutrition
We follow a strict NO SPAM Policy

Orange Marmalade Recipe
Equipment
- Mixing Bowl
- Citrus Juicer
- Saucepan
Ingredients
- 300 ml orange juice (approx 5 Kinnow Oranges)
- 200 gram orange pulp
- 60 gram orange rind, julienned
- 250 gram granulated white sugar
- 1 tablespoon lime juice
Ingredients To Clean Oranges:
- 1 teaspoon baking soda
- water
Instructions
- Add a teaspoon of baking soda to water. Wash the oranges with the skin in baking soda water. Pat dry with a clean kitchen towel.
- Cut the oranges in half. Using a sharp fruit knife remove seeds from oranges.
- Using a citrus juicer squeeze out the juice from the oranges. Scoop out the pulp in a separate bowl. Discard white pith, seeds, or transparent skin covering the pulp. Combine juice and pulp. Total they should be 500 gram (300 ml Juice + 200 gram Pulp).
- Using a spoon remove the white pith inside the rind. It tastes bitter and spoils the marmalade. Now, julienne the orange rind or cut it into thin strips. It should be 60 gram. I use the rind of two oranges.
- Add sugar, line juice, and mix. Cover and keep aside. After 15 minutes, sugar will be completely dissolved with the fruit. Do not rush this process.
- Start cooking the marmalade in a heavy-duty ceramic, enamel, steel, or glass saucepan.
- Stage 1, the marmalade will be watery, and white foam on top. Keep cooking on low heat, while stirring at regular intervals.
- Slowly, the white foam will start reducing, the texture of the marmalade would thicken a bit. Use a potato masher or a ladle to gently mash the pulp and orange rind.
- After 20 minutes on low heat, the white foam on top will disappear, pulp mashed nicely, and the marmalade will start sticking to the spoon. Turn off the heat.
- Take a big spoonful of marmalade and spread it on a plate. It should be sticky and not watery with a sheen to it. That is the signal that marmalade is ready!
- Allow the marmalade to cool down completely at room temperature. Store the cooled marmalade in a clean, sterilised glass jar with a tight-fitting lid.
Video
Notes
- Use fine granulated white sugar for this recipe. And not powdered sugar, icing sugar, or big crystals of sugar.
- Make sure to use an enamel-coated ceramic or non-stick saucepan for making the marmalade rather than the cast iron pan, aluminum, or any other reactive metal cookware.
- Until and unless the white foam from the top disappears keep cooking it. Please note the cooking time may vary according to the quantity and type of oranges.
- Do not add any water while cooking the marmalade. It needs to cook in its own natural juices and sugar.
Nutrition
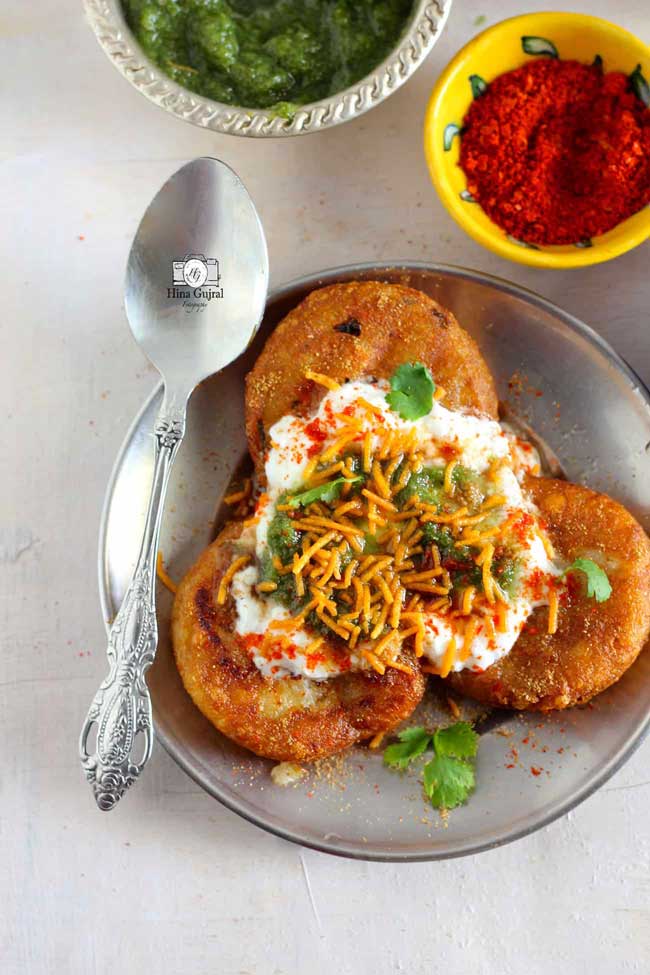
Aloo Tikki Chaat is a delicious Indian street food of crisp potato tikki loaded with curd, chutney, and spices. This is a tried and tested Chaat Wala-style potato tikki recipe. Be sure to watch the video!
Aloo Tikki Chaat Recipe
About Aloo Tikki
Over the years, Chaat has become emblematic of Indian Cuisine. The tour of the narrow, hustling bustling bylanes of India, especially Delhi, to taste the authentic flavours served by local food carts is not concluded until you dig into a delectable platter of aloo tikki chaat.
The plate full of tikki chaat laced with vivacious condiments, some sweet while others are spicy, is one of the must-try Indian street food fares.
Over the years, aloo tikki has become one of the most popular potato snacks across North India.
Aloo Tikki Chaat
My Delhi Style Aloo Tikki Chaat
On routine visits to Chaat stall, the colossal and spacious pan of Chaat wala always fascinated me. The hot oil was sputtering in that wide pan while he with skilled precision shallow fried so many aloo patties at a time is always a fascinating watch.
As the evening progresses into night, the mob of hungry goblins starts gathering around the Chaat Wala . Each gluttonous pair of eyes stared at the potato tikki swimming in the hot oil, waiting zealously for their plate of decked-up aloo tikki chaat.
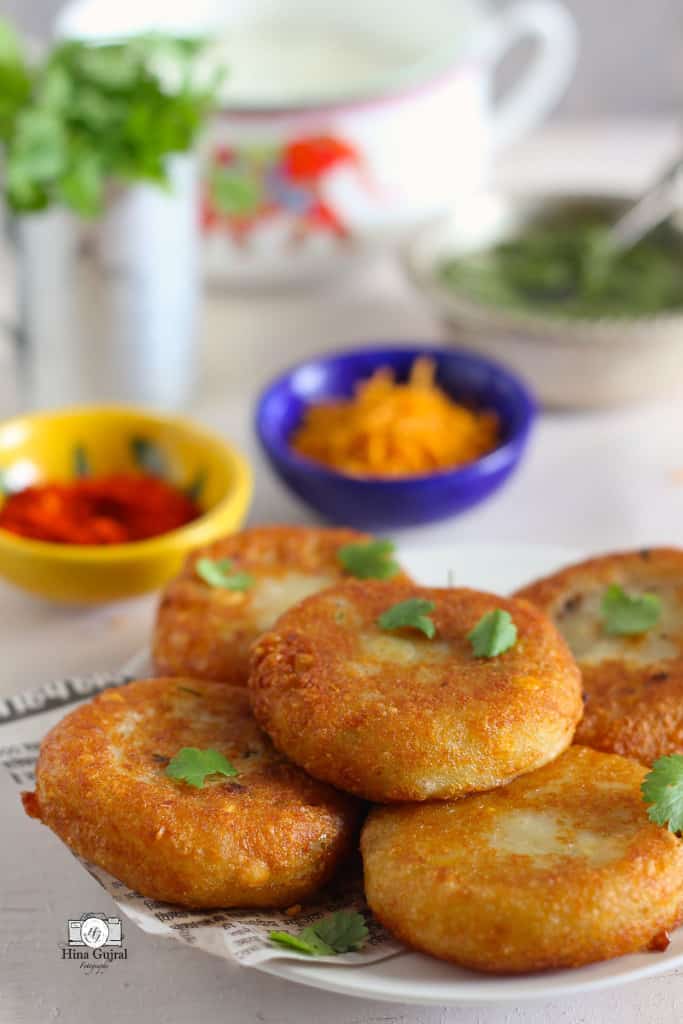
The surface of his aloo ki tikki is perfectly crisp, crunchy, and deep golden, while the inside layer is a mouth-melting mashed potato .
Over the years, admiringly staring at the Chaat vendor’s pan and gulping plates full of aloo tikki chaat helped me understand the nuances of a perfect aloo tikki.
If you are looking for a crispy Delhi style aloo tikki recipe with that golden brown colour and crunchy stuffing (yes, my tikki has filling) just like the chaat wala , then this is the recipe worth bookmarking.
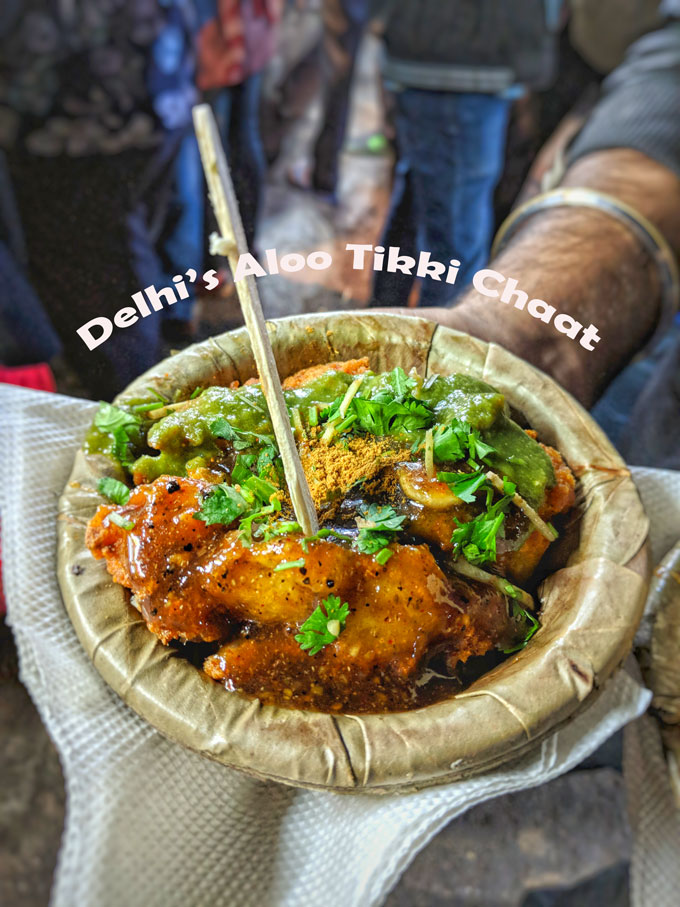
Delhi Street Food – Aloo Tikki Chaat
Perfect Aloo Tikki – My Tips
Tip 1) Boil potato a few hours beforehand or the previous day and keep in the fridge. This way, you get the perfect moisture-free boiled potatoes to make tikki.
Tip 2) Grate the boiled potatoes rather than mash. This will help to get a smooth texture of the tikki.
Tip 3) To handle the potato mixture while shaping the patties dip your fingers in lukewarm water or grease them with a teaspoon of oil to smoothen the edges and avoid the stickiness of the dough.
Tip 4) Do not overstuff the potato coating with the dal mixture. Otherwise, it will burst open while shallow frying.
Tip 2) Always fry tikki in hot oil over low to medium heat. If you fry tikki on very high heat, they will burn from the outside and remain cold/uncooked from the inside.
Also, do not flip the tikki while frying more than once or twice.
Serving Suggestion
Serve homemade aloo tikki with sweet curd (dahi), mint chutney , tamarind chutney or sweet date chutney, crushed crisp papdi for the crunchiness, and a dash of spices sprinkled on top like cumin powder, chaat masala and chilli powder.
You can add thinly sliced beetroot or finely chopped fresh coriander right before serving the tikki chaat. Many food lovers like to serve boiled chana (chole) or ragda along with aloo tikki.
Watch Aloo Tikki Chaat Video
More Indian Chaat Recipes
- Lobia Chaat
- Peanut Chaat
- Sweet Corn Chaat
- Moong Dal Chaat
- Dahi Vada Chaat
- Dahi Papdi Chaat
- Bread Basket Chaat
- Moong Dal Samosa
If you try this recipe and love it, please leave a comment and a rating. This helps us grow and reach other food lovers like you.

Ingredients
Ingredients For Aloo Tikki (Potato Patties):
- ▢ 3 large – size boiled potato
- ▢ ½ Cup dried white peas (safed matar)
- ▢ ¼ Cup chana dal (Bengal Gram)
- ▢ 1 tablespoon corn flour (corn starch)
- ▢ Salt to taste
- ▢ 1 teaspoon red chili powder
- ▢ 1 teaspoon turmeric powder
- ▢ 1 teaspoon mango powder (amchur)
- ▢ 1 teaspoon cumin powder (jeera powder)
- ▢ ¼ teaspoon asafoetida (hing)
- ▢ ¼ Cup chopped coriander leaves
- ▢ 2 tablespoon cooking oil + for shallow frying
Ingredients To Make Aloo Tikki Chaat:
- ▢ 1 Cup curd (dahi)
- ▢ ¼ Cup green mint chutney ( see recipe here )
- ▢ ¼ Cup sweet tamarind chutney
- ▢ 1 tablespoon bhujia sev
- ▢ a pinch of red chili powder
- ▢ a pinch of cumin powder (jeera powder)
- ▢ 1 tablespoon chopped fresh coriander leaves
Instructions
Prep For Aloo Tikki:
- To prepare the Aloo Tikki Chaat, soak the white peas and chana dal for 5 hours. Next, cook in a pressure cooker along with a teaspoon of salt and 1 cup of water for 3 whistles over low heat. Transfer cooked lentils in a colander to drain excess liquid.
- Meanwhile boil the potato, peel and grate them. Keep in the fridge until required.
- Next heat a teaspoon of oil in a saute pan. Add spices, asafoetida followed by cooked peas, and dal. Stir to combine and fry for next few minutes so that all the liquid dries up. Mash the lentil mixture to a smooth consistency. Transfer to a bowl, add chopped coriander leaves and set aside to cool down completely.
- Mix cornflour and salt to taste in the grated potato, mix to combine and try to form a non-sticky dough. Make sure no lumps remain in the potato mixture.
How To Make Aloo Tikki:
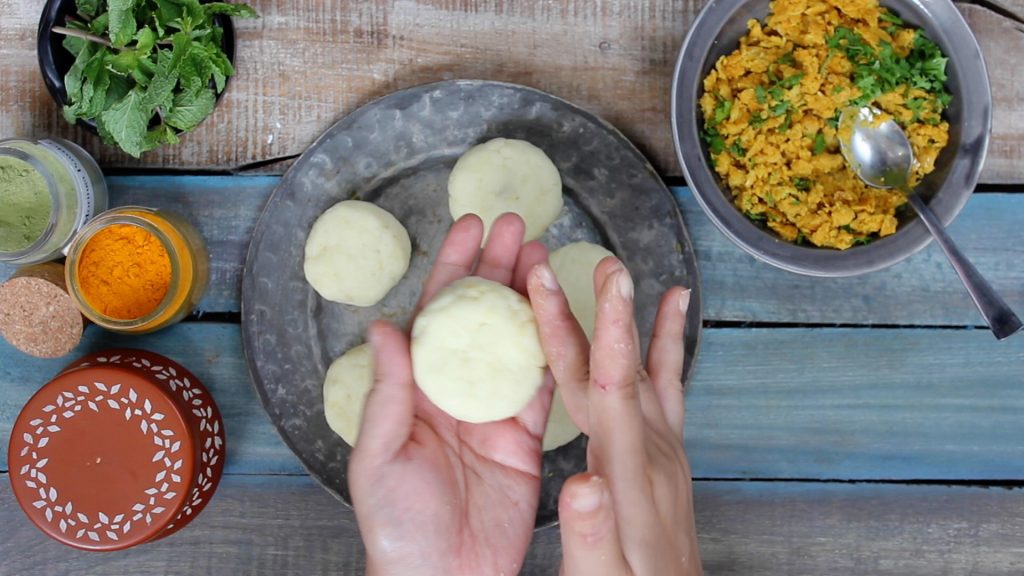
- To shape the aloo tikki, take a small portion of mashed potato in between your palms. Roll it and gently flatten it using fingers. If the potato mixture seems sticky, moisten your fingers with a teaspoon of oil.
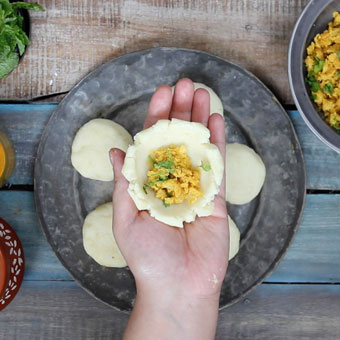
- Make a well in the center of the potato ball, fill in a teaspoon of lentil stuffing. Close the edges. Gently flatten the tikki once again to get the thickness of an inch or so. Similarly, shape all the patties.
- Heat oil in a frying pan over medium flame.
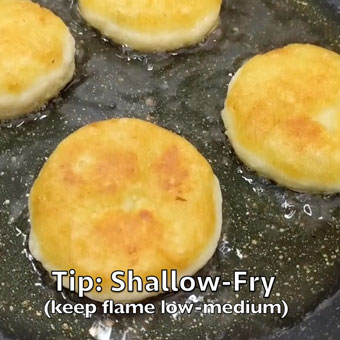
- Shallow fry the potato tikki in small batches over low-medium heat. While shallow frying keep on gently pressing the tikki to evenly cook from all sides.
- Do not flip tikki again and again. Let it turn crisp from one side, flip and then cook from other side. Once cooked transfer to a metal colander or sieve.
How To Make Aloo Tikki Chaat:
- Whisk curd nicely to a smooth dropping consistency. Add a tablespoon of water or milk if required to get the desired consistency.
- To serve Aloo Tikki Chaat, arrange tikki in a plate, add a spoonful of whisked curd, a teaspoon of each chutney, and sprinkle spices as per your taste.
- Sprinkle bhujia sev, chopped coriander and serve immediately.
Recipe Notes:
- Make sure to grate the potatoes and not mash them. This is to ensure smooth, lump-free potato dough.
- Do not add too much water while boiling the lentils. One or two cups is enough for pressure cooking.
- If you do not have white peas, use ½ cup of chana dal. Soak it for 2 – 3 hours only.
- Do not overstuff the potato casing with the lentil mixture. Otherwise, the outer casing will tear.
- Always fry potato tikki over low-medium heat to get the perfect color and crisp texture.
- You can fry potato tikki in an air-fryer as well. Brush uncooked potato tikki with oil on both sides. Arrange them in the air fryer basket. Do not overcrowd the fryer basket. Cook each side at 190 degrees celsius for 10 minutes. If you need more crisp then cook for 15 minutes each side.
- If you serve aloo tikki without curd or yogurt. It is a vegan snack.
Nutrition
We follow a strict NO SPAM Policy
