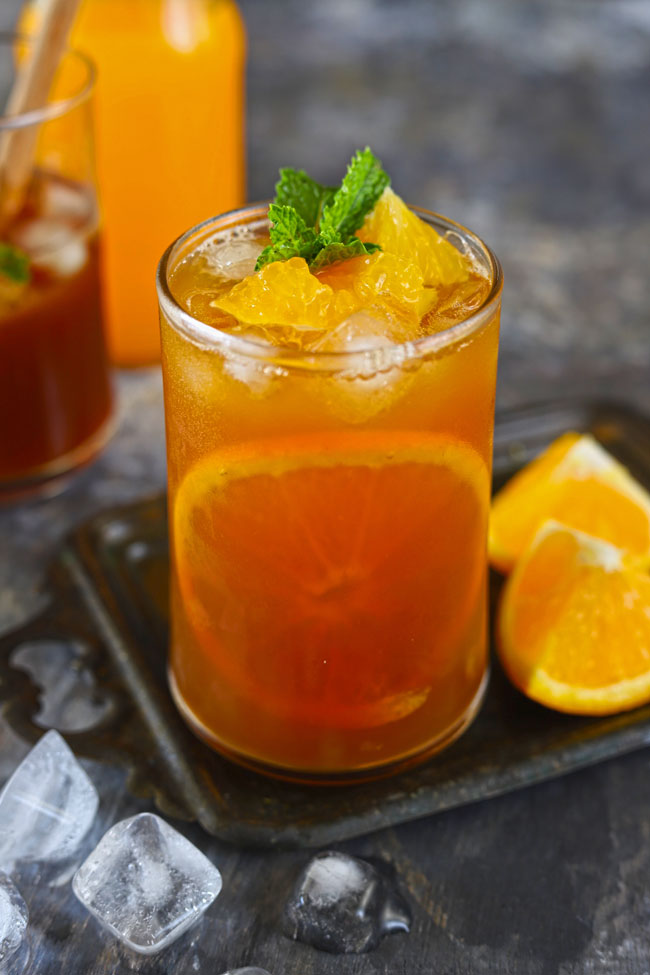
Orange Iced Tea is a refreshing cold tea recipe packed with the flavour of fresh oranges. Make a large batch of this iced tea for the hot summer afternoons because it will get over fast.
Orange Iced Tea
- Ingredients Required
- How To Make Orange Iced Tea
- Watch Lemon Iced Tea Video
- FAQs Related To Iced Tea
- More Summer Drink Recipes
- Orange Iced Tea Recipe
Packed with fresh orange flavour, this orange iced tea is the perfect summer thirst-quencher. You must think I am using all these exaggerated words to describe my iced tea recipe but trust me; it is one of the most refreshing summer drinks.
Reasons I Love Homemade Iced Tea
- easy to store
- budget-friendly
- preservative free
- highly customizable
- vegan and gluten-free
- requires only 4 – 5 ingredients
I love the summer afternoon quietness; it is dull yet inspiring and fills me with many inspiring recipe ideas, such as this orange-flavoured iced tea.
Ingredients Required
- Tea: I prefer using Indian milk tea or black tea leaves for making iced tea decoction. Make sure the tea leaves are not too old or stale. Else, the flavour of the iced tea would be bitter or flavourless.
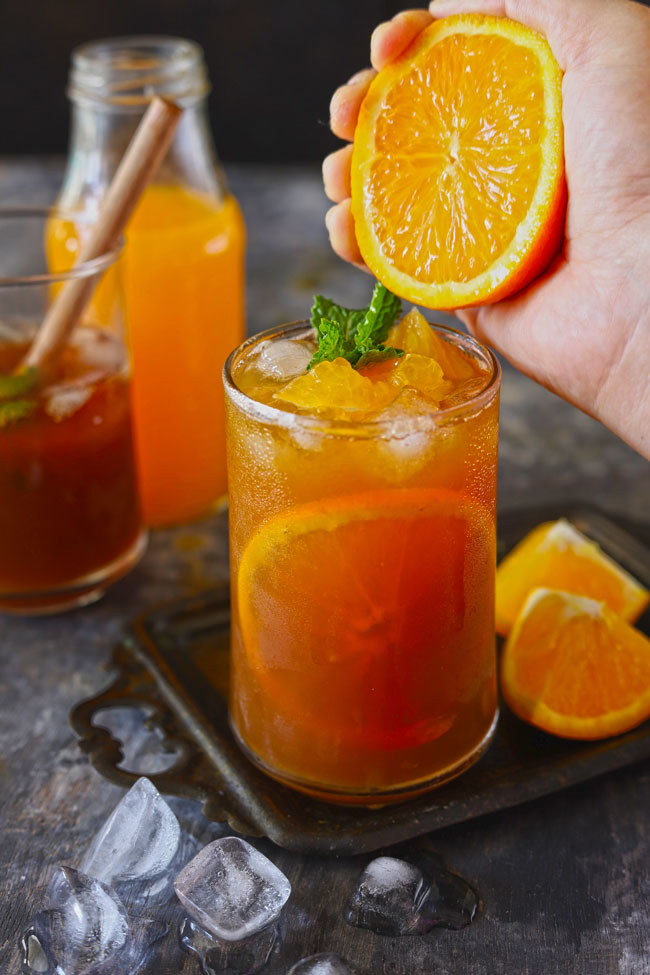
- Orange: One can use fresh or canned orange juice for flavouring the iced tea . From Spanish Seville to Australian Orange, or a Naval, any variety of sweet oranges work for this tea recipe. A few slices of orange can also be added to the iced tea for a natural taste and garnishing. But make sure that the orange slices are not bitter.
- Sweetener: From granulated white sugar and syrup to organic honey, there are multiple options to sweeten the iced tea. If you are using sweetened orange juice for making the iced tea, then taste and add the additional sweetening agent accordingly.
Orange Iced Tea
How To Make Orange Iced Tea
Making orange iced tea is an easy process.
- Brew the tea. Start with steeping the tea in hot water to make the decoction. Follow the recipe video to brew tea.
- Add a sweetener of your choice to the hot tea. Stir to combine.
- Filter the tea. Allow it to cool down. Add orange juice.
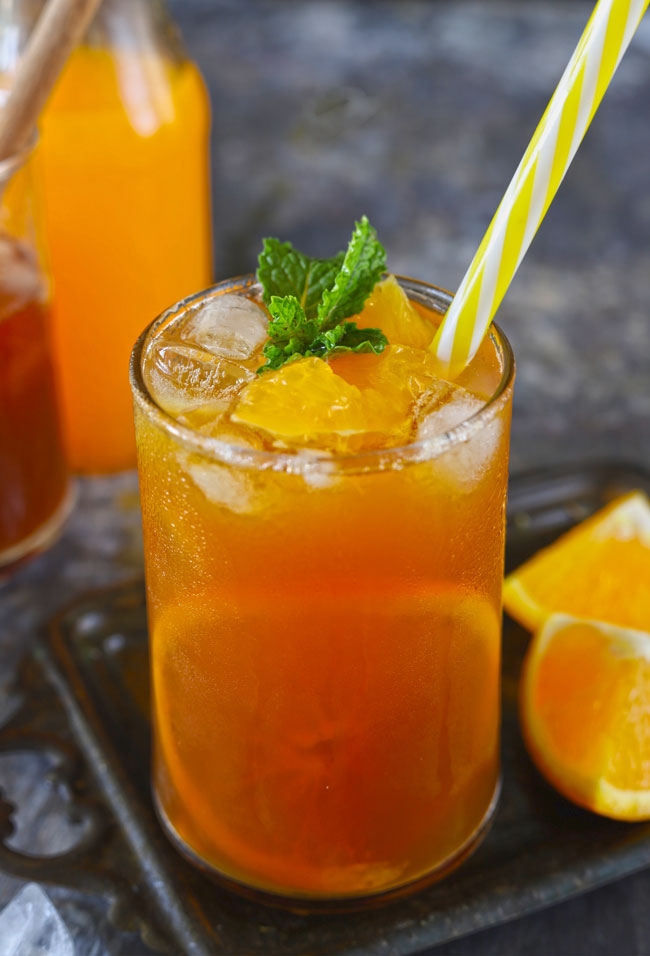
- Chill in the refrigerator for a few hours. Serve over ice cubes.
Watch Lemon Iced Tea Video
Black tea is the best for making a basic iced tea at home . If you can get your hands on Indian-origin Assam or Darjeeling tea, then nothing like it. The colour of the iced tea also comes out stunning when prepared using black tea leaves. Other good alternatives are Earl Grey tea, green tea, and chamomile tea .
Iced tea is best consumed fresh or within 8 hours. After a day or two, the taste and colour change. However, consuming it in the fridge for 2 – 3 days remains good.
Iced Tea is a caffeinated, sweet drink you can consume in moderation daily. Usually, 2 – 3 glasses in a day are absolutely fine, considering you are not suffering from any chronic illness or diabetes.
More Summer Drink Recipes
- Mango Lassi
- Lemon Iced Tea
- Mango Iced Tea
- Sugarcane Juice
- Oreo Cold Coffee
- Hibiscus Iced Tea
- Virgin Mango Mojito
- Vietnamese Iced Coffee

Ingredients
- ▢ 2 tablespoon loose black tea (chai patti)
- ▢ 6 Cups of water
- ▢ ¼ Cup granulated white sugar or to taste
- ▢ 2 Cup unsweetened orange juice
Ingredients For Garnish:
- ▢ 5 – 6 fresh mint leaves
- ▢ 4 – 5 thin orange slices with skin
- ▢ ice-cubes
Instructions
- Boil water and sugar in a saucepan. Turn off the heat once sugar is dissolved.
- Add the loose tea leaves or the tea bags. Cover the pan with a lid. Steep the tea for 2 – 3 minutes.
- Strain the tea in a jar, keeping the liquid and discarding the leaves. Allow the brewed tea to cool down.
- Stir in the orange juice. Let sit in the fridge until served.
- To serve, put ice cubes in each glass along with a orange slice and mint leaves.
- Pour chilled iced tea on each glass. Enjoy!
Recipe Notes:
- You can use tea bags as well instead of loose tea leaves.
- Do not steep or boil the tea for more than 5 minutes.
- If you are using sugar as a sweetener, it is important to dissolve it in boiling water before adding tea leaves/tea bags.
Nutrition
We follow a strict NO SPAM Policy

Orange Iced Tea Recipe
Equipment
- Saucepan
Ingredients
- 2 tablespoon loose black tea (chai patti)
- 6 Cups of water
- ¼ Cup granulated white sugar or to taste
- 2 Cup unsweetened orange juice
Ingredients For Garnish:
- 5 - 6 fresh mint leaves
- 4 - 5 thin orange slices with skin
- ice-cubes
Instructions
- Boil water and sugar in a saucepan. Turn off the heat once sugar is dissolved.
- Add the loose tea leaves or the tea bags. Cover the pan with a lid. Steep the tea for 2 - 3 minutes.
- Strain the tea in a jar, keeping the liquid and discarding the leaves. Allow the brewed tea to cool down.
- Stir in the orange juice. Let sit in the fridge until served.
- To serve, put ice cubes in each glass along with a orange slice and mint leaves.
- Pour chilled iced tea on each glass. Enjoy!
Notes
- You can use tea bags as well instead of loose tea leaves.
- Do not steep or boil the tea for more than 5 minutes.
- If you are using sugar as a sweetener, it is important to dissolve it in boiling water before adding tea leaves/tea bags.
Nutrition
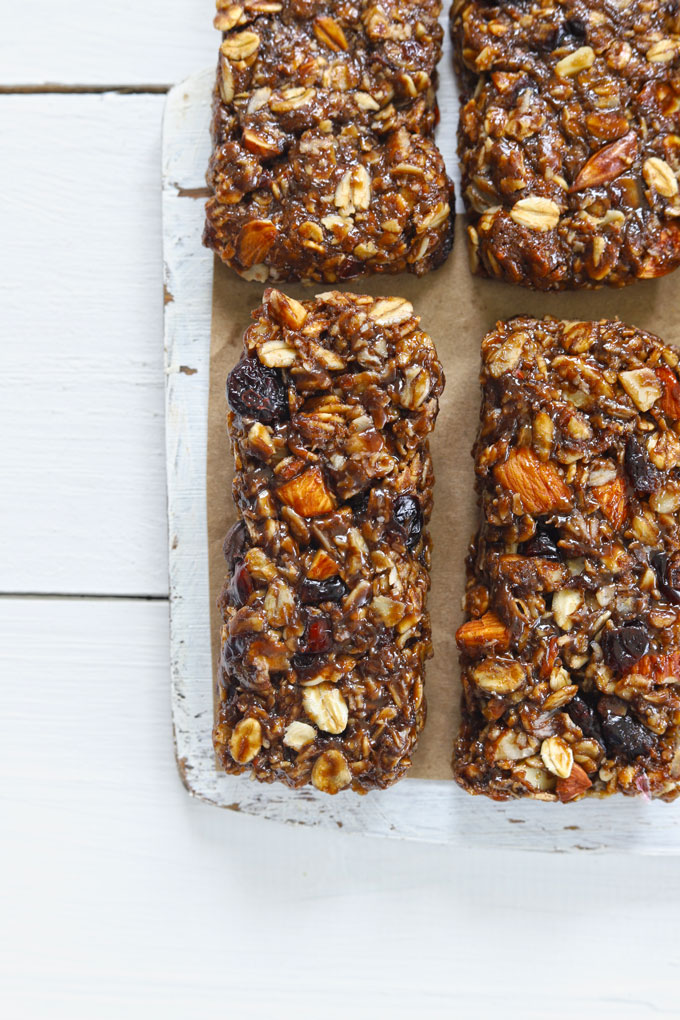
Try this easy, gluten-free chewy granola bar recipe packed with oats, nuts and chocolate chips. Perfect for back-to-school snacks or a quick breakfast on the go. Be sure to watch the video!
- Ingredients Required
- Tips To Make Chewy Granola Bars
- Watch Granola Bar Video
- Chewy Granola Bar Recipe
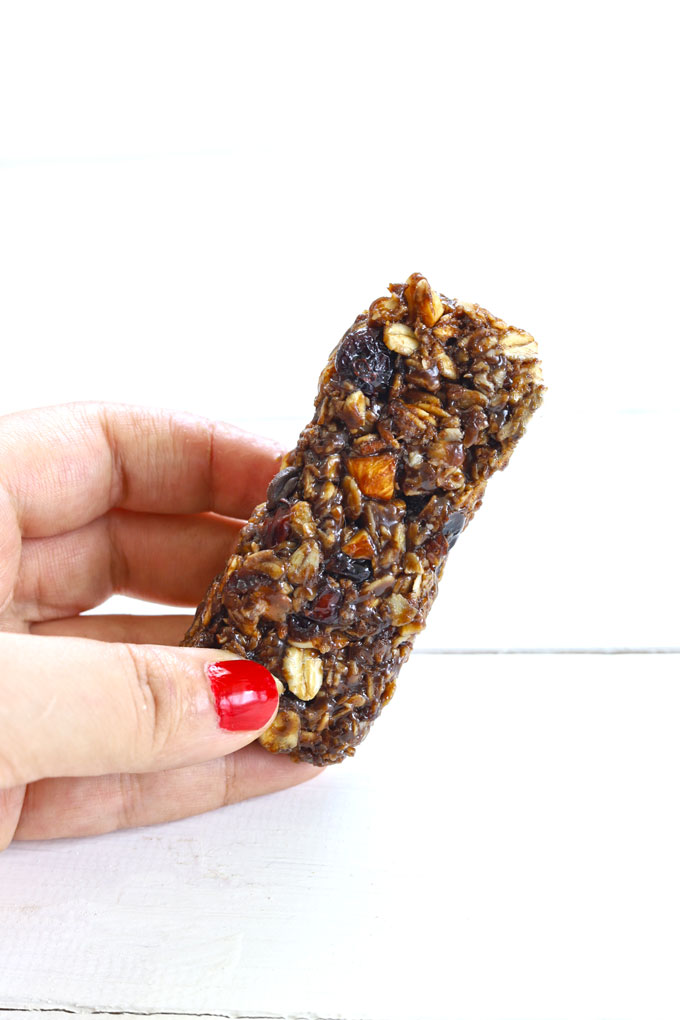
Granola Bars are the powerhouse of energy. They are perfect for a quick breakfast on the go, evening or back to school snack, or for after-workout hunger pangs.
Making Granola Bar at home is like custom ordering your own sandwich at Subway. I find homemade granola bars way better than the store-bought ones. Why?
Reasons To LOVE Homemade Granola Bars
- highly customizable
- easy to make and store
- gluten-free and vegetarian
- zero palm oil or harmful chemicals
- no artificial flavour or preservatives
Use a variety of dry fruits, nuts, and berries as per your liking and enjoy all of them in one bite.

Ingredients Required
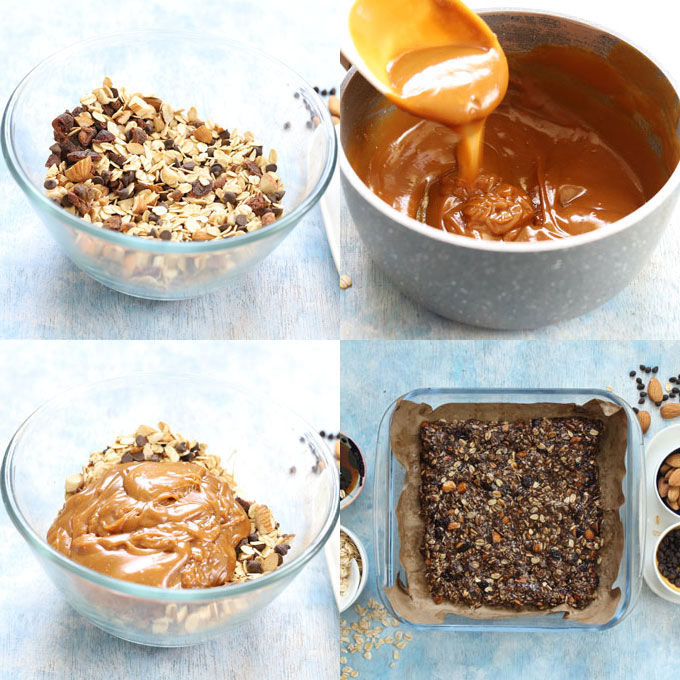
Talking about the ingredients for the chewy granola bar recipe, you need:
- Whole Oats: I have used gluten-free whole oats for making granola bars. They give the sort after chewy texture to the bars. I use them to make overnight oats , pancakes , and even smoothies .
- Almonds: The roughly chopped almonds give a great crunch to the granola bars. In case you are allergic to almonds, use hazelnuts, pistachio, or any other nuts.
- Dried Cranberry : The sweetness, tartness, and chewiness of the dried cranberries perfectly complement the crunchiness of almonds. Feel free to use dried blueberries, figs, apricot, or golden raisins .
- Dark Chocolate Chips : Can you say no to chocolate? I cannot. Hence, there have to be chocolate chips in my granola bars.
- Cinnamon Powder: It gives a spicy, warm, and earthy taste to the granola bars. You can use a pumpkin pie spice mix as well .
- Peanut Butter : It is the binding ingredient in this chewy granola bar recipe. Any good quality, creamy nut butter will do the job.
- Honey : It helps to get the desired spoon-dropping consistency of the peanut butter. If the nut butter you are using is of a liquid consistency, skip adding honey.
- Vanilla : It is only for the sweet flavour and aroma.
Tips To Make Chewy Granola Bars
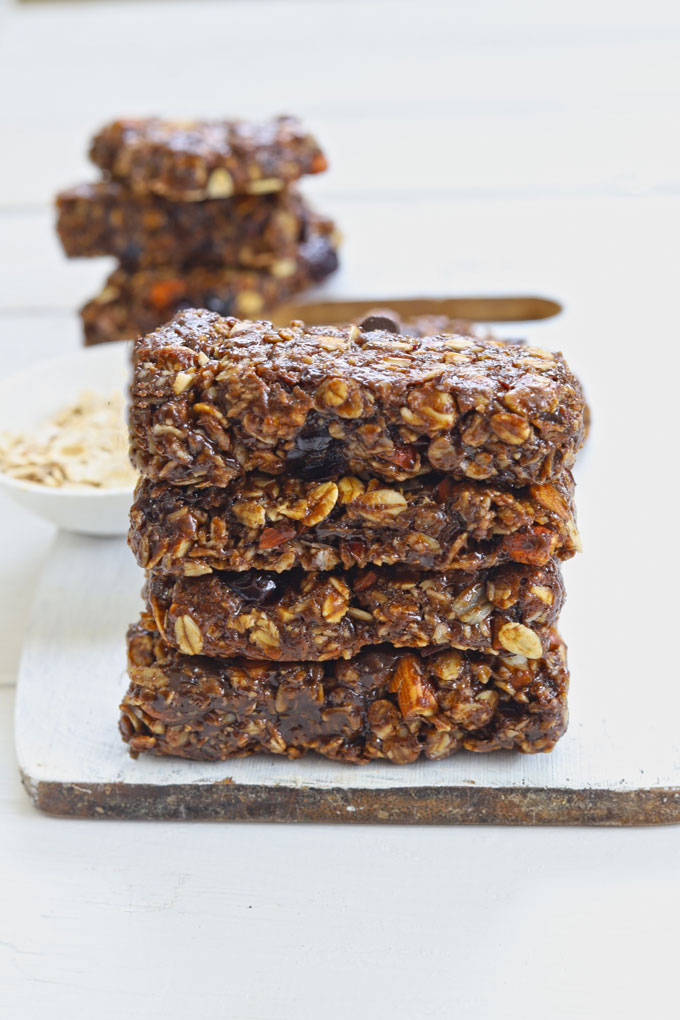
- For the soft and chewy granola bars, do not bake them for more than 20 minutes else they will turn crisp.
- Once the granola bars come out of the oven, the nutty aroma is really tempting and luring. But you need to control your fingers from digging into the hot granola bars.
- Allow them to cool completely for 2 – 3 hours before cutting into bars then only they will be chewy and not crumble apart.
Watch Granola Bar Video
Storage Suggestion
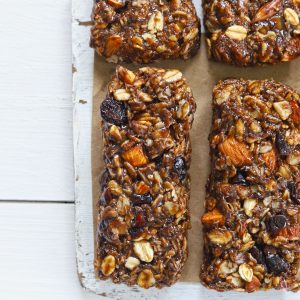
The best way to store granola bars is in a square or rectangular airtight glass container with a lid.
Place a sheet of parchment paper in between each granola bar or pack each one of them in individual sheets. This way they remain fresh and do not crumble or stick together.
You can store them in the fridge for 1 – 2 weeks. Though, in cold climatic conditions, you can store them at room temperature.
Recipe Variation: Vegan Granola Bars
For making vegan chewy granola bars, use stevia, molasses, or liquid brown sugar instead of honey.
In case the consistency of your nut butter is runny and liquid, you can skip adding honey.
More Baked Snack Recipes
- Date Nut Bread
- Cheese Corn Muffins
- Eggless Banana Bread
- Chocolate Chip Scones
- Double Chocolate Chip Muffins
- Apple Muffin With Oats Crumble
- Indian Shortbread Cookies (Nankhatai)
Ingredients
- ▢ 1 ¼ Cup instant oats
- ▢ 1 Cup chopped almonds
- ▢ ⅓ Cup dried cranberry
- ▢ ⅓ Cup dark chocolate chips
- ▢ ½ Cup creamy peanut butter
- ▢ ⅓ Cup honey
- ▢ 1 teaspoon vanilla extract
- ▢ 1 teaspoon cinnamon powder
Instructions
- Grease and line with parchment paper a 9 x 13 inch (23 x 33 cm) baking pan. Set aside. Preheat oven at 180 degrees Celcius for 10 minutes.
- In a large bowl mix together all the dry ingredients – oats, almonds, cranberry, chocolate chips, and cinnamon powder. Set aside.
- Transfer honey and peanut butter to a saucepan. Mix nicely. Heat for 20 – 30 seconds stirring continuously to make a smooth liquid. Do not heat or cook for too long. Turn off the heat. Remove the saucepan from the stovetop.
- Add vanilla extract and whisk to combine. The peanut butter mixture should be of spoon dropping consistency.
- Pour over the oat mixture. With a large spoon or spatula, stir the mixture, making sure all the dry ingredients are completely coated with the peanut butter liquid.
- Transfer the granola into the greased baking pan. Using fingers/back of a glass/bowl lightly press the granola into an even layer.
- Bake for about 18 – 20 minutes, or until set in the middle rack of the oven. Remove from the oven and let cool for about 2 – 3 hours before cutting into bars.
- Store granola bars in a clean airtight container at room temperature or in the fridge.
Recipe Notes:
- I have used gluten-free whole oats for making granola bars.
- In case you are allergic to almonds, use hazelnuts, pistachio, or any other nuts.
- Feel free to use dried blueberries, figs, apricot, or golden raisins.
- Any good quality, creamy nut butter will do the job. I love the flavor of peanut butter, hence used it.
- If the nut butter you are using is of a liquid consistency, skip adding honey.
- For making vegan chewy granola bars, use stevia, molasses, or liquid brown sugar instead of honey.
Nutrition
We follow a strict NO SPAM Policy
