Follow my tips to make bright, lip-smacking mint chutney recipe each time. Also known as green chutney or pudina chutney.
Estimated reading time: 4 minutes
- What is ‘Chutney’?
- Ingredients You’ll Need
- How To Avoid Black and Bitter Mint Chutney
- Serving Suggestion
- Storage Suggestion
- Mint Chutney Recipe
What is ‘Chutney’?
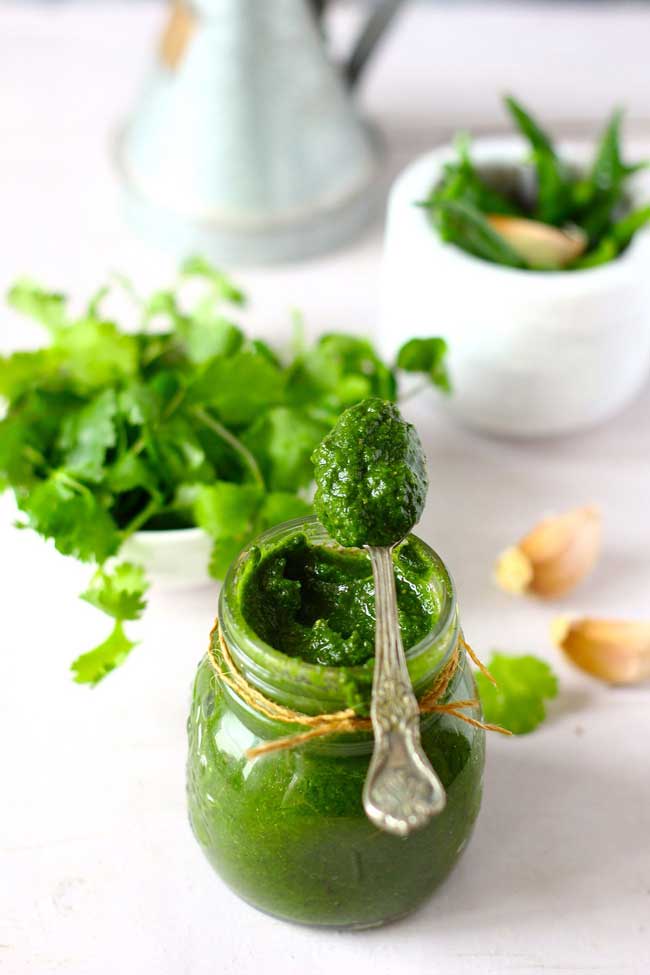
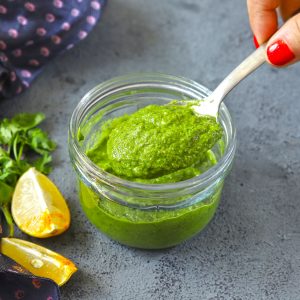
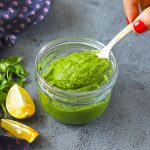
Mint Chutney is a spicy Indian dip, also known as green chutney or pudina chutney. It is an essential dip for Indian snacks and Chaat. There are hundreds of chutney recipes followed across India among them pudina chutney is one of the most popular one. It is bold, delicious, and refreshing at the same time.
Why You’ll Love This Chutney Recipe
- easy to make and store
- vegan and vegetarian
- low calorie side dish
- rich in anti-oxidants
- gluten and nut free
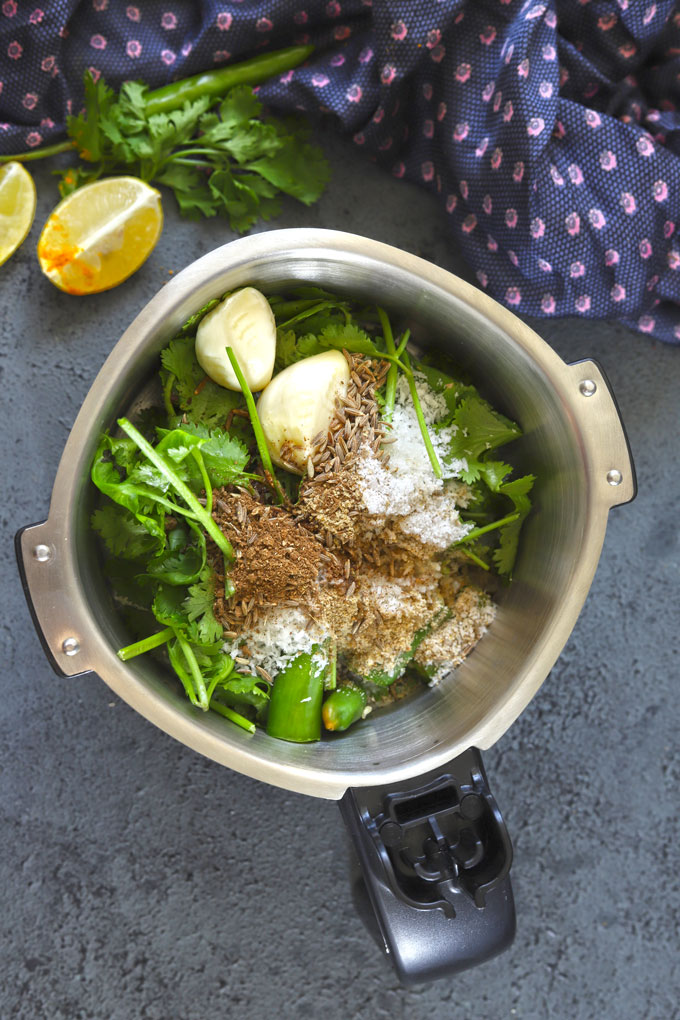
Ingredients You’ll Need
- Mint Leaves are the key ingredient for making this green chutney. Do not use dried mint leaves or mint powder.
- Coriander Leaves balance the bitterness of mint leaves. Do not throw away coriander stalks as they add a lot of flavour to the chutney.
- Green Chilli adds spiciness. Jalapeno or any other mildly spicy green chilli works for making chutney.
- Ginger and Garlic: I love the flavor of garlic and ginger in my chutney. Skip adding garlic if you are allergic or do not like it.
- Cumin Powder gives an earthy, roasted flavour to the chutney.
- Mango Powder gives a sour, lip-smacking taste to the chutney. You can use lemon or lime juice, rock salt, Himalayan Pink Salt, or a tablespoon of sour cream to get the same taste.
- Sugar balances the spiciness and gives a subtle sweet taste to the chutney making it perfectly umami.
How To Avoid Black and Bitter Mint Chutney
The biggest challenge with the mint chutney is at times – it turns black and bitter. I am sharing a few tips and tricks to avoid black and bitter green chutney:
- Green Chutney turns black when exposed to air for a longer duration due to oxidation.
Tip: This can be prevented by storing chutney in an airtight container. Or you can 1 – 2 ice cubes while blending the chutney to control the heat generated from the blender.
- Often mint chutney tastes bitter. Usually, there are two reasons responsible for the same. First, the chutney is blended for too long leading to the release of bitter juices of mint leaves. Second, the ratio of mint leaves to other ingredients is not correct.
Tip: Ensure one or two blitzes in a blender are enough to make chutney. Or use the traditional mortar and pestle to make it. Add coriander leaves to balance the bitterness of mint leaves.
Serving Suggestion
From an enticing dip to a finger-licking side dish for Indian main course dishes , a pudina chutney can be many things. It is a quintessential part of an Indian thali .
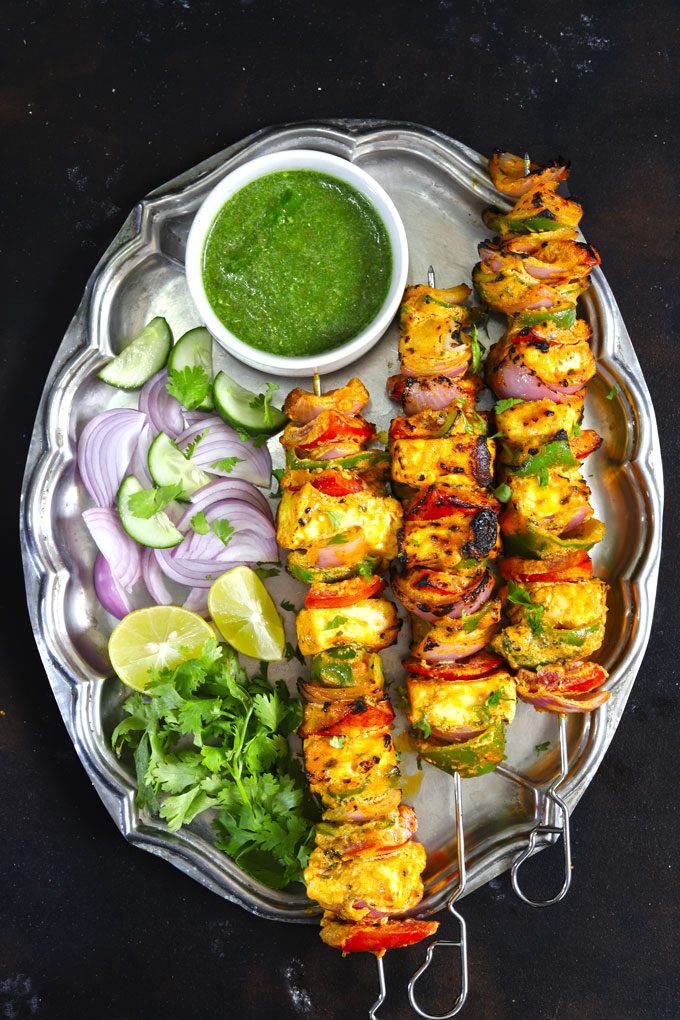
A teaspoon of green chutney on aloo tikki chaat and suddenly it turns into a tantalizing appetizer. Served on the side of tandoori prawns or paneer tikka with onion rings and you have the perfect Indian appetizer platter.
You can layer the green chutney as a spread on bread slices to make Indian Style Cheese Chutney Sandwich .
Storage Suggestion
It is always best to store green chutney in a clean, airtight container in the fridge. It remains fresh in the fridge for 3 – 5 days.
But after a few hours, the mint chutney starts changing its color from bright green to dark green. Hence, it is best to consume it within a day or two.
More Indian Chutney Recipes
- Apple Raisin Chutney
- Green Mango Chutney
- Roasted Tomato Chutney
- Coconut Coriander Chutney
- Sweet Raw Mango Chutney
Ingredients
- ▢ 2 Cup fresh mint leaves
- ▢ 1 Cup fresh coriander leaves
- ▢ 1 tablespoon ginger, roughly chopped
- ▢ 2 garlic cloves
- ▢ 2 green chili, chopped
- ▢ 1 teaspoon mango powder (amchur powder)
- ▢ 1 teaspoon roasted cumin powder (jeera powder)
- ▢ 1 teaspoon granulated white sugar
- ▢ Salt to taste
- ▢ 4 tablespoon water or use 2 – 3 ice cubes
Instructions
- To make the chutney, first clean and wash the green leaves.
- In a blender add all the ingredients to make the chutney along with water or ice cubes.
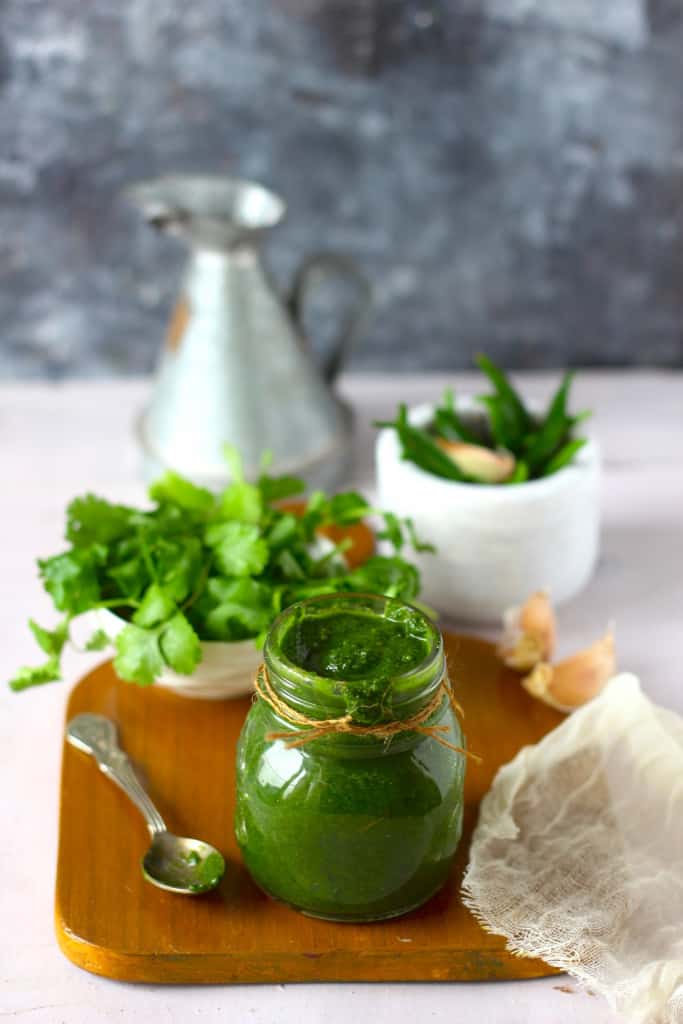
- Blend the ingredients to a smooth paste to make the chutney. If required, add more water. Transfer chutney to a clean bowl.
- Serve Mint Chutney with snacks or store in the refrigerator.
Recipe Notes:
- Do not blend the chutney for too long else it will turn black and bitter.
- If the chutney seems too watery or spicy or bitter, add a tablespoon of thick, plain curd/yogurt and blend one more time.
Nutrition
We follow a strict NO SPAM Policy
Mint Chutney Recipe
Equipment
- Blender
Ingredients
- 2 Cup fresh mint leaves
- 1 Cup fresh coriander leaves
- 1 tablespoon ginger, roughly chopped
- 2 garlic cloves
- 2 green chili, chopped
- 1 teaspoon mango powder (amchur powder)
- 1 teaspoon roasted cumin powder (jeera powder)
- 1 teaspoon granulated white sugar
- Salt to taste
- 4 tablespoon water or use 2 - 3 ice cubes
Instructions
- To make the chutney, first clean and wash the green leaves.
- In a blender add all the ingredients to make the chutney along with water or ice cubes.
- Blend the ingredients to a smooth paste to make the chutney. If required, add more water. Transfer chutney to a clean bowl.
- Serve Mint Chutney with snacks or store in the refrigerator.
Notes
- Do not blend the chutney for too long else it will turn black and bitter.
- If the chutney seems too watery or spicy or bitter, add a tablespoon of thick, plain curd/yogurt and blend one more time.
Nutrition
If you’re a fan of paneer, you’re in for a treat. Here is a detailed guide on how to make soft masala paneer that’s perfect for grilling, salads, or even snacking on its own.
Estimated reading time: 6 minutes

- About Masala Paneer
- Ingredients You’ll Need
- How To Make Masala Paneer
- Tips for Making Soft Paneer
- Homemade Masala Paneer Recipe
About Masala Paneer
Paneer, a fresh and versatile soft cheese, is a staple ingredient in Indian Cuisine. Adding spices and herbs while making the paneer transforms it from a simple, plain cheese into a flavorful ingredient that can elevate any dish.
Why you should make Masala Paneer:
Making paneer at home may seem daunting at first, but here’s why you should make it:
- it is fresh and free from preservatives
- a good vegetarian, high-protein snack
- you can make it a small/large quantity
- it is completely gluten and nut-free
- meal prep friendly and inexpensive
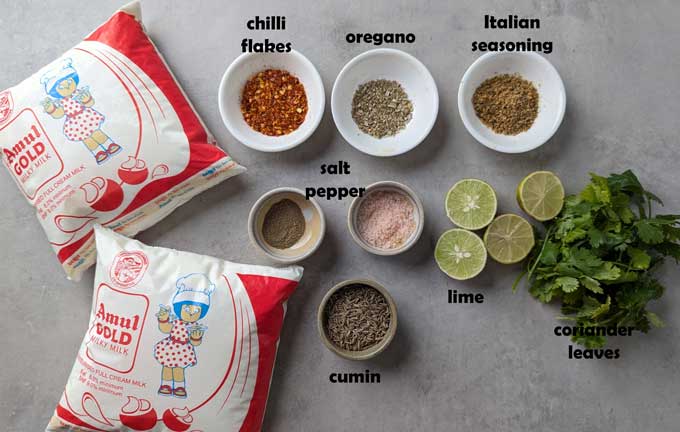
Ingredients You’ll Need
- Full-fat milk with more than 5% fat. In India, I prefer Amul Gold for making curd or paneer at home.
- Acidic Agents like lime juice or white vinegar to transform milk into paneer.
- Seasoning: Chilli Flakes, Cumin, Oregano or Pizza Seasoning Mix, Salt, Crushed Black Pepper, Fresh Coriander
- Ice Cold Water
Equipment:
- Paneer Box
- Colander or sieve
- Large, heavy-bottomed pot
- Muslin cloth or cheesecloth
- Heavy Weight (a pot filled with water or mortar, for example)
How To Make Masala Paneer
1. Boiling the milk
- Pour a tiny bit of water into the saucepan. This prevents milk from sticking to the pot and burning.
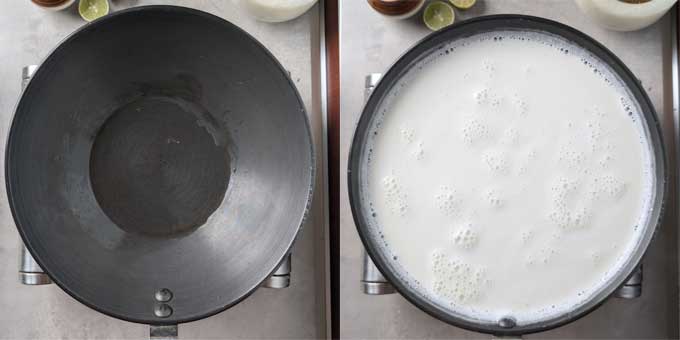
- Start by pouring full-fat milk into a large, heavy-bottomed pot.
- Place the pot over high heat and bring the milk to a boil, stirring occasionally to prevent it from scorching at the bottom.
2. Seasoning the milk
- Once the milk reaches a rolling boil, reduce the heat to the lowest setting.
- Add all the seasoning and salt. Gently stir to combine.
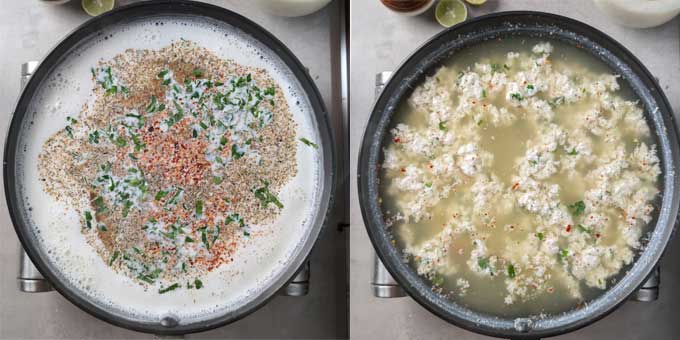
3. Adding the Acidic Agent
- Slowly add lemon juice or white vinegar while stirring the milk gently.
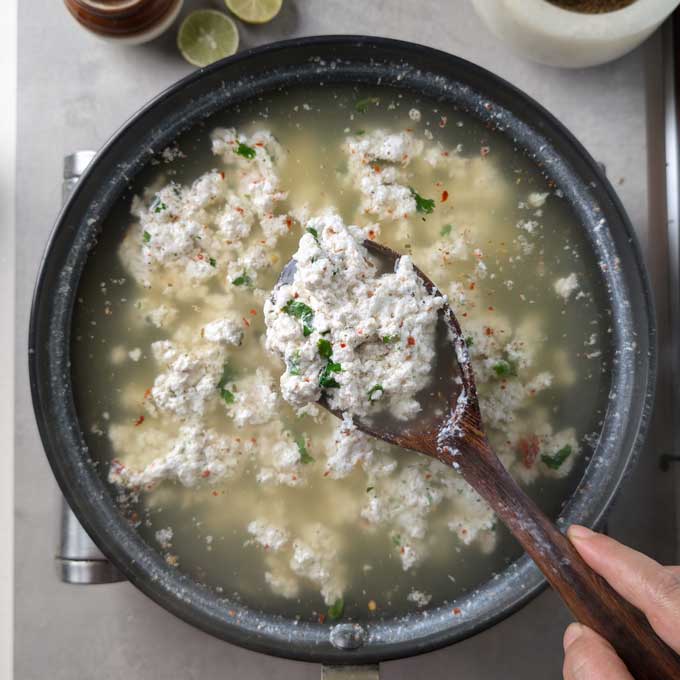
- You’ll notice that the milk begins to curdle, and the cheese (solid parts) starts separating from the whey (liquid). Continue stirring until the whey becomes a pale greenish colour. At this stage, turn off the heat. Remove the saucepan from the heat.
- If the milk doesn’t curdle completely, add more lemon juice or vinegar.
4. Straining the paneer
- Line a colander with cheese or muslin cloth.
- Immediately pour the cheese into a colander lined with cloth. Do not waste the whey water, use it for binding paratha dough or making kadhi .
- Pour 2 cups of ice-cold water over the paneer to stop cooking and wash away any residual acidic taste.
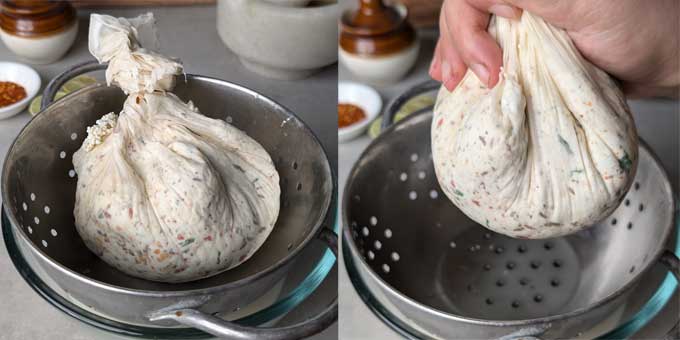
- Gather the cloth’s edges and twist them to form a bundle, allowing excess whey to drain out.
5. Draining and pressing the paneer
- For soft and spongy paneer, it’s important not to press it too hard.
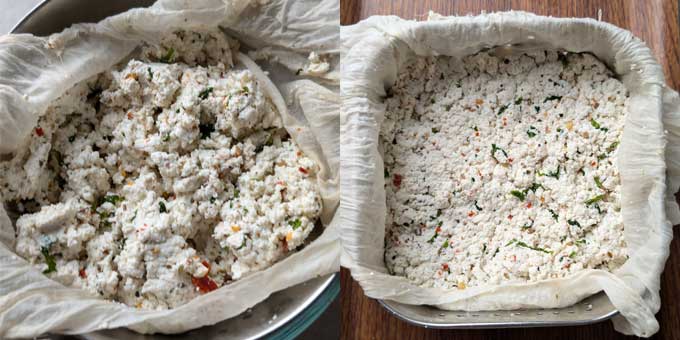
- Place the muslin cloth-wrapped cheese on a flat surface and place a lightweight on top (such as a plate with a pot of water). Let it sit for 30 minutes to an hour.
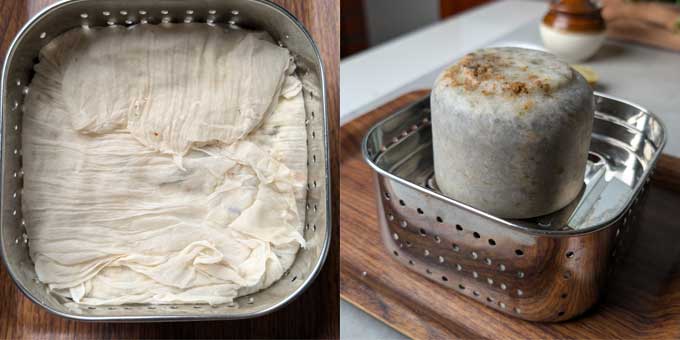
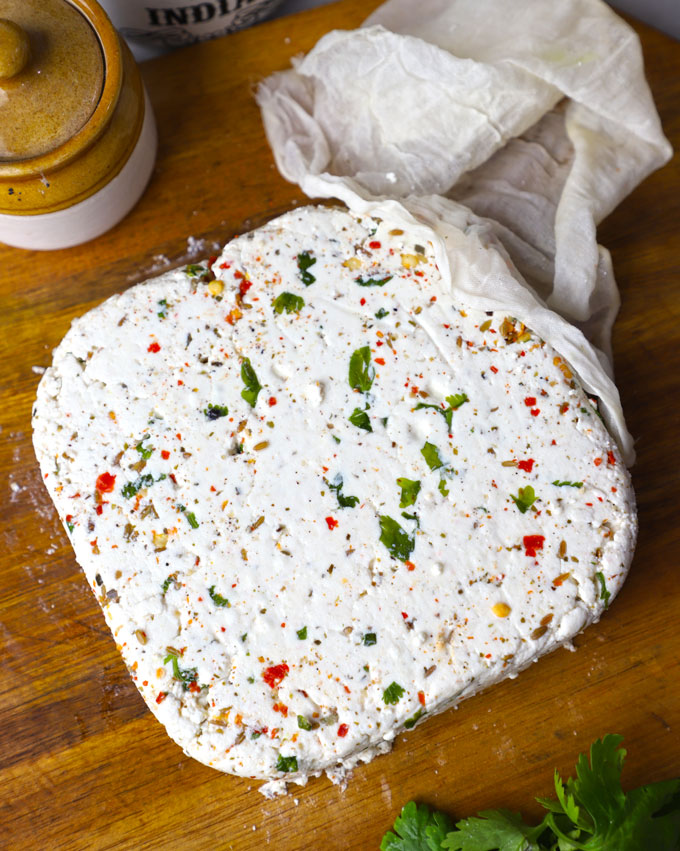
6. Cutting and storing the masala paneer
- After the pressing time, unwrap the paneer from the cloth. You’ll have a smooth block of paneer ready to be cut into cubes or slices.
- If you’re not using it immediately, store it in a container filled with water in the refrigerator. This keeps the paneer soft and prevents it from drying out.
Tips for Making Soft Paneer
- Use fat-rich milk as it curdles well and gives you better paneer.
- Temperature matters: Don’t add the acidic agent while the milk is still on high heat. Turn off the heat and then add an acidic agent.
- Pressing time: For a softer paneer, reduce the pressing time and use a lighter weight. If you want a firmer paneer for grilling or frying, press it longer with a heavier weight.
- Gentle pressing: If you prefer your paneer to be extra soft, reduce the pressing time and use a lighter weight. The longer you press, the firmer your paneer will be.
How to Use Masala Paneer
Masala Paneer is incredibly versatile and can be used in a variety of dishes:
- Curries: Add to Indian gravies like kadai paneer , paneer jalfrezi , pulao , or palak paneer
- Snacks: Marinate and grill , make paneer tikka or pan-fry the masala paneer for a spicy, flavorful snack.
- Salads: Toss it with fresh veggies for a protein-rich salad.
- Desserts: Use it to make sweets like Rasgulla or Sandesh .
- Wraps and sandwiches: Add to wraps, or sandwiches for flavoursome, protein-packed stuffing.

Ingredients
- ▢ 2 litre full-cream milk (full fat milk)
- ▢ ¼ Cup lime juice or white vinegar
- ▢ 1 teaspoon red chilli flakes
- ▢ 1 teaspoon Italian Seasoning Mix
- ▢ 1 teaspoon crushed black pepper or to taste
- ▢ 2 teaspoon salt or to taste
- ▢ 1 tablespoon cumin seeds (jeera) roughly crushed
- ▢ 2 tablespoon chopped fresh coriander
Instructions
- Pour a tiny bit of water into the saucepan. This prevents milk from sticking to the pot and burning.
- Start by pouring full-fat milk into a large, heavy-bottomed pot.
- Place the pot over high heat and bring the milk to a boil, stirring occasionally to prevent it from scorching at the bottom.
- Once the milk reaches a rolling boil, reduce the heat to the lowest setting. Add all the seasoning and salt. Gently stir to combine.
- Slowly add lemon juice or white vinegar while stirring the milk gently.
- You’ll notice that the milk begins to curdle, and the cheese (solid parts) starts separating from the whey (liquid). Continue stirring until the whey becomes a pale greenish colour. At this stage, turn off the heat. Remove the saucepan from the heat.
- Line a colander with cheese or muslin cloth. Immediately pour the cheese into a colander lined with cloth. Do not waste the whey water, use it for binding dough or making kadhi.
- Pour 2 cups of ice-cold water over the paneer to stop cooking and wash away any residual acidic taste.
- Gather the cloth’s edges and twist them to form a bundle, allowing excess whey to drain out.
- Place the muslin cloth-wrapped cheese on a flat surface and place a lightweight on top (such as a plate with a pot of water). Let it sit for 30 minutes to an hour.
- After the pressing time, unwrap the paneer from the cloth. You’ll have a smooth block of paneer ready to be cut into cubes or slices.
Recipe Notes:
- If the milk doesn’t curdle completely , add more lemon juice or vinegar. Balance the spices: Adjust the amount of spices based on your preference. For a milder flavour, reduce the chilli flakes or pepper. Use fresh herbs: Fresh coriander and mint enhance the paneer’s flavour. You can also experiment with other herbs like dill or fenugreek. Do not waste the whey water, use it for binding dough or making kadhi. For soft and spongy paneer, it’s important not to press it too hard. If you’re not using it immediately, store it in a container filled with water in the refrigerator. This keeps the paneer soft and prevents it from drying out.
Nutrition
We follow a strict NO SPAM Policy
