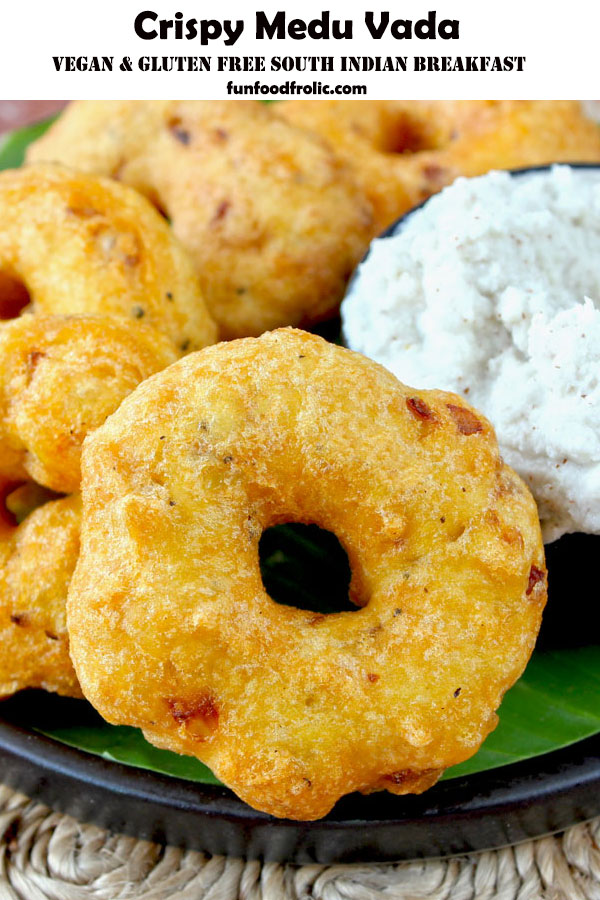
Medu Vada is a deep-fried, vegetarian snack from South India. Follow my tips to make perfectly crispy medu vada each time without fail. Be sure to watch the video!
What is ‘Medu Vada’?
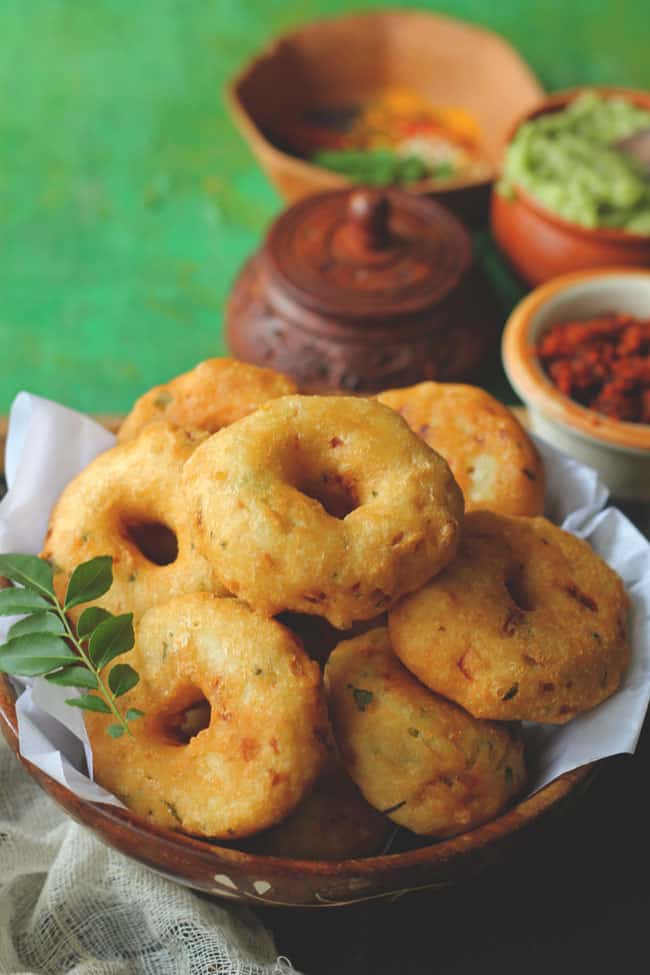
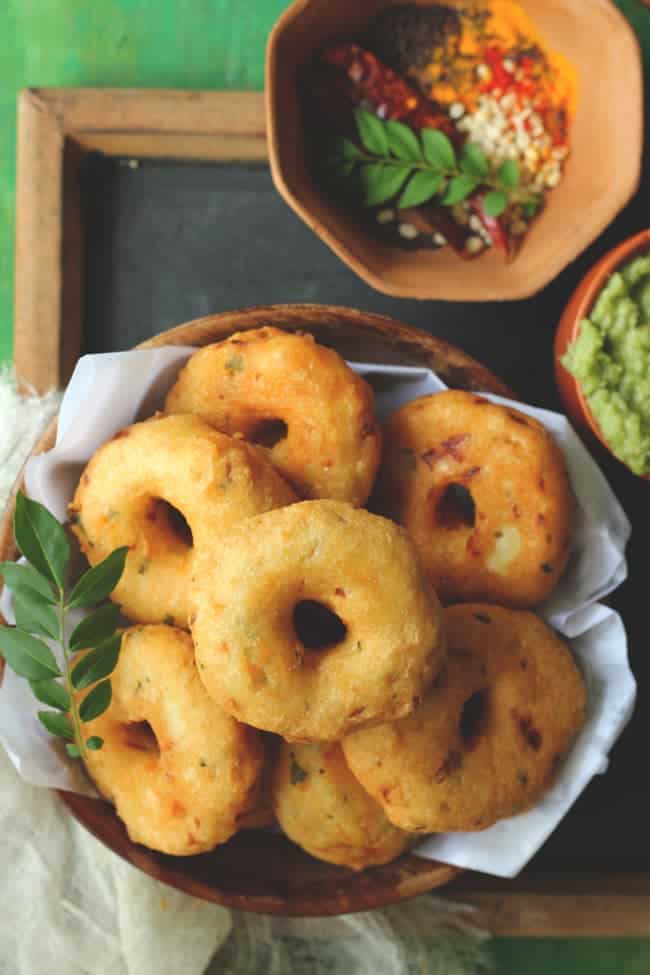
Medu Vada is a spicy and savoury doughnut shape like fritter made with urad dal, onion, spices, and seasoning.
The word ‘medu’ in Tamil means soft, and the ‘vada’ is the word for deep-fried fritter. Hence, it is called a soft deep-fried fritter (medu vada).
In South India and Sri Lanka, medu vada, along with idli, dosa, sambar, and chutney, is the most popular vegetarian breakfast dish.
Types of Vada
Probably you might be confused between medu vada, maddur vada , and dal vada. All of these are a different variety of vada (fritters).
The distinguishing characteristic of the medu vada is its doughnut-like shape with a hole in the centre.
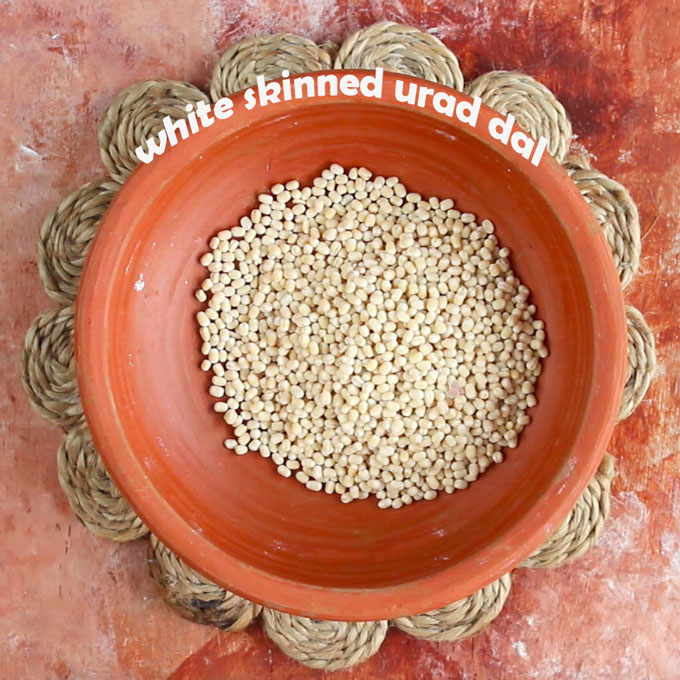
The Kumaoni Vada (Bada) is similar to the medu vada. The only difference between the two is – the former is prepared with split black urad dal (chilka urad) while the South Indian vada is prepared with skinned urad dal.
These all are one or the other form of vegetarian Indian fritters, equally delicious, crispy, and all-time favourite teatime snacks.
My Tried & True Tips
There is no shortcut to making an authentic medhu vadai. It has to be done from scratch. There are a few Indian recipes that require the love of labour, and this is surely one of those.
Soaking the dal: It is essential to soak the dal for vada for at least 5 – 6 hours before grinding. The vada batter is never prepared with unsoaked lentils.
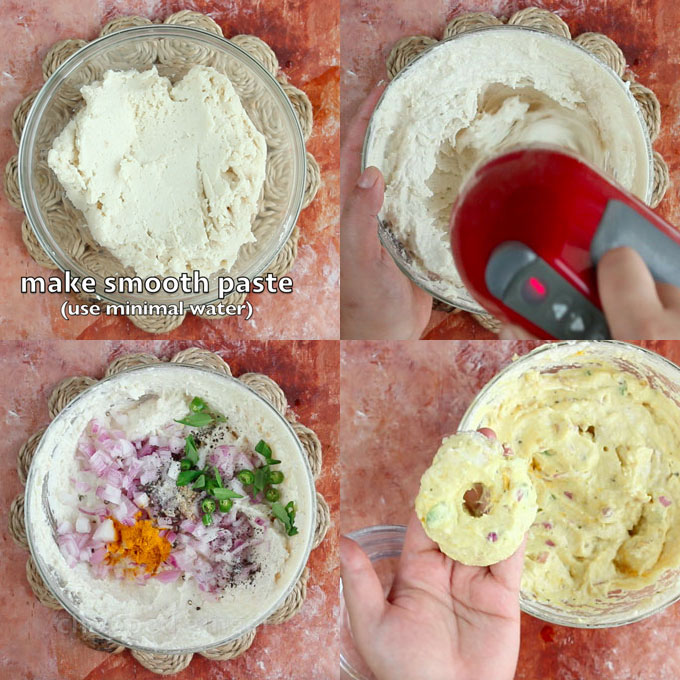
Grinding the dal: Use very little water while grinding the dal ( by little I mean not more than 2 – 4 tablespoons ). If the batter seems thick, add a tablespoon of water at a time. It is a time and labour-intensive process but worth it.
Whisk the batter: After grinding without adding salt, whisk the batter for 10 minutes or till it is light, airy, and fluffy. I use my electric hand mixer for this purpose.
It does the job excellently. The perfectly fluffy dal batter results in a delicious restaurant-style vada.
Shaping Vada: It requires a bit of practice. Always wet your fingers with water before shaping the vada, or you can use a banana leaf also for the purpose.
Frying Vada: Before deep-frying the vada, ensure the oil is hot enough. Perform a test by dropping a small drop of batter into the oil. If it quickly floats to the surface, oil is ready. But if it sinks or gets stuck to the pan, wait for more time.
I prefer frying the vada at medium-high heat so that it gets perfectly cooked from the inside and crisp from the outside.
Let the vada cook and turn golden from one side, then flip, and cook from the other side.
Serving Suggestion
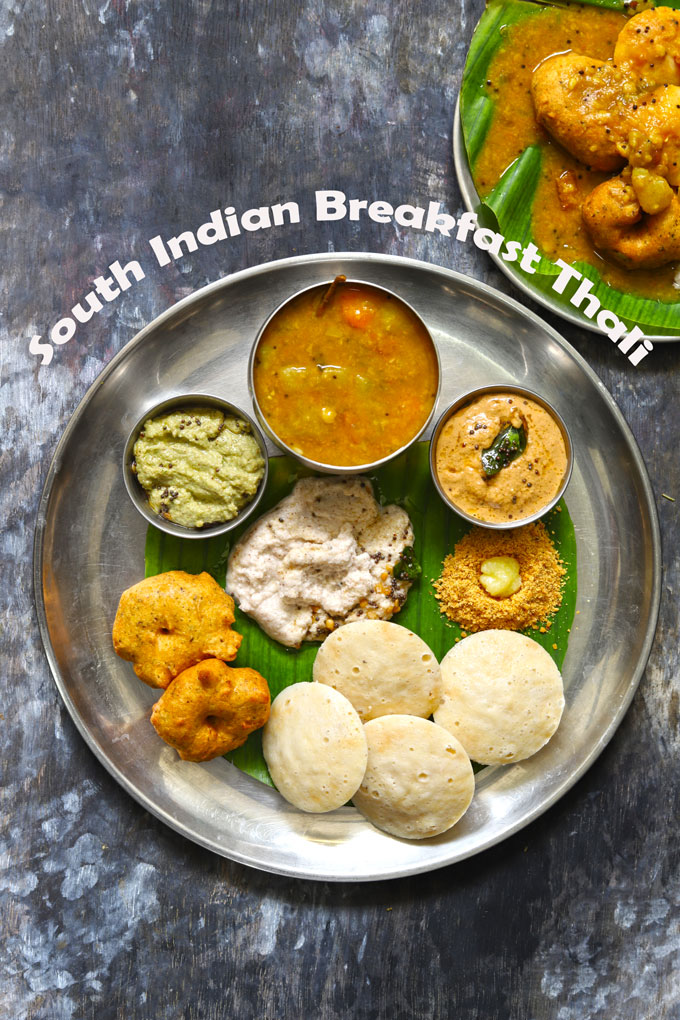
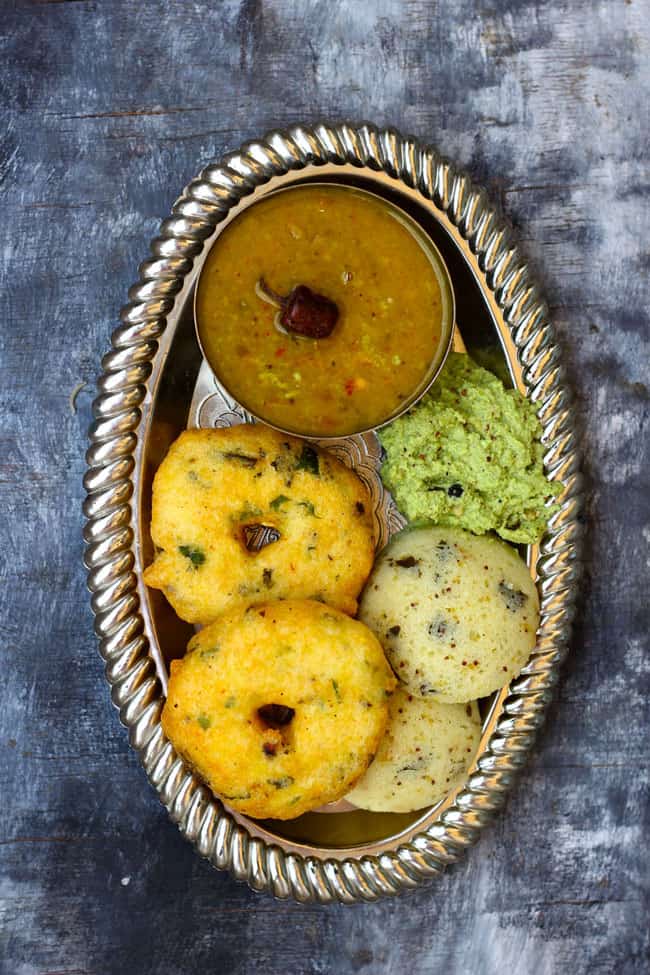
For an authentic South Indian breakfast at home, prepare – Rava Idli , Medu Vada, Sambar , Coconut Chutney , and filter coffee. It will be a blissful Sunday morning breakfast.
While most people choose to have vada in the morning, many love to binge on it as a teatime snack with a cup of tea or coffee.
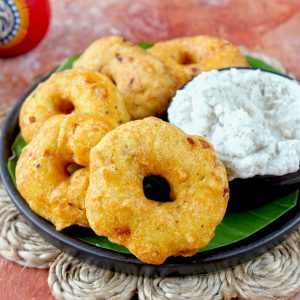
Traditionally, medu vada sambar is the most popular meal combination; however, you can also savour it with a dash of slightly sweet, whipped curd as dahi vada or only with coconut chutney.
Watch Medu Vada Video
Yes, you can. It is a meal-prep-friendly batter. Transfer the dal batter to a clean, dry, airtight container. Store it in the refrigerator for 2 – 3 days. Before making the vada, bring the batter from the refrigerator and let it come to room temperature. Lightly aerate the batter by whisking for 1 – 2 minutes once again, and fry the vada.
You can fix a watery vada batter by adding rice flour or a fine variety of semolina (rava/sooji). Once you have added any of these ingredients to the dal batter, whisk to combine well and let the batter sit for 10 minutes for rice flour or rava to absorb the excess liquid.
If the vada absorbs too much oil while deep-frying, there could be two reasons for the same. One, the oil is not hot enough. Second, too much water is added while grinding the batter. Finally, after you’ve fried the vada, drain them on an oil-absorbing paper towel.
Yes, you can. But it will not be traditional style medu vada. The taste and texture of the vada will not change.
I prefer reheating the vada in an air fryer or Instant Pot Crispy Lid. Arrange them on the basket of the fryer. Heat each side for 5 minutes at 180 degrees Celsius. Reheating in a microwave makes vada oily and soggy.
The trick is to whisk the dal batter to make it light and airy. If the dal batter is not whisked properly, the medu vada will turn out hard and not soft.
Any neutral-tasting oil with a high smoke point will work well for frying vadas. You could use refined sunflower, groundnut, vegetable, or peanut oil.
More South Indian Recipes
Lemon Rice
Curd Rice
Rava Upma
Coconut Rice
Tomato Rasam
Pineapple Rava Kesari
If you try this recipe and love it, please leave a comment and a rating. This helps us grow and reach other food lovers like you.
Ingredients
- ▢ 1 Cup skinned urad dal (dhuli urad)
- ▢ ½ Cup finely chopped onion
- ▢ 1 teaspoon chopped ginger
- ▢ 5 – 6 curry leaves
- ▢ 1 roughly chopped green chilli
- ▢ 1 teaspoon black peppercorns (sabut kalimirch), roughly crushed
- ▢ ¼ teaspoon asafoetida (hing)
- ▢ ¼ teaspoon turmeric (optional)
- ▢ Salt to taste
- ▢ Oil for deep-frying
Instructions
Prepare Batter:
- Rinse and soak the urad dal in water for 4 – 5 hours or overnight. Next day, drain the water from the urad dal and let it sit in the strainer for 5 minutes to drain the excess water. Now grind the dal in the mixer grinder.
- To get the smooth paste you need to stir the dal a few times while grinding. Turn off the mixer, stir and then grind. Repeat the process till you get thick, smooth dal paste. Use 1 tablespoon of water at a time to grind the dal. Do not add more than 2 – 4 tablespoons of water. Transfer the dal paste to a clean, large bowl.
- You can whisk the dal using an electric hand blender or manually. Continuous whisking of 8 – 10 minutes is good enough to incorporate air in the dal. Add 2 – 3 tablespoons of water if the batter is too thick and then whisk.
Season Batter:
- Add salt, chopped green chilli, onion, ginger, curry leaves, black pepper and spices in the dal. Mix nicely.
Prepare Vada:
- Heat oil in a wide deep frying pan.
- To shape the vada, keep water in a small bowl next to the dal paste. Soak the fingers of both the hands in water and pinch a lemon size portion of dal paste. Hold it with your one hand fingers and flatten it using the other hand wet fingers. Make a hole in the center of the flattened vada using your finger.
- Gently slip it on to the pan of hot oil to deep fry. For safety reasons, it is best to slide the shaped vada from the sides of the pan.
- Deep fry the vada over medium-high heat till they turn golden brown, crisp from both sides.
- Transfer to a plate lined with a kitchen towel. Serve Medu Vada warm with coconut chutney and sambar .
Recipe Notes:
- Use only white skinless urad dal for making the vada batter.
- It is an essential step to soak the dal for vada at least 5 – 6 hours before grinding.
- Use very little water while grinding the dal ( by little I mean not more than 2 – 4 tablespoons ). If the batter seems thick add a tablespoon of water at a time.
- After grinding without adding salt whisk the batter for 10 minutes or till it is light, airy, and fluffy.
- Always wet your fingers with water before shaping the vada, or you can use banana leaf also for the purpose.
- I prefer frying the vada at medium-high heat so that it gets perfectly cooked from the inside and crisp from the outside.
- Store the leftover vada batter in the refrigerator for 2 – 3 days.
Nutrition
We follow a strict NO SPAM Policy

Medu Vada Recipe
Equipment
- Blender
- Mixing Bowl
- Deep Frying Pan
Ingredients
- 1 Cup skinned urad dal (dhuli urad)
- ½ Cup finely chopped onion
- 1 teaspoon chopped ginger
- 5 - 6 curry leaves
- 1 roughly chopped green chilli
- 1 teaspoon black peppercorns (sabut kalimirch), roughly crushed
- ¼ teaspoon asafoetida (hing)
- ¼ teaspoon turmeric (optional)
- Salt to taste
- Oil for deep-frying
Instructions
Prepare Batter:
- Rinse and soak the urad dal in water for 4 – 5 hours or overnight. Next day, drain the water from the urad dal and let it sit in the strainer for 5 minutes to drain the excess water. Now grind the dal in the mixer grinder.
- To get the smooth paste you need to stir the dal a few times while grinding. Turn off the mixer, stir and then grind. Repeat the process till you get thick, smooth dal paste. Use 1 tablespoon of water at a time to grind the dal. Do not add more than 2 - 4 tablespoons of water. Transfer the dal paste to a clean, large bowl.
- You can whisk the dal using an electric hand blender or manually. Continuous whisking of 8 - 10 minutes is good enough to incorporate air in the dal. Add 2 – 3 tablespoons of water if the batter is too thick and then whisk.
Season Batter:
- Add salt, chopped green chilli, onion, ginger, curry leaves, black pepper and spices in the dal. Mix nicely.
Prepare Vada:
- Heat oil in a wide deep frying pan.
- To shape the vada, keep water in a small bowl next to the dal paste. Soak the fingers of both the hands in water and pinch a lemon size portion of dal paste. Hold it with your one hand fingers and flatten it using the other hand wet fingers. Make a hole in the center of the flattened vada using your finger.
- Gently slip it on to the pan of hot oil to deep fry. For safety reasons, it is best to slide the shaped vada from the sides of the pan.
- Deep fry the vada over medium-high heat till they turn golden brown, crisp from both sides.
- Transfer to a plate lined with a kitchen towel. Serve Medu Vada warm with coconut chutney and sambar .
Video
Notes
- Use only white skinless urad dal for making the vada batter.
- It is an essential step to soak the dal for vada at least 5 – 6 hours before grinding.
- Use very little water while grinding the dal ( by little I mean not more than 2 – 4 tablespoons ). If the batter seems thick add a tablespoon of water at a time.
- After grinding without adding salt whisk the batter for 10 minutes or till it is light, airy, and fluffy.
- Always wet your fingers with water before shaping the vada, or you can use banana leaf also for the purpose.
- I prefer frying the vada at medium-high heat so that it gets perfectly cooked from the inside and crisp from the outside.
- Store the leftover vada batter in the refrigerator for 2 - 3 days.
Nutrition
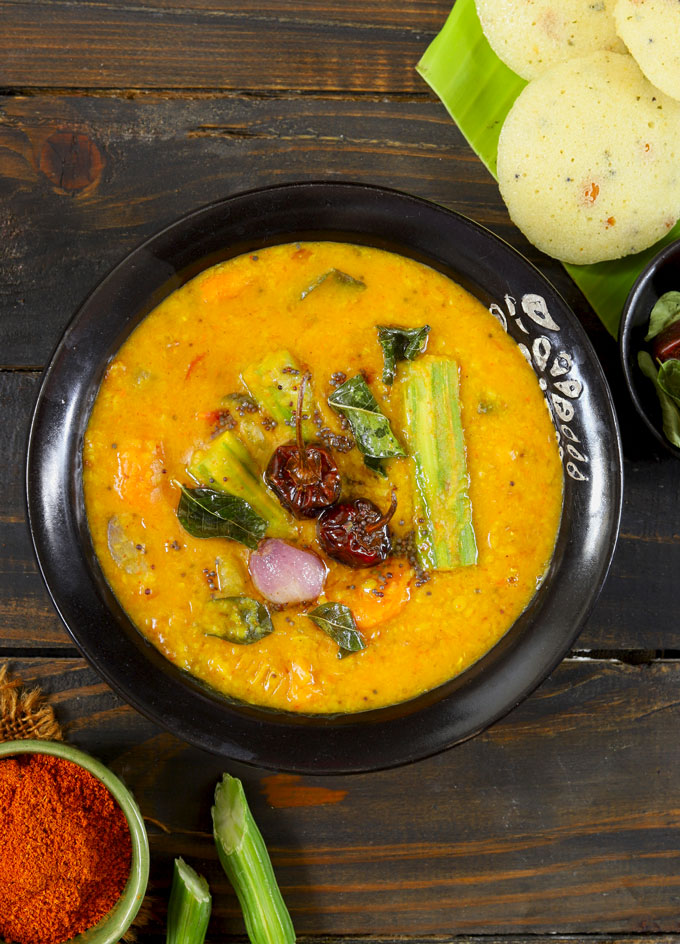
Sambar is a wholesome, vegetarian stew from South India. I am sharing an easy and tasty vegetable sambar recipe for idli, dosa, or vada.
About Sambar
Sambar is the flag bearer of South Indan Cuisine. A sweet, spicy, sour stew of lentils, vegetables, and spices.
While living in South India, I discovered one secret about sambar; every family has its special sambar recipe passed on from generation to generation. Also, when it comes to sambar, the possibilities are endless. There is a radish sambar, drumstick sambar, Tamil style sweet spicy sambar, Udipi style sambar, Karanataka style slightly sweet sambar or Kerala style coconut sambar and so on.
Vegetable Sambar is a fridge forage kind of stew where you can put lentils and all the vegetables in the fridge.
What I LOVE about sambar is:
- healthy
- fulfilling
- gluten-free
- rich in fibre
- easy to customize
- protein-packed
- meal prep friendly
- …….comforting!
Ingredients Required
Dal: Usually, split pigeon pea (toor or arhar dal ) is used for making sambar. You can also make it with split red lentils (masoor dal).
Vegetables: Onion and tomato are the two essentials for making vegetable sambar. You can also add bottle gourd, ridge gourd, squash, pumpkin, carrot, radish and eggplant.
Onion: Traditionally, a sambar is made only with shallots or, as we call them, sambar onion . The tiny, round onion. They have a slightly sweeter taste. Substitute them with chopped red onion.
Drumsticks : It is an essential ingredient for making sambar. Drumsticks are the fruits of the moringa tree, also known as Sahjan Ki Fali in Hindi. It is a plant-based vegan ingredient and has nothing to do with chicken drumsticks. You can get them fresh or frozen at Indian grocery stores.
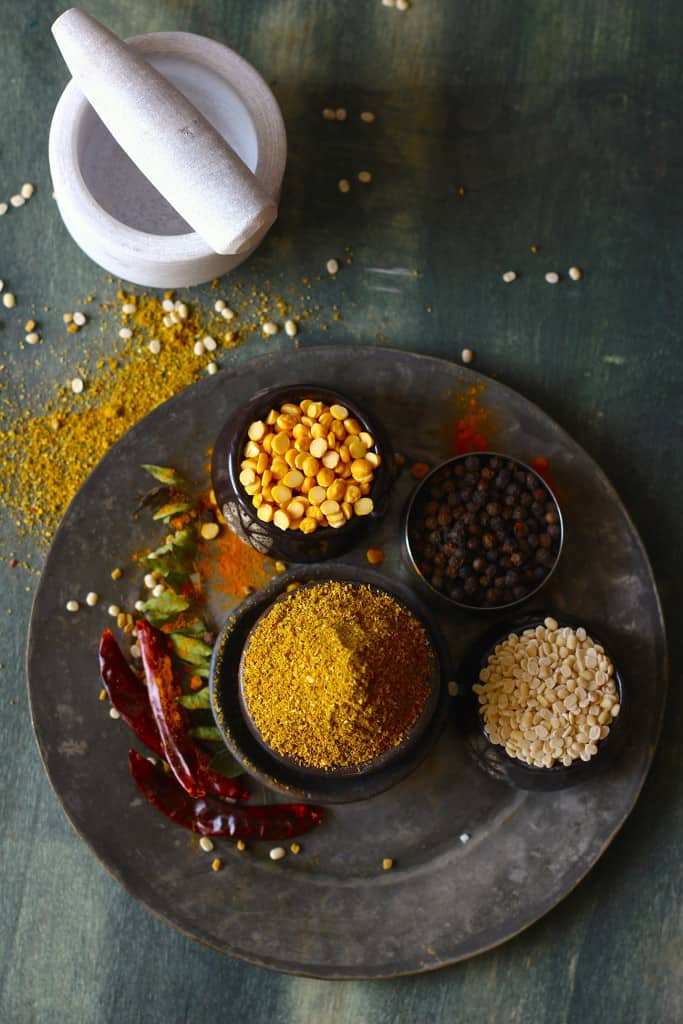
Sambar Powder: It is a spice blend used for flavouring the stew. It is best to use good quality sambar masala for the perfect taste and colour. Either use a readymade masala or follow my homemade sambar masala powder recipe.
Tamarind: The sourness in the vegetable sambar comes from the tamarind paste. I use the readymade tamarind paste of Mother’s Recipe. You can use homemade tamarind paste also.
Jaggery: I add a tablespoon of jaggery to my sambar. It helps in balancing the sourness and spiciness of the stew. You can substitute it with dark brown sugar.
Oil: You can cook sambar with ghee, vegetable oil, coconut oil, or Gingelly oil (local sesame oil). I use ghee for tempering (tadka) as it makes vegetable sambar extra delicious and aromatic.
Other Ingredients: Salt, Red Chilli Powder, Turmeric Powder, Garlic, Dried Red Chillies, Mustard Seeds (rai), Curry Leaves, Asafoetida
What Vegetables I Can Add To Sambar?
A vegetable sambar is made with a variety of local and seasonal vegetables. You can choose a combination of vegetables as per your taste and preference.
- Carrot
- Spinach
- Eggplant
- Potato
- Tomatoes
- Drumsticks
- Snake Gourd
- Bottle Gourd
- White Radish
- Yellow Pumpkin
- French Beans
How To Make
This is a pressure cooker method to make vegetable sambar. You can get the instant pot method to make vegetable sambar in my debut cookbook The 100 Best Curries .
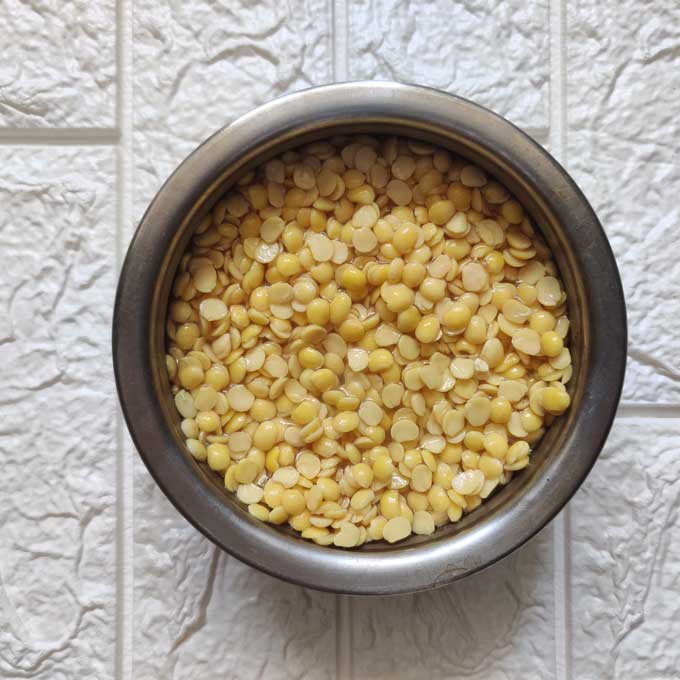
Step 1) Clean, wash and soak dal in water for 15 minutes. At the same time, the dal is soaked; clean and chop the vegetables (bottle gourd, carrot, pumpkin, drumstick) for the sambar.
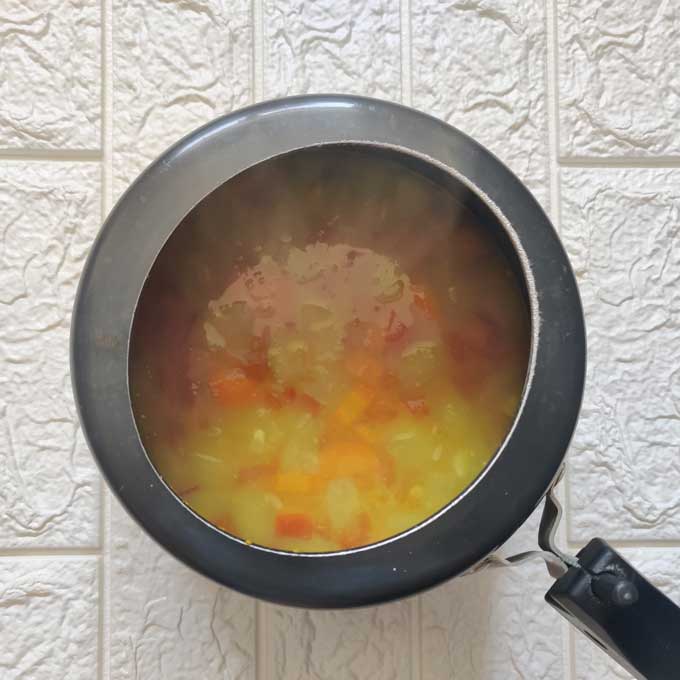
Step 2) Transfer dal to a pressure cooker with chopped vegetables, tomato, turmeric powder, red chilli powder, garlic, salt and water. Stir to mix. Pressure Cook for 3 whistles over medium heat. The dal should become soft and mushy.
Step 3) Heat ghee in a kadhai. Once hot, add mustard seeds, red chillies, asafoetida, and curry leaves. Saute for 30 to 40 seconds or till seeds start spluttering.
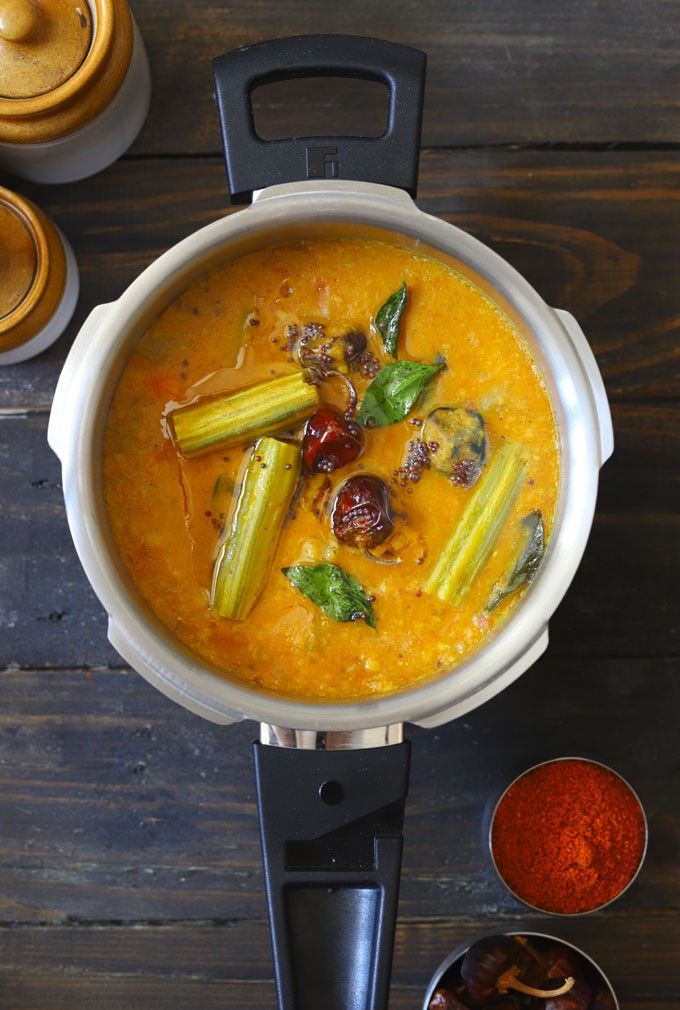
Step 4) Add onion (shallots) and drumsticks. Fry till onions are translucent and drumsticks are tender. Add boiled sambar over the tadka ( be cautious as there will be sizzling ). Stir to combine.
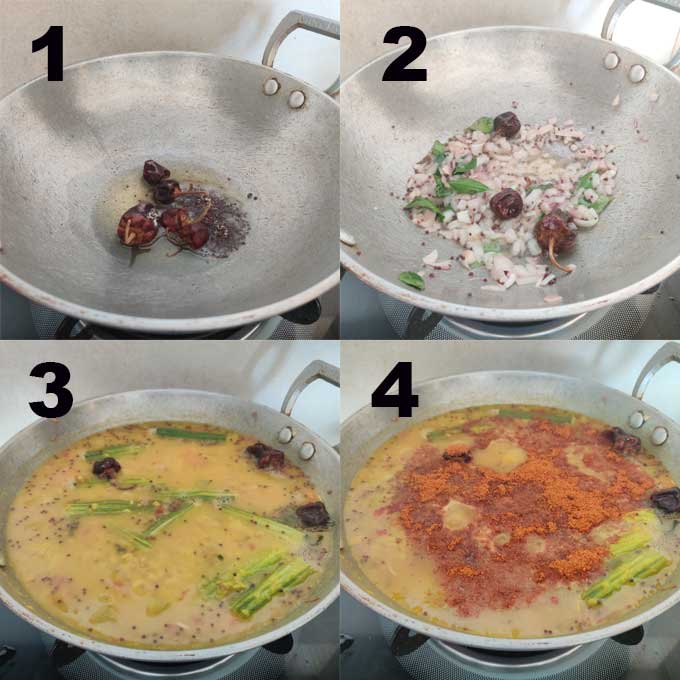
Step 5) Add tamarind paste, jaggery, and sambar powder. Allow the vegetable sambar to simmer over low heat for 15 minutes. Keep stirring at regular intervals. You can taste and add more seasoning or spices to your sambar at this stage.
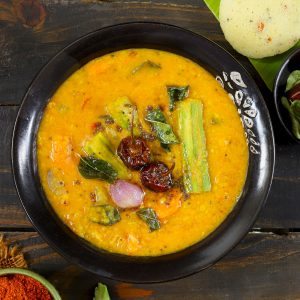
Serve vegetable sambar warm.
Serving Suggestion
Sambar is a main course dish. In South India, for breakfast, it is served with idli , dosa, or medu vada and coconut chutney on the side. Idli Sambar or Vada Sambar are among the most popular South Indian breakfast combinations.
For lunch, you can serve it with plain rice. Sambar Rice is a delicious and comforting meal.
Whether it is a plate of piping hot idli, crispy dosa, or a typical South Indian meal, it’s incomplete without a bowl of vegetable sambar.
More South Indian Recipes
Curd Rice
Rava Upma
Lemon Rice
Maddur Vada
Rava Paniyaram
Tomato Garlic Rasam
If you try this recipe and love it, please leave a comment and a rating. This helps us grow and reach other food lovers like you.
Ingredients
- ▢ 1 Cup split pigeon peas (toor dal)
- ▢ 4 garlic cloves
- ▢ ½ Cup chopped tomato
- ▢ ¼ Cup carrot, peeled and diced
- ▢ ⅓ Cup bottle gourd, peeled and diced
- ▢ ¼ Cup yellow pumpkin, peeled and cut into cubes
- ▢ 1 drumstick, peeled and cut into one inch pieces
- ▢ 1 tablespoon tamarind paste
- ▢ 1 tablespoon jaggery powder
- ▢ 2 teaspoon salt or to taste
- ▢ 2 teaspoon turmeric powder
- ▢ 1 teaspoon red chili powder
- ▢ 1 tablespoon Sambar Powder ( see recipe )
- ▢ 3 Cup water
Ingredients for tempering
- ▢ 4 tablespoon ghee (clarified butter)
- ▢ 1 teaspoon mustard seeds (rai)
- ▢ ¼ teaspoon asafoetida (hing)
- ▢ ½ Cup shallots or chopped onion
- ▢ 6 curry leaves
- ▢ 4 dried red chillies
Instructions
- To prepare vegetable sambar, clean, wash and soak dal in water for 15 minutes. While the dal is soaked, clean and chop the vegetables (bottle gourd, tomato, carrot, drumstick).
- Transfer dal to a pressure cooker with the chopped carrot, pumpkin, bottle gourd, tomato, turmeric powder, red chilli powder, garlic, salt and water. Stir to mix. Pressure Cook for 3 whistles over medium heat. The dal should become soft and mushy.
- Turn off the heat and release the steam manually from the pressure cooker.
- Heat ghee in a kadhai. Once hot, add mustard seeds, red chillies, asafoetida, and curry leaves. Saute for 30 to 40 seconds or till seeds start spluttering.
- Add onion (shallots) and drumsticks. Fry till onions are translucent and drumsticks are tender. Add boiled sambar over the tadka ( be cautious as there will be sizzling ). Stir to combine.
- Add tamarind paste, jaggery, and sambar powder. Allow the vegetable sambar to simmer over low heat for 15 minutes. Keep stirring at regular intervals. At this stage, you can taste and add more seasoning or spices to your sambar.
- Serve Vegetable Sambar warm with idli, dosa or rice.
Recipe Notes:
- There could be infinite combinations of vegetables in vegetable Sambar. But I always prefer using easy-to-cook vegetables that do not have an overpowering taste like bitter gourd.
- If you do not like overcooked vegetables in sambar, fry them with onion and drumsticks, cover and cook before adding the boiled dal.
- Adjust the consistency of the sambar by adding more water.
- While simmering, the sambar keeps on stirring at regular intervals. This process of simmering and stirring gives sambar a great depth of flavour.
- If you want to make vegan sambar, skip using ghee for tempering. Use coconut oil or sesame oil.
Nutrition
We follow a strict NO SPAM Policy
