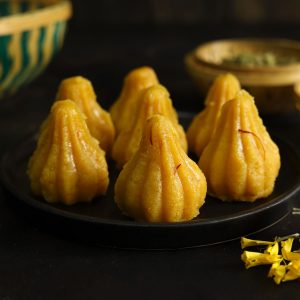
Modak is a traditional Indian sweet offered as a prasad (sacred offering) to the Lord Ganesha. This is an easy-to-follow instant modak recipe. Be sure to watch the video!
Estimated reading time: 4 minutes
- What is Modak?
- Ingredients You’ll Need
- My Tried and True Tips
- Watch Instant Modak Video
- Kesar Mawa Modak Recipe
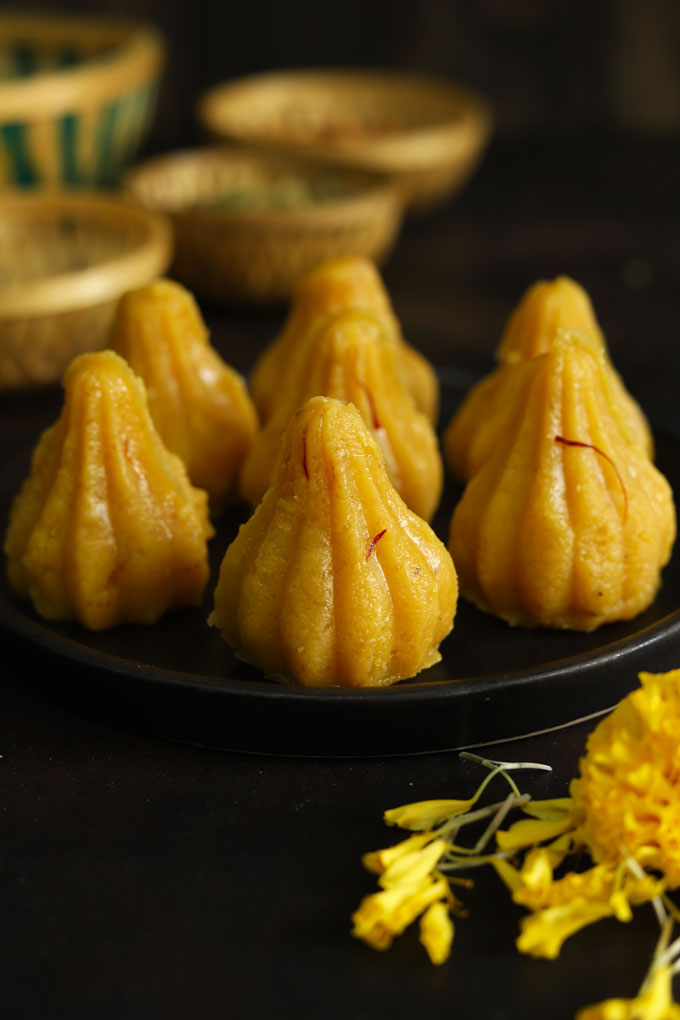
What is Modak?
Modak is a rice flour dumpling stuffed with coconut and jaggery sweet mixture. It is a gluten-free Maharashtrian sweet made to celebrate the festival of Ganesh Chaturthi.
According to folklore, Modak is considered Lord Ganesha’s favourite sweet dish.
There are a variety of modak recipes such as ukadiche modak, mawa (khoya) modak, nariyal modak , or modern versions such as chocolate modak .
- This is a delicious instant modak recipe that requires minimal ingredients.
- It is an easy-to-follow, fuss-free modak recipe for the beginners .
- There is no steaming process or stuffing required .
- Saffron gives a beautiful golden colour to the modak.
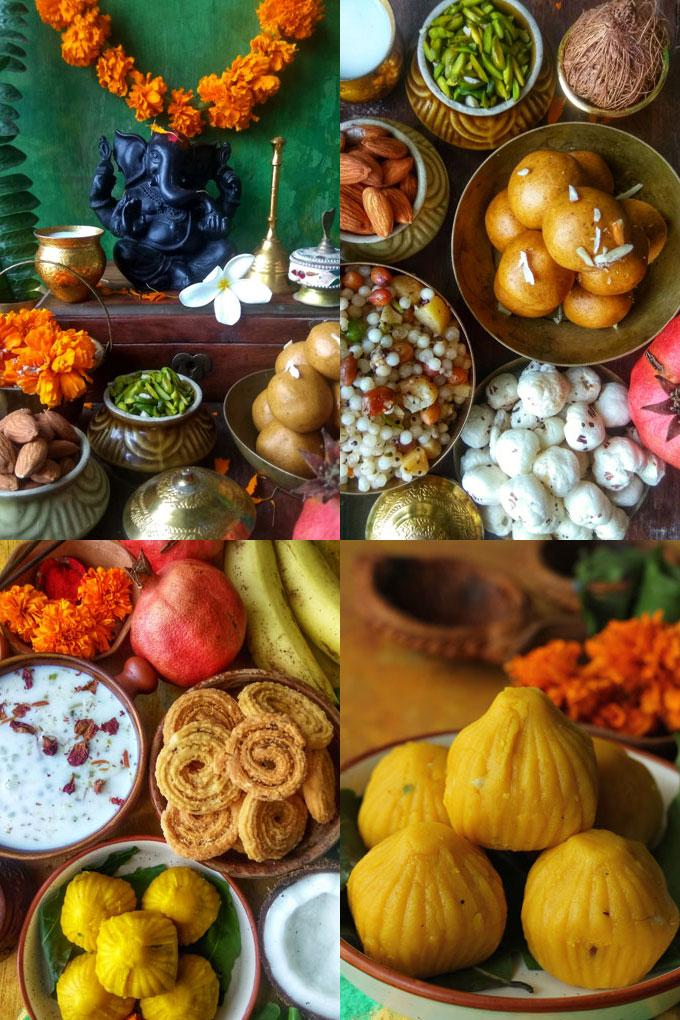
The Festival Of Ganesh Chaturthi
Ganesh Chaturthi is a Hindu festival celebrated to welcome the Lord Ganesha to earth. There are a lot of traditional dishes prepared to celebrate Ganesh Chaturthi. Modak is one of the essential sweets to be made on occasion.
Apart from modak, coconut ladoo , karanji , kheer , sabudana khichdi , puran poli, and many other festive sweets and snacks are prepared to offer Lord Ganesha.
Ingredients You’ll Need
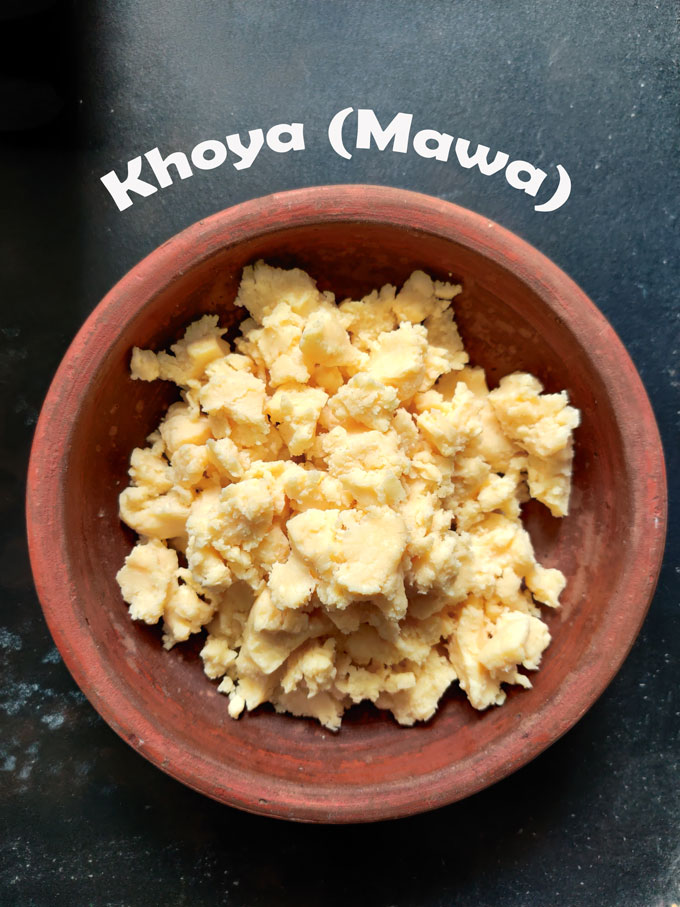
- Khoya (mawa) – is a dried or thick evaporated milk mainly used to make Indian sweets and desserts . You can get it in Indian grocery stores or sweet shops.
- Sugar – use powdered white sugar or grind granulated white sugar in the blender. You can use jaggery powder as well.
- Semolina (rava) – I add a tablespoon of suji (rava) to give modak a good taste and texture. But this is optional.
- Optional Ingredients – ghee, saffron, green cardamom powder
My Tried and True Tips
- Use unsweetened khova for this modak recipe. If you are using sweet khova, taste first, and add sugar accordingly.
- While frying semolina (rava) and khoya do not leave the pan unattended as the mixture burns quickly. You have to continuously stir it for even frying.
- You can use powdered jaggery or light brown sugar instead of white sugar to sweeten the modak. But make sure to use powdered sugar, not granulated.
- Do not add sugar to the hot khoya mixture . It should be lukewarm to touch and not piping hot. Otherwise, sugar will start melting, making the dough too sticky and difficult to mould.
- If khoya is unavailable , combine ½ cup milk with 1 ½ cup milk powder (dairy whitener). Cook them over a low flame, and continuously stir till you get a soft, non-sticky dough. Flavour the dough with saffron, cardamom, and sugar.
- If you do not have modak mould , shape a lemon size dough ball using your fingers like a potli or dumpling, having a pointing tip and round bottom. Using a toothpick or bamboo skewer, make curved lines at equal distances from top to bottom.
Watch Instant Modak Video
How To Store
Modak remains fresh and soft for 1 – 2 hours at room temperature. I prefer storing them in an airtight container in the refrigerator. The texture becomes firm and remains fresh for 10 – 15 days.
In cold climatic conditions, you can leave them at the kitchen counter in an airtight container for 1 – 2 days.
More Indian Sweet Recipes
- Instant Coconut Ladoo
- Khoya Gulab Jamun
- Kesar Mawa Ghujia
- Besan Ladoo
- Doodh Pak
- Mawa Barfi
- Atta Ladoo
- Basundi
- Jalebi
Ingredients
- ▢ 200 gram khoya (mawa/pal khova/evaporated milk)
- ▢ 1 tablespoon ghee
- ▢ 1 tablespoon semolina (rava/suji)
- ▢ ½ Cup powdered white sugar
- ▢ 1 teaspoon green cardamom powder
- ▢ ½ teaspoon saffron
- ▢ 2 tablespoon warm milk
Instructions
Prepare Modak Mixture:
- Soak saffron strands in warm milk. Set aside while preparing the modak mixture.
- Heat ghee in a heavy bottom kadhai or casserole.
- Add semolina (rava) fry till it turns light brown in color. Continuously stir the semolina while frying. If left unattended it burns very fast.
- Next, add crumbled khoya (mawa). Mix semolina and khoya using a spatula. Now keep frying the khoya till it becomes smooth and the fat starts oozing from the sides. That is stage 1 of perfect frying.
- In low to medium flame, keep frying the khoya till all the fat disappears and the khoya starts coming together like a soft dough. This is in stage 2 .
- Now, add the green cardamom powder and saffron soaked milk. Mix nicely. Keep frying until all the milk is absorbed by the khoya and once again it becomes like a soft dough. This is the final stage . Turn off the heat.
- Transfer the khoya mixture to a wide bowl. Allow to cool down for 5 – 10 minutes or till it becomes lukewarm to touch.
- Add powdered sugar and mix with your fingers to form a smooth, soft, non-sticky dough.
Shape Modak:
- Grease or brush the modak mold with the ¼ teaspoon of ghee. You can skip this step if the mold is a non-stick one.
- Pinch a small portion of the dough (according to the size of the mold) and stuff it on one side of the mold. Gently press the filling with the other side of the mold to get modak shape. Unmold the modak gently without breaking its shape.
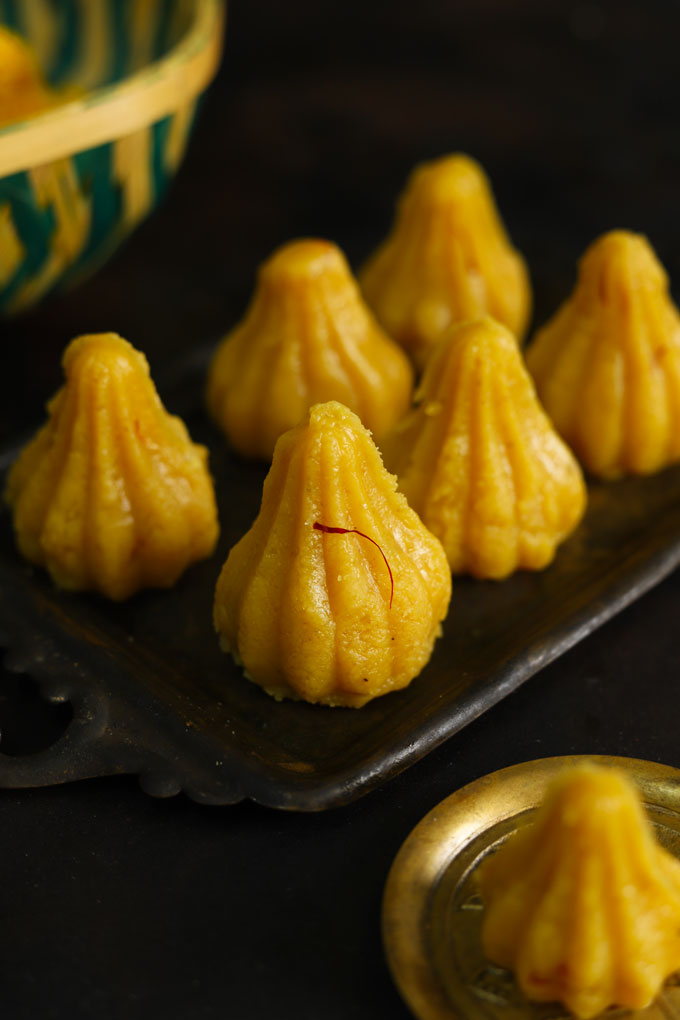
- Arrange the modak on a serving platter. Garnish with saffron. You can keep them in the refrigerator for 5 – 10 minutes if they are too soft.
- Kesar Mawa Modak is ready to serve.
Recipe Notes:
- I use unsweetened khova to make modak. If you are using sweet khova, taste first, and add sugar accordingly.
- Make sure khoya is at room temperature and not semi-frozen or cold. Leave it at room temperature for a few minutes before using it.
- Semolina (rava) gives a nice texture and taste to the modak. If you are not too keen to add semolina, skip ghee as well. Start frying khova straightaway.
- Do not add powdered sugar in the hot khoya mixture. It should be lukewarm to touch and not piping hot.
- You can stuff a variety of dry fruits, desiccated coconut, and other types of sweet filling in this mawa modak.
- If you live in a place where khoya is not available , combine ½ cup milk with 1 ½ cup of milk powder (dairy whitener). Cook them over a low flame, continuously stir till you get a soft, non-sticky dough. Flavor the dough with saffron, cardamom, and sugar. Shape modak.
- If you do not have modak mold , shape a lemon size dough ball using your fingers like a potli or dumpling. Using a toothpick or bamboo skewer make lines at equal distance from top to bottom.
Nutrition
We follow a strict NO SPAM Policy
Kesar Mawa Modak Recipe
Equipment
- Heavy Bottom Kadhai
- Modak Mould
Ingredients
- 200 gram khoya (mawa/pal khova/evaporated milk)
- 1 tablespoon ghee
- 1 tablespoon semolina (rava/suji)
- ½ Cup powdered white sugar
- 1 teaspoon green cardamom powder
- ½ teaspoon saffron
- 2 tablespoon warm milk
Instructions
Prepare Modak Mixture:
- Soak saffron strands in warm milk. Set aside while preparing the modak mixture.
- Heat ghee in a heavy bottom kadhai or casserole.
- Add semolina (rava) fry till it turns light brown in color. Continuously stir the semolina while frying. If left unattended it burns very fast.
- Next, add crumbled khoya (mawa). Mix semolina and khoya using a spatula. Now keep frying the khoya till it becomes smooth and the fat starts oozing from the sides. That is stage 1 of perfect frying.
- In low to medium flame, keep frying the khoya till all the fat disappears and the khoya starts coming together like a soft dough. This is in stage 2 .
- Now, add the green cardamom powder and saffron soaked milk. Mix nicely. Keep frying until all the milk is absorbed by the khoya and once again it becomes like a soft dough. This is the final stage . Turn off the heat.
- Transfer the khoya mixture to a wide bowl. Allow to cool down for 5 - 10 minutes or till it becomes lukewarm to touch.
- Add powdered sugar and mix with your fingers to form a smooth, soft, non-sticky dough.
Shape Modak:
- Grease or brush the modak mold with the ¼ teaspoon of ghee. You can skip this step if the mold is a non-stick one.
- Pinch a small portion of the dough (according to the size of the mold) and stuff it on one side of the mold. Gently press the filling with the other side of the mold to get modak shape. Unmold the modak gently without breaking its shape.
- Arrange the modak on a serving platter. Garnish with saffron. You can keep them in the refrigerator for 5 - 10 minutes if they are too soft.
- Kesar Mawa Modak is ready to serve.
Video
Notes
- I use unsweetened khova to make modak. If you are using sweet khova, taste first, and add sugar accordingly.
- Make sure khoya is at room temperature and not semi-frozen or cold. Leave it at room temperature for a few minutes before using it.
- Semolina (rava) gives a nice texture and taste to the modak. If you are not too keen to add semolina, skip ghee as well. Start frying khova straightaway.
- Do not add powdered sugar in the hot khoya mixture. It should be lukewarm to touch and not piping hot.
- You can stuff a variety of dry fruits, desiccated coconut, and other types of sweet filling in this mawa modak.
- If you live in a place where khoya is not available , combine ½ cup milk with 1 ½ cup of milk powder (dairy whitener). Cook them over a low flame, continuously stir till you get a soft, non-sticky dough. Flavor the dough with saffron, cardamom, and sugar. Shape modak.
- If you do not have modak mold , shape a lemon size dough ball using your fingers like a potli or dumpling. Using a toothpick or bamboo skewer make lines at equal distance from top to bottom.
Nutrition
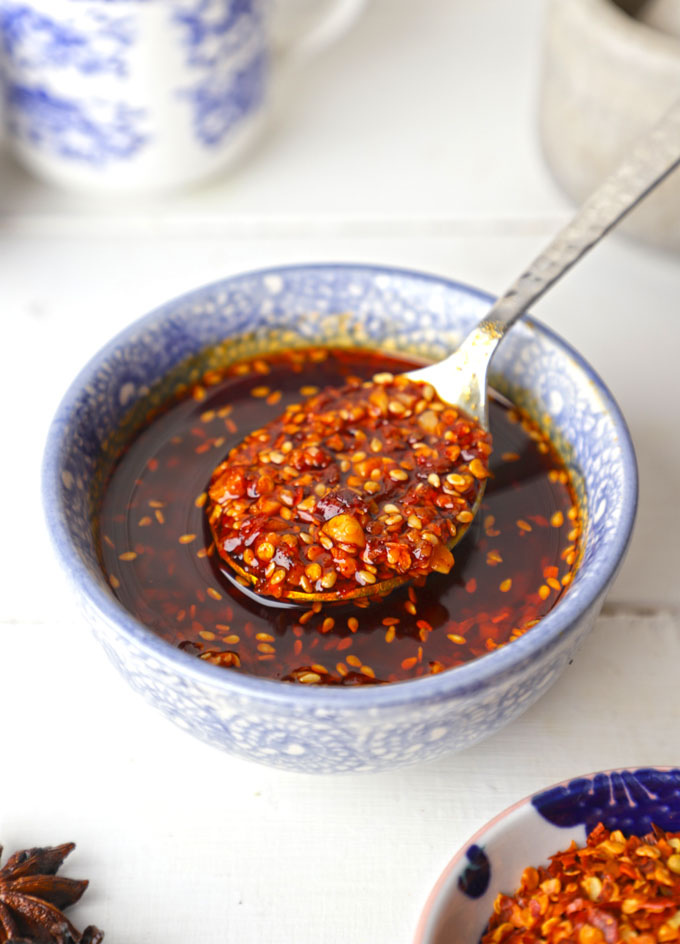
Here is a tried and tested homemade chilli oil recipe. Drizzle it over your favourite dishes for a spicy and flavourful kick.
Estimated reading time: 5 minutes
- Instagram Viral Chilli Oil
- Ingredients You’ll Need
- How To Make Chilli Oil
- Serving Suggestion
- My Tried and True Tips
- Homemade Chilli Oil Recipe
Instagram Viral Chilli Oil
This Chili Oil recipe hack has been Instagram’s most trending and popular since 2022. It is oddly satisfying to watch , easy to try at home, and borderline addictive once you taste it. You will end up drizzling it over anything and everything.
Chilli Oil is a spicy, garlicky, vegetarian Asian sauce — also known as chilli crisp. It is a traditional Chinese condiment served as a dipping sauce for dim sum, bao, and other main dishes .
Over the years, like other Chinese dishes, the chilli oil recipe popularity reached worldwide.
Why You Should Make it at Home
- no artificial colour or flavours
- great edible gift
- easy to make
- gluten-free
- no MSG
- vegan
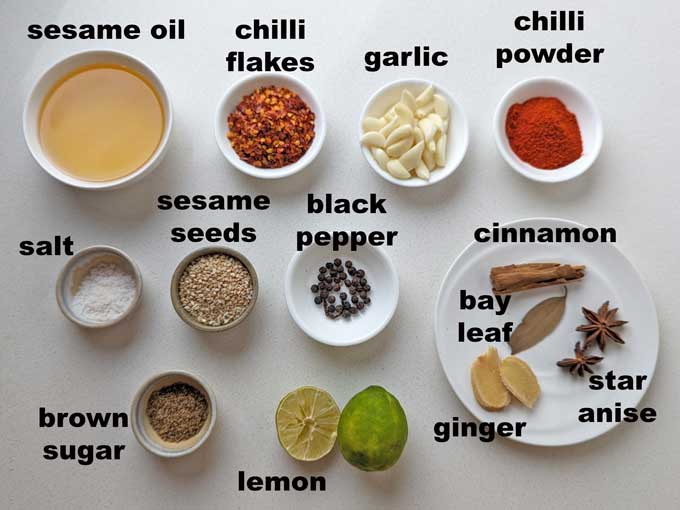
Ingredients You’ll Need
- Chilli Flakes or crushed dried red chillies. You can blend dried red chillies in a food processor to get flakes.
- Chilli Powder: If you can get Gochujang chilli powder, nothing like it. Or use Kashmiri red chilli powder for that bright red colour and medium spicy flavour.
- Garlic: You need finely minced garlic. Many chilli oil recipes suggest garlic powder, but that won’t give you the crispy bits of garlic.
- Oil: Use sesame, peanut, or any other flavourless refined oil. Do not use overpowering oil like mustard or coconut oil.
- Whole Spices: Bay Leaf, Black Peppercorns, Star Anise, Cinnamon
- Fresh Ginger Slices to flavour the oil.
- Sesame Seeds add a delicious crunch to the oil.
- White Granulated Sugar or brown sugar gives a caramelised taste and balances the heat of red chilli.
- Lemon Zest and Juice , Salt
How To Make Chilli Oil
Step 1: Take a wide, heat-proof bowl, preferably steel, stoneware, or thick ceramic.
Step 2: Combine chilli flakes, garlic, powder, salt, and sugar in the heat-proof bowl ( image 1 ).
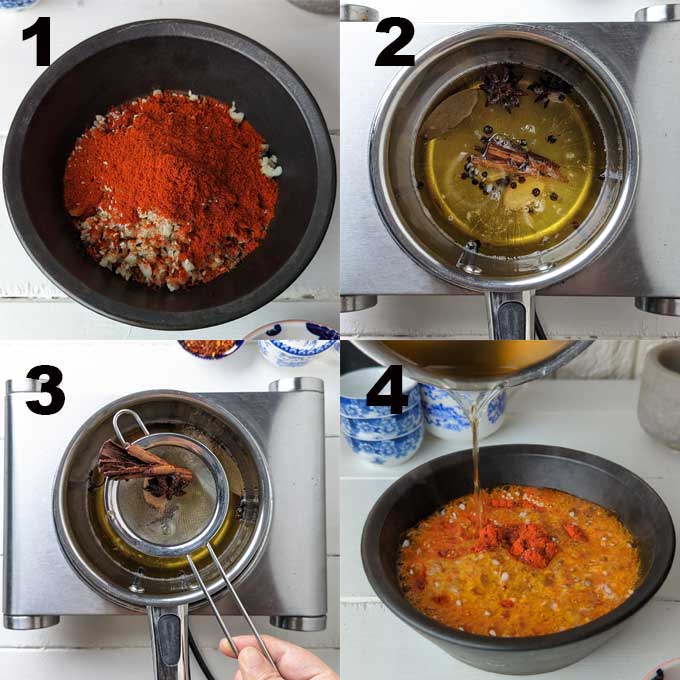
Step 3: In a saucepan, add oil, whole spices, and ginger slices— heat oil to 180 degrees F (approx 80 degrees C) . In simpler words, the oil should be ready for deep frying, and the aroma of spices should release. Ensure it is not fuming or smoking, or chilli flakes will burn.
Step 4: Remove the whole spices from the hot oil using a slotted spoon or a pair of tongs. You can also filter the oil to get rid of whole spices ( image 3 ).
Step 5: Carefully and cautiously pour the hot oil over the chilli mix in a heat-proof bowl ( image 4 ). Keep the bowl at a safe distance from your eyes.
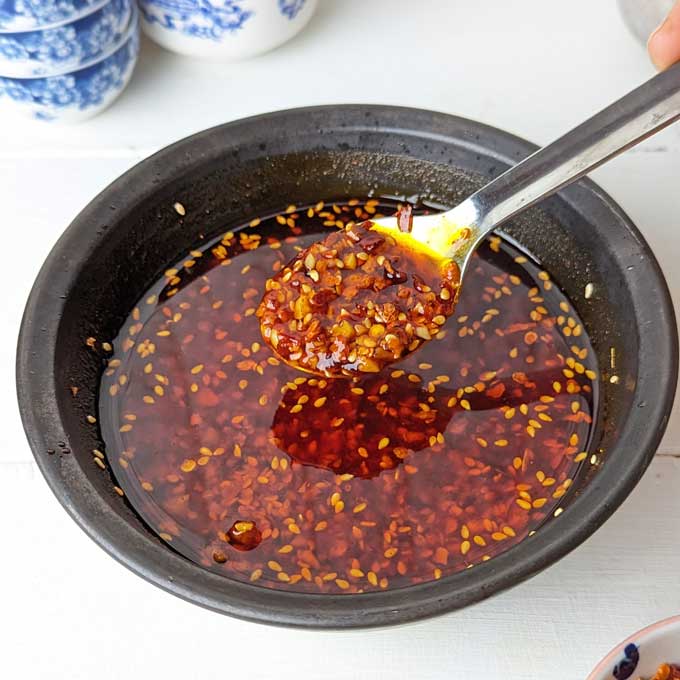
Step 6: Mix the chilli oil with a big spoon. Once it cools down a bit, add lemon zest and juice. Mix one last time and allow it to cool completely. Store it in an airtight container or use it right away.
Serving Suggestion
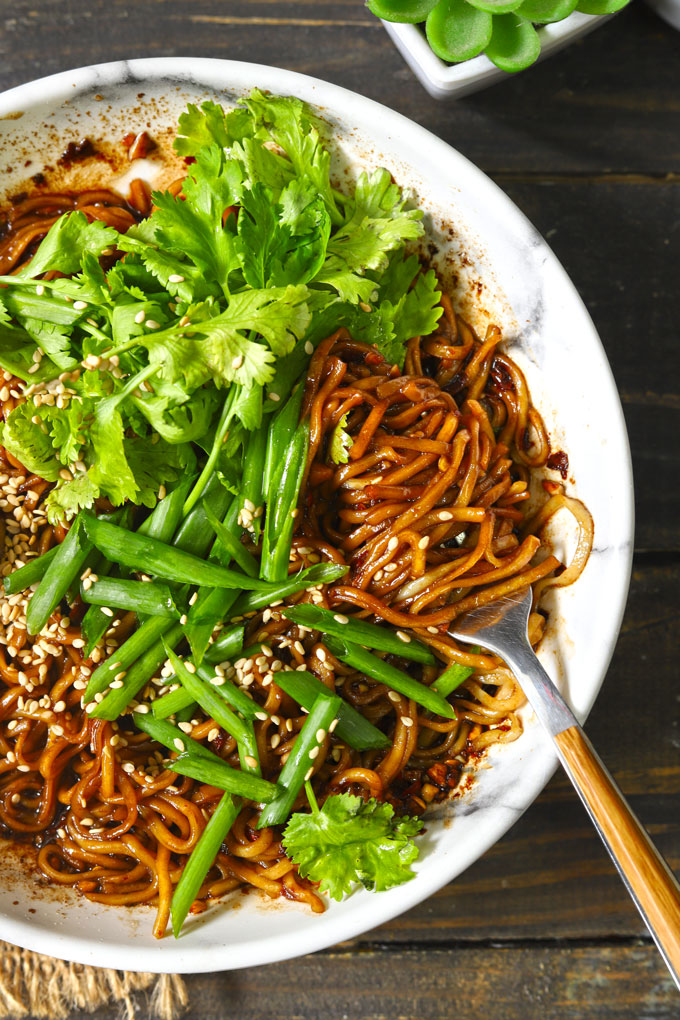
Chilli Oil is a versatile Asian condiment. You can drizzle it over chicken noodle soup , dim sum, dumplings, crispy tofu , smashed cucumber salad , ramen noodles, or fried eggs.
Use it as a stir-fry sauce for chilli oil noodles , pasta dishes , fried rice , or tofu stir fry .
My Tried and True Tips
- You can use most types of vegetable oil, though a neutral, flavourless or complimenting flavour oil like sesame, canola or peanut is ideal for highlighting the chilli pepper flavour.
- I do not recommend oils with more robust flavours , such as olive oil, coconut oil, or mustard oil, as they overpower the taste of chilli oil.
- Do not let your oil smoke ; it can burn your chilli flakes and spices, resulting in a bitter flavour and black oil.
- If you do not have a temperature thermometer, you can test it by adding a tiny pinch of chilli flakes to the hot oil. It is ready when the flakes sizzle.
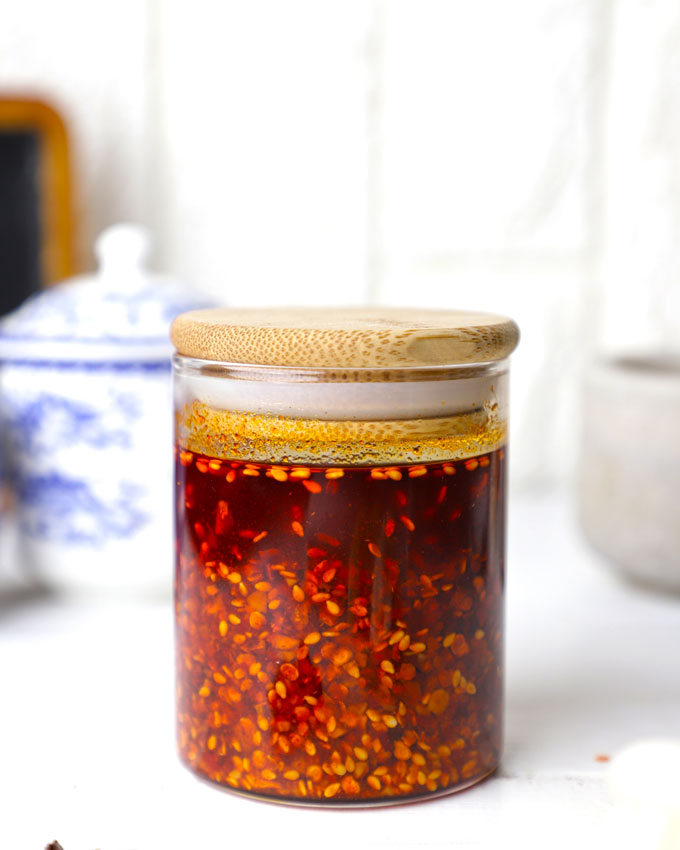
- Homemade chilli oil can last for 2-3 months when stored in an airtight container in a cool dark place at room temperature and even longer in the refrigerator.
- You can increase the shelf life of chilli oil by keeping it away from moisture and water. Use a clean, dry spoon to scoop it out each time.
More Asian Sauce Recipes
- Thai Sweet Chilli Sauce
- Spicy Peanut Sauce
- Schezwan Sauce

Ingredients
- ▢ 4 tablespoon red chilli flakes
- ▢ 2 tablespoon Kashmiri red chilli powder or the Gochujang chilli powder
- ▢ 2 tablespoon finely minced garlic
- ▢ 1 tablespoon white sesame seeds (til)
- ▢ 2 teaspoon sea salt or table salt
- ▢ 2 teaspoon brown sugar
- ▢ 1 Cup sesame oil
- ▢ 1 teaspoon black peppercorns (sabut kali mirch)
- ▢ 1 cinnamon stick (dal chini)
- ▢ 1 bay leaf (tej patta)
- ▢ 2 ginger slices
- ▢ 2 star anise (phool chakri)
Instructions
- Take a wide, heat-proof bowl, preferably steel, stoneware, or any other bowl that does not break while pouring the hot oil.
- Combine chilli flakes, garlic, powder, salt, and sugar in a heat-proof bowl.
- In a saucepan, add oil, whole spices, and ginger slices— heat oil to 180 degrees F (approx 80 degrees C) . In simpler words, the oil should be ready for deep frying, and the aroma of spices should release. Ensure it is not fuming or smoking, or chilli flakes will burn.
- Remove the whole spices from the hot oil using a slotted spoon or a pair of tongs. You can also filter the oil to get rid of whole spices. You can leave the black peppercorns in the oil itself.
- Carefully and cautiously pour the hot oil over the chilli mix in a heat-proof bowl. Keep the bowl at a safe distance from your eyes.
- Mix the chilli oil with a big spoon. Once it cools down a bit, add lemon zest and juice. Mix one last time and allow it to cool completely.
- Store chilli oil in an airtight container or use it right away.
Recipe Notes:
- Make sure the oil is rightly heated before pouring over the dry ingredients. It should not be lukewarm or mildly hot.
- Instead of lemon juice, you can add rice vinegar or Chinese vinegar.
- You can flavour the chilli oil with a teaspoon of light soy sauce, fish sauce, or Schezuan Chilli Peppers.
Nutrition
We follow a strict NO SPAM Policy
