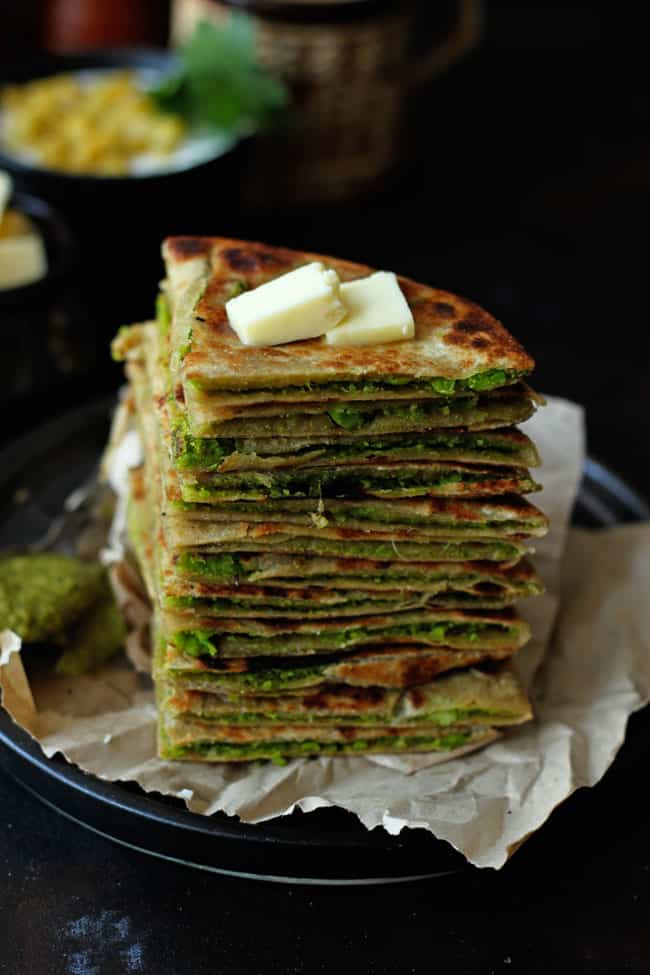
Matar Paratha is an absolute family favourite fulfilling, and wholesome Indian breakfast.
- Winter Green Peas
- Green Peas Stuffing – 3 Ways
- Watch Matar Paratha Video
- Serving Suggestion
- Hina’s Tried and True Tips
- Matar Paratha Recipe
In the huge extended family of paratha, matar paratha is surely one of our family’s favourite, especially during the winter season. It is an excellent wholesome Indian breakfast . If you are looking for a no onion or garlic recipe , then the green peas paratha recipe is worth bookmarking.
More Reasons To LOVE Green Peas Paratha
- vegan
- nut-free
- wholesome & fulfilling
- meal-prep and lunchbox friendly
Winter Green Peas
In India, during the winter season we are blessed with bountiful of fresh green peas that taste extremely delicious and sweet on their own.
Hence, we have so many green peas recipes like chura matar , kachori , matar ka nimona , matar ki ghugni , methi matar malai to celebrate the seasonal produce Green Peas are starchy yet high in fiber, vitamins, minerals, and proteins .
You can use fresh, canned, or frozen green peas for making the paratha stuffing.
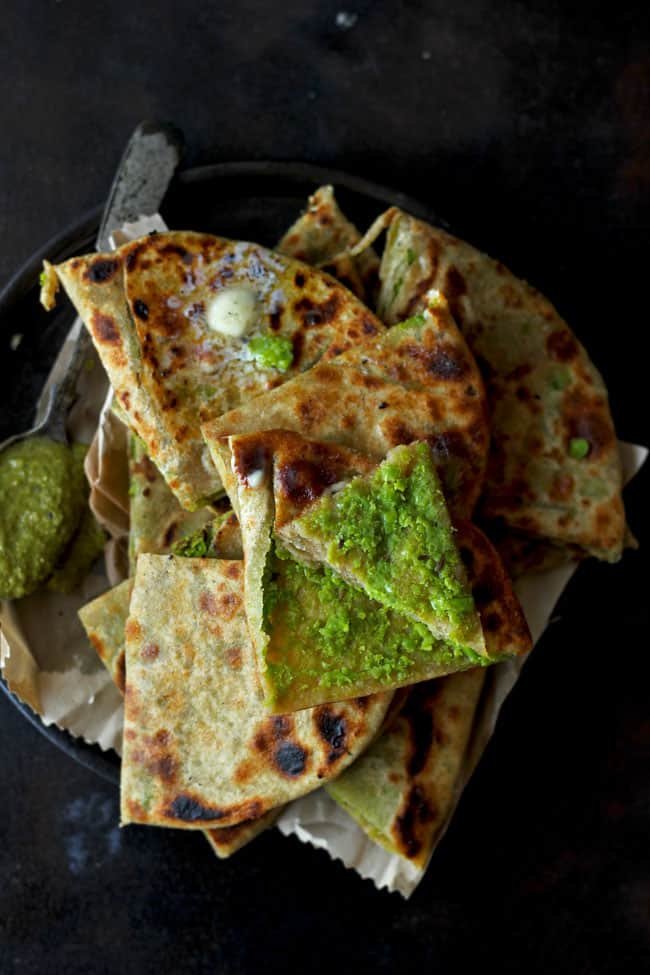
Green Peas Stuffing – 3 Ways
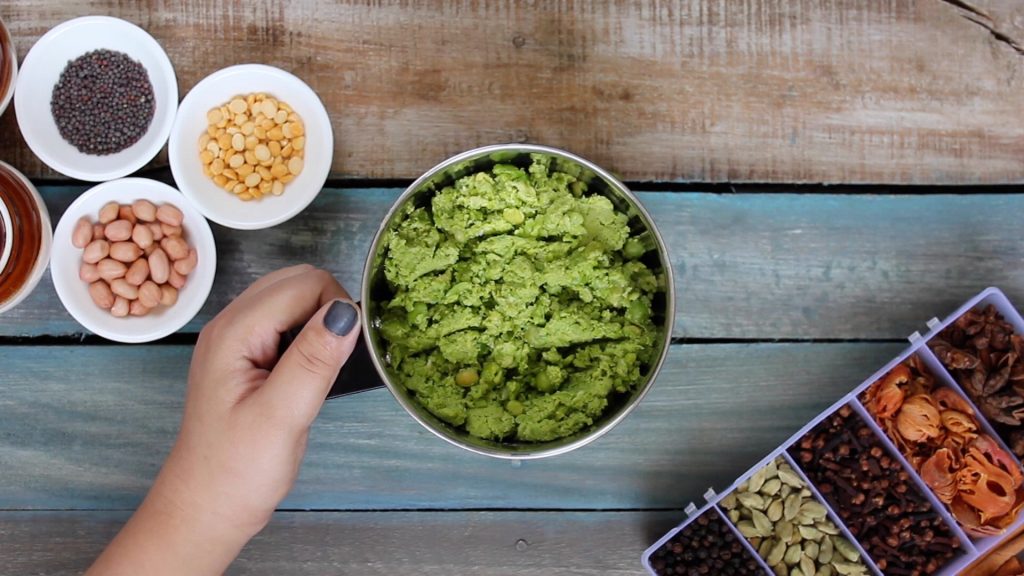
Method 1) Steam or pressure cook the green peas, combine them with the spices, salt, and blend to make the paratha stuffing.
Method 2) Blend the green peas to a smooth paste. Heat oil, add cumin seeds followed by the green peas mixture, spices, and salt. Fry the green peas mixture till it starts leaving the surface of the pan and comes together. Add gram flour and mix nicely. The stuffing will be totally dry and nicely roasted.
Method 3) Prepare the stuffing as suggested in method 2 and combine it while binding the dough for paratha. This way you won’t have to stuff the paratha. The dough itself will have the flavor of green peas.
Watch Matar Paratha Video
Serving Suggestion
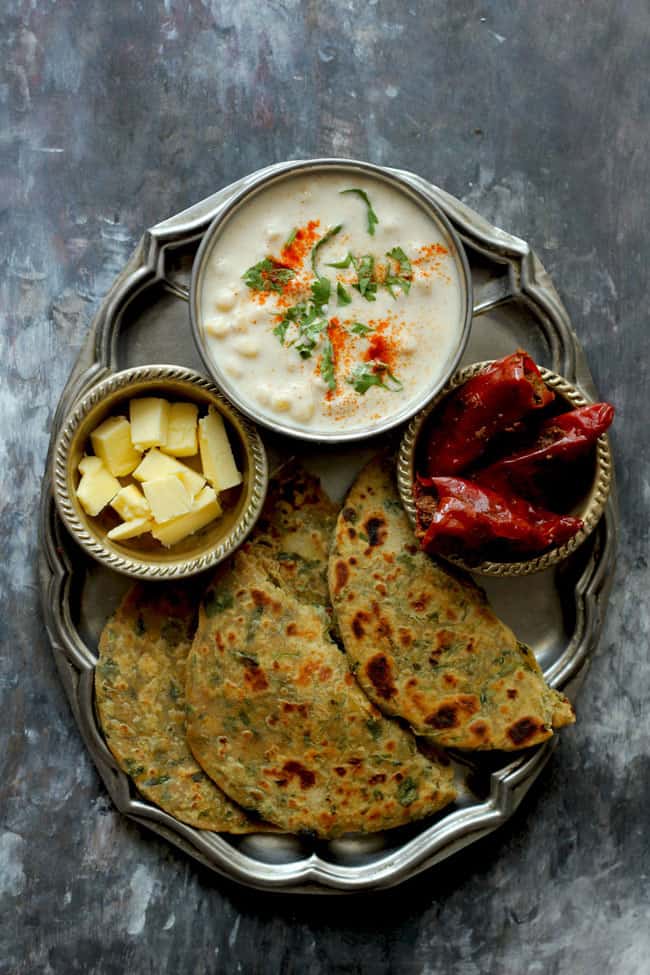
The best way to enjoy a matar paratha is with loads of white butter , flavoursome raita , seasonal homemade pickle , and a piping hot masala tea (chai) .
This combination is totally a winter bliss and always a classic Indian breakfast that never goes out of fashion.
Hina’s Tried and True Tips
- Use fresh green peas to make the matar paratha. The flavour of fresh green peas is way tastier than the frozen ones.
- A teaspoon of gram flour (besan) or sattu flour (chana dal flour) is added to the peas mixture to make it non-sticky and tastier. But it is totally optional.
- Do not overstuff the paratha with the peas mixture else it will tear from the sides. While rolling the paratha be gentle . If you will put too much pressure the pea stuffing will ooze out from the sides of the paratha.
follow me on Youtube or Instagram for latest recipes.

Ingredients
For the Stuffing
- ▢ 2 Cup green peas (matar)
- ▢ 2 tablespoon cooking oil
- ▢ 1 teaspoon cumin seeds (jeera)
- ▢ ¼ teaspoon asafoetida
- ▢ 1 tablespoon grated ginger
- ▢ Salt to taste
- ▢ ½ teaspoon turmeric powder
- ▢ 1 teaspoon red chilli powder
- ▢ 1 teaspoon coriander powder (dhaniya powder)
- ▢ 1 teaspoon mango powder (amchur powder)
- ▢ 1 tablespoon gram flour (besan)
Ingredients for the dough
- ▢ 2 Cups whole wheat flour (atta)
- ▢ Water to bind the dough
- ▢ a pinch of salt
- ▢ ½ teaspoon cooking oil + for cooking each paratha
Instructions
Prepare Green Peas Stuffing:
- To prepare the stuffing, make a paste of green peas in a mixer without using water. If the peas are too hard to grind, sue 1 – 2 tablespoon of water.
- Heat oil in a pan over medium heat. Add cumin seeds, asafoetida, and ginger. Fry them over low heat for a minute.
- Add pea paste and fry over low heat till all the moisture is evaporated. Keep stirring at regular intervals to avoid burning of the masala.
- Add salt and spices. Mix nicely and cook the peas paste for another few minutes. At last, add gram flour, mix and cook for 5 – 7 minutes. Turn off the heat and allow the filling to cool down completely.
Prepare the Dough:
- Meanwhile, prepare the dough for the paratha. We need chapati like dough for the matar paratha.
- Now roll the stuffed paratha gently to the size of a chapati or roti.
- Combine salt and flour. Mix nicely. Using a ¼ cup of water at a time bind a non-sticky, smooth dough. Knead it for 3 – 5 minutes. Smear the dough with oil. Cover and rest for 5 – 15 minutes.
Stuff Peas Paratha:
- To make the Matar Paratha, heat a griddle pan (tawa) over medium heat.
- Pinch a lemon size portion from the dough. Shape it into a round ball. Roll out this ball into a small disc about 3 inches in diameter.
- Add one tablespoon of the peas stuffing in the center of the rolled out disc. Be careful not to overstuff the paratha.
- Bring together the edges of the dough to seal the peas stuffing. Gently press the disc with the pressure of your palm. Now roll the stuffed paratha lightly to the size of a chapati or roti.
Cook Peas Paratha:
- Cook the matar paratha on a preheated griddle (tawa) from both the sides until the brown char marks or spots appear.
- Smear a teaspoon of ghee/oil on each side of paratha, gently press it with a flat spatula and cook till uniformly crisp from both sides.
- Serve matar paratha warm with raita, pickle and a cup of masala chai.
Recipe Notes:
Nutrition
We follow a strict NO SPAM Policy

Matar Paratha Recipe
Equipment
- Blender
- Frying Pan
- Tawa/Griddle
Ingredients
For the Stuffing
- 2 Cup green peas (matar)
- 2 tablespoon cooking oil
- 1 teaspoon cumin seeds (jeera)
- ¼ teaspoon asafoetida
- 1 tablespoon grated ginger
- Salt to taste
- ½ teaspoon turmeric powder
- 1 teaspoon red chilli powder
- 1 teaspoon coriander powder (dhaniya powder)
- 1 teaspoon mango powder (amchur powder)
- 1 tablespoon gram flour (besan)
Ingredients for the dough
- 2 Cups whole wheat flour (atta)
- Water to bind the dough
- a pinch of salt
- ½ teaspoon cooking oil + for cooking each paratha
Instructions
Prepare Green Peas Stuffing:
- To prepare the stuffing, make a paste of green peas in a mixer without using water. If the peas are too hard to grind, sue 1 - 2 tablespoon of water.
- Heat oil in a pan over medium heat. Add cumin seeds, asafoetida, and ginger. Fry them over low heat for a minute.
- Add pea paste and fry over low heat till all the moisture is evaporated. Keep stirring at regular intervals to avoid burning of the masala.
- Add salt and spices. Mix nicely and cook the peas paste for another few minutes. At last, add gram flour, mix and cook for 5 – 7 minutes. Turn off the heat and allow the filling to cool down completely.
Prepare the Dough:
- Meanwhile, prepare the dough for the paratha. We need chapati like dough for the matar paratha.
- Now roll the stuffed paratha gently to the size of a chapati or roti.
- Combine salt and flour. Mix nicely. Using a ¼ cup of water at a time bind a non-sticky, smooth dough. Knead it for 3 - 5 minutes. Smear the dough with oil. Cover and rest for 5 - 15 minutes.
Stuff Peas Paratha:
- To make the Matar Paratha, heat a griddle pan (tawa) over medium heat.
- Pinch a lemon size portion from the dough. Shape it into a round ball. Roll out this ball into a small disc about 3 inches in diameter.
- Add one tablespoon of the peas stuffing in the center of the rolled out disc. Be careful not to overstuff the paratha.
- Bring together the edges of the dough to seal the peas stuffing. Gently press the disc with the pressure of your palm. Now roll the stuffed paratha lightly to the size of a chapati or roti.
Cook Peas Paratha:
- Cook the matar paratha on a preheated griddle (tawa) from both the sides until the brown char marks or spots appear.
- Smear a teaspoon of ghee/oil on each side of paratha, gently press it with a flat spatula and cook till uniformly crisp from both sides.
- Serve matar paratha warm with raita, pickle and a cup of masala chai.
Video
Notes
Nutrition
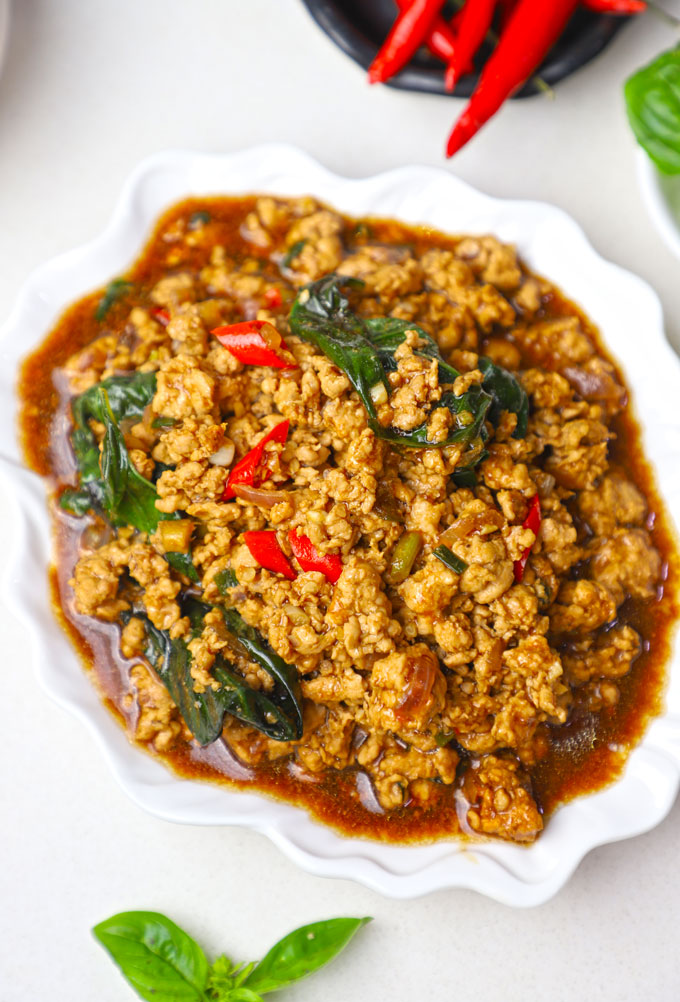
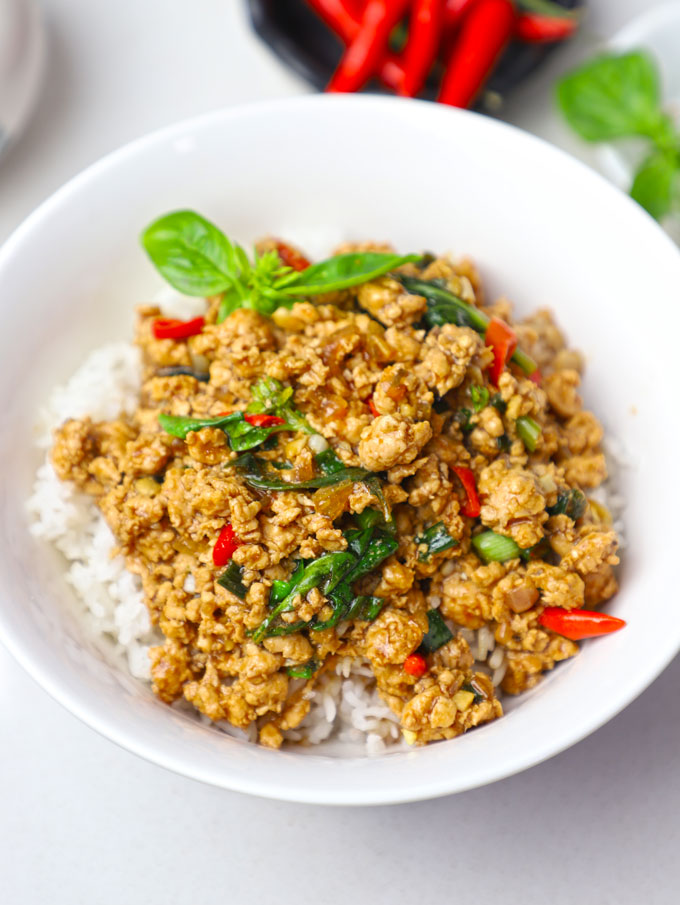
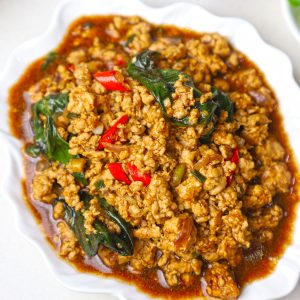
Thai Basil Chicken, known in Thailand as Pad Krapow Gai, is flavourful, satisfyingly spicy, and lightning-fast to prepare.
- Ingredients You’ll Need
- How To Make Thai Basil Chicken
- Serving Suggestion
- Thai Basil Chicken Recipe
Pad Krapow Gai isn’t just delicious; it’s a representation of Thai culinary ingenuity packed with local fiery chilies, pungent garlic, umami-rich sauces, and a generous handful of fragrant basil. It is the ultimate comforting street food.
Why You’ll Love Thai Basil Chicken
- Quick & Easy: From prep to plate in under 30 minutes! Seriously, it’s faster than takeout.
- Flavour Bomb: A perfect balance of salty, spicy, savoury, and aromatic.
- Minimal Cleanup: One wok or large skillet is all you really need.
- Customizable Heat: Love it mild? Dial back the chilies. Crave a fiery kick? Go wild!
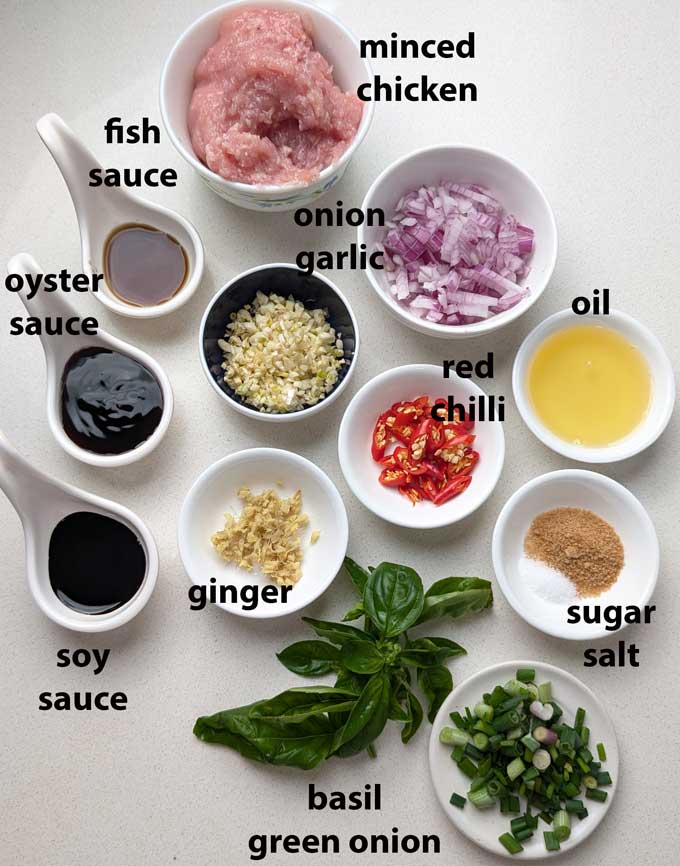
Ingredients You’ll Need
- Minced Chicken: This recipe focuses on using minced chicken , which is the traditional and most efficient way to make Pad Krapow Gai. Thigh meat will be more tender and flavourful due to higher fat content or use chicken breast.
- Holy Basil (Grapow) OR Thai Sweet Basil: It has a unique peppery, almost clove-like flavour. If you can’t find it, Thai sweet basil (the kind with purple stems often labeled “Thai basil”) is an excellent substitute, offering a lovely anise-like aroma. Regular Italian basil is NOT recommended, as the flavour profile is entirely different.
- Thai Bird’s Eye Chilies: Adjust to your spice preference. For a milder version, remove the seeds.
- Aromatics : Garlic, Ginger, Red Onion or Shallots
- Sauce : Oyster Sauce, Ligh and Dark Soy Sauce, Fish Sauce (backbone of Thai cuisine), Bown Sugar, and Salt
- Cooking Oil: Sesame, Canola, or Vegetable Oil
- Green Onion or Scallions are an optional addition.
Are you a chicken lover?
How To Make Thai Basil Chicken
1)Prepare Your Mise en Place:
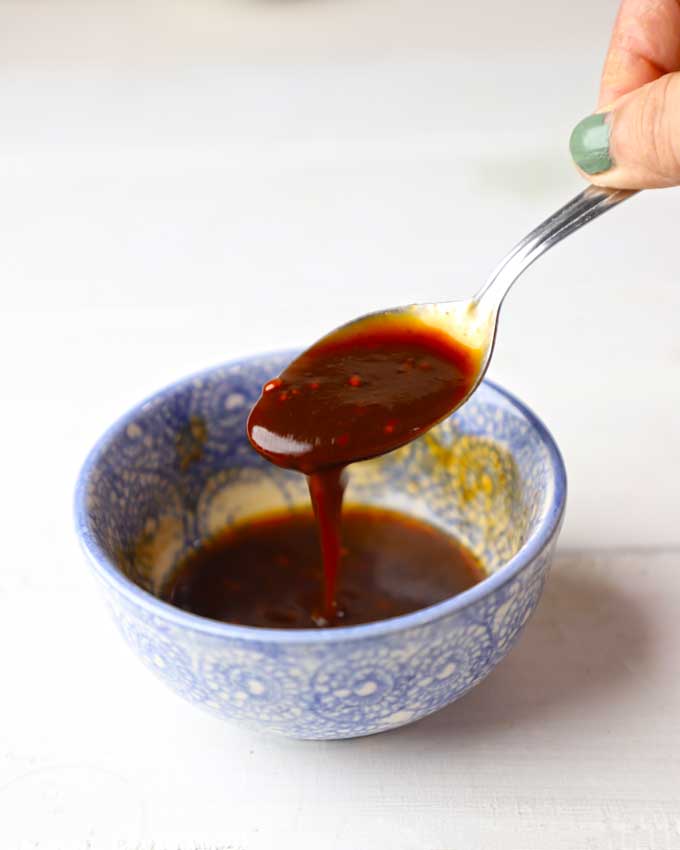
- The Sauce: In a small bowl, whisk together the oyster sauce, light soy sauce, dark soy sauce, fish sauce, and sugar. Set aside.
- The Basil: Pick the basil leaves from the stems. Wash and gently pat dry.
2) The Stir-Fry Begins (High Heat is Key!):
- Heat oil in a wok till it starts smoking.
- Add the half of the garlic, ginger, onion and fresh chilli. Stir-fry rapidly for about 20-30 seconds until very fragrant. Be careful not to burn it!
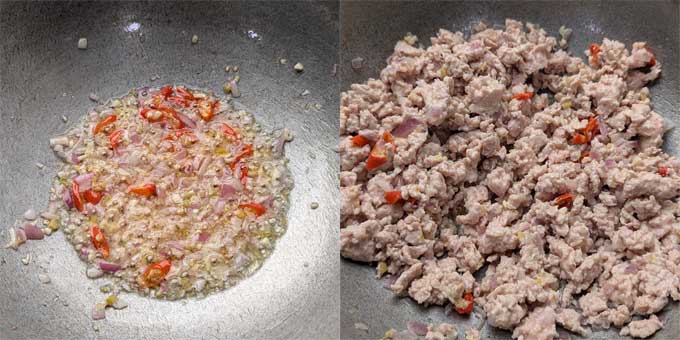
3)Add the Minced Chicken:
- Add the minced chicken to the wok. Break it up with your spatula and stir-fry vigorously.
- Cook until the chicken turns pale white, releases juices , and is mostly cooked through. This should take 5 to 6 minutes.
4)Sauce it Up!
- Pour the prepared sauce mixture, salt, and remianing garlic over the cooked chicken.
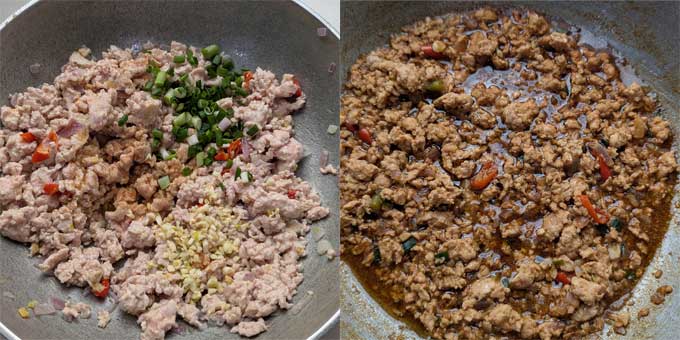
- Continue to stir-fry on high heat, tossing everything together. The sauce will thicken slightly and coat the chicken beautifully. Cook for another 1-2 minutes until the sauce is well incorporated and slightly reduced.
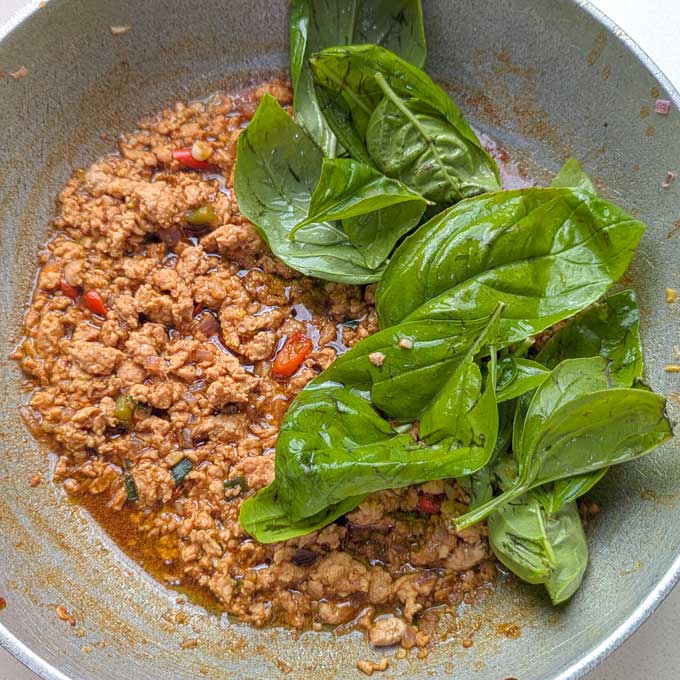
- Add the generous handful of basil leaves. Toss them quickly through the hot chicken until they just wilt. The residual heat will cook them perfectly without overcooking.
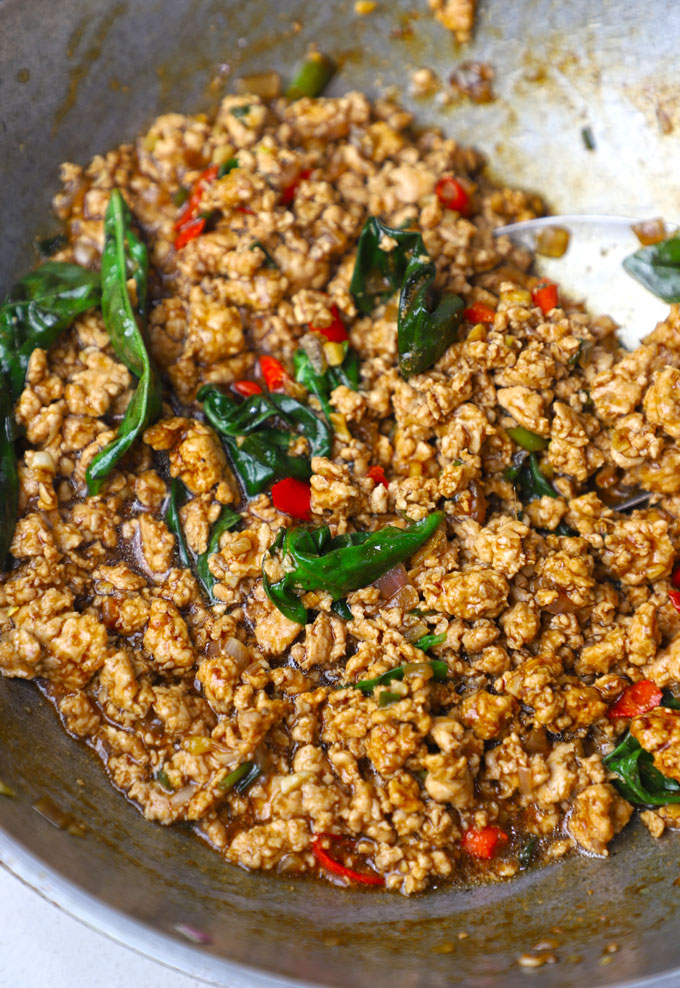
Thai Basil Chicken is ready to serve!
Serving Suggestion
Pad Krapow Gai often eaten for breakfast, lunch, or dinner , highlighting its versatility and widespread appeal.
Served over fluffy jasmine rice (essential for soaking up all the delicious sauce), it transports you straight to the bustling streets of Bangkok.
If you haven’t already included these, they are considered essential for the authentic experience:
- Thai Fried Egg (Kai Dao): A “lacey” deep-fried egg with a runny yolk. The yolk acts as a rich sauce that tempers the spice of the chilies.
- Prik Nam Pla: The ultimate Thai condiment. It’s a mix of fish sauce, lime juice, chopped bird’s eye chilies, and sometimes garlic. A tiny spoonful over your rice changes everything.
- Cucumber Slices: Simple, unseasoned, thick-cut slices of cold cucumber to provide a cooling crunch between spicy bites or a Thai Cucumber Salad .
- Som Tum ( Green Papaya Salad ): The classic choice. Its shredded texture and high acidity (from lime and tamarind) refresh the palate.
Love Thai food? Here are a few of my favourites I make on repeat – Thai Coconut Soup , a sweet and spicy Chicken Pad Thai , and ofcourse the flagship dish Thai Red Curry .
follow me on Youtube or Instagram for latest recipes.
Ingredients
- ▢ 500 gram minced chicken
- ▢ 2 tablespoon sesame oil
- ▢ 1 tablespoon minced garlic (divided)
- ▢ ½ tablespoon minced ginger
- ▢ 1 small red onion, finely chopped
- ▢ 2 Thai red eye bird’s chilli, sliced
- ▢ 2 tablespoon oyster sauce
- ▢ 1 tablespoon light soy sauce
- ▢ 1 tablespoon dark soy sauce
- ▢ 1 teaspoon fish sauce
- ▢ 1 teaspoon light brown sugar
- ▢ salt to tastes
- ▢ 1 packed Thai basil leaves
- ▢ 1 sprig green onion or scallion, finely chopped (optional)
Instructions
- In a small bowl, whisk together the oyster sauce, light soy sauce, dark soy sauce, fish sauce, and sugar. Set aside.
- Heat oil in a wok till it starts smoking. Add the half of the garlic, ginger, onion and fresh chilli. Stir-fry rapidly for about 20-30 seconds until very fragrant. Be careful not to burn it!
- Add the minced chicken to the wok. Break it up with your spatula and stir-fry vigorously. Cook until the chicken turns pale white, releases juices, and is mostly cooked through. This should take 5 to 6 minutes.
- Pour the prepared sauce mixture, green onion, and remianing garlic over the cooked chicken.
- Continue to stir-fry on high heat, tossing everything together. The sauce will thicken slightly and coat the chicken. Cook for another 1-2 minutes until the sauce is well incorporated and slightly reduced. If you want it extra saucy, at this stage, add the stock plus cornstarch slurry.
- Add the generous handful of basil leaves. Toss them quickly through the hot chicken until they just wilt. The residual heat will cook them perfectly without overcooking.
- Serve Thai Basil Chicken with jasmine rice.
Recipe Notes:
- Taste and Adjust: Thai cooking is all about balance. Taste your finished dish and adjust with a pinch more sugar, a splash more fish sauce, or a dash more lime juice (optional, but lovely!) if needed.
- Don’t Skimp on the Basil: The dish is named after it! Use a good amount for maximum flavor.
- Wok Hei (Breath of the Wok): This smoky flavour comes from cooking at very high temperatures. Use your highest heat setting and don’t overcrowd the pan. If your pan cools down, the chicken will steam instead of stir-fry.
- Prep Everything First: Stir-fries move fast, so have all your ingredients measured, chopped, and ready to go before you even turn on the heat.
- Extra Saucy: If you want it slightly more saucy, combine ½ Cup of chicken stock with 1 teaspoon of cornstarch, make a slurry, and add it to the chicken towards the end. Allow it to simmer for 2 – 3 minutes to thicken.
- Season Cautiously: All the sauces have enough saltiness in them. Hence, add extra salt to the dish cautiously.
Nutrition
We follow a strict NO SPAM Policy
