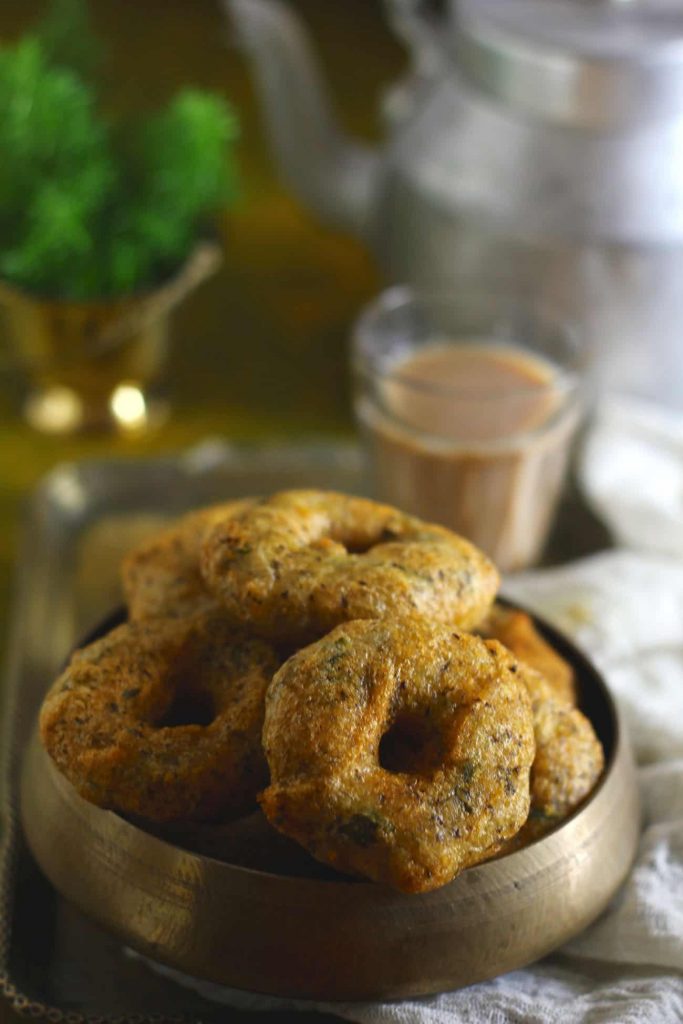
Kumaoni Bada, as we Kumaoni pronounce it, is a crispy, flavorsome, gluten-free, and vegan split black urad dal fritter. Seasoned with plenty of fresh coriander, green chilli, turmeric, red chilli and a generous amount of asafoetida to get the sought after taste of the Pahadi bada.
History Of Pahadi Bada…
Many might argue that Kumaoni Bada Recipe is no different from medu vada or for saying any other vada recipe. And they are not totally wrong when comparing the two recipes, as the process of making is almost similar.
For making medu vada we use skinless white urad dal whereas for pahadi bada we use split urad dal with half-black skin attached.
Also, the medieval period saw an influx of high-caste migrants into the Himalayan foothills from Gujarat, Karnataka, Maharashtra, Rajasthan, Bengal and other parts of India. Each brought with them a treasure of food heritage from their native region.
With time, all these distinctive food cultures blended with the local Kumaoni cuisine. Hence, you could find traces of other regional cuisines in Kumaoni Cuisine .
The Making Of Kumaoni Bada…
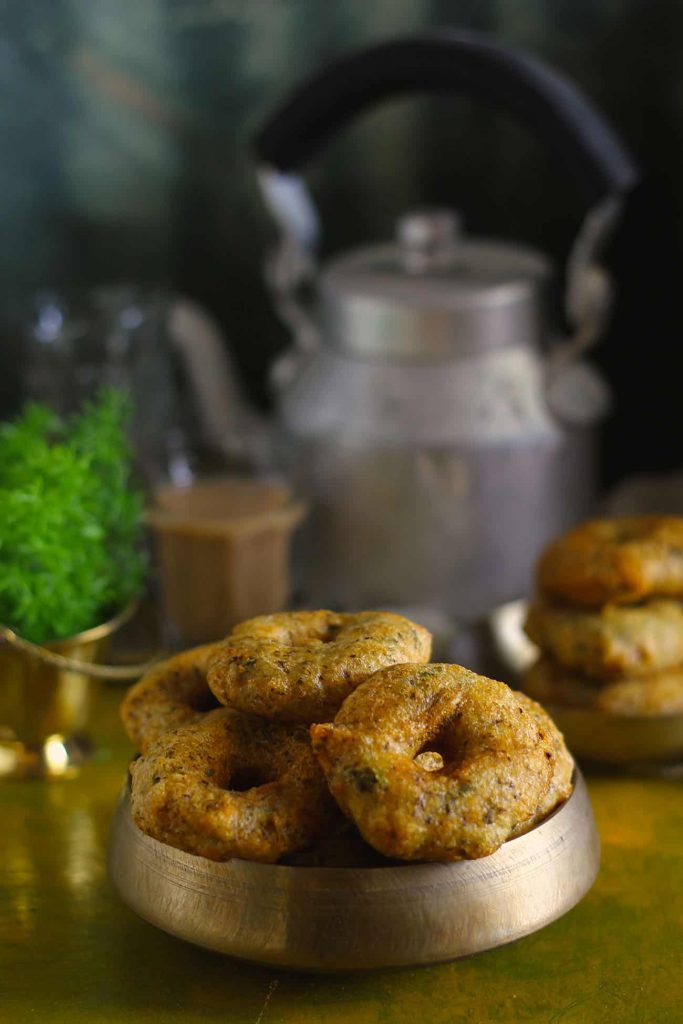
The urad dal bada is a quintessential part of Kumaoni ceremonious food. Whether it is our harvesting festival ‘Harela’, Hindu New Year ‘Sankranti’, the month of ‘Shradh’ or auspicious affair like welcoming newly born in the family, on each occasion dal bada (Vada) graces the festive food platter.
The ladies of the house are responsible for making the bada and then offering the first five pieces of it to the deity of the family.
For years, I have watched my mother, aunts, and great-grandmother grind dal for the vada in a hefty stone mortar and pestle. It was not the time when electric mixers were new to Indian kitchens. My great grandmother believed that grinding dal in a stone mortar adds to the taste of the vada.
Traditionally, the soaked split urad dal is ground in a stone mortar and pestle to get the fine paste for the vada. Then whisked manually till it is light and airy, perfect to make vada.
The same split urad dal is used to make – shahi urad dal or Sankranti special urad dal khichdi .
A few years back only my mother started using a mixer for grinding vada dal. She is not happy about it but with passing age grinding dal manually is an uphill task.
The taste of pahadi bada made with dal ground in a mixer whisked with hand blender could not be compared with the one laced with hours of hard work. Still, it is good to see the tradition of making dal bada on every important Kumaoni affair has not died yet.
More Kumaoni Recipes For You:
Kumaoni Aloo Ke Gutke
Pahadi Kheera Raita
Pahadi Gahat Dal
Pahadi Lai Ki Sabzi
If you try this recipe and love it, please leave a comment and a rating. This helps us grow and reach many other food lovers like you, who are looking for a perfect tried and tested recipe.

Ingredients
- ▢ 1 Cup split black urad dal chilka urad
- ▢ ¼ teaspoon asafoetida
- ▢ 1 teaspoon turmeric powder
- ▢ 1 teaspoon red chili powder
- ▢ 1 – 2 green chili fine chopped
- ▢ half a bunch of coriander finely chopped
- ▢ Mustard oil to deep fry the vadas
- ▢ Salt to taste
Instructions
- To make the Kumaoni Bada, rinse and soak dal overnight in enough water or for at-leat 6 hours.
- Next morning you will notice the the black peel of the dal start leaving the white skin underneath.
- Rub the dal in small batches in between your palms to remove the black peel. Each time drain the black peel.
- After 2 – 3 times you will end up with majorly white skinned dal with few black peel here and there.
- Let the dal sit in colander for 10 – 15 minutes for excess water to drain off.
- Now grind the dal in small batches in the mixer. Make sure not to use any water while grinding the dal.
- To get the smooth paste you need to stir the dal few times while grinding. Grind, turn off the mixer, stir and then grind. Repeat the process till you get thick, smooth dal paste.
- Transfer to a clean, large bowl.
- The trick to make crisp, fluffy vada is to whisk the dal till it is light and airy.
- You can whisk the dal using electric hand blender or manually. The traditional way it is done manually. A continuous whisking of 10 – 15 is good enough to incorporate air in the dal.
- Add hing, chopped coriander, green chili, spices and salt in the dal paste. Stir to combine.
- Heat mustard oil in a wide deep frying pan over medium heat.
- To shape the vadas, keep water in a small bowl next to dal paste.
- Soak your fingers of both the hands in water and pinch a lemon size portion of dal paste. Hold it over your one hand fingers and flatten it using the other hand wet fingers.
- Make a hole in the centre of the flattened vada.
- Gently slip it on to the pan of hot oil to deep fry. For safety reasons, it is best to slide the shaped vada from the sides of the pan.
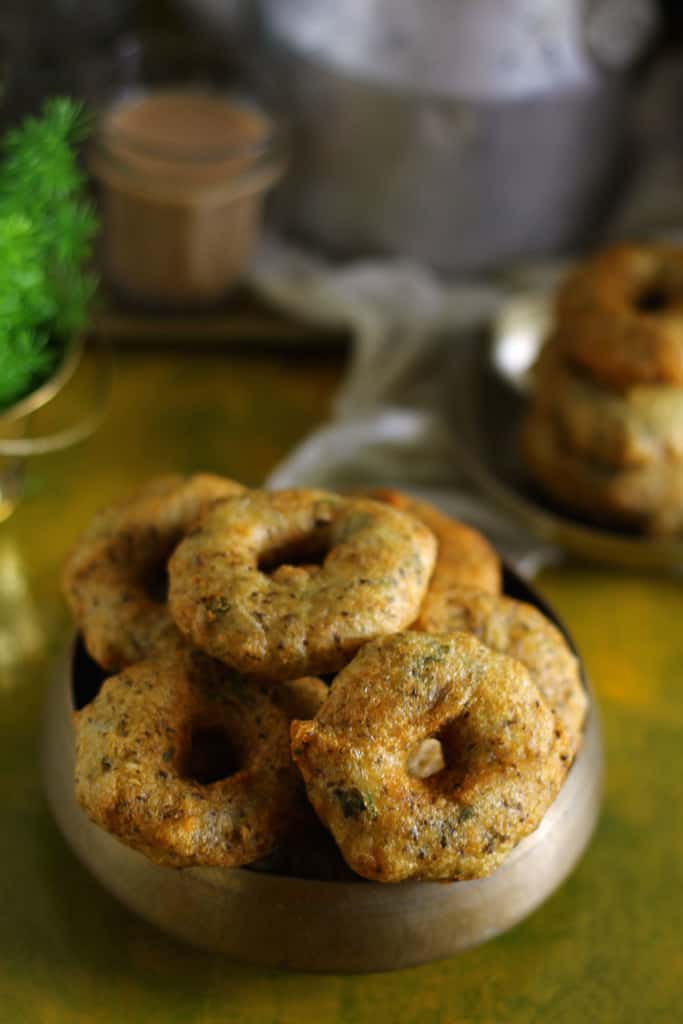
- Deep fry the vada over medium high heat till deep golden, crisp from both the sides.
- Transfer to a plate lined with kitchen towel. Serve Kumaoni Bada warm.
Recipe Notes:
Nutrition
We follow a strict NO SPAM Policy
Kumaoni Bada Recipe (Chilka Urad Dal Vada)
Ingredients
- 1 Cup split black urad dal chilka urad
- ¼ teaspoon asafoetida
- 1 teaspoon turmeric powder
- 1 teaspoon red chili powder
- 1 - 2 green chili fine chopped
- half a bunch of coriander finely chopped
- Mustard oil to deep fry the vadas
- Salt to taste
Instructions
- To make the Kumaoni Bada, rinse and soak dal overnight in enough water or for at-leat 6 hours.
- Next morning you will notice the the black peel of the dal start leaving the white skin underneath.
- Rub the dal in small batches in between your palms to remove the black peel. Each time drain the black peel.
- After 2 - 3 times you will end up with majorly white skinned dal with few black peel here and there.
- Let the dal sit in colander for 10 - 15 minutes for excess water to drain off.
- Now grind the dal in small batches in the mixer. Make sure not to use any water while grinding the dal.
- To get the smooth paste you need to stir the dal few times while grinding. Grind, turn off the mixer, stir and then grind. Repeat the process till you get thick, smooth dal paste.
- Transfer to a clean, large bowl.
- The trick to make crisp, fluffy vada is to whisk the dal till it is light and airy.
- You can whisk the dal using electric hand blender or manually. The traditional way it is done manually. A continuous whisking of 10 - 15 is good enough to incorporate air in the dal.
- Add hing, chopped coriander, green chili, spices and salt in the dal paste. Stir to combine.
- Heat mustard oil in a wide deep frying pan over medium heat.
- To shape the vadas, keep water in a small bowl next to dal paste.
- Soak your fingers of both the hands in water and pinch a lemon size portion of dal paste. Hold it over your one hand fingers and flatten it using the other hand wet fingers.
- Make a hole in the centre of the flattened vada.
- Gently slip it on to the pan of hot oil to deep fry. For safety reasons, it is best to slide the shaped vada from the sides of the pan.
- Deep fry the vada over medium high heat till deep golden, crisp from both the sides.
- Transfer to a plate lined with kitchen towel. Serve Kumaoni Bada warm.
Notes
Nutrition
The layer of cold, freezing winter has engulfed the land. We are hiding away in the cozy cocoon. Once in a while, we are shedding away the covering of blanket and stepping out of the house. The crisp, frosty air turn our cheeks blushing red and tickles the nostrils. Still we stand brave and handpick the fresh produce to refill the empty pantry. The site of bright, shiny vegetables is a bit comforting and cheering in this biting cold weather.
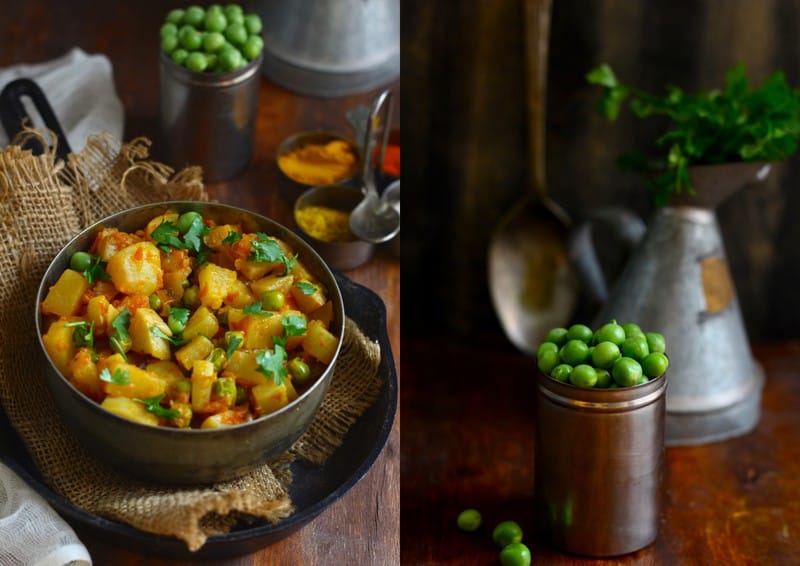
The local farmer’s market is beaming with vibrant colors of winter produce. The delicate rays of sun cast a lustrous coating over the vegetables making them look garden-fresh. From tiny red radishes, green leafy vegetables, long red carrots, peas to purplish turnips we stuffed them all in the carry-bag. Shalgam aur Matar Ki Sabzi is our ode to nature’s bounty during this bitterly cold weather.
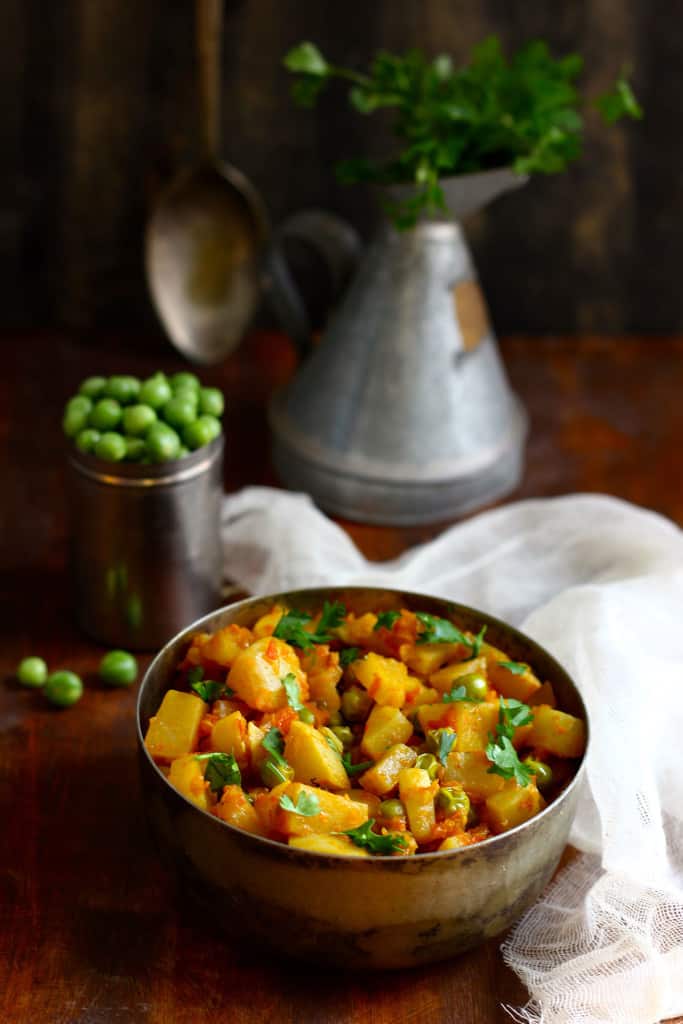
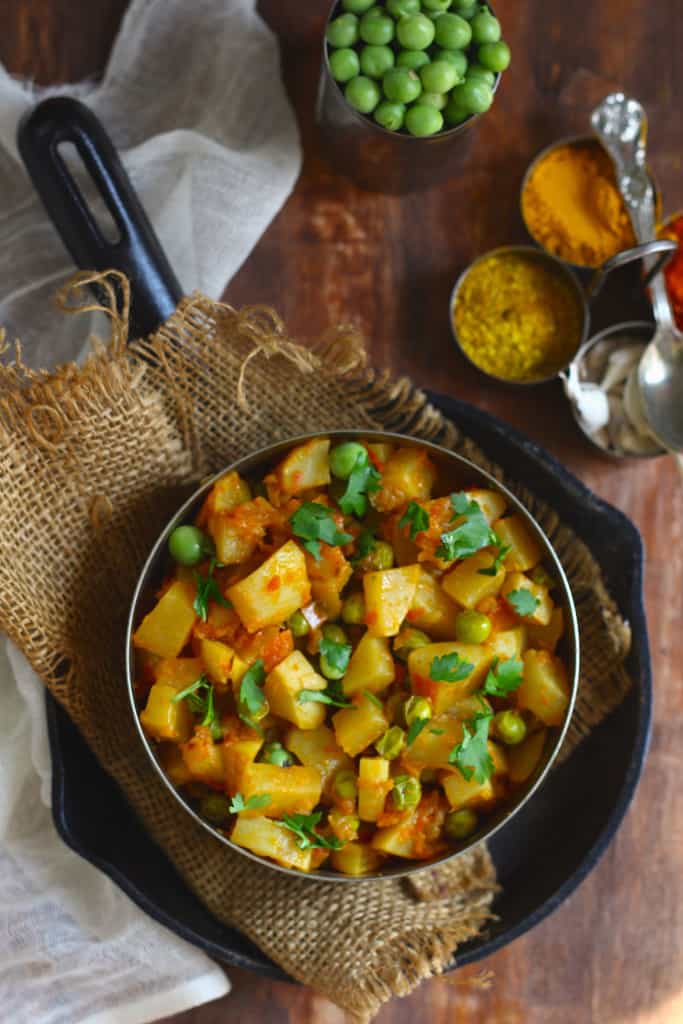
Shalgam aur Matar Ki Sabzi is another Indian curry. The turnip is cooked with fresh green peas in the routine onion and tomato masala . The pressure cooker can also be used to cook the curry. But we have stick to the old school method of slow cooking to make Shalgam aur Matar Ki Sabzi . The turnips absorb the flavour of the spices while simmering. In turn, each bite of turnip turns out succulent and full of bursting flavours. The overpowering spices are kept at bay instead a dash of Garam Masala ( see recipe ) is enough to spice up the flavour of the dish.
Learn how to make Shalgam aur Matar Ki Sabzi in few simple steps:
Ingredients
- ▢ 250 gram turnips
- ▢ 2 large onion chopped
- ▢ 2 to matoes chopped
- ▢ ⅓ Cup green peas
- ▢ an inch piece of ginger
- ▢ 3 - 4 garlic cloves
- ▢ 2 green chillies - chopped
- ▢ 1 teaspoon turmeric powder
- ▢ 1 teaspoon red chili powder
- ▢ 1 teaspoon Garam Masala see recipe
- ▢ 1 teaspoon coriander powder
- ▢ 1 bay leaf
- ▢ 2 tablespoon cooking oil
- ▢ Salt to taste
- ▢ Finely chopped coriander leaves to garnish.
Instructions
- To prepare Shalgam ki Sabzi, first peel the skin of turnips.
- Wash the turnips and pat dry with a clean kitchen towel.
- Chop the turnips into equal size cubes.
- Next make paste of chopped onion, green chili, ginger and garlic in mixer. Use little water to make paste if required. Set aside the paste till required.
- Next make a coarse paste of tomatoes as well.
- Heat the cooking oil in a heavy bottom cooking vessel.
- Add the bay leaf in hot oil and once the aroma of bay leaf is released add the onion paste.
- Fry over medium heat till the paste leaves the sides of the cooking vessel and the raw smell wafts aways.
- By now the onion paste would have changed color to deep brown.
- Now, add the chopped tomatoes, salt, turmeric powder, red chili powder and coriander powder.
- Stir to combine and continue cooking the spice mix on medium-low heat till the mixture comes together and starts leaving sides of the pan. This usually takes 5 - 10 minutes.
- Add the chopped turnips along with the peas and mix to coat the vegetables with the masala.
- Add garam masala and stir to combine.
- Add approximately ¼ Cup of water and stir well.
- Cover the cooking vessel with the lid and cook the turnips over low heat.
- Turnips take a bit longer to get cooked through. In between open the lid, stir the vegetables and check for doneness.
- Once the turnips are cooked through, turn off the heat.
- Garnish with finely chopped coriander leaves.
- Serve Shalgam aur Matar Ki Sabzi warm with Phulka or Paratha.
We follow a strict NO SPAM Policy
