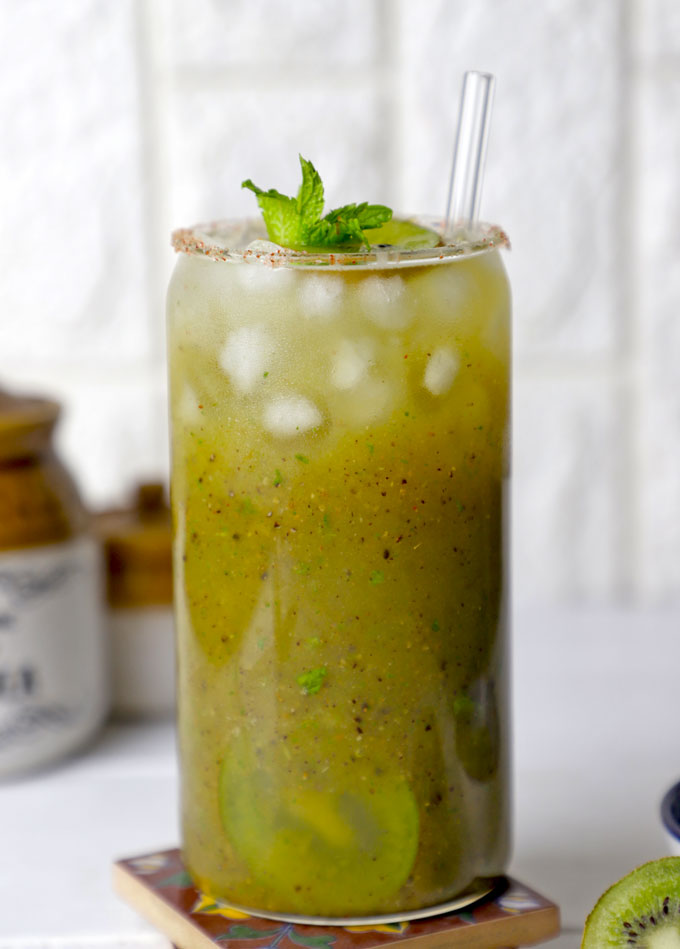
This is a traditional Indian drink panna recipe with roasted kiwi. It is vegan, gluten-free, and an excellent summer cooler.
Estimated reading time: 4 minutes
- Ingredients You’ll Need
- How To Make Kiwi Panna
- Kiwi Panna Recipe
For the country where summers are scorching, clammy and extended till late August, refreshing homemade drinks are a necessity to resist the soaring high heat. There is an eternal comfort in enjoying a glass of homemade sherbet during the summer evening with family.
In India, Aam Ka Panna is a popular summer drink with sweet and sour green mango. The traditional aam panna inspires this Kiwi Panna Recipe.
The plenty of kiwis sitting in our basket and the slow departure of raw mangoes from the fruit vendor stall sparked an idea to churn an Indian-style sherbet out of these Chinese Gooseberries.
Why You’ll LOVE It
- requires only five ingredients
- has minimal jaggery
- gluten and nut free
- dairy free vegan drink
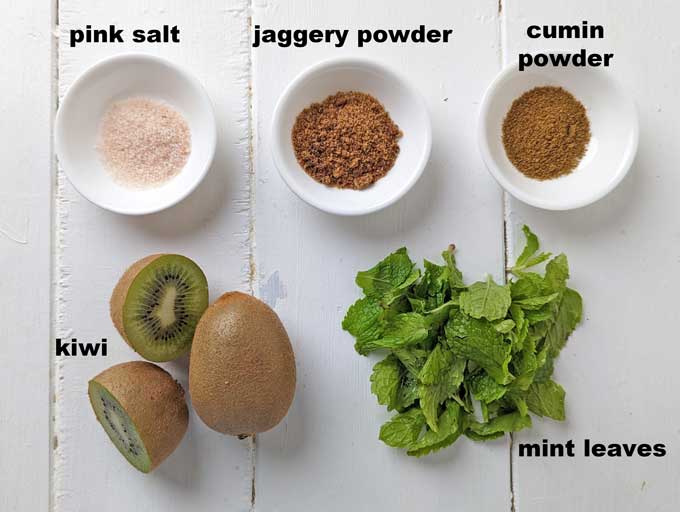
Ingredients You’ll Need
- Kiwi: Use ripe, slightly sweet-tasting kiwi for making this panna recipe.
- Salt: I use Himalayan pink salt for its unique flavour and minerals. You can use any other rock salt or regular cooking salt also.
- Jaggery: Substitute jaggery with brown sugar or white granular sugar.
- Cumin Powder, Water, and Fresh Mint Leaves
How To Make Kiwi Panna
Step 1) Make a cross or an ‘x’ mark using a sharp serrated knife on top of the crown area of each kiwi ( image 1 ).
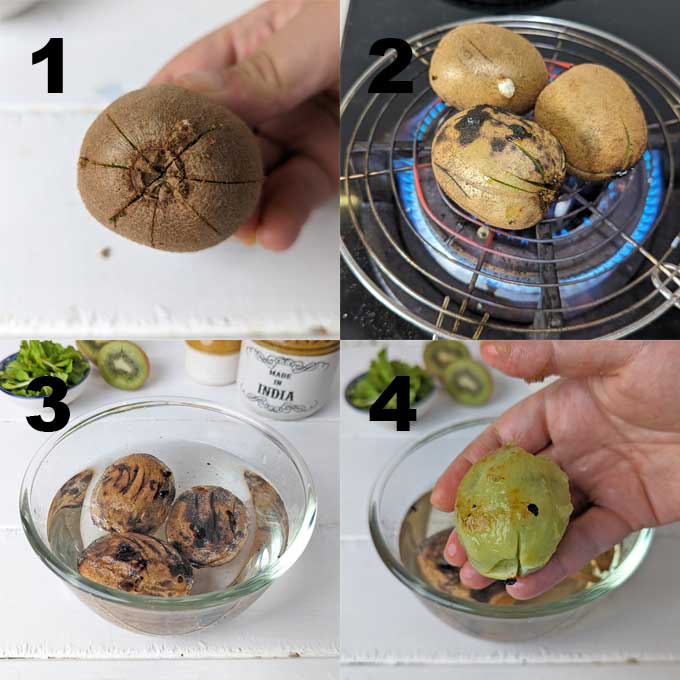
Step 2) To roast the kiwi, keep them directly over the stovetop flame or use a wire mesh. You can roast them on a bbq grill as well. Roast the kiwi until the outer brown skin is charred and black spots appear ( image 2 ). Keep on turning them while roasting.
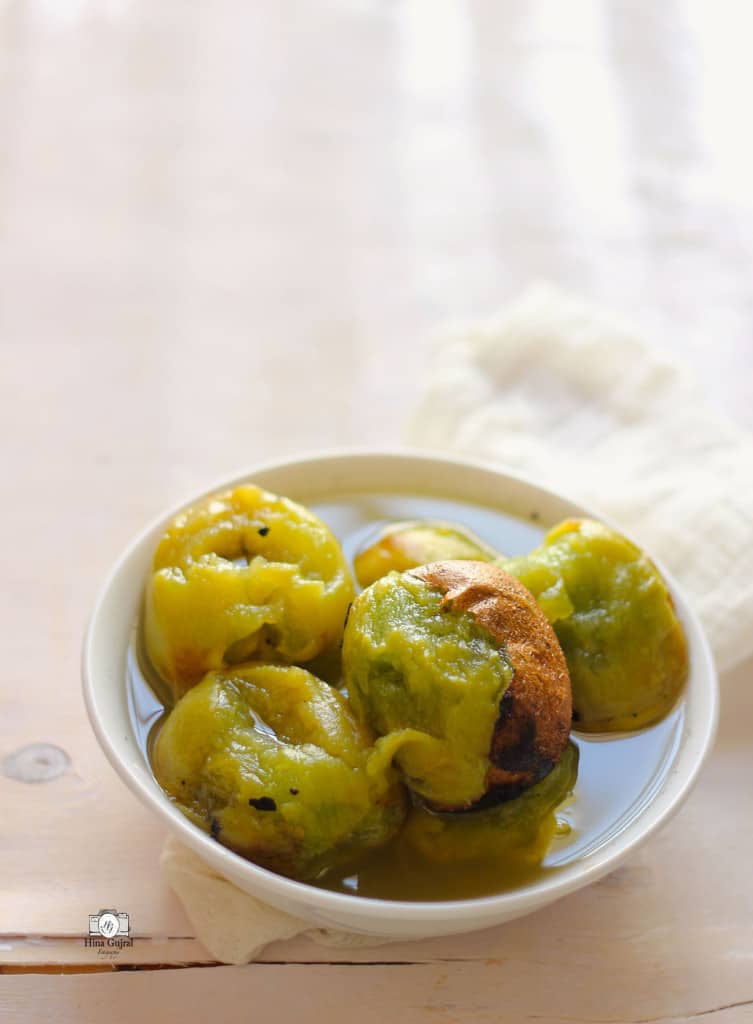
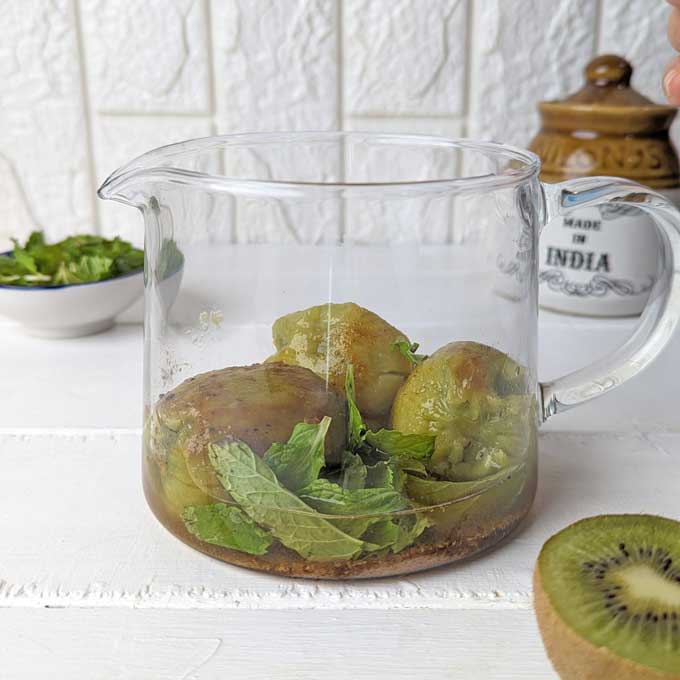
Step 3) Transfer the roasted kiwi to a bowl of cold water ( image 3 ). This step helps to remove the skin of the roasted kiwi easily. Remove and discard the charred skin of each kiwi.
Step 4 ) Add all ingredients (roasted kiwi, salt, cumin powder, jaggery, mint, and water) to a blender jar. Blend to a smooth consistency.
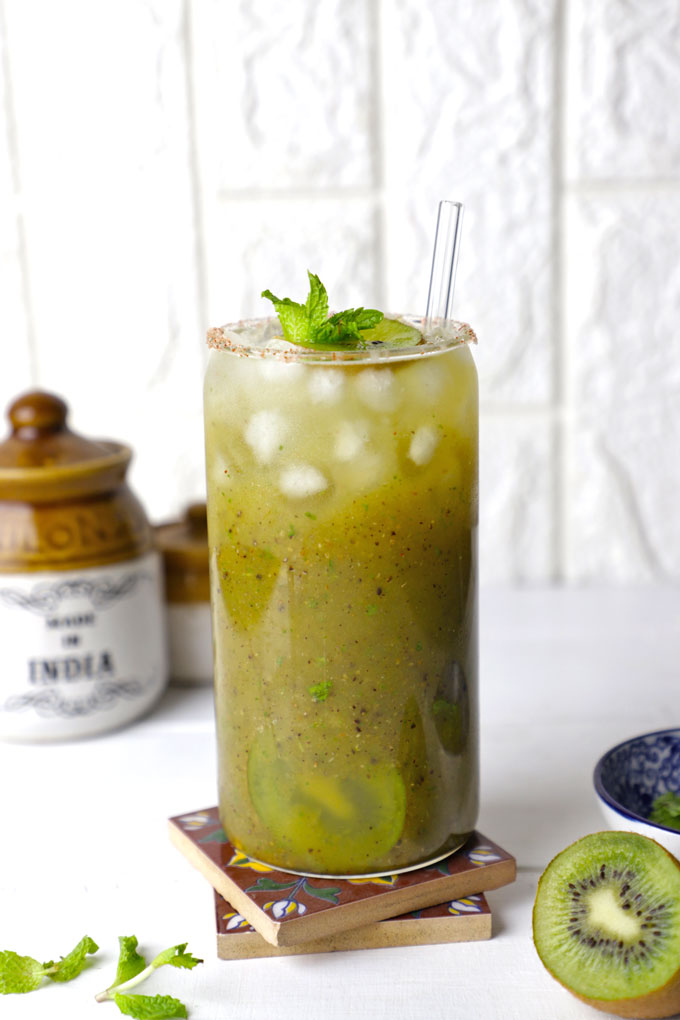
Step 5) Transfer the thick panna concentrate to the serving glass. Add cold water to get the desired drinking consistency, stir to combine, and the kiwi panna is ready to serve.
To serve Kiwi Ka Panna in a serving glass , add ¼ Cup of panna and fill the glass with water. Stir to combine. Add ice cubes. Serve Kiwi Ka Panna chilled.
More Indian Drink Recipes
- Badam Milk
- Mango Lassi
- Sattu Sharbat
- Masala Chaas
- Kesar Thandai
- Sugarcane Juice
- Jamun Lemondade

Ingredients
- ▢ 3 – 4 Kiwi
- ▢ 2 tablespoon brown sugar or jaggery powder
- ▢ 1 teaspoon cumin powder (jeera powder)
- ▢ 1 teaspoon Himalayan Pink Salt
- ▢ ¼ Cup fresh mint leaves
- ▢ ¼ Cup water
Instructions
- Make a cross or an ‘x’ mark using a sharp serrated knife on top of the crown area of each kiwi.
- To roast the kiwi, keep them directly over the stovetop flame or use a wire mesh. You can roast them on a bbq grill as well. Roast the kiwi until the outer brown skin is charred and black spots appear. Keep on turning them while roasting.
- Transfer the roasted kiwi to a bowl of cold water. This step helps to remove the skin of the roasted kiwi easily. Remove and discard the charred skin of each kiwi.
- Add all ingredients (roasted kiwi, salt, cumin powder, jaggery, mint, and water) to a blender jar. Blend to a smooth consistency. Taste, and if required, add more sugar or seasoning.
- Kiwi Panna concentrate is ready.
- To serve Kiwi Ka Panna, in a serving glass, add ¼ Cup of panna and filled the glass with water. Stir to combine. Add ice cubes. Serve Kiwi Ka Panna chilled.
Recipe Notes:
- Do not blend the ingredients for too long, as the heat generated by the blender might make the kiwi taste bitter and turn the colour of the mint leaves black.
- Adjust the amount of sugar per personal taste preference and the tartness of kiwi.
- This recipe yields very thick kiwi panna concentrate, to get the desired drinking consistency add ice cold water.
Nutrition
We follow a strict NO SPAM Policy
Kiwi Panna Recipe
Equipment
- Blender
Ingredients
- 3 - 4 Kiwi
- 2 tablespoon brown sugar or jaggery powder
- 1 teaspoon cumin powder (jeera powder)
- 1 teaspoon Himalayan Pink Salt
- ¼ Cup fresh mint leaves
- ¼ Cup water
Instructions
- Make a cross or an ‘x’ mark using a sharp serrated knife on top of the crown area of each kiwi.
- To roast the kiwi, keep them directly over the stovetop flame or use a wire mesh. You can roast them on a bbq grill as well. Roast the kiwi until the outer brown skin is charred and black spots appear. Keep on turning them while roasting.
- Transfer the roasted kiwi to a bowl of cold water. This step helps to remove the skin of the roasted kiwi easily. Remove and discard the charred skin of each kiwi.
- Add all ingredients (roasted kiwi, salt, cumin powder, jaggery, mint, and water) to a blender jar. Blend to a smooth consistency. Taste, and if required, add more sugar or seasoning.
- Kiwi Panna concentrate is ready.
- To serve Kiwi Ka Panna, in a serving glass, add ¼ Cup of panna and filled the glass with water. Stir to combine. Add ice cubes. Serve Kiwi Ka Panna chilled.
Video
Notes
- Do not blend the ingredients for too long, as the heat generated by the blender might make the kiwi taste bitter and turn the colour of the mint leaves black.
- Adjust the amount of sugar per personal taste preference and the tartness of kiwi.
- This recipe yields very thick kiwi panna concentrate, to get the desired drinking consistency add ice cold water.
Nutrition
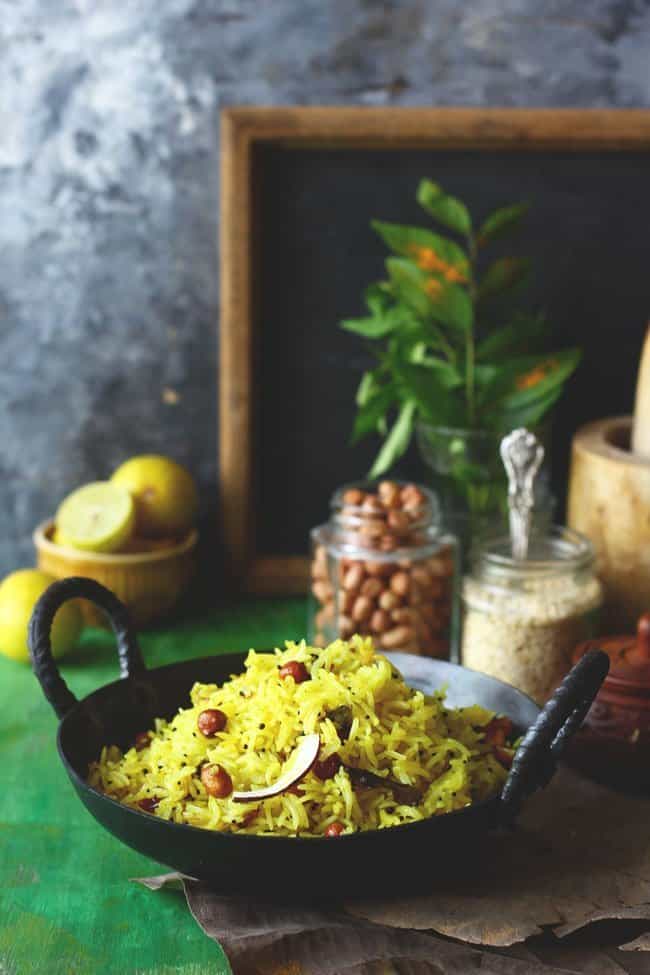
Lemon Rice is the best way to use leftover rice and transform it into a quick summer meal ready in 20 minutes.
Estimated reading time: 2 minutes
- About Lemon Rice
- My Tried and True Tips
- Watch Lemon Rice Video
- Serving Suggestion
- Lemon Rice Recipe
About Lemon Rice
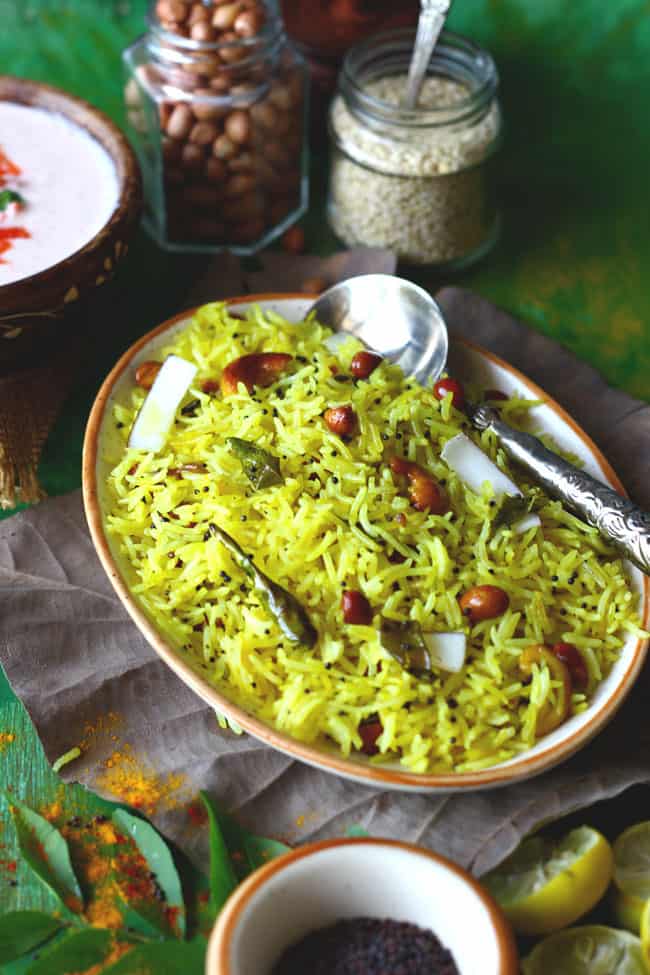
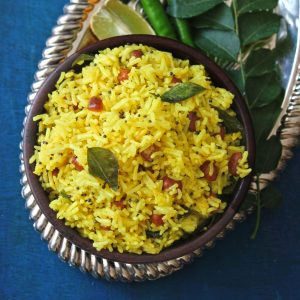
Lemon Rice is a popular South Indian rice recipe. It is also known as chitranna or elumichai sadam. It has the nuttiness of peanuts, the spiciness of chilies, and the bursting tartness of lemon. This chitranna makes all your one-pot meal dreams come true.
We were introduced to this delicious fried rice recipe during our stay in South India. And ever since then, it has been a regular repeat in our weekly meal menu and my husband’s office lunchbox .
Reasons to Bookmark Lemon Rice Recipe
- vegan and gluten-free
- easy to pack and reheat
- requires only 20 minutes
- fuss-free and one-pot dish
- meal-prep and lunchbox friendly
My Tried and True Tips
- The leftover cooked rice sitting in the fridge works best for this fried rice recipe.
- Any medium-short grain white rice is perfect for making lemon rice.
- Many chitranna recipes suggest adding lemon juice in the beginning. However, I prefer stirring the lemon juice towards the end once the rice is ready to serve.
- Talking about the cooking oil used in the making of chitranna. Try to use either ghee, sesame oil, coconut oil, or the traditional gingelly oil. It requires rich, flavoursome oil to enhance the flavour of the ingredients.
Watch Lemon Rice Video
Serving Suggestion
You can serve lemon rice with a bowl of chilled mint raita or masala potato roast . One can serve it with spicy Indian curries, such as chana masala or chicken curry .
More Indian Rice Recipes
- Chana Pulao
- Pudina Pulao
- Coconut Rice
- Vegetable Pulao
- Mushroom Pulao
- Paneer Tikka Pulao
- Curd Rice (Yogurt Rice)
Ingredients
- ▢ 2 Cup cooked white rice
- ▢ ¼ Cup lemon juice
- ▢ Salt to taste
- ▢ 2 teaspoon black mustard seeds (rai)
- ▢ 1 teaspoon dhuli urad dal
- ▢ 2 tablespoon peanuts
- ▢ 1 tablespoon cashew nuts, sliced
- ▢ ¼ teaspoon asafoetida (hing)
- ▢ 2 green chilies, slit
- ▢ 1 sprig of curry leaves
- ▢ Salt to taste
- ▢ 1 teaspoon turmeric powder
- ▢ 2 tablespoon mustard oil/sesame oil/coconut oil
Instructions
- Heat oil in a kadhai over a high flame. Once the oil starts fuming, reduce the heat to low.
- Add mustard seeds and allow to splutter. Next, add urad dal and hing. Fry till dal turn light golden in color.
- Add peanuts, cashews, curry leaves, and green chilies. Fry till cashews turn golden in color. Add turmeric powder, mix and turn off the heat.
- Now add rice, salt, and lemon. Stir to combine. Rice should get coated with the seasoning nicely.
- Cover the pan with the lid and allow the rice to absorb the flavors for 5 – 10 minutes.
- Serve lemon rice warm with chilled raita and roasted potato.
Recipe Notes:
- The leftover cooked rice sitting in the fridge works best for this fried rice recipe.
- Lemon Rice requires strong, flavorsome oil to enhance the flavor of the ingredients.
- You can store lemon rice for a week in the refrigerator. Reheat in a microwave or stir-fry pan before serving.
Nutrition
We follow a strict NO SPAM Policy
