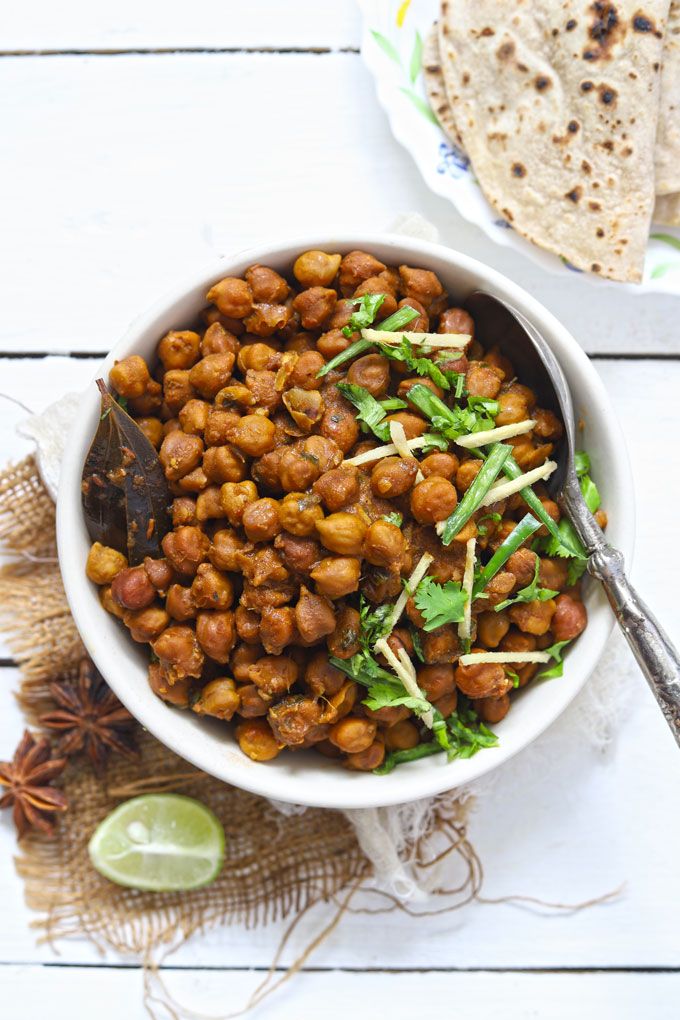
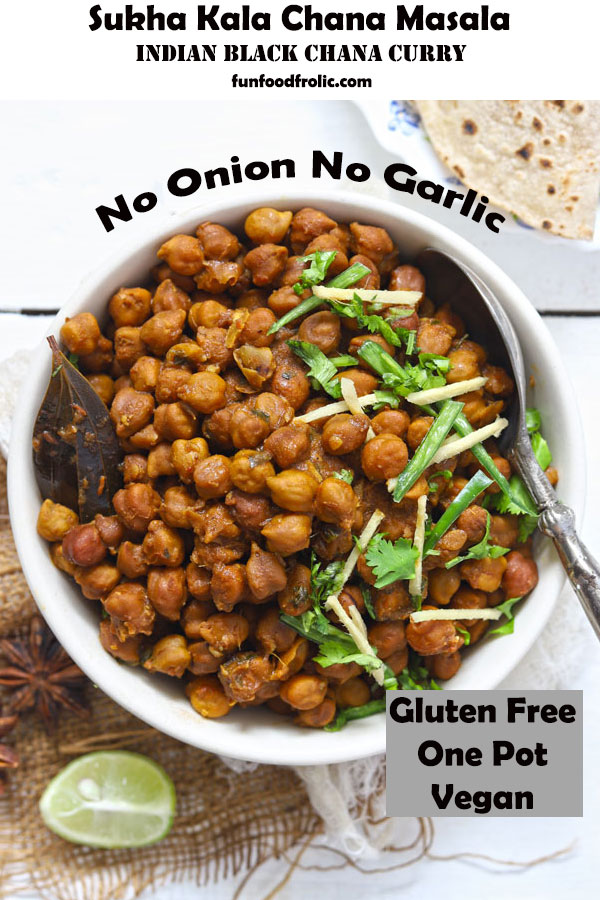
This kala chana recipe is a pressure cooker-friendly one-pot wonder. A spicy, vegetarian Indian curry without onion and garlic.
The Brown Chickpeas
In the Indian subcontinent, the brown chickpeas are commonly used to make curry, kebab, salad , or other snacks. They are commonly known as kala chana. It is a fantastic plant-based vegan protein.
Many communities in India follow a no onion, no garlic diet regime. The reason is mainly religious. Hence, there is a whole section of Indian food recipes without onion and garlic .
This kala chana masala is one such curry recipe that is perfect for festive feasts and does not require onion and garlic.
Reasons To LOVE Kala Chana Masala
- easy to cook
- one-pot wonder
- vegan and gluten-free
- plant-based high protein
- meal-prep and microwave-friendly
Soaking Brown Chana
Like many other legumes and beans, the dry black chana requires a soaking time of 5 – 6 hours before cooking.
The soaking process reduces the cooking time , deactivates anti-nutrients , and improves the amount of magnesium, zinc, and iron you absorb .
I would not recommend cooking dry black chickpeas without soaking. They taste bland and take a hell lot of time to cook.
If you are using canned chickpeas, then this step is not required. Rinse the canned chickpeas nicely and add to the curry masala.
How To Make Chana Curry
I am using a stovetop pressure cooker for this Kala chana recipe. You can follow the same process in an instant pot as well.
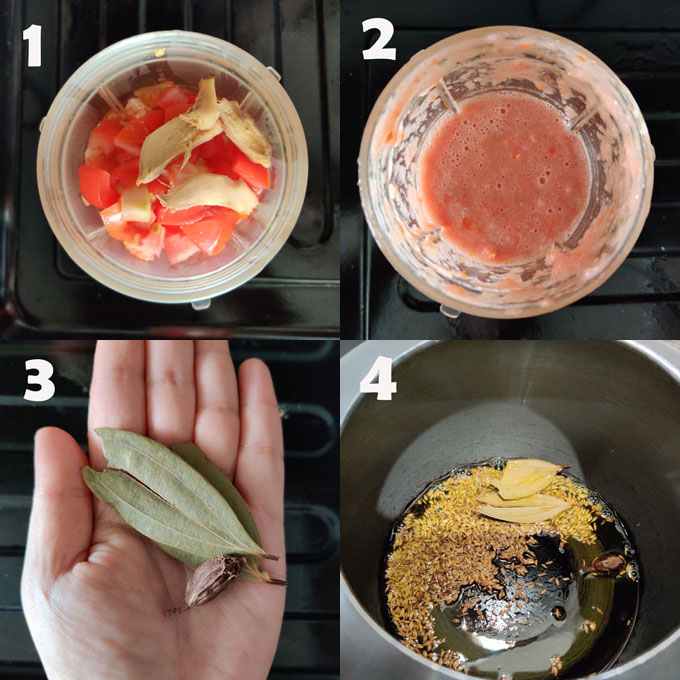
Tomato Paste: Combine ginger, tomato, and green chili to make a smooth paste in a blender ( image 2 ).
The Aromatics: Heat mustard oil in a pressure cooker till it starts smoking. Reduce the heat to low. Add bay leaf, black cardamom, and cumin seeds. Saute for a minute to release the aroma of the spices ( image 4) .
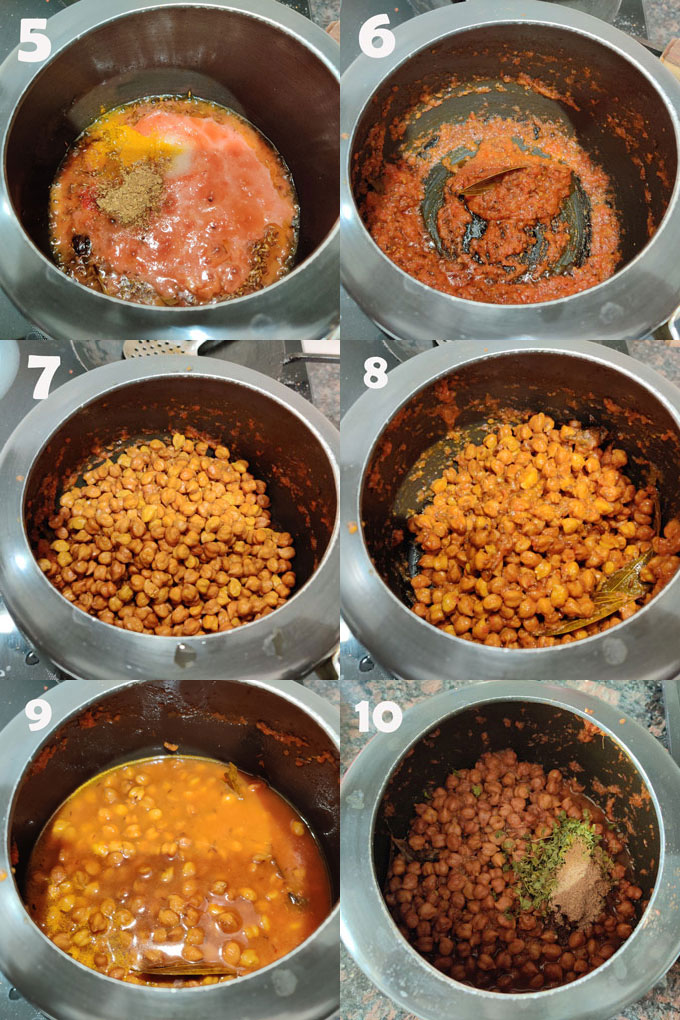
Fry Masala: Add tomato paste made in Step 1 along with salt, red chili powder, turmeric powder, and coriander powder. Fry the masala over low heat till oil separates ( image 6 ).
Soaked Chana: Drain water from the soaked chana. Add them to the pressure cooker. Mix nicely to combine all the ingredients. Fry for a minute.
Pressure Cook: Add 1 – 2 Cups of water. Stir to combine. Close the lid of the pressure cooker. Put the whistle. Cook brown chana over low heat for 15 minutes or 3 – 4 whistles.
Finishing Touch: Once chana masala is cooked, add mango powder, garam masala , and dry fenugreek leaves (kasuri methi). Stir to combine. Cook for a minute.
Garnish with julienned ginger, green chili, and fresh coriander.
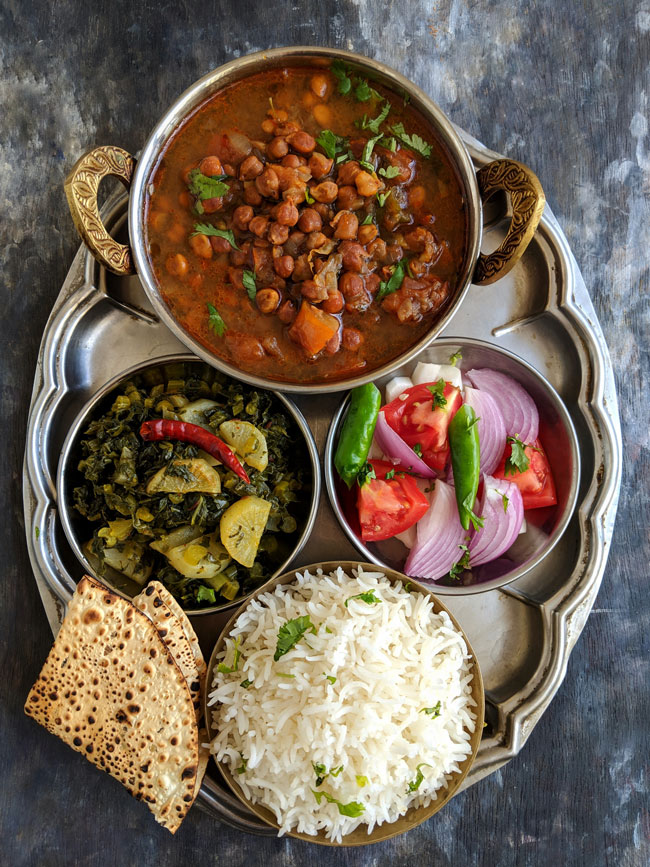
Serving Suggestion
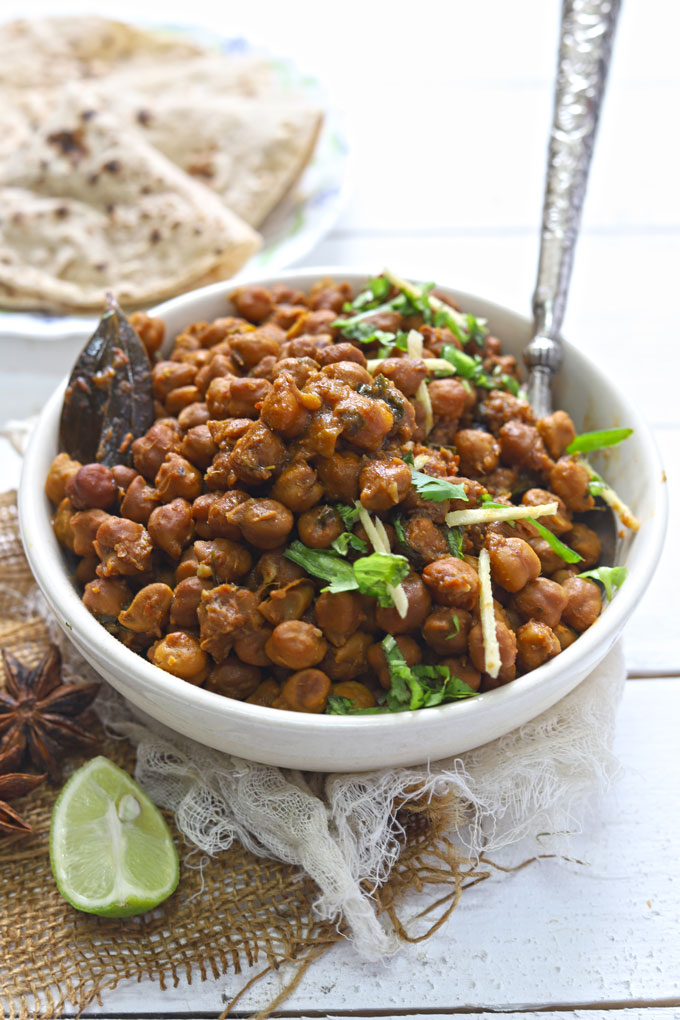
The best way to enjoy kala chana masala is with piping hot chapati, palak poori , atta poori , or paratha.
If you make them with extra gravy or curry, serve them with jeera rice or basmati rice.
For a wholesome gluten-free and vegan meal, you can also serve chana masala with quinoa or bulgar wheat .
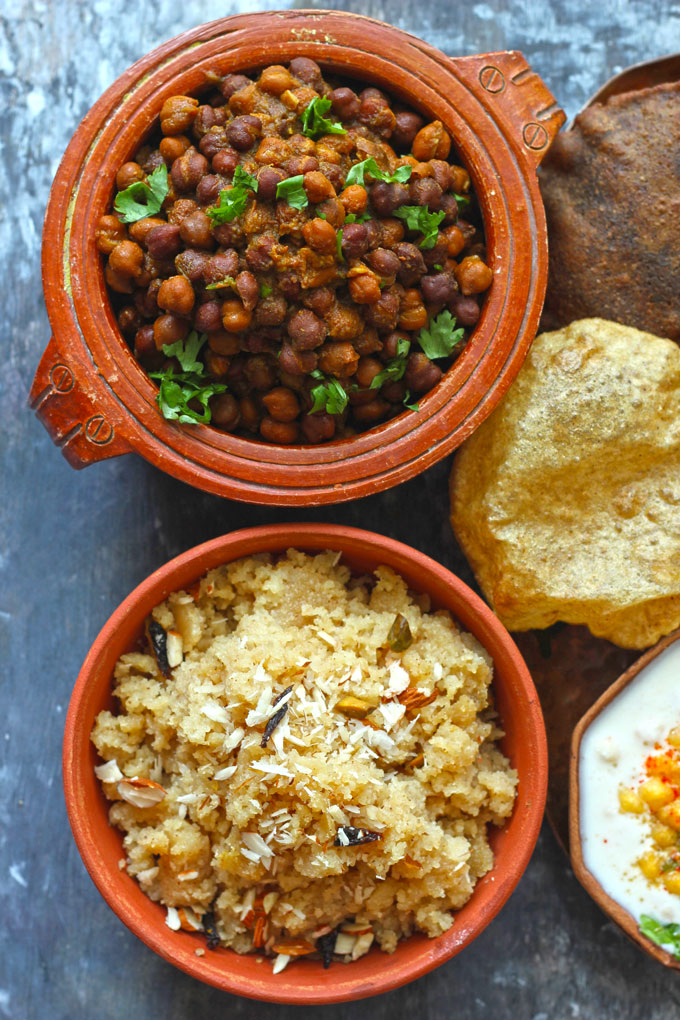
Navratri Prasad Sukha Kala Chana
On the festive occasion of Navratri Pujan or Ram Navmi, the prasad of Halwa , Chana, and Puri is offered to the Goddess Durga.
No onion, garlic, tomato, ginger, green chili, or garam masala is added to the prasad chana.
It is cooked in pure ghee with cumin seeds, turmeric powder, red chili powder, salt, and water. A true Sattvic-style dish.
More Indian Curry Recipes
- Paneer Butter Masala
- Phool Makhana Curry
- Dahi Potato Curry
- Boondi Ki Kadhi
- Chana Masala
- Aloo Ki Sabzi
- Arbi Ki Sabzi
If you try this recipe and love it, please leave a comment and a rating. This helps us grow and reach other food lovers like you.

Ingredients
- ▢ 2 Cup Black Chickpeas (kala chana)
Ingredients To Make Paste:
- ▢ 1 Cup chopped tomato
- ▢ 1 green chili
- ▢ 1 tablespoon chopped ginger
Other Ingredients:
- ▢ ⅛ Cup mustard oil or other cooking oil
- ▢ 1 black cardamom (badi elaichi)
- ▢ 1 bay leaf
- ▢ 1 teaspoon red chilli powder
- ▢ 1 teaspoon turmeric powder
- ▢ 1 teaspoon coriander powder
- ▢ Salt to taste
- ▢ 1 teaspoon Garam Masala ( see recipe )
- ▢ 1 teaspoon dry mango powder (amchur)
- ▢ 1 tablespoon dry fenugreek leaves (kasuri methi)
- ▢ 1 tablespoon chopped fresh coriander
- ▢ 2 Cup water
Instructions
- Clean, rinse, and soak black chana overnight or for 5 – 6 hours in water.
- Meanwhile, make a paste of tomato with ginger and green chili in a blender.
- Heat mustard oil in a pressure cooker till it starts smoking. Reduce the heat to low. Add bay leaf, black cardamom, and cumin seeds, Saute for a minute to release the aroma of the spices
- Once cumin is roasted add tomato paste along with salt, red chili powder, turmeric powder, and coriander powder. Fry the masala over low heat till oil separates.
- Drain water from the soaked chana. Add them to the pressure cooker. Mix nicely to combine all the ingredients. Fry for 1 – 2 minutes.
- Add 1 – 2 Cups of water. Stir to combine. Close the lid of the pressure cooker. Put the whistle. Cook kala chana over low heat for 15 minutes or 3 – 4 whistle. Turn off the heat.
- Let the steam release naturally from the pressure cooker. Check chana for doneness. It should soft and mushy. Taste and add more seasoning if required. Slightly mash the chana with the back of the ladle.
- Add mango powder, garam masala, and dry fenugreek leaves (kasuri methi). Stir to combine. Cook for a minute over the flame. Garnish with coriander, ginger, and green chili.
- Serve Kale Chane warm with poori and raita .
Recipe Notes:
- If channa is soaked, it does not take more than 15 – 20 minutes to get cooked.
- Adjust the quantity of water as per the gravy required. I prefer semi-dry chana masala. Hence, I add only 2 cups of water. If the chana masala seems too thick you can add more water once it is cooked.
- Instead of mustard oil, you can use ghee, refined oil, or coconut oil to cook chana masala.
- This is a moderately spicy chana masala recipe. Hence, adjust the quantity of green chili and spices accordingly.
- You can store the leftover chana masala in the refrigerator for 2 – 3 days. Reheat in a microwave or stovetop before serving.
Nutrition
We follow a strict NO SPAM Policy

Kala Chana Recipe
Equipment
- Pressure Cooker
Ingredients
- 2 Cup Black Chickpeas (kala chana)
Ingredients To Make Paste:
- 1 Cup chopped tomato
- 1 green chili
- 1 tablespoon chopped ginger
Other Ingredients:
- ⅛ Cup mustard oil or other cooking oil
- 1 black cardamom (badi elaichi)
- 1 bay leaf
- 1 teaspoon red chilli powder
- 1 teaspoon turmeric powder
- 1 teaspoon coriander powder
- Salt to taste
- 1 teaspoon Garam Masala ( see recipe )
- 1 teaspoon dry mango powder (amchur)
- 1 tablespoon dry fenugreek leaves (kasuri methi)
- 1 tablespoon chopped fresh coriander
- 2 Cup water
Instructions
- Clean, rinse, and soak black chana overnight or for 5 - 6 hours in water.
- Meanwhile, make a paste of tomato with ginger and green chili in a blender.
- Heat mustard oil in a pressure cooker till it starts smoking. Reduce the heat to low. Add bay leaf, black cardamom, and cumin seeds, Saute for a minute to release the aroma of the spices
- Once cumin is roasted add tomato paste along with salt, red chili powder, turmeric powder, and coriander powder. Fry the masala over low heat till oil separates.
- Drain water from the soaked chana. Add them to the pressure cooker. Mix nicely to combine all the ingredients. Fry for 1 - 2 minutes.
- Add 1 – 2 Cups of water. Stir to combine. Close the lid of the pressure cooker. Put the whistle. Cook kala chana over low heat for 15 minutes or 3 – 4 whistle. Turn off the heat.
- Let the steam release naturally from the pressure cooker. Check chana for doneness. It should soft and mushy. Taste and add more seasoning if required. Slightly mash the chana with the back of the ladle.
- Add mango powder, garam masala, and dry fenugreek leaves (kasuri methi). Stir to combine. Cook for a minute over the flame. Garnish with coriander, ginger, and green chili.
- Serve Kale Chane warm with poori and raita .
Notes
- If channa is soaked, it does not take more than 15 – 20 minutes to get cooked.
- Adjust the quantity of water as per the gravy required. I prefer semi-dry chana masala. Hence, I add only 2 cups of water. If the chana masala seems too thick you can add more water once it is cooked.
- Instead of mustard oil, you can use ghee, refined oil, or coconut oil to cook chana masala.
- This is a moderately spicy chana masala recipe. Hence, adjust the quantity of green chili and spices accordingly.
- You can store the leftover chana masala in the refrigerator for 2 - 3 days. Reheat in a microwave or stovetop before serving.
Nutrition
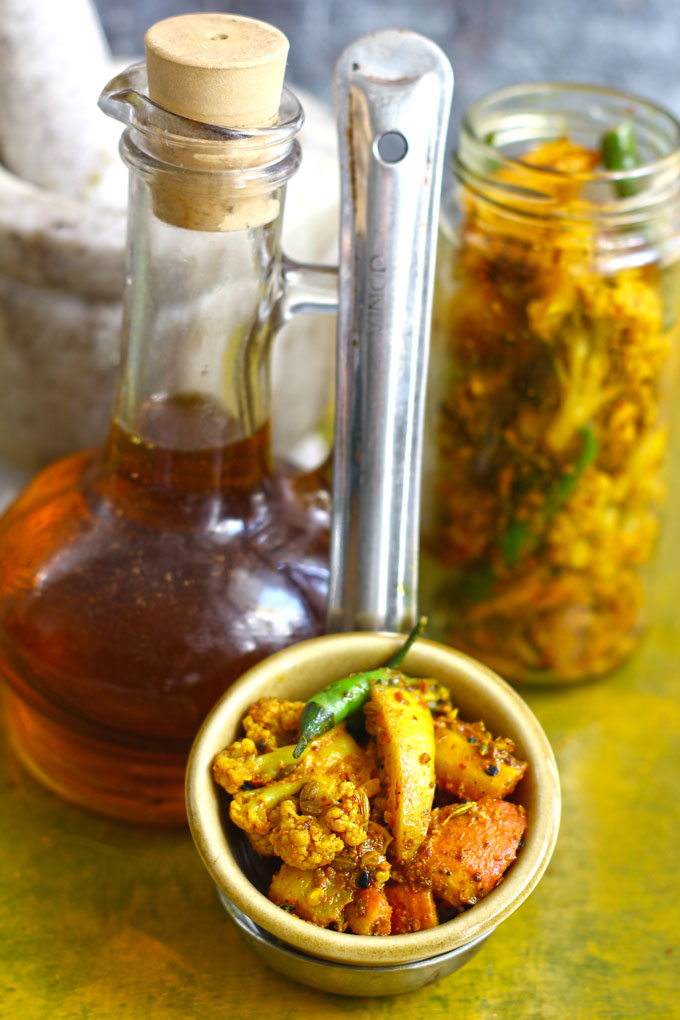
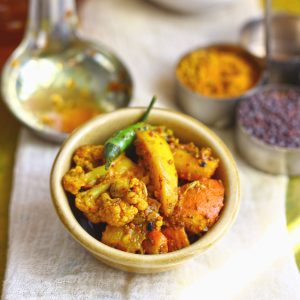
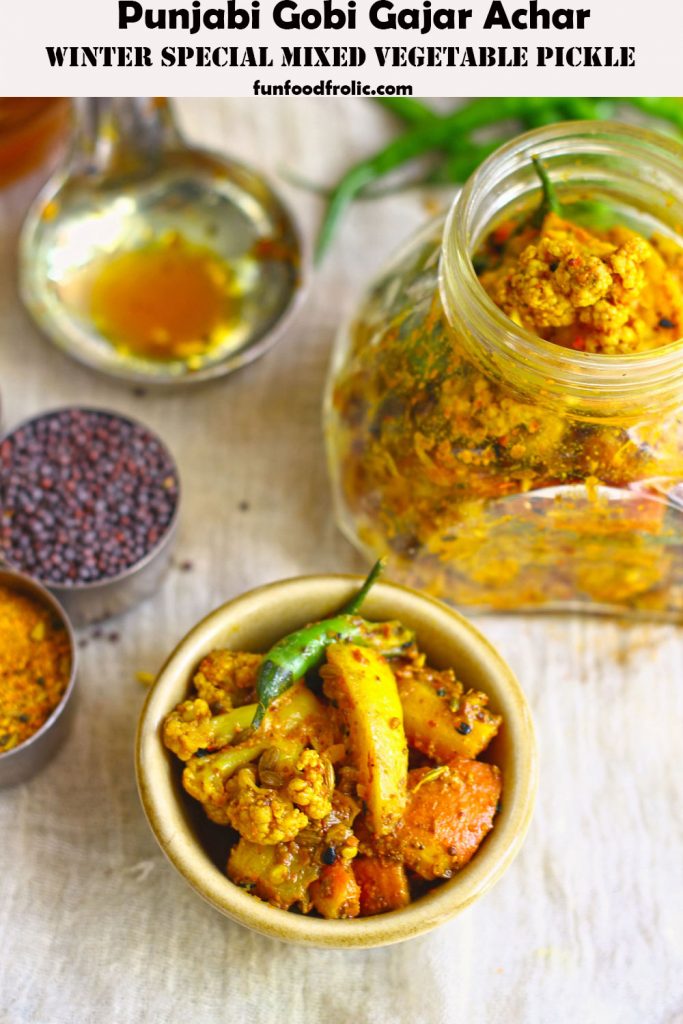
Gobhi Gajar Ka Achar is a seasonal mix vegetable pickle. Here is a tried and tested Punjabi-style vegetable pickle recipe perfect for beginners.
The Pickle Story
In India, pickling is one of the most commonly used techniques to preserve seasonal fruits, vegetables, and berries. We have pickle recipes for every mood and season of the year.
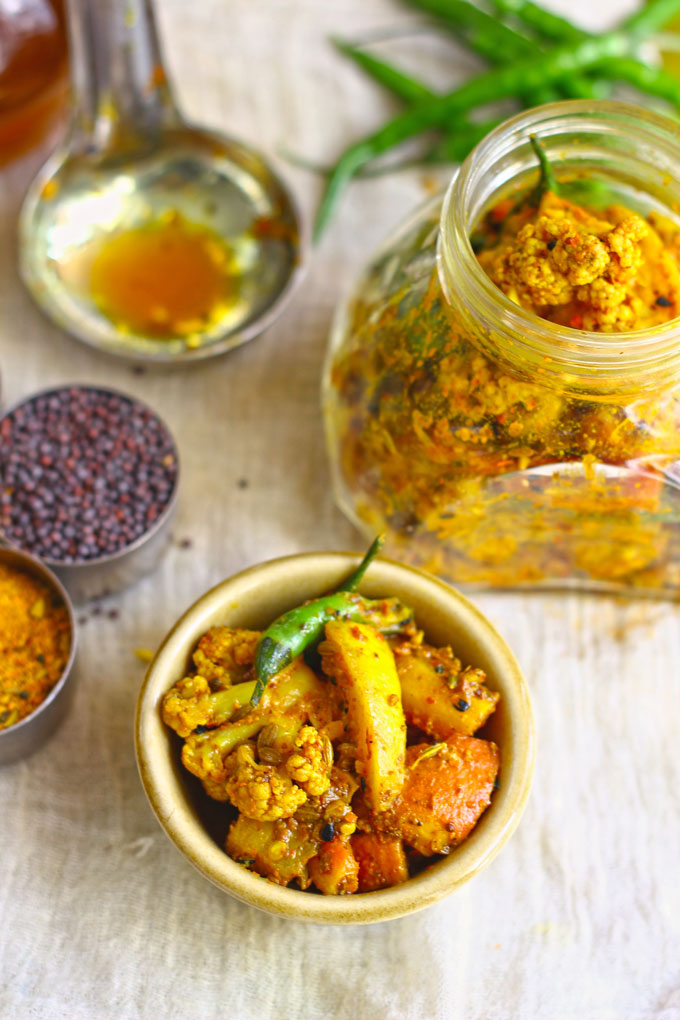
Gobhi Gajar Ka Achar is a popular winter pickle recipe from North India.
Also known as gobi gajar shalgam ka achar. ‘Gobi’ = Cauliflower, ‘Gajar’ = Carrot, ‘Shalgam’ = Turnip . It is a sweet and spicy instant pickle made with colourful winter vegetables – cauliflower, red carrot, turnip, ginger, lemon, and green chillies .
This mixed vegetable pickle is a staple condiment made at every home in Northern India during the winter (November – February). Every family has its own mixed vegetable pickle recipe passed on from generation to generation. This pickle is undoubtedly one of the most delicious ways to relish winter vegetables.
I am sharing with you my mother-in-law’s signature recipe.
It is easy to follow, tried and tested for more than 20 years, and perfect for beginners.
Ingredients Required
You need a few staple ingredients to make gobhi gajar ka achar from scratch at home.
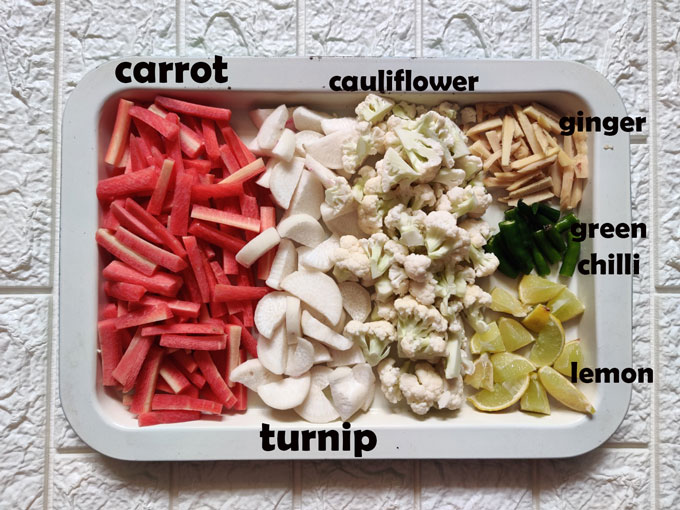
- Vegetables: My family combines cauliflower florets, carrots, turnips, ginger, lemon, and green chilli to make this Punjabi mixed vegetable pickle. Feel free to skip radish or turnip if the aroma and taste are too much for your senses.
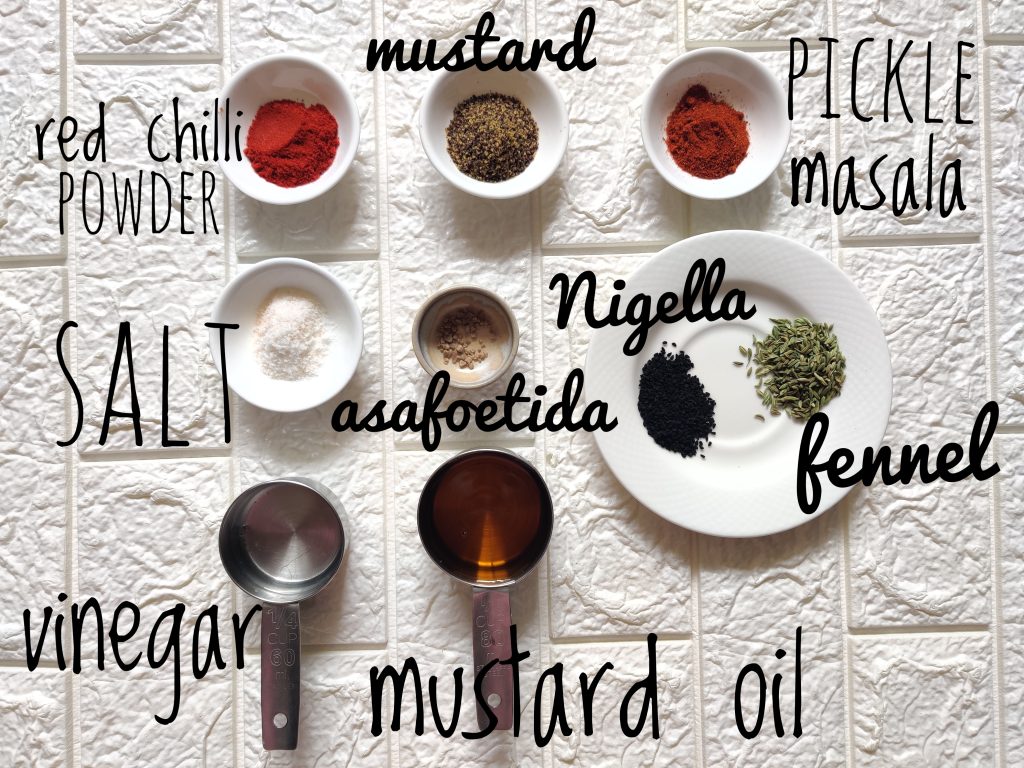
- Mustard Seeds (Rai): The tiny black mustard seeds, also known as rai, are the key flavouring ingredient for gobhi gajar ka achar. Gently crush the seeds using a mortar and pestle.
- Spices: Salt to taste, turmeric powder, red chilli powder, asafoetida (thing), fennel seeds (saunf), and nigella seeds (kalonji/onion seeds).
- Pickle Masala: I add homemade achaar masala to this gobi gajar pickle. It is optional. But makes a lot of difference to the taste of the pickle. You can use readymade or packaged pickle masala as well.
- Mustard Oil : The pungent taste and luscious texture of mustard oil are the soul of Indian pickles. There is no substitute for mustard oil in this gobi gajar achar recipe.
- White Vinegar: It gives a sour taste to the pickle and helps in preservation.
The Pickling Process
It took me a while to understand the sorcery behind making the finger-licking good pickles. But once you get it right, there is no going back to store-bought pickles.
For a novice pickle maker like me the gobhi, gajar ka achaar is one of the simplest pickle recipes to begin the pickling expedition.
Prepare Vegetables: Clean, wash, pat dry, and cut the vegetables.
Blanching: Boil water in a deep saucepan; add turmeric and salt to the boiling water. First, add the cauliflower florets to the boiling water and blanch for 2 minutes or till tender (al-dente). Transfer to a colander.
Similarly, blanch the carrots and turnip for 2 minutes each, drain, and transfer to the same colander as the cauliflower ( image 3 ). Make sure not to overcook the vegetables while blanching.
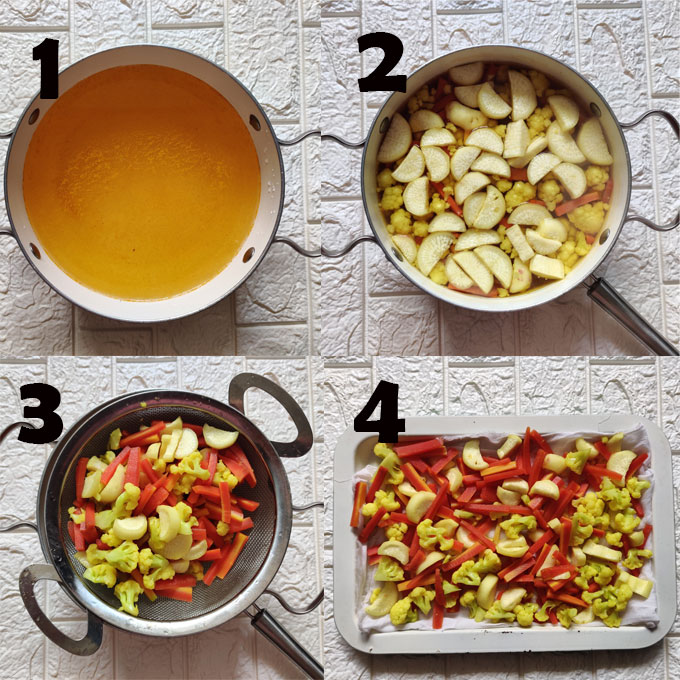
Dehydrating: Spread all the blanched vegetables on a large/clean/dry baking sheet or tray lined with a cheesecloth/ muslin cloth. Sundry or air dry the vegetables. I put them under the fan at high speed for 2 hours. Gently turn the vegetables after 1 hour for even drying.

Make Masala: Gently pound the mustard seeds in a stone mortar and pestle. Or pulse mustard seeds once in a spice grinder to make a coarse powder. Transfer to a bowl and keep aside.
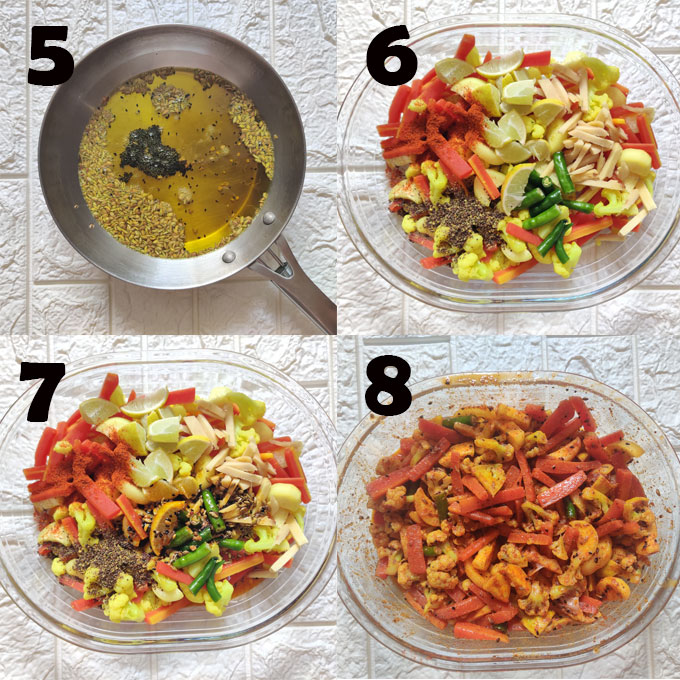
Tempering Oil: Heat mustard oil in a pan over a high flame. Once the oil starts fuming, turn off the heat. Add asafoetida, fennel seeds, and nigella seeds. Once the seeds start spluttering, keep the oil aside to cool down completely. (image 5)
Pickling: After dehydrating the vegetables transfer them to a wide mixing bowl. Add ginger juliennes, sliced green chilli, sliced lemon (discard seeds and white pith), crushed mustard seeds, salt, and pickle masala, and mix nicely ( images 6 & 7 ) .
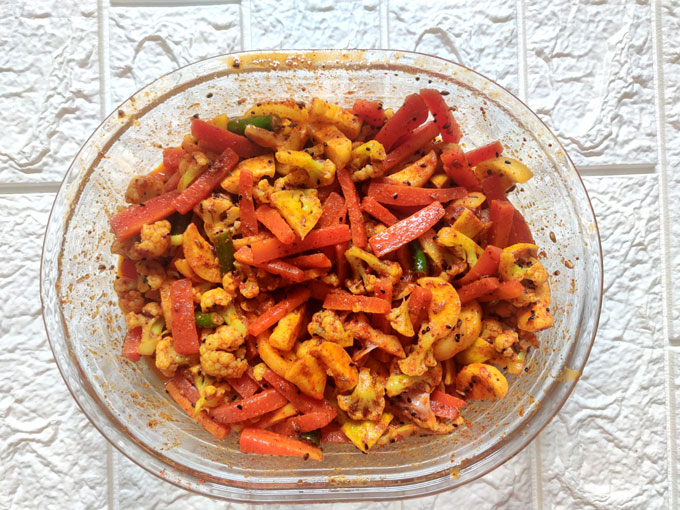
Pour tempered mustard oil, and white vinegar, and mix the pickle using a spoon or cooking gloves to mix the pickle. Taste the pickle for seasoning; if required add more spices/seasoning according to taste, and mix one more time nicely. (image 8)
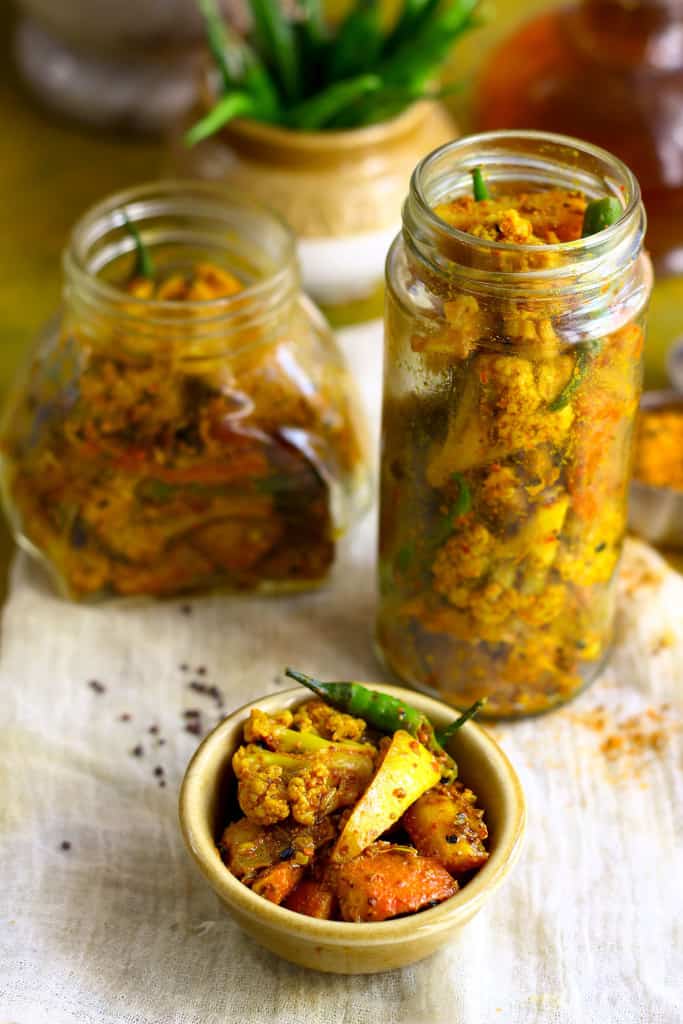
Take a clean, dry, sterilized jar and transfer gobhi gajar ka achar into the jar. Seal the jar with a tight-fitting lid.
Allow the pickle jar to sit at room temperature or under direct sun for 2 days . Shake the jar once or twice a day.
Gobhi Gajar Achar is ready to be served. This pickle stays good at room temperature for 10 – 15 days.
My Tried & True Tips
The freshest vegetables are the best for making pickles. Try to use the crisp, freshest available vegetables to make the pickle rather than the stale, spotted ones.
Blanch the vegetables and do not cook. The vegetables need to have a crunch to them. Mushy and overcooked vegetables are a BIG NO for making this pickle.
Dehydrating or drying vegetables is highly important for this pickle recipe. They should not be slimy or wet while making the pickle.
Safeguard it from all kinds of moisture, whether it is a wet spoon, water splashes, or a humid climate. Once the pickle comes in contact with water content, it will develop fungus.
Shelf life of this pickle is not more than 15 – 20 days , unlike other Indian pickles. Hence, it is best to make it in small batches to consume quickly.
Storage Suggestion
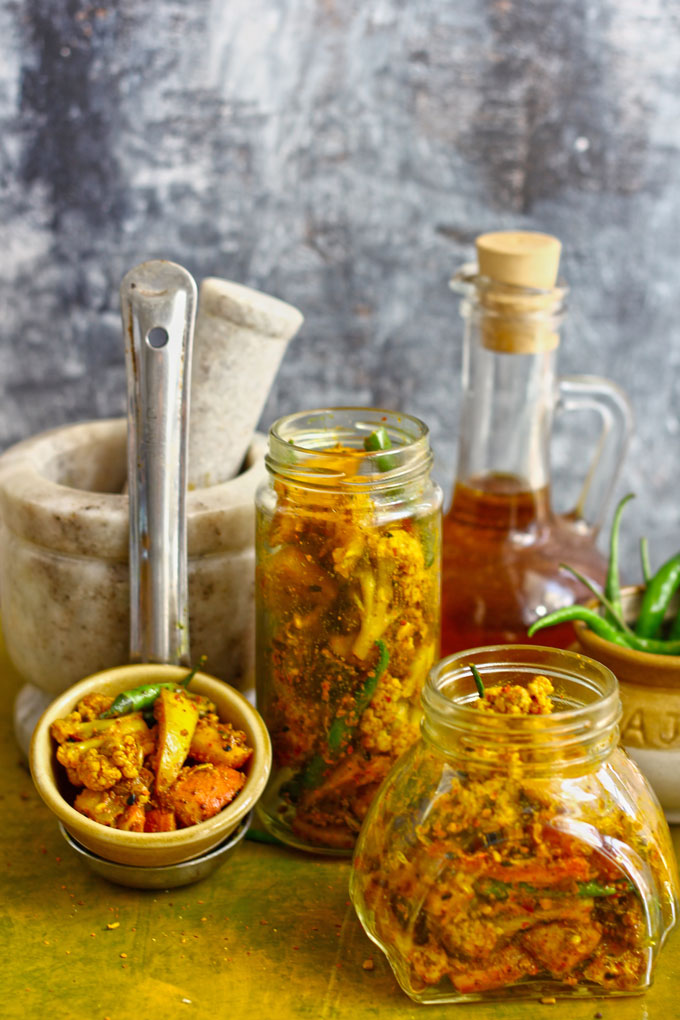
It is always best to use a clean, sterilized glass or ceramic jar with a tight-fitting lid to store pickles.
Store gobhi gajar ka achar at room temperature for 15 – 20 days . Or you can keep it in the refrigerator to increase its shelf life.
Use a clean, dry spoon to scoop out the pickle. If you are lucky enough to get a warm, bright winter sun, keep the pickle jar in the sun.
Bring it inside after 3 – 4 hours of sunlight. Remove the lid and cover the opening of the jar with a muslin/cheesecloth to avoid dirt/moisture infiltration.
Repeat this practice once a week to increase the shelf life of the pickle.
Serving Suggestion
With piping hot, flaky methi paratha , paneer paratha , palak puri , cheese puri , or regular atta puri , this gobi gajar ka achaar is an inviting combination.
You can serve this mixed vegetable pickle with dal & rice, khichdi , or any other comforting Indian meal .
More Indian Pickle Recipes
- Instant Green Chili Pickle
- Punjabi Mango Pickle
- Instant Mango Pickle
- Instant Ginger Pickle
- Lal Mirch Ka Achar
- Garlic Pickle
If you try this recipe and love it, please leave a comment and a rating. This helps us grow and reach other food lovers like you.
Ingredients
- ▢ 130 gram cauliflower florets (approx half cauliflower)
- ▢ 190 gram carrot, cut into sticks (approx 3 medium size carrots)
- ▢ 75 gram turnip, peeled and diced (approx 2 small size turnip)
- ▢ 4 green chili, cut into ½ inch pieces (medium spicy to hot)
- ▢ 20 gram ginger, peeled and julienned
- ▢ 1 lemon, cut into pieces (discard seeds and white pith)
- ▢ 8 Cups water
- ▢ 1 teaspoon salt
- ▢ 1 teaspoon turmeric powder
Ingredients For Masala:
- ▢ ⅔ Cup mustard oil
- ▢ 1 teaspoon fennel seeds (saunf)
- ▢ 1 teaspoon nigella seeds ( kalonji)
- ▢ ¼ teaspoon asafoetida (hing)
- ▢ 1 teaspoon black mustard seeds (choti rai), crushed
- ▢ 2 teaspoon red chilli powder
- ▢ 2 teaspoon achar masala (pickle masala powder) see recipe
- ▢ 2 teaspoon salt
- ▢ ⅛ Cup white vinegar
Instructions
- Clean, wash, pat dry, and cut the vegetables.
- Boil water in a deep sauceppan, add turmeric and salt to the boiling water.
- First, add the cauliflower florets in the boiling water and blanch for 2 minutes or till tender (al-dente). Transfer to a colander. Similarly, blanch the carrots and turnip till al dente, drain, and transfer to the same colander as cauliflower. Make sure not to cook the vegetables while blanching.
- Spread all the blanched vegetables on a large/clean/dry baking sheet or tray lined with a cheesecloth/ muslin cloth. Sundry or air dry the vegetables. I put them under the fan at high speed for 2 hours.
- After drying, excess moisture will evaporate from the vegetables and they will be dehydrated.
- Meanwhile gently pound the mustard seeds in a stone mortar and pestle. You can do the same in a spice grinder as well. Pulse mustard seeds once in the grinder. Collect in a bowl and set aside.
- Heat mustard oil in a pan over a high flame. Once the oil starts fuming, turn off the heat. Add asafoetida, fennel seeds, and nigella seeds. Stir to mix. Allow the tempered oil to cool down completely.
- After dehydrating the vegetables transfer them to a wide mixing bowl. Add ginger juliennes, sliced green chili, sliced lemon (discard seeds and white pith), crushed mustard seeds, salt, pickle masala, and mix nicely.
- Pour tempered mustard oil, white vinegar, and mix the pickle using a spoon or wear cooking gloves to mix the pickle. Taste the pickle for seasoning, if required add more spices/seasoning according to taste, and mix one more time nicely.
- Take a clean, dry jar and transfer the pickled vegetables into the jar. Seal the jar with a tight fitting lid.
- Allow the pickle jar to sit at room temperature for 2 days. You can also keep the jar under the direct sun rays for a day or two. Shake the jar once or twice a day.
- Gobhi Gajar Ka Achaar is ready to be served. This pickle stays good at room temperature for 10 – 15 days.
Recipe Notes:
- Try to use the crisp, and the freshest available vegetables for making the pickle rather than the stale, spotted ones.
- After dehydrating the weight of the vegetables is reduced. hence, you will get an exact 250 gram of pickle with the quantity of the ingredients suggested in the recipe above.
- At every stage, taste the pickle to adjust the seasoning and spices accordingly. Do not worry it is not harmful.
- Make sure to use the tiny mustard seeds or the yellow mustard seeds (sarson) for this pickle recipe.
Nutrition
We follow a strict NO SPAM Policy
