Here is my tried and tested Indian Jalebi recipe without using yeast. These homemade jalebis will remain crisp for hours and taste delicious.
Estimated reading time: 6 minutes
- About Jalebi
- My Jalebi Obsession
- Watch Jalebi Video
- My Tried and True Tips
- Serving Suggestion
- Storing and Reheating
- Jalebi Recipe
Looking for more festive recipes? Try my 50+ Traditional Diwali Recipe Ideas , or if you are a paneer lover, 15 Best Paneer Recipes for Diwali . We have 10 Indian thali festive thali meals that will make your Diwali feast one of the best.
About Jalebi
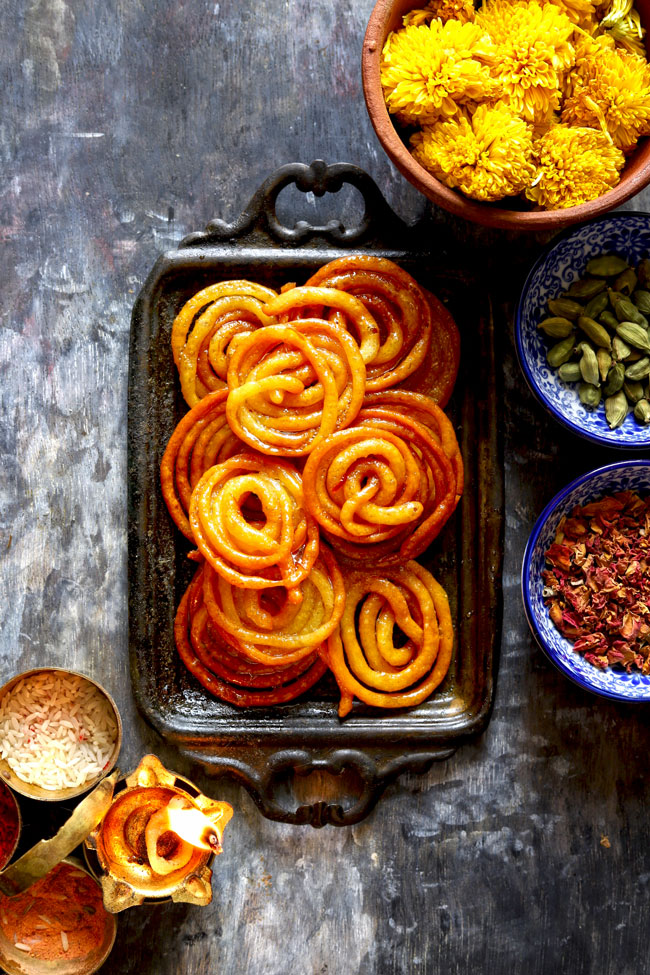
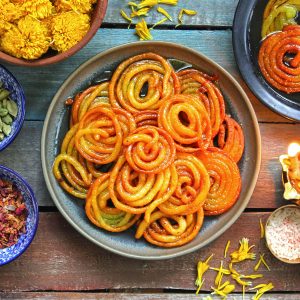
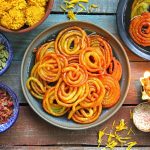
Jalebi – the deep-fried pretzel-like sweet from India, is well-celebrated among food lovers. Across the Indian sub-continent, it is readily available at sweet shops, restaurants, and street carts. The moment Jalebi batter touches the hot oil, it starts taking whimsical shapes as if it has a mind of its own.
The pair of hands seasoned with years of practice could only master the tactful technique of shaping a perfect Jalebi.
The man sitting beside the wide and flat skillet filled with oil, the batter filled in a muslin cloth, moves his wrist like a magic wand in a rhythmic motion over the kadhai, and voila, there you have Jalebi ready. It is always absorbing to watch the halwai make Jalebis.

My Jalebi Obsession
My obsession with Jalebi Recipe unfolded two years back. It took me two years to bring the perfect recipe to the blog. The task of disciplining Jalebi batter on a pan filled with piping hot oil is no less than taming a dragon.
Finally, we have a failproof jalebi recipe after many trials and errors.
Reasons To LOVE This Jalebi Recipe
- easy to follow
- requires minimal ingredients
- always yield crisp and tasty jalebi
- no yeast is used to ferment the batter
Watch Jalebi Video
My Tried and True Tips
Sharing with you a few notes scribbled in my recipe journal after each trial.
- Jalebi Batter: You need only 6 ingredients – maida (all-purpose flour), corn starch, curd, baking powder, ghee, and a pinch of turmeric. The batter comes together in 5 minutes. The batter should be thick with a dropping consistency, a little thicker than the idli dosa batter.
- Sour Curd: Use only sour curd to mix the batter, no milk. If required, use a tablespoon or so of lukewarm water.
- Fermentation: Inside the oven or microwave are my pet spots to keep the batter for fermentation. During the summer or humid season, the jalebi batter gets fermented in 6 – 8 hours, but it might give you a heart wreck during the cold season. Wrap the bowl containing batter with a woolen piece of cloth and then keep it for fermenting, it may sound funny but this trick really works.
Jalebi Shape: To shape the Jalebi, you can either use the piping bag, plastic squeeze bottle, or a muslin cloth. Initially, it is best to make small-size Jalebi with one or two concentric circles.
- To test the batter and perfect the wrist movement, try making a few jalebis on a plate or kitchen counter.
- Don’t get intimidated by the idea of creating a perfectly shaped Jalebi.
Sugar Syrup: For soaking the jalebi, we need a thick and one-string consistency of sugar syrup.
To test the sugar syrup , take a spoonful of it and try to check it in between your thumb and index finger. If the syrup sticks to your fingers and forms one string when pulled apart, it is ready for jalebi.
- The sugar syrup should be hot while soaking the jalebi.
- It can be flavoured with saffron, green cardamom powder, kewra, or rose water.
Frying Jalebi: While deep-frying the Jalebi, keep on moderating the heat. Jalebi gets the desired colour and crispness when deep-fried at the right temperature.
- The fuming hot oil might result in a burnt and disoriented Jalebi. Also, do not flip the jalebi again and again while frying. Let them get crisp and light brown from one side, then flip and cook from the other side.
- Traditionally ghee (clarified butter) is used for frying jalebi. But I always prefer flavourless refined oil for frying the jalebi, and the taste is truly delicious.
Soaking Jalebi: After frying, transfer jalebi to a metal colander for 5 – 10 seconds. This step ensures the removal of excess oil from the fried jalebi. Next, soak the fried jalebi in the warm sugar syrup. The jalebi and sugar syrup should be warm, not lukewarm or at room temperature. Let the jalebi sit in the sugar syrup for 5 – 10 minutes to absorb the syrup.
Serving Suggestion
A jalebi is best-served piping hot after soaking in the sugar syrup. It is crisp, warm, and tastes best. Many food lovers enjoy crisp and hot jalebi with chilled rabri, phirni , or plain curd .
In North India, jalebi is served for a hearty breakfast with poha or kachori .
Storing and Reheating
As I said earlier, Jalebi is best served piping hot.
After a few hours at room temperature, it starts turning soft and loses its crunch. I would not recommend storing it in the refrigerator for many days. However, you can store the batter in the refrigerator and make jalebi whenever you like.
For reheating the jalebi, I prefer using the air-fryer or crispy lid of the Instant Pot . Within 5 minutes, they both make jalebi crisp and hot.
More Indian Sweet Recipes for festive season
- Gujiya
- Mawa Barfi
- Carrot Halwa
- Besan Ladoo
- Coconut Laddo
- Sattu Ke Laddu
- Khoya Gulab Jamun
Ingredients
Ingredients For Batter:
- ▢ 1 Cup maida (all-purpose flour)
- ▢ 2 tablespoon corn flour (starch)
- ▢ ½ teaspoon baking powder
- ▢ 1 Cup sour curd
- ▢ 2 tablespoon ghee (clarified butter)
- ▢ ¼ teaspoon turmeric powder for color
Ingredients For Sugar Syrup:
- ▢ 2 Cup granulated white sugar
- ▢ 2 Cup water
- ▢ ¼ teaspoon saffron
Instructions
Jalebi Batter:
- To make the Jalebi batter, combine together the maida, cornflour, baking powder, turmeric in a bowl.
- Add ghee and curd to the dry ingredients. Mix nicely to make a thick batter. Whisk the batter nicely for 5 – 10 minutes either with a wire whisk or using an electric hand mixer.
- The consistency of the batter should be thick and not watery, a little thicker than dosa batter. You should be able to make a shape using a piping bag.
- Cover the jalebi batter and place it in a warm place for 24 hours or at least 8 – 10 hours, till it is fermented, the batter will rise once fermented.
- Once the batter is fermented stir the batter in a cut and folds motion to combine it once again. Make sure not to whisk it for too long once it is fermented.
Sugar Syrup:
- To make the sugar syrup, boil the sugar with water and saffron strands in a wide pan on medium heat until the sugar dissolves. When the syrup becomes thick and of one string consistency. Turn off the heat and keep aside. But make sure the syrup is hot while soaking the jalebi.
Frying Jalebi:
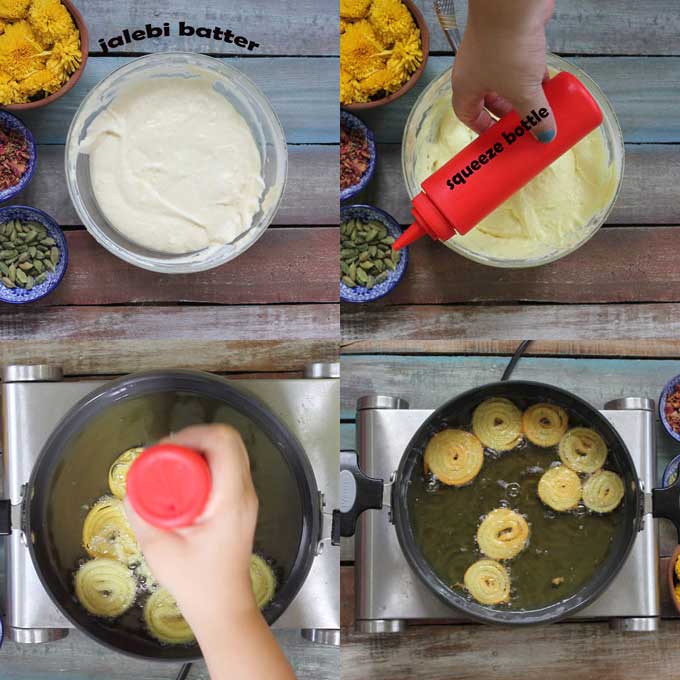
- Now to make the jalebis preheat the oil in a wide heavy-bottomed pan for deep frying. To check whether the oil is hot enough for deep frying the Jalebi, drop a teaspoon of batter in oil and if it comes floating to the top almost immediately, the oil is ready for frying.
- Meanwhile fill the plastic squeeze bottle with the batter. Tap to remove air. Test the batter by making few jalebis on a plate. Next, pipe spirals or concentric circles of the batter onto the hot oil. Fry the jalebi on low-medium heat until golden brown in color and crisp.
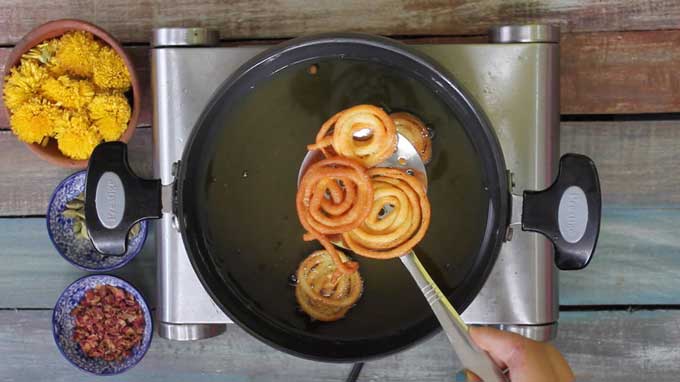
- Once the jalebi is crisp and browned, transfer to a metal colander to drain the excess oil. Let it sit for 5 – 10 seconds.
Soaking Jalebi:
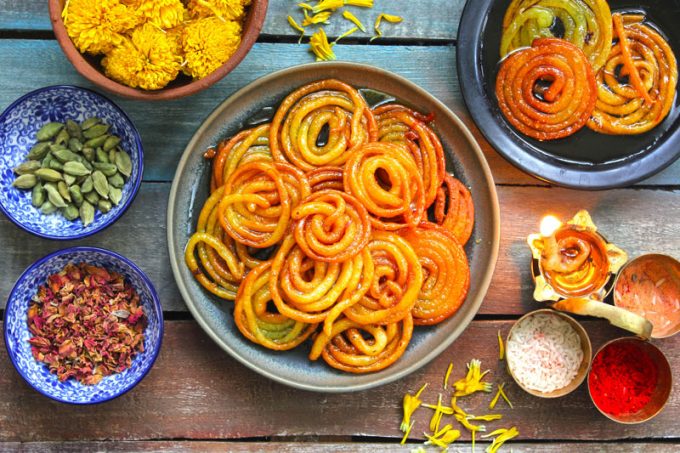
- Transfer the warm jalebi to the hot sugar syrup. And let them sit in the syrup for the next 5 – 10 minutes to absorb the sweetness.
- Serve Jalebi warm with rabri, kheer or curd.
Recipe Notes:
- The leftover batter can be stored in the fridge and is good to use for the next 2 – 3 days.
- As we are not using any yeast in this recipe, it is important to use sour curd for making the batter. The batter will turn light and fluffy after fermenting.
- Turmeric is added only for the color in the batter. You can use organic food color as well.
- If the nozzle or tip of the squeeze bottle is too thin, cut it a little bit to get the desired thickness of jalebi. Please keep in mind, the jalebi expands in size while frying. So adjust the thickness of the nozzle accordingly.
Nutrition
We follow a strict NO SPAM Policy
Jalebi Recipe
Equipment
- Heavy Bottom Kadhai
- Saucepan
- Mixing Bowl
Ingredients
Ingredients For Batter:
- 1 Cup maida (all-purpose flour)
- 2 tablespoon corn flour (starch)
- ½ teaspoon baking powder
- 1 Cup sour curd
- 2 tablespoon ghee (clarified butter)
- ¼ teaspoon turmeric powder for color
Ingredients For Sugar Syrup:
- 2 Cup granulated white sugar
- 2 Cup water
- ¼ teaspoon saffron
Instructions
Jalebi Batter:
- To make the Jalebi batter, combine together the maida, cornflour, baking powder, turmeric in a bowl.
- Add ghee and curd to the dry ingredients. Mix nicely to make a thick batter. Whisk the batter nicely for 5 - 10 minutes either with a wire whisk or using an electric hand mixer.
- The consistency of the batter should be thick and not watery, a little thicker than dosa batter. You should be able to make a shape using a piping bag.
- Cover the jalebi batter and place it in a warm place for 24 hours or at least 8 - 10 hours, till it is fermented, the batter will rise once fermented.
- Once the batter is fermented stir the batter in a cut and folds motion to combine it once again. Make sure not to whisk it for too long once it is fermented.
Sugar Syrup:
- To make the sugar syrup, boil the sugar with water and saffron strands in a wide pan on medium heat until the sugar dissolves. When the syrup becomes thick and of one string consistency. Turn off the heat and keep aside. But make sure the syrup is hot while soaking the jalebi.
Frying Jalebi:
- Now to make the jalebis preheat the oil in a wide heavy-bottomed pan for deep frying. To check whether the oil is hot enough for deep frying the Jalebi, drop a teaspoon of batter in oil and if it comes floating to the top almost immediately, the oil is ready for frying.
- Meanwhile fill the plastic squeeze bottle with the batter. Tap to remove air. Test the batter by making few jalebis on a plate. Next, pipe spirals or concentric circles of the batter onto the hot oil. Fry the jalebi on low-medium heat until golden brown in color and crisp.
- Once the jalebi is crisp and browned, transfer to a metal colander to drain the excess oil. Let it sit for 5 - 10 seconds.
Soaking Jalebi:
- Transfer the warm jalebi to the hot sugar syrup. And let them sit in the syrup for the next 5 - 10 minutes to absorb the sweetness.
- Serve Jalebi warm with rabri, kheer or curd.
Video
Notes
- The leftover batter can be stored in the fridge and is good to use for the next 2 - 3 days.
- As we are not using any yeast in this recipe, it is important to use sour curd for making the batter. The batter will turn light and fluffy after fermenting.
- Turmeric is added only for the color in the batter. You can use organic food color as well.
- If the nozzle or tip of the squeeze bottle is too thin, cut it a little bit to get the desired thickness of jalebi. Please keep in mind, the jalebi expands in size while frying. So adjust the thickness of the nozzle accordingly.
Nutrition
This is a tried and tested Pahadi style pua recipe from my mom’s kitchen. And till date, it never fails to yield perfectly moist gulgule.
Estimated reading time: 3 minutes
- What is Pua?
- Ingredients You’ll Need
- My Tried and True Tips
- Pua (Gulgule) Recipe
Looking for more festive recipes? Try my 50+ Traditional Diwali Recipe Ideas , or 12+ Best Indian Kheer Recipes . We have 10 Indian thali festive thali meals that will make your festive feast one of the best.
What is Pua?
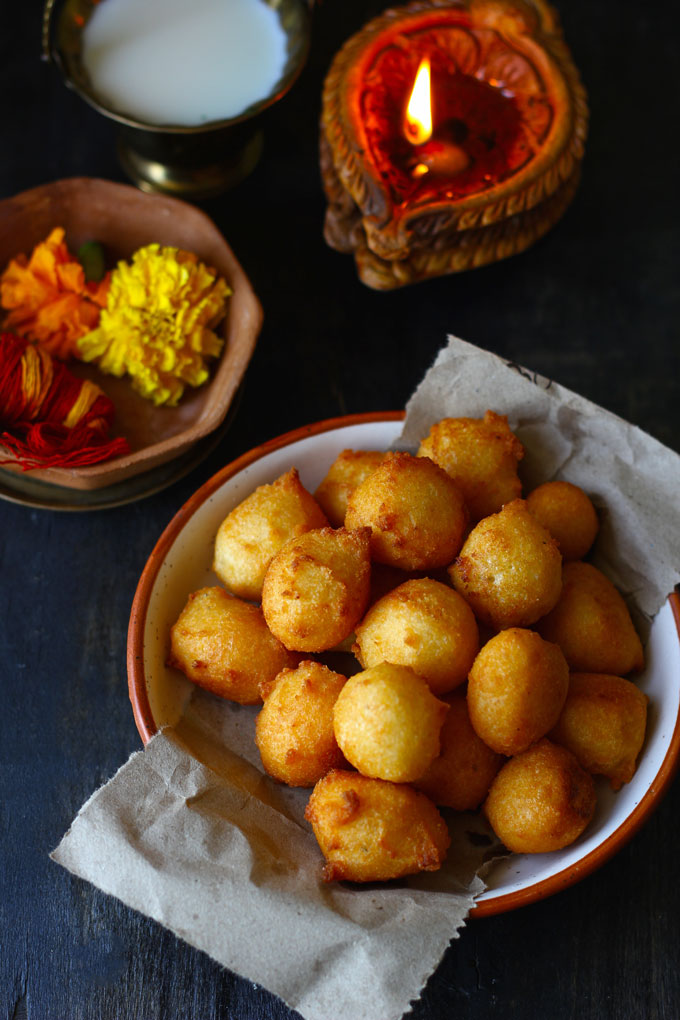
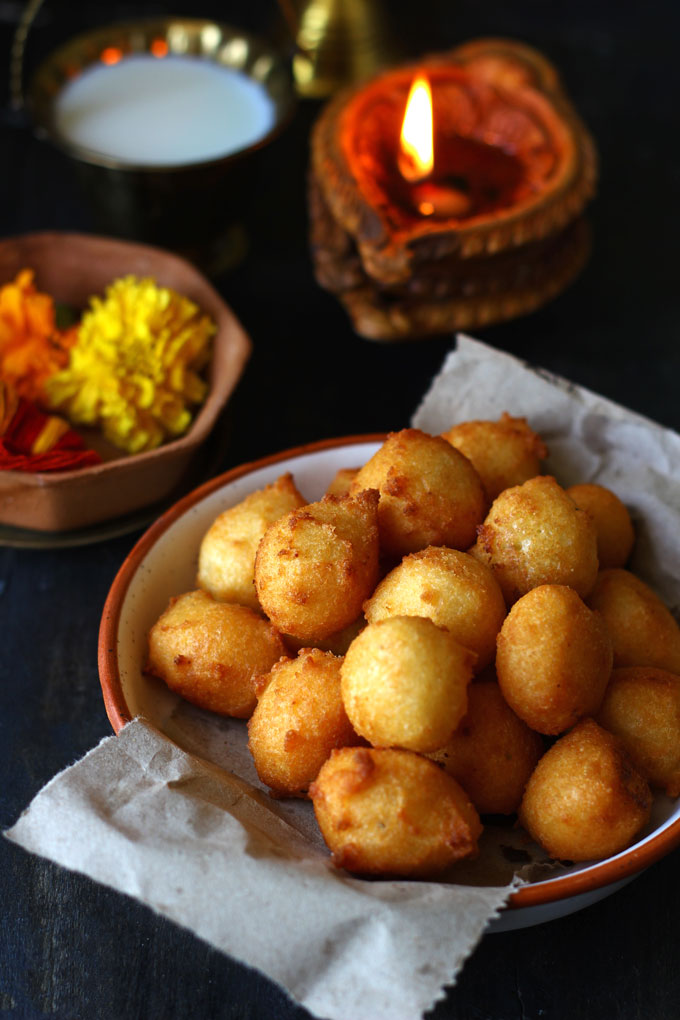
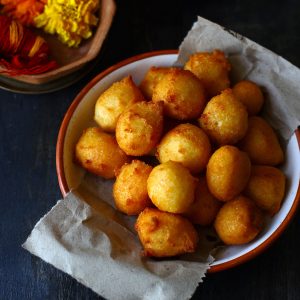
Pua can also be defined as an eggless Indian doughnut. It is made with semolina (suji), banana, ghee, and sugar. Pua is a crispy, mouth-melting traditional North Indian sweet dish. It is also known as Gulgula. In North India, mainly Uttar Pradesh, Uttarakhand, Bihar, pua is a widely popular sweet dish.
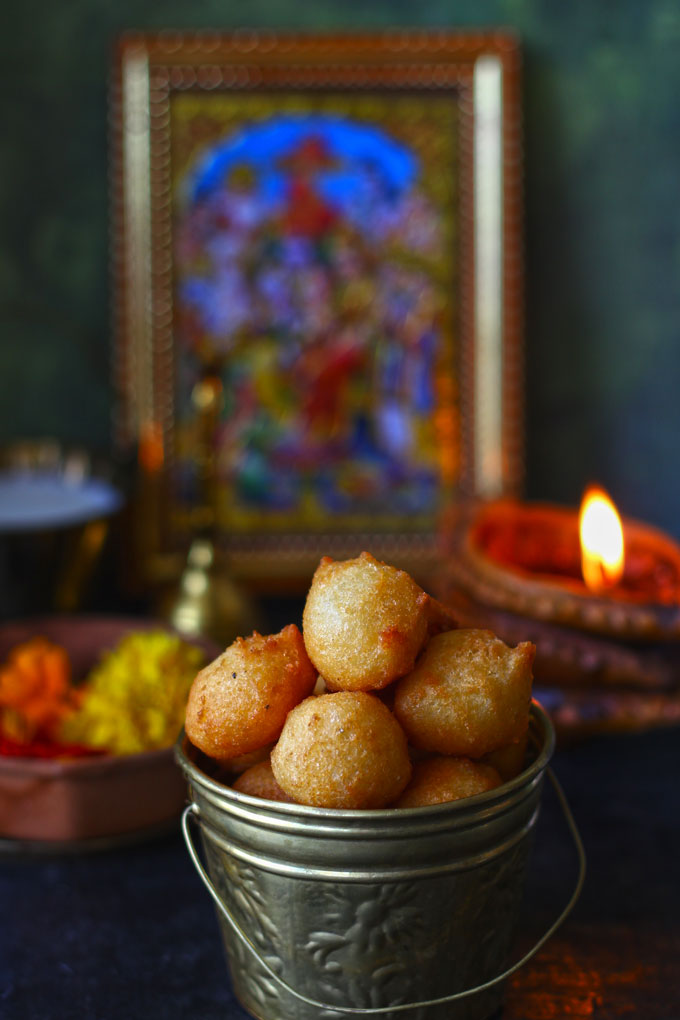
It is considered an auspicious sweet to prepare for festivals such as – Karwa Chauth, Chath Pooja, or Sankranti. Pua is offered as a sacred prasad to God.
In Kumaoni Culture (Uttarakhand) no festive feast is complete without crisp, mouth melting, sweet and simple – Pua.
Whether it is birthday, marriage, festivals, fast or feast, we always cook – Kumaoni Bada , Meetha Pua (Gulgula), Aloo Ke Gutke , Kheere Ka Raita and tons of poori .
Ingredients You’ll Need
- Semolina: In Kumaoni style Pua, semolina (suji) is the key ingredient. Use fine rava (suji) rather than a coarse one. In many pua recipes, whole wheat flour is used.
- Curd : It softens the semolina (suji). If the curd is not available use thick, flavorless yogurt.
- Ghee: It gives a rich and intense taste to the gulgula. For deep frying the pua also ghee is used.
- Sugar: This pua recipe requires granulated white sugar. You can use jaggery powder or light brown sugar.
- Banana: I add an over-ripe mashed banana in the batter. Why? It gives softness, great taste, and aroma to the pua. It is an optional ingredient. Otherwise, you can add 4 tablespoon milk to soften the batter.
- Cardamom Powder: It is added for the sweet taste and aroma.
My Tried and True Tips
- Soak semolina (suji) in curd overnight. But if you are in a hurry then 2 – 3 hours is a good enough time. Why? The semolina turns soft and absorbs the moisture of curd. It has no grainy texture.
- If you are adding banana , make sure it is over-ripe, mushy, and is nicely mashed so that no lumps remain in the pua batter.
- Whisk the batter till it doubles in volume, turns light and airy. I use a hand mixer for the purpose but my mom does it manually. So depending upon the process you choose, the whisking time may vary between 5 – 15 minutes.
- Last but not the least, always fry pua over low or medium heat. On high heat, it might turn crisp from the outside but remain uncooked from the inside. Slow frying gives it a beautiful golden color, crisp exterior, and fluffy interior.
More Traditional Indian Dessert Recipes
- Bhapa Doi
- Lauki Kheer
- Prasad Panjiri
- Sattu Ke Laddu
- Chikoo Ka Halwa
- Paneer Gulab Jamun
Ingredients
- ▢ 1 Cup semolina (suji/rava)
- ▢ 1 Cup curd
- ▢ 2 tablespoon ghee
- ▢ ¼ Cup granulated white sugar or to taste
- ▢ ¼ Cup ripe banana, mashed
- ▢ ½ teaspoon cardamom powder
- ▢ Ghee to deep-fry
Instructions
- Combine rava, curd, sugar and ghee in a bowl. Whisk nicely. Soak overnight or for 2 – 3 hours.
- Next, add the mashed banana (if using) and cardamom powder to the soaked semolina. Whisk the batter manually or using a hand blender until it is light and airy. The batter doubles in volume and becomes fluffy if whisked nicely.
- Heat ghee in a frying pan to deep-fry the pua.
- Pinch a small lemon size portion from the batter using your fingers and drop it in hot ghee.
- Similarly, add few more pua in the ghee. Do not over-crowd the pan.
- Fry the pua over medium heat till turns crisp and brown from the outside. Do not fry the pua over high heat as it might remain uncooked from the inside.
- Pua is best enjoyed when it is warm.
Recipe Notes:
- If you are using milk instead of banana, start with one tablespoon and add more if required. The batter should not be too thin otherwise you will not be able to get a round shape pua.
- Do not add an unripe banana.
- The consistency of the batter is like a vada batter, thick, light, and airy.
- Use a wide, and heavy bottom pan for frying the pua.
- Transfer the leftover pua in an airtight container. Store them in the refrigerator for 2 – 3 days. Or at room temperature for a day. After 2 days they start tasting sour.
- The best way to reheat pua is in a microwave or air-fryer.
Nutrition
We follow a strict NO SPAM Policy
