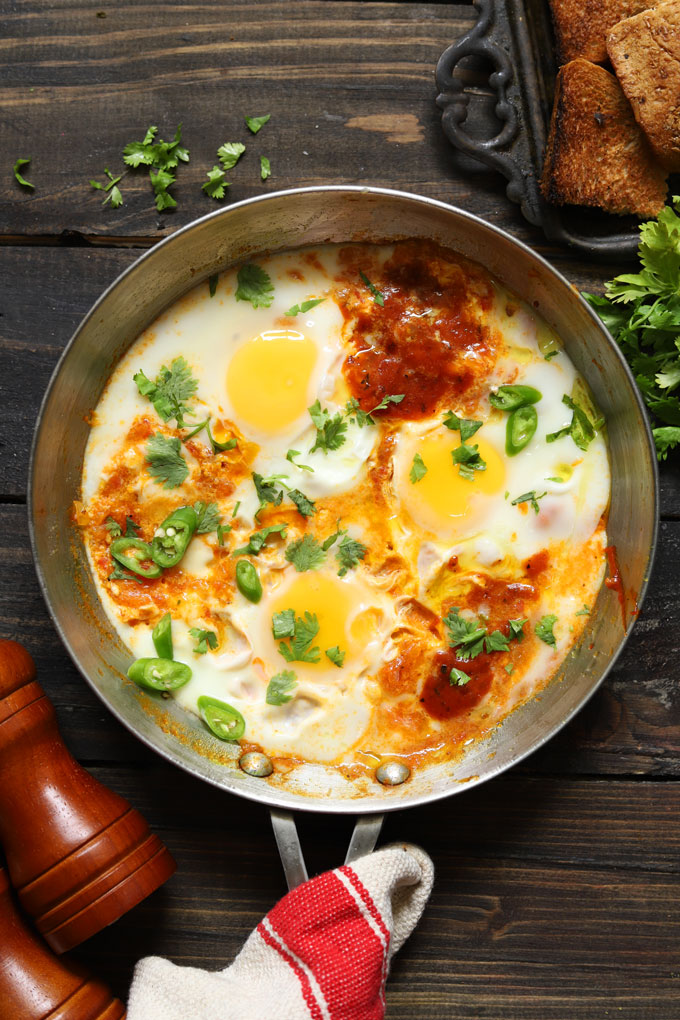
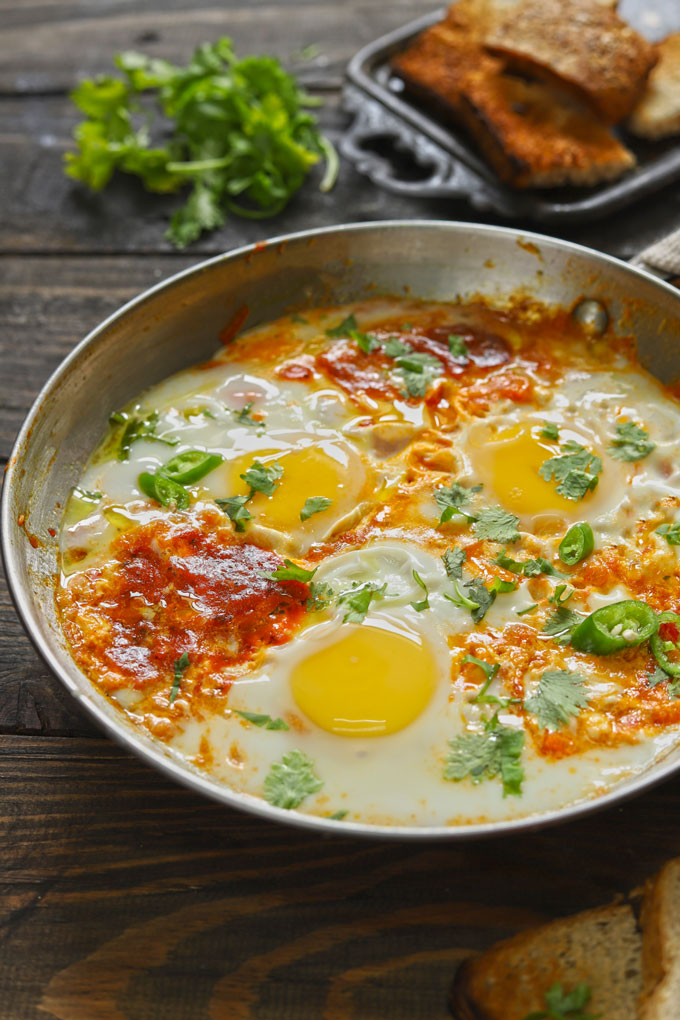
Indian Style Shakshuka is a delicious twist to the traditional shakshuka recipe. Little pockets of eggs served in a spicy Indian-style sauce are perfect for Sunday breakfast.
About Shakshuka
If you’ve never tried or heard of this egg dish, I highly urge you to try the shakshuka recipe.
The whole premise of the shakshuka recipe is centred around the combination of tomatoes and eggs, which are a perfect blend – the tanginess and juiciness of the tomatoes and the soft creaminess of the eggs are a match unlike any other.
This dish’s simplicity is the BIGGEST SELLING POINT – fresh flavours, good protein, and super easy to make.
Origin of Shakshuka
Shakshuka originated in Africa but later got recognition in Middle Eastern Cuisine.
Many variations of the shakshuka recipes are popular in Middle Eastern and Mediterranean Cuisine.
However, the flavours and cooking process of the dish are very similar to Indian curries. The shakshuka recipe is easily adaptable to suit the local palettes.
My Indian Style Shakshuka
This Indian-style shakshuka recipe is very similar to that of curry masala.
Frying onion and tomatoes, adding Indian spices, the touch of coriander, and green chilli will remind me of making an Indian curry.
The tomato sauce is spiced with a hint of Indian spices and has small pockets of perfectly runny eggs.
Other versions of the shakshuka recipe recommend adding more vegetables, red bell peppers, minced meat, lean protein like chicken, chickpeas, or even soft cheese such as feta .
Shakshuka can either be baked or cooked on a stovetop. This one is a very easy stovetop shakshuka recipe .
But it would be best to have a cast-iron skillet or a heavy-duty non-stick pan for making shakshuka.
How To Make
The Sauce: Sauté some onions and tomato in oil. Season with salt, turmeric, cumin powder, and red chilli powder. This mix must cook until the tomatoes are reduced to a rich, saucy blend.
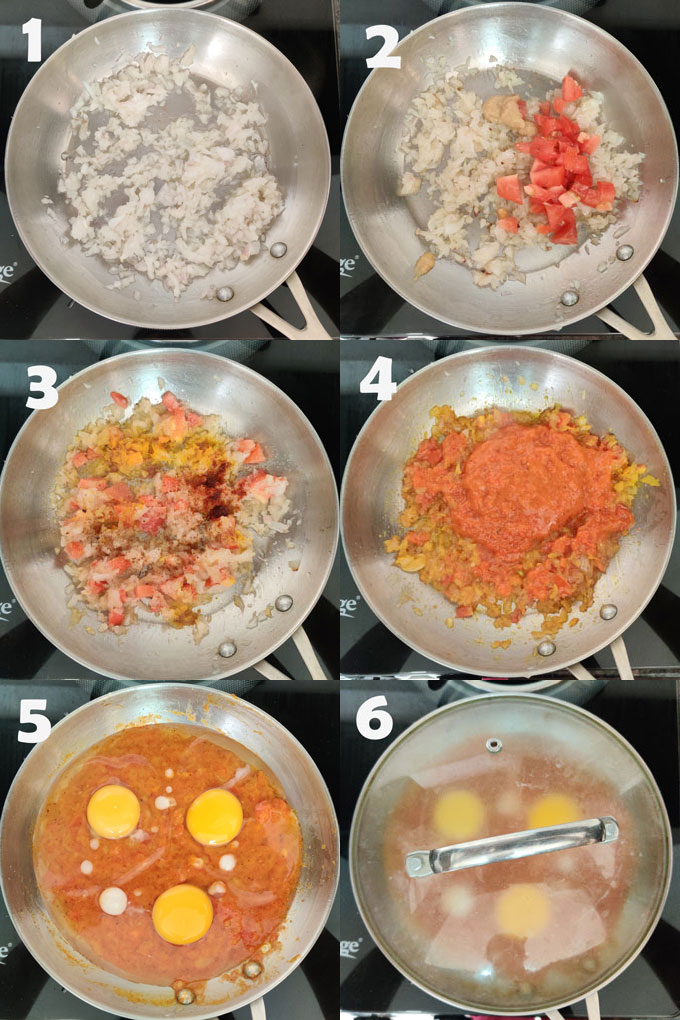
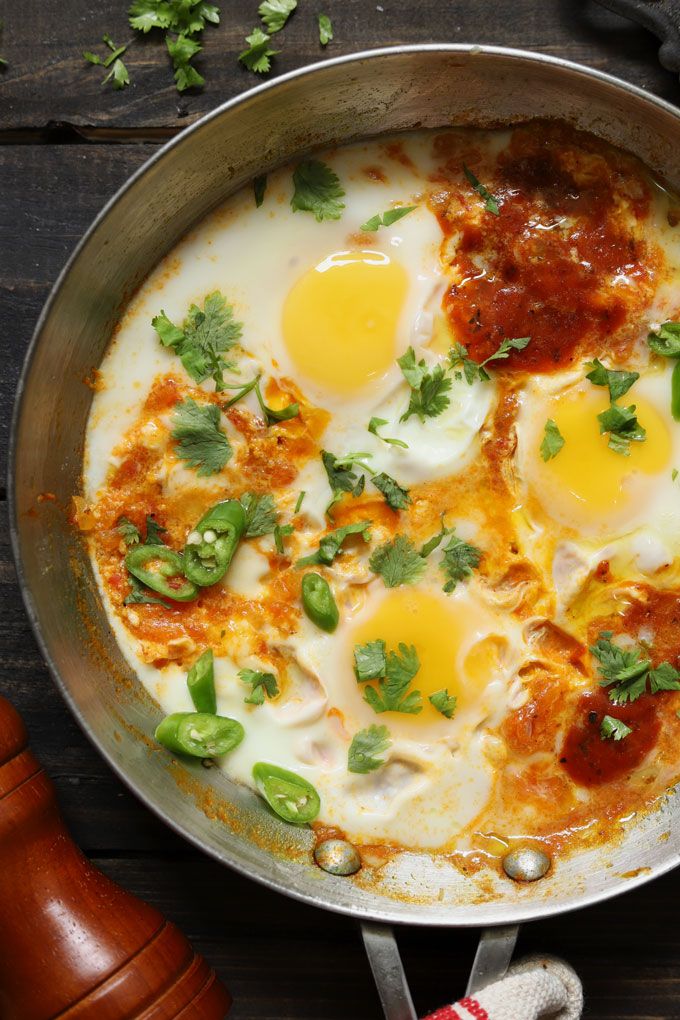
The Eggs: The USP of this Indian Style breakfast comes – from the egg pockets. Carefully make little pockets or wells in the tomato gravy and crack eggs into it, taking good care not to break the yolk.
Then cover the dish with a lid and let the eggs cook in steam (while the stovetop flame is on low).
Once the whites of the eggs are set, your shakshuka is ready to be dished out.
Serving Suggestion
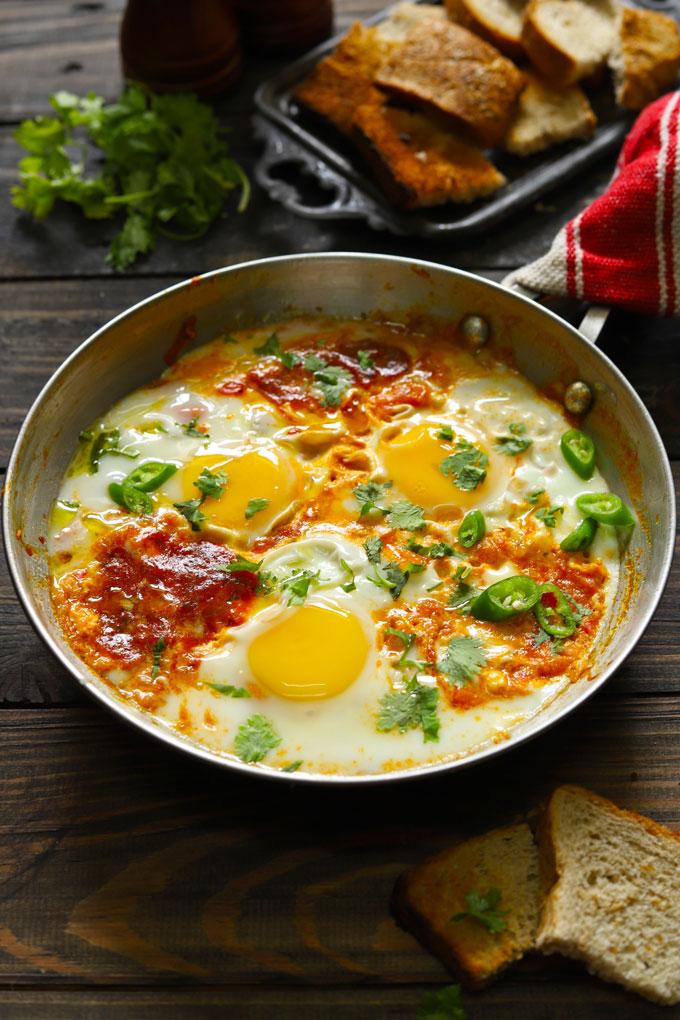
Traditionally, shakshuka is served with warm pita bread and freshly churned hummus .
You can serve it with homemade focaccia bread slices , Indian-style paratha, or on its own with herb roasted potatoes on the side.
Shakshuka is best enjoyed straight from the pan while dipping the toasted bread slices to absorb the sauce’s flavour.
My Tried & True Tips
Use the ripe tomatoes to make the sauce. You can use canned tomatoes as well.
The shakshuka recipe requires tomato puree and diced tomatoes to give the dish its rich, saucy consistency. Use canned tomatoes or manually grate fresh tomatoes.
Adding a bit of suga r (about half a teaspoon) removes the tomatoes’ excess tanginess and balances out the flavours. The original recipe, however, doesn’t use sugar.
This dish uses sweet-tasting cooking oil like olive oil to get a more authentic, nutty flavour.
Adjust the quantity of spices according to your taste or how spicy you like to make shakshuka.
Once eggs are added, do not bake or cook the shakshuka for too long. Else, egg yolk will solidify.

More Breakfast Recipes
Granola Bar
Overnight Oats
Potato Tray Bake
Whole Wheat Pancake
Mango Oats Smoothie
Spinach Corn Sandwich
If you try this recipe and love it, please leave a comment and a rating. This helps us grow and reach other food lovers like you.

Ingredients
- ▢ ½ Cup finely chopped onion
- ▢ ½ Cup finely chopped red bell pepper
- ▢ 1 tablespoon tomato paste or ketchup
- ▢ ½ Cup canned tomato or grated tomato
- ▢ 1 teaspoon garlic paste
- ▢ ½ teaspoon red chilli powder
- ▢ ½ teaspoon cumin powder (jeera powder)
- ▢ ½ teaspoon black pepper powder
- ▢ ½ teaspoon sugar
- ▢ Salt to taste
- ▢ 4 eggs
- ▢ 2 tablespoon olive oil
- ▢ 2 tablespoon chopped coriander
Instructions
- Heat olive oil in a cast iron skillet or a heavy duty non-stick pan.
- Add chopped onion. Fry till they start caramelizing.
- Add the chopped bell pepper, garlic paste, tomato paste, grated tomato, salt, and spices. Fry for the next 5 minutes or till the oil starts separating from the masala.
- Using a spoon, make indentations, or “wells,” in the tomato mixture (make sure the indentations are spaced out). Gently crack an egg into each indention.
- Reduce the heat, cover the skillet with a lid, and cook on low heat until the egg whites are set. This does not take more than 5 minutes. You can bake it as well.
- Uncover, and add the fresh coriander leaves for garnish.
- Serve Indian style shakshuka with the toasted bread slices.
Recipe Notes:
- Use the ripe tomatoes for making the sauce. You can use canned tomatoes as well.
- Adding a tiny bit of suga r (about half a teaspoon) to the recipe takes away the excess tanginess of the tomatoes and balances out the flavors.
- Adjust the quantity of spices according to your taste or how much spicy you like to make shakshuka.
- Once eggs are added, do not bake or cook the shakshuka for too long else egg yolk will solidify.
- Other versions of the shakshuka recipe recommend adding more vegetables, red bell peppers, minced meat, or lean protein like chicken, chickpeas, or even soft cheese such as feta to the dish.
- Shakshuka can either be baked or cooked on a stovetop. But you need a cast-iron skillet or a heavy-duty non-stick pan for making shakshuka.
- Shakshuka is not a freezer-friendly dish. It is best enjoyed fresh and warm.
Nutrition
We follow a strict NO SPAM Policy

Indian Style Shakshuka Recipe
Equipment
- cast iron skillet
Ingredients
- ½ Cup finely chopped onion
- ½ Cup finely chopped red bell pepper
- 1 tablespoon tomato paste or ketchup
- ½ Cup canned tomato or grated tomato
- 1 teaspoon garlic paste
- ½ teaspoon red chilli powder
- ½ teaspoon cumin powder (jeera powder)
- ½ teaspoon black pepper powder
- ½ teaspoon sugar
- Salt to taste
- 4 eggs
- 2 tablespoon olive oil
- 2 tablespoon chopped coriander
Instructions
- Heat olive oil in a cast iron skillet or a heavy duty non-stick pan.
- Add chopped onion. Fry till they start caramelizing.
- Add the chopped bell pepper, garlic paste, tomato paste, grated tomato, salt, and spices. Fry for the next 5 minutes or till the oil starts separating from the masala.
- Using a spoon, make indentations, or “wells,” in the tomato mixture (make sure the indentations are spaced out). Gently crack an egg into each indention.
- Reduce the heat, cover the skillet with a lid, and cook on low heat until the egg whites are set. This does not take more than 5 minutes. You can bake it as well.
- Uncover, and add the fresh coriander leaves for garnish.
- Serve Indian style shakshuka with the toasted bread slices.
Notes
- Use the ripe tomatoes for making the sauce. You can use canned tomatoes as well.
- Adding a tiny bit of suga r (about half a teaspoon) to the recipe takes away the excess tanginess of the tomatoes and balances out the flavors.
- Adjust the quantity of spices according to your taste or how much spicy you like to make shakshuka.
- Once eggs are added, do not bake or cook the shakshuka for too long else egg yolk will solidify.
- Other versions of the shakshuka recipe recommend adding more vegetables, red bell peppers, minced meat, or lean protein like chicken, chickpeas, or even soft cheese such as feta to the dish.
- Shakshuka can either be baked or cooked on a stovetop. But you need a cast-iron skillet or a heavy-duty non-stick pan for making shakshuka.
- Shakshuka is not a freezer-friendly dish. It is best enjoyed fresh and warm.
Nutrition
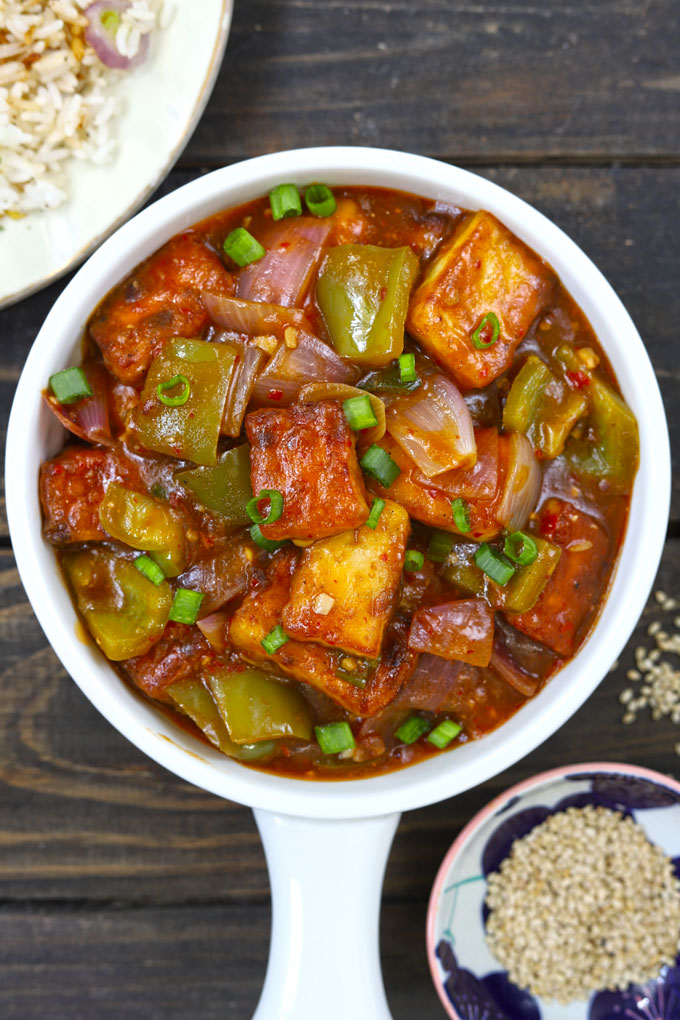
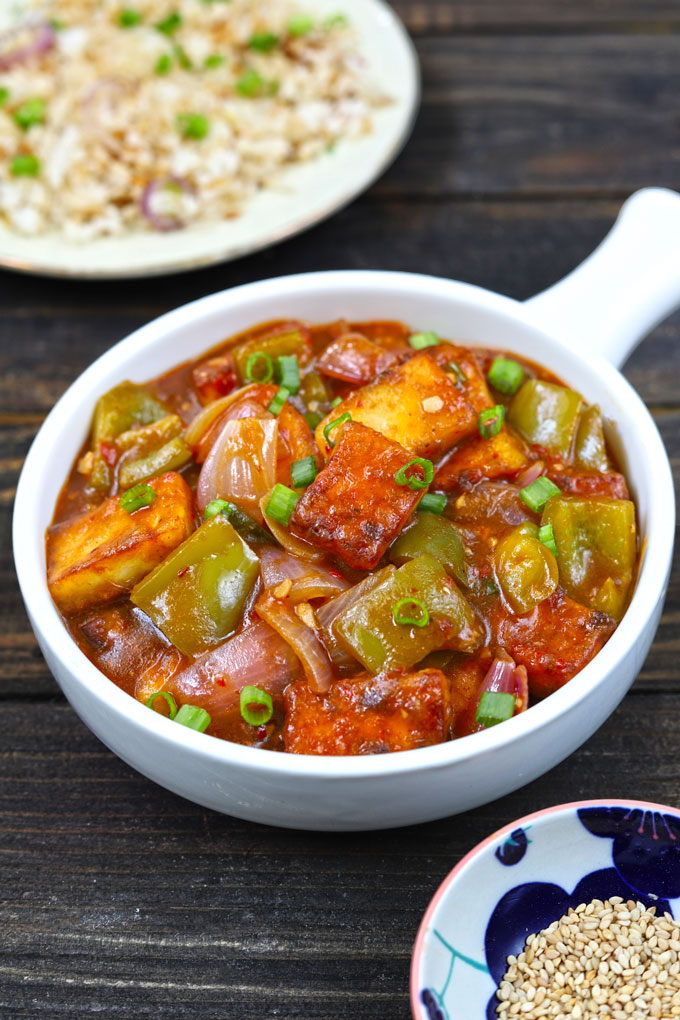
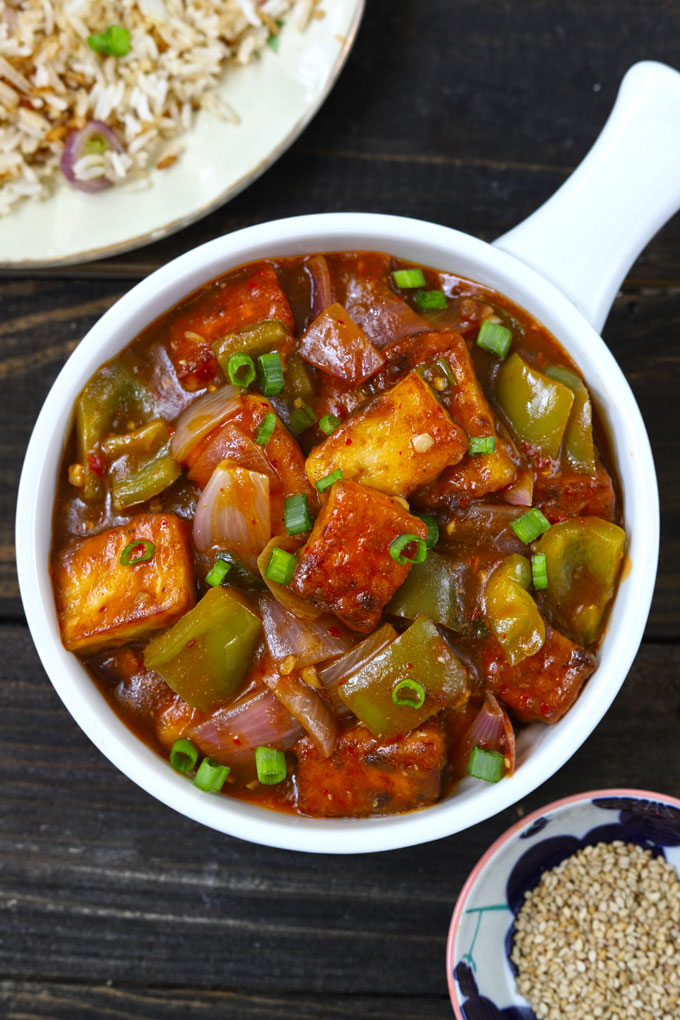
Chilli Paneer is a fusion Indian-Chinese main course dish. Follow my tips and tricks to make restaurant-style chilli paneer gravy at home. Be sure to watch the video!
- My Secret Tips
- Watch Chilli Paneer Video
- Serving Suggestion
- More Indian-Chinese Recipes
- Chilli Paneer Recipe
Hina Says -“We, in India, love paneer and anything loaded with Indo-Chinese flavours . Chilli Paneer is the perfect combination of these two crowd-charming favourites.”
It is the most popular vegetarian version of takeout style Kung Pao Chicken or Chilli Chicken . BIG on flavours and loaded with the goodness of cottage cheese (paneer).
In the Indian sub-continent, you can easily spot chilli paneer on the menu of many restaurants or takeaway joints.
Ok, let’s get right to it. Here are the important things I have learned over the years about making an excellent Chilli Paneer :
- Use the fresh and best quality paneer for the dish.
- Marination is one crucial step in the making of Chilli Paneer. Marinate paneer for at least 30 minutes before shallow frying.
- Cooking for too long is the last thing you want to do for an Indian-Chinese dish. It has to be quickly stir-fried. So that the vegetables do not lose their crunch and the paneer is not turn chewy.
- To make a little extra sauce , add ¼ Cup of water while cooking the vegetables. Simmer the sauce until it thickens. And then add the paneer. If you prefer dry Chilli Paneer, do not add more than 2 – 3 tablespoons of water.
- At last, allow the paneer to absorb the sauce’s flavour. Let paneer sit in the pan for at least 5 – 10 minutes before serving.
My Secret Tips
TIP #1 – soak the block of paneer in lukewarm water for 5 – 6 minutes before marinating. This way, your paneer will always be super soft and moist even after shallow frying.
TIP #2 – the secret formula for making restaurant-style chilli paneer is my homemade chilli paste . It is bursting with real flavours. One tablespoon of it in the gravy, and you will fall in love with the taste. No store-bought sauce can give you this taste.
TIP #3 – To make a vegan chilli sauce, use tofu or mushroom instead of paneer as I did in this vegan tofu stir fry . Marinate, shallow-fry, and cook the tofu/mushroom in the chilli sauce. Chilli Mushroom or tofu is a gratifying vegan meal for lunch or dinner.
Watch Chilli Paneer Video
Serving Suggestion
Chilli Paneer is served as a snack and main course. The dry version of the dish is served as an appetizer.
For the main course, serve it with chilli garlic noodles , chicken fried rice , mushroom fried rice , steamed jasmine rice, or sticky rice.
You can use the leftover chilli paneer to make vegetarian tortilla wraps for the evening snacks and school lunch boxes.
If sandwiches and wraps are not your things, toss the leftover chilli paneer with cooked rice, and you have a fantastic one-pot meal.
More Indian-Chinese Recipes
- Soya Manchurian
- Masala Macaroni
- Dry Chilli Chicken
- Honey Chilli Potato
- Chilli Garlic Noodles
- Chinese Chopsuey
- Chilli Mushroom Gravy
- Vegetable Hot Garlic Sauce
If you try this recipe and love it, please leave a comment and a rating. This helps us grow and reach other food lovers like you.

Ingredients
- ▢ 200 gram paneer (cottage cheese), cut into cubes
- ▢ 1 Cup diced onion
- ▢ 1 Cup diced capsicum
- ▢ 1 tablespoon finely chopped ginger
- ▢ 1 tablespoon finely chopped garlic
- ▢ 1 tablespoon white vinegar
- ▢ 1 tablespoon soy sauce
- ▢ 4 tablespoon cooking oil
- ▢ 2 tablespoon chopped spring onion
- ▢ Salt to taste
- ▢ 1 tablespoon cornflour (corn starch)
- ▢ 1 Cup water
Ingredients For Sauce:
- ▢ 4 dry red chilli (sabut lal mirch)
- ▢ 1 inch piece of ginger
- ▢ 1 tablespoon garlic cloves
- ▢ 1 tablespoon chopped onion
- ▢ ¼ Cup hot water
- ▢ 2 tablespoon tomato ketchup
Ingredients for the marinade
- ▢ 4 tablespoon corn flour (cornstarch)
- ▢ 1 tablespoon all-purpose flour (maida)
- ▢ 1 teaspoon soy sauce
- ▢ Salt and black pepper to taste
Instructions
Prep Work:
- Soak paneer block in lukewarm water for 5 – 6 minutes. Later, cut into cubes. Marinate the paneer cubes in corn flour, all-purpose flour, salt, pepper, and soy sauce. Mix nicely to coat each paneer cube with the flour mixture. Add a tablespoon of water if the marinade is too thick. Set aside.
- Prepare my secret sauce. Soak dry red chili in hot water. Cover and set aside for 5 – 6 minutes for chilies to soften a bit. Later, blend the chilies along with soaked water, ginger, garlic, onion, and tomato ketchup to a smooth sauce. Set aside.
- Make a paste of cornflour and water. Mix nicely to make a lump free mixture. Set it aside till required.
Prepare Chilli Paneer:
- Heat oil in a deep frying pan. Shallow fry the marinated paneer cubes until light golden in color and crisp from both sides. Do not turn the paneer cubes again and again while frying. Transfer to a plate and set aside.
- In the same pan add ginger and garlic. Stir fry for a minute. Add onion, and stir-fry over a high flame for 1 – 2 minutes or till onion soften a bit.
- Add the capsicum and sauté for a minute or so.
- Next add vinegar, soy sauce, chili sauce, salt, and mix nicely.
- Now, add the cornflour paste and stir the sauce continuously to avoid any lump formation.
- The sauce will start thickening now. Taste and adjust the seasoning accordingly
- Once the sauce thickens, add fried paneer cubes. Stir to combine. Allow the sauce to simmer over low heat for 5 – 6 minutes for paneer to absorb the flavor.
- Garnish the chilli paneer with chopped spring onion greens.
- Serve Chilli Paneer with fried rice.
Recipe Notes:
- Recommended Equipment: Wok ( buy it here )
- Do not deep-fry the marinated paneer cubes as they become chewy and hard.
- You can prepare my secret chili sauce in advance and store in the fridge. Or the leftover sauce can also be stored in the fridge.
- The chili sauce is spicy. Hence, taste it and then add to the gravy accordingly. We love spicy food so add the entire cup.
- To adjust the consistency of the gravy add more water if required.
Nutrition
We follow a strict NO SPAM Policy
