Packed with plant based protein these soya cutlets are a satisfying and healthy snack that you can tuck inside wraps or burger buns for a wholesome meal.
- Ingredients You’ll Need
- How To Make Soya Cutlets
- Hina’s Tried and True Tips
- Healthy Soya Cutlets Recipe
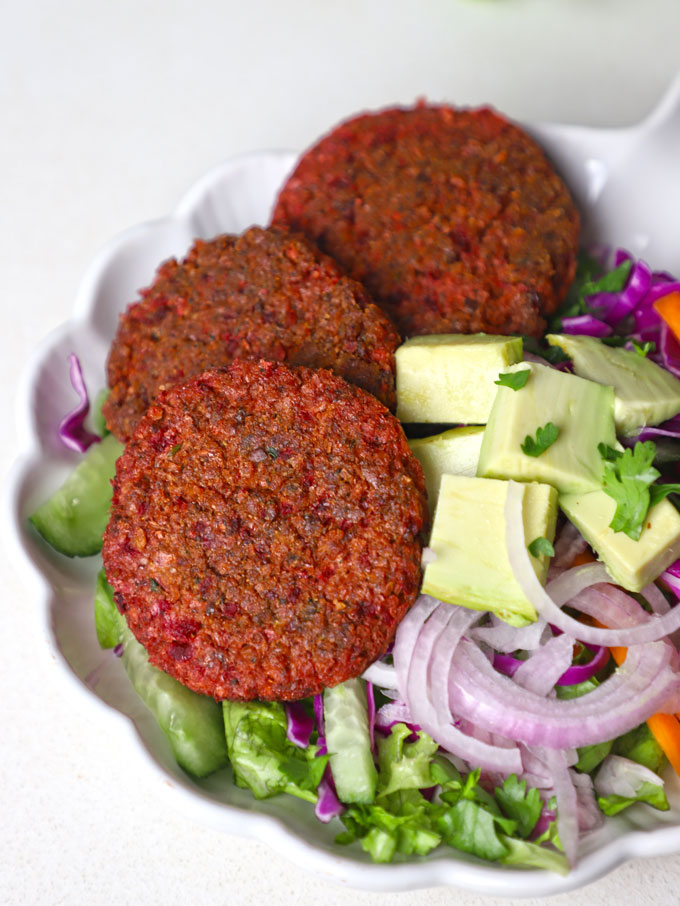
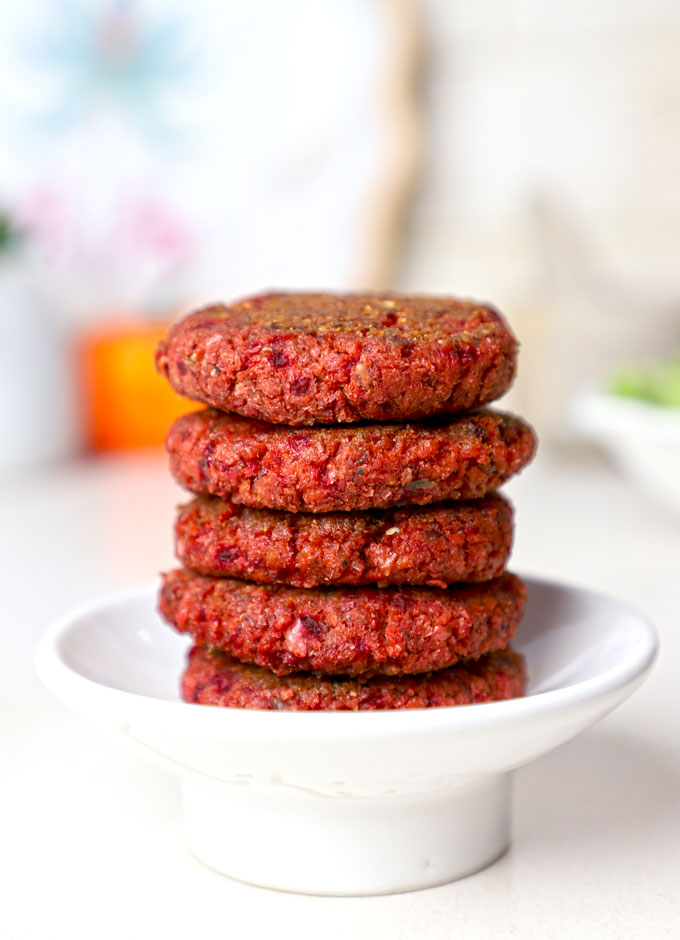
Packed with plant-based protein from soya and the nutritional goodness of beetroot, these soya cutlets are crisp from outside and soft from inside.
Why Choose Soya Beetroot Cutlets?
This recipe combines the best of both worlds:
- High Protein: Soya Chunks, flaxseeds powder, and gram flour (besan) are an excellent source of complete plant-based protein, making these cutlets great for protein rich diet.
- Nutrient-Dense: Beetroot adds a host of vitamins, minerals, and antioxidants, plus a beautiful natural color.
- Dietary Friendly: By avoiding wheat flour and dairy products, this recipe is naturally Gluten-Free and Dairy-Free (Vegan-friendly).
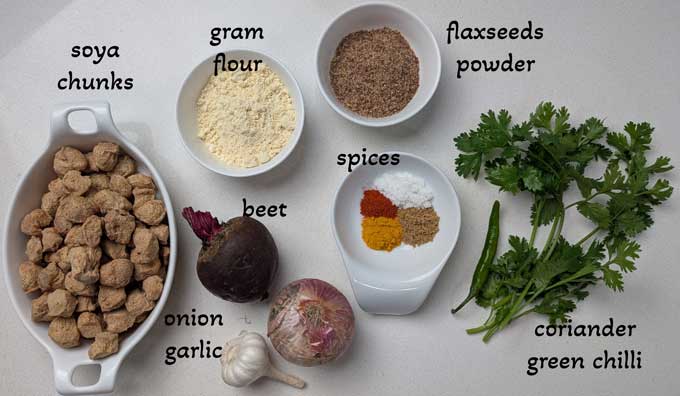
Ingredients You’ll Need
- Soya Chunks or the soya wadi, also known as meal maker, is the key ingredient of this vegetarian cutlet recipe. You can use them to make curry , manchurian , salad, and so much more.
- Beetroot adds the much required dietary fibre and colour to the cutlet.
- Gram Flour and Flaxseeds Powder for the binding and extra nutrition.
- Spices : Chilli Powder, Cumin Powder, Turmeric, Coriander Powder, Salt
- Onion, Green Chilli, Ginger, Garlic, Fresh Coriander Leaves
- Oil Spray or vegetable oil to cook the beetroot.
How To Make Soya Cutlets
1) Prep Soya Chunks

- Soak soya chunks in boiling hot water covered to soften for 15 minutes.
- Later, squeeze out all the water from the soaked chunks. They become soft, moist, and ready to use.
2) Make Cutlet Mixture
- In a food processor with blade attachment, combine the squeezed soya chunks, chopped beetroot, diced onion, ginger, garlic, green chilli, coriander leaves, spice powders, salt, gram flour, and flaxseeds powder.
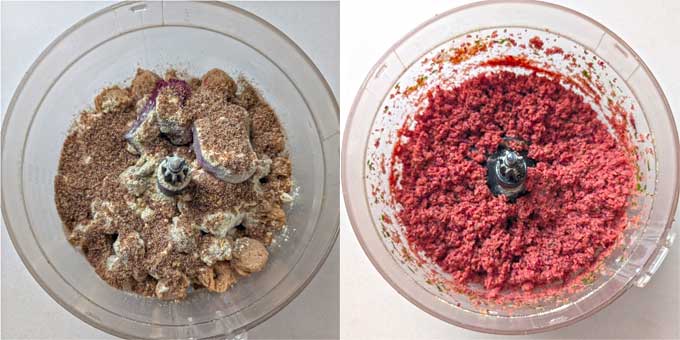
- Pulse the food processor till all the ingredients are combined.
- Towards the end you will realise the cutlet mixture sticking together.
- At this stage, taste and transfer the cutlet mixture to a large bowl.
3) Shape the Cutlets
- Divide the mixture into equal portions.
- Grease your palms lightly with oil. Roll each portion into a ball and gently flatten it into a thick disc shape.
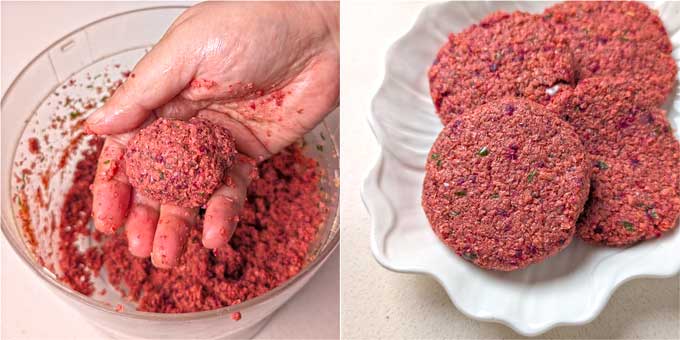
Pro Tip: For a crispier cutlet, you can chill the shaped cutlets in the refrigerator for 15-30 minutes before cooking.
4) Cook the Cutlets (Shallow Fry/Air Fry)
- Pan Frying (Recommended for best crispness): Heat 2-3 tablespoons of oil in a non-stick pan over medium heat. Place the cutlets, leaving some space between them. Fry until one side is golden brown and crisp (about 3-4 minutes). Flip and fry the other side until uniformly golden brown.
- Air Frying: Preheat air fryer to 180 degree celcius. Spray the cutlets with a vegetable oil. Air Fry for 10-12 minutes, turning the cutlets halfway, until they are golden and crispy.
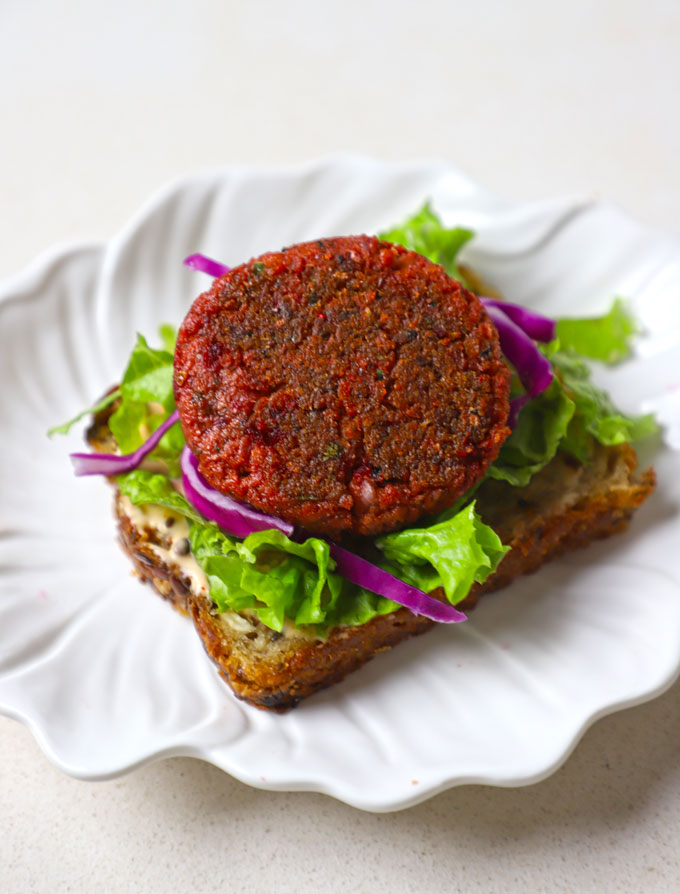
Serve high protein soya cutlet with a refreshing mint-coriander chutney , homemade tomato ketchup or Garlic Yogurt Sauce as a snack.
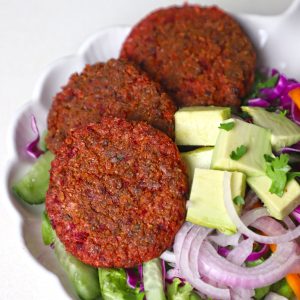
Sometimes I use these cutlets as a filling for sandwiches, pita pockets, or wraps or as the main dish in healthy bowl meals with loads of salad .
Looking for more healthy snacks? Try my gluten free Oats Cutlet , egg-free Zucchini Fritters , or the air fryer Smashed Potatoes .
Hina’s Tried and True Tips
- Moisture Control is Key: The main challenge is moisture. Always squeeze the water from the cooked soya. Excess moisture leads to crumbling cutlets.
- Gluten-Free Coating: Instead of traditional breadcrumbs or all purpose flour, use healthier options like oats flour, rice flour, or gram flour.
- Flavour Boost: Add optional seasonings like Chaat Masala , mint powder, garam masala , or crushed kasoori methi .
- Batch Cooking: These cutlets can be prepared and shaped ahead of time. Store the uncooked, coated cutlets in an airtight container in the refrigerator for up to 2 days, or freeze them for up to a month. Air Fry/bake them directly from the fridge or freezer when ready to serve.
Ingredients
- ▢ 2 Cup soya chunks (meal maker)
- ▢ 1 small beetroot, peeled and chopped
- ▢ 1 small onion, diced
- ▢ 1 green chilli
- ▢ 4 garlic cloves
- ▢ 1 inch ginger, peeled
- ▢ ½ teaspoon cumin powder
- ▢ ½ teaspoon turmeric powder
- ▢ ½ teapsoon red chilli powder
- ▢ ½ teaspoon salt or to taste
- ▢ ¼ Cup gram flour (besan)
- ▢ 2 tablespoon flaxseeds powder
- ▢ handful of coriander leaves
- ▢ 2 tablespoon vegetable oil for pan frying
Instructions
- Soak soya chunks in boiling hot water covered to soften for 15 minutes. Later, squeeze out all the water from the soaked chunks. They become soft, moist, and ready to use.
- In a food processor with blade attachment, combine the squeezed soya chunks, chopped beetroot, diced onion, ginger, garlic, green chilli, coriander leaves, spice powders, salt, gram flour, and flaxseeds powder. Pulse the food processor till all the ingredients are combined.
- Towards the end you will realise the cutlet mixture sticking together. At this stage, taste and transfer the cutlet mixture to a large bowl.
- Divide the mixture into equal portions. Grease your palms lightly with oil. Roll each portion into a ball and gently flatten it into a thick disc shape.
- Heat 2-3 tablespoons of oil in a non-stick pan over medium heat. Place the cutlets, leaving some space between them. Fry until one side is golden brown and crisp (about 3-4 minutes). Flip and fry the other side until uniformly golden brown.
- Serve high protein soya cutlet with a refreshing mint-coriander chutney , homemade tomato ketchup or Garlic Yogurt Sauce as a snack.
Nutrition
We follow a strict NO SPAM Policy

Healthy Soya Cutlets Recipe
Equipment
- Food Processor
- Mixing Bowl
- Frying Pan
Ingredients
- 2 Cup soya chunks (meal maker)
- 1 small beetroot, peeled and chopped
- 1 small onion, diced
- 1 green chilli
- 4 garlic cloves
- 1 inch ginger, peeled
- ½ teaspoon cumin powder
- ½ teaspoon turmeric powder
- ½ teapsoon red chilli powder
- ½ teaspoon salt or to taste
- ¼ Cup gram flour (besan)
- 2 tablespoon flaxseeds powder
- handful of coriander leaves
- 2 tablespoon vegetable oil for pan frying
Instructions
- Soak soya chunks in boiling hot water covered to soften for 15 minutes. Later, squeeze out all the water from the soaked chunks. They become soft, moist, and ready to use.
- In a food processor with blade attachment, combine the squeezed soya chunks, chopped beetroot, diced onion, ginger, garlic, green chilli, coriander leaves, spice powders, salt, gram flour, and flaxseeds powder. Pulse the food processor till all the ingredients are combined.
- Towards the end you will realise the cutlet mixture sticking together. At this stage, taste and transfer the cutlet mixture to a large bowl.
- Divide the mixture into equal portions. Grease your palms lightly with oil. Roll each portion into a ball and gently flatten it into a thick disc shape.
- Heat 2-3 tablespoons of oil in a non-stick pan over medium heat. Place the cutlets, leaving some space between them. Fry until one side is golden brown and crisp (about 3-4 minutes). Flip and fry the other side until uniformly golden brown.
- Serve high protein soya cutlet with a refreshing mint-coriander chutney , homemade tomato ketchup or Garlic Yogurt Sauce as a snack.
Video
Nutrition
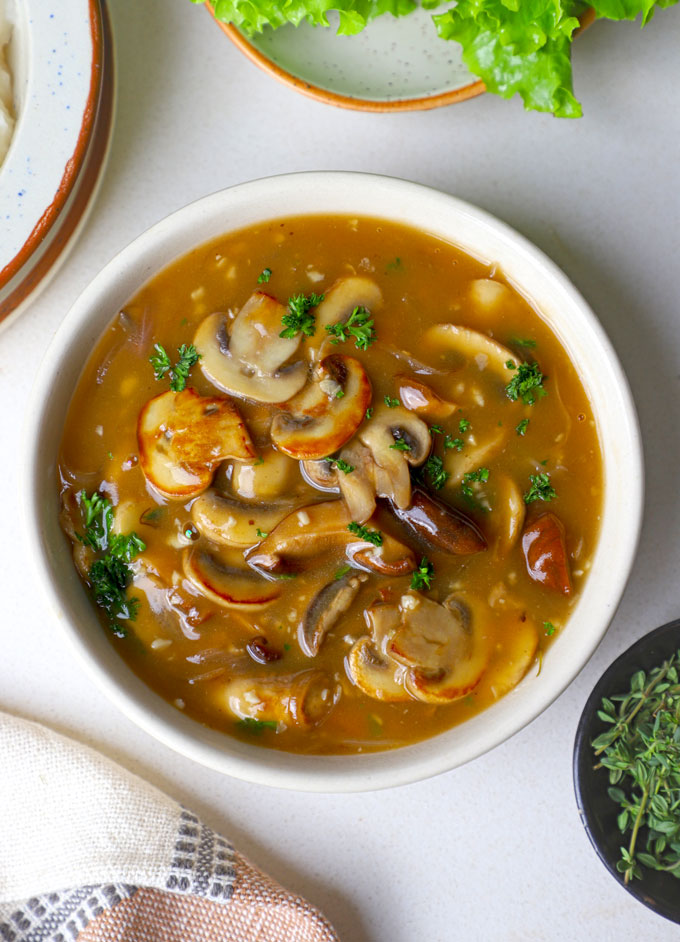
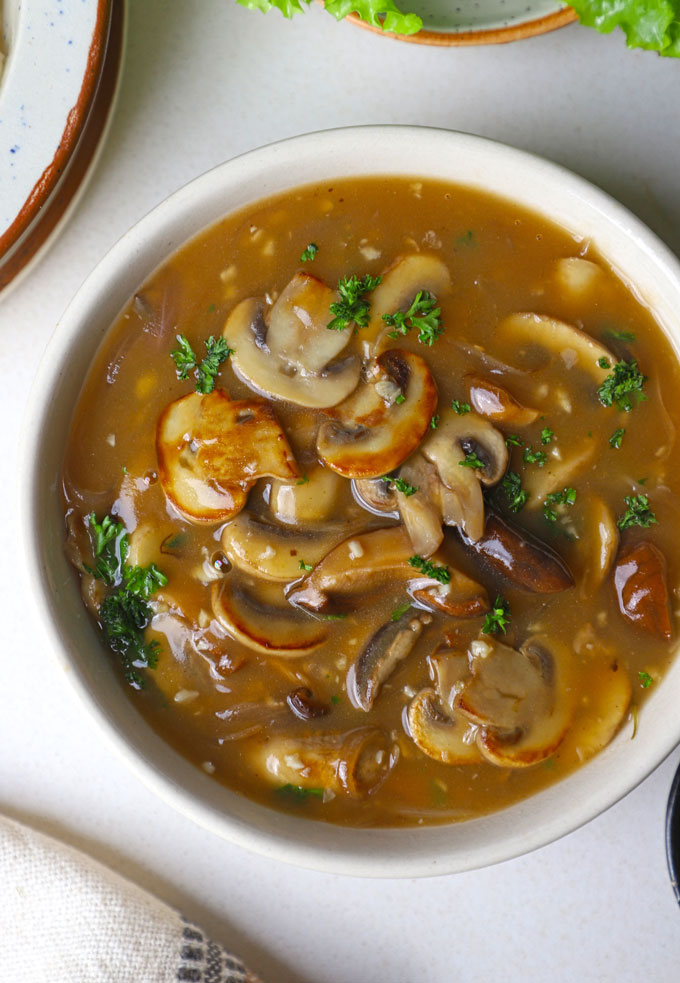
The ultimate vegetarian Mushroom Gravy is here. It’s packed with earthy umami notes, velvety texture – the perfect counterpoint to any main course.
- Ingredients You’ll Need
- How To Make Mushroom Gravy
- Hina’s Gravy Pro Tips
- Serving Suggestions
- Vegetarian Mushroom Gravy Recipe
You love a perfectly seared steak, juicy pork chop, or a hearty meatloaf, but sometimes you need a gravy that’s lighter, vegetarian, or simply richer in flavor—without relying on meat drippings. Try this vegetarian mushroom gravy!
Why This Gravy is a Game-Changer
- Deep Umami Flavor typically found in meat-based gravies.
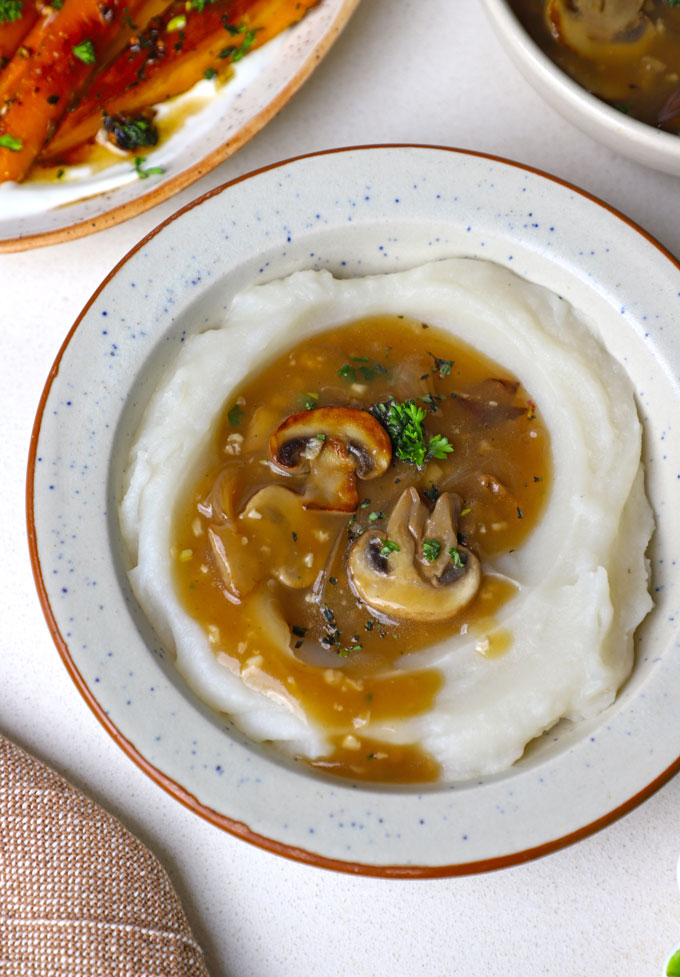
- Versatile: It pairs beautifully with everything from mashed potatoes and lentil loaf to steak or pan-seared chicken breast.
- Quick and Easy: Ready in about 30 minutes, it’s perfect for a weeknight meal but impressive enough for a Thanksgiving table.
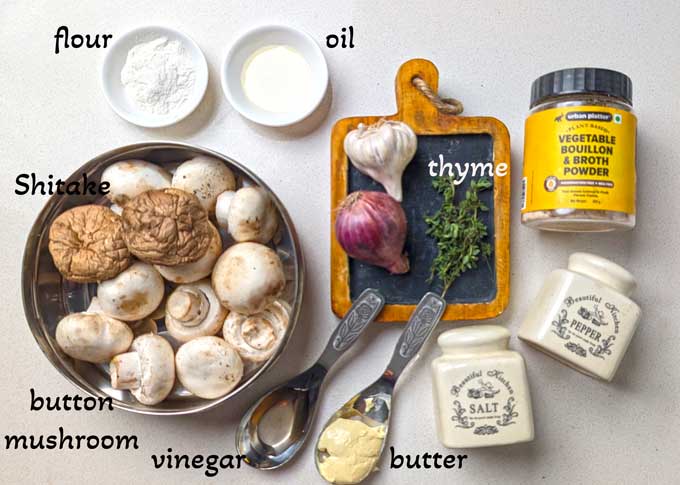
Ingredients You’ll Need
- Mushrooms like cremini, button, or bella – inexpensive and easily available are perfect for this gravy.
- Dried Shitake or Porcini mushrooms if you are after that meaty flavour and aroma. I highly recommend adding them.
- Roux : All purpose flour (maida), butter or olive oil, and garlic
- Key Flavour Base: Good quality vegetable stock (don’t use water), fresh thyme, and onion.
- Salt, Crushed Black Pepper, Thyme, and Dry Sherry or Red Wine
How To Make Mushroom Gravy
1. Prepare the Umami Boost
- Place the dried porcini or shiitake mushrooms in a small bowl and cover with 1 cup of boiling water .
- Let them soak for at least 15 minutes to rehydrate.
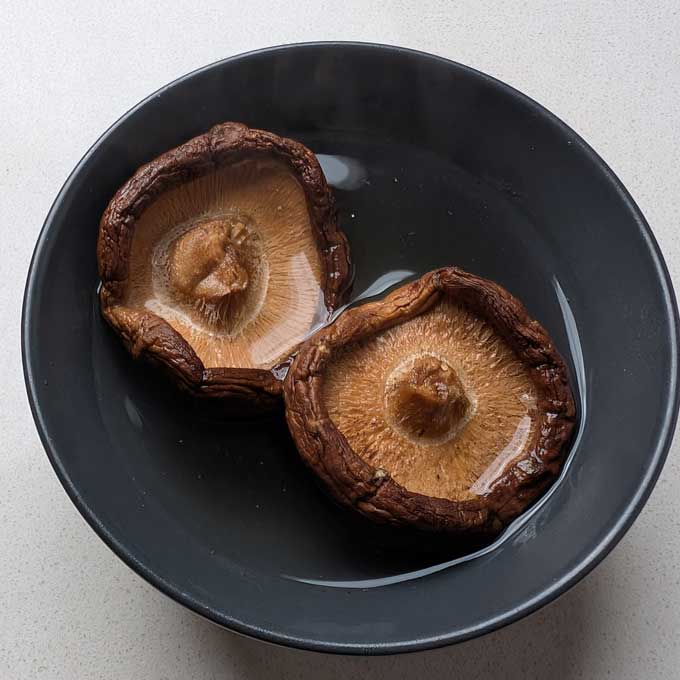
- Crucially: Remove the mushrooms, then strain the soaking liquid through a fine-mesh sieve or cheesecloth. This “liquid gold” is full of flavor—reserve it! Finely chop the rehydrated porcini.
2. Sauté the Mushrooms
- In a medium saucepan or skillet, melt butter.
- Add the onion/shallots and fresh mushrooms . Season with salt.
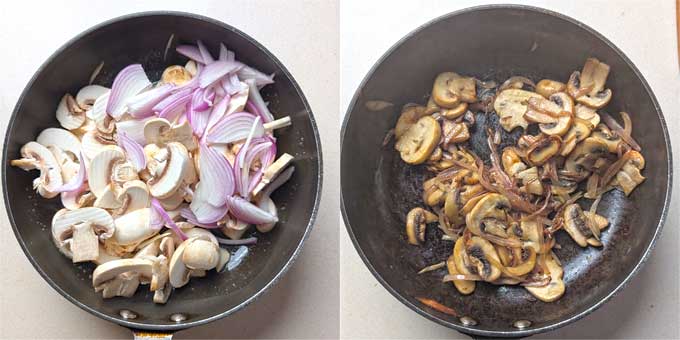
- Cook for 8-10 minutes, stirring occasionally, until the mushrooms have released their liquid and are beautifully browned and caramelized.
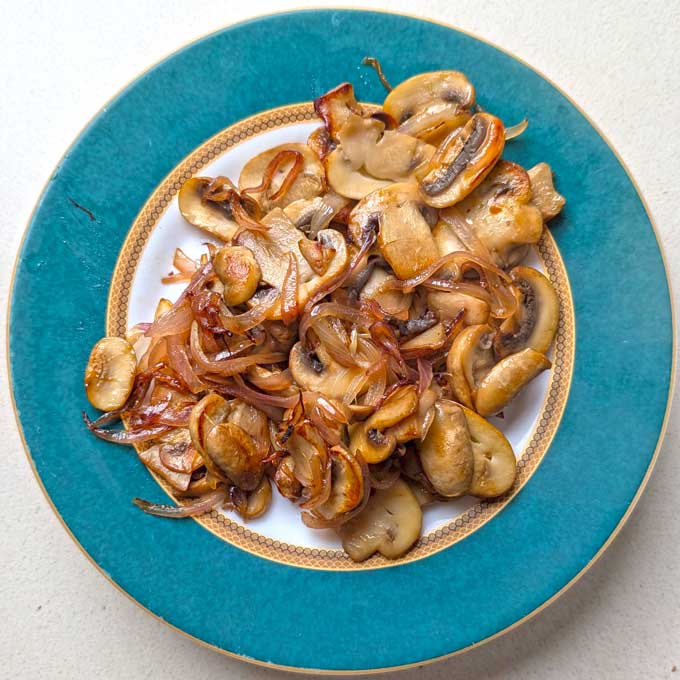
- Stir in the rehydrated/chopped mushroom for the last minute. Cook for a minute. Transfer all the mushrooms with onion to a plate.
3. Make the Roux and Build Flavor
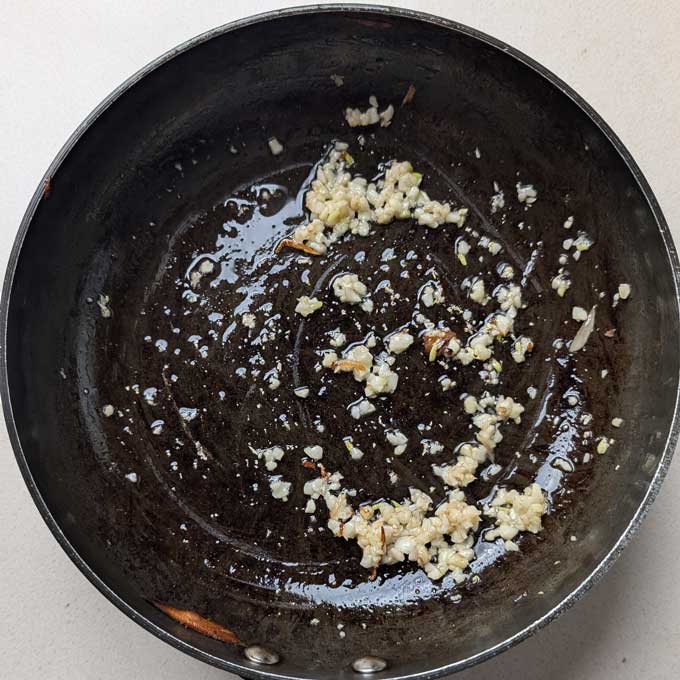
- Heat oil in the same pan. Saute garlic for 20 – 30 seconds.
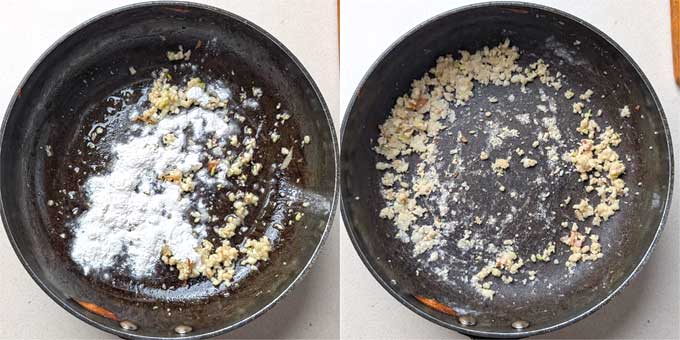
- Sprinkle the flour . Cook for 1-2 minutes, stirring constantly, to cook out the raw flour taste.
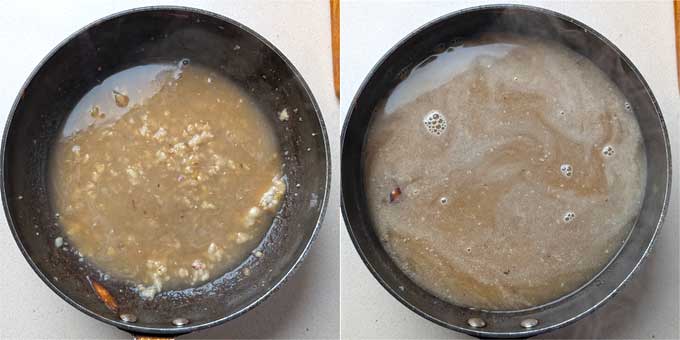
- Slowly whisk in the reserved porcini liquid and the vegetable stock/water , stirring until no clumps of flour remain.
- Bring the gravy to a simmer over medium heat. Reduce the heat to low and let it cook, stirring occasionally, for about 5 – 10 minutes, or until it has thickened to your desired consistency. It will thicken more as it cools.
- Add the cooked mushrooms and stir to combine.
5. Finish and Serve
- Remove the pan from the heat. Stir in the remaining butter (or oil) for extra richness and shine.
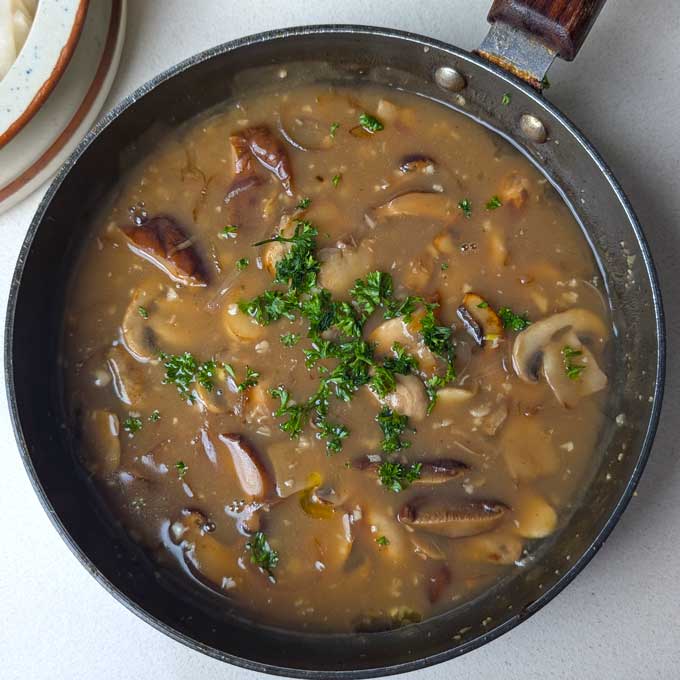
- Season with salt and freshly ground black pepper to taste. If using, stir in the optional dry sherry or red wine vinegar for an extra layer of complexity.
- Serve hot over your favorite steak, roast, or side dish!
Hina’s Gravy Pro Tips
- Go for the Brown: Don’t rush the sautéing process. Allowing the mushrooms to fully brown and release their moisture is what builds the deep, nutty flavor that is the backbone of this gravy.
- The Power of Mushroom: Dried porcini or shitake are your best friend for a non-meat gravy. They add an incredibly concentrated, smoky, and “meaty” flavor. Always save and strain that soaking liquid!
- Smooth or Chunky: For a chunky, rustic gravy, chop your fresh mushrooms into slices. For a smoother, more classic gravy, chop them very finely, or use an immersion blender at the end to purée the mixture.
Serving Suggestions
This versatile gravy is truly a star on any plate:
- For the Steak/Meat Lover: Drizzle generously over a pan-seared ribeye, prime rib, grilled chicken breast, or juicy pork chops.
- For the Vegetarian Thanksgiving or Holiday Feast: The ultimate topping for creamy Mashed Potatoes , Caulifower Steak or mash a hearty Lentil Loaf , Roasted Vegetables (like asparagus, green beans , or Brussels sprouts), or even a scoop of polenta .
follow me on Youtube or Instagram for latest recipes.

Ingredients
- ▢ 200 gram button mushrooms, sliced
- ▢ 2 large size dried Shiitake mushrooms
- ▢ ½ Cup hot water
- ▢ 1 tablespoon vegetable oil
- ▢ 2 tablespoon unsalted butter (divided)
- ▢ 1 large size onion, thinly sliced
- ▢ 1 tablespoon minced garlic
- ▢ 2 tablespoon all purpose flour
- ▢ 2 Cup vegetable stock ( get recipe )
- ▢ 1 tablespoon red wine vinegar
- ▢ ¼ teaspoon salt or to taste
- ▢ 2 sprigs thyme
Instructions
- Place the dried shiitake mushrooms in a small bowl and cover with ½ cup of boiling water . Let them soak for at least 15 minutes to rehydrate. Remove the mushrooms, then strain the soaking liquid through a fine-mesh sieve or cheesecloth. Finely chop the rehydrated mushroom.
- In a medium saucepan or skillet, melt 1 tablespoon of butter. Add the onion/shallots and fresh mushrooms . Season with salt. Cook for 8-10 minutes, stirring occasionally, until the mushrooms have released their liquid and are browned.
- Stir in the rehydrated/chopped mushroom for the last minute. Cook for a minute. Transfer all the mushrooms with onion to a plate.
- To make roux, heat vegetable oil in the same pan. Saute garlic for 20 – 30 seconds. Sprinkle the flour . Cook for 1-2 minutes, stirring constantly, to cook out the raw flour taste.
- Slowly whisk in the reserved Shiitake liquid and the vegetable stock , stirring until no clumps of flour remain. Bring the gravy to a simmer over medium heat. Reduce the heat to low and let it cook, stirring occasionally, for about 5 – 10 minutes, or until it has thickened to your desired consistency.
- Add the cooked mushrooms and stir to combine. Remove the pan from the heat. Stir in the remaining butter for extra richness and shine.
- Season with salt and freshly ground black pepper, thyme to taste. If using, stir in the optional dry sherry or red wine vinegar for an extra layer of complexity.
- Serve mushroom gravy hot over your favourite steak, roast, or side dish!
Recipe Notes:
- If you find gravy too thick, add a splash more broth. If too thin, continue to simmer for a few more minutes.
- Transfer the gravy to an airtight container to prevent it from absorbing odors and to keep it fresh. Store in the refrigerator for a week.
- Gravy often thickens a lot when cooled. If it’s too thick after reheating, whisk in a splash of broth (vegetable or chicken), milk, or water until it reaches your desired consistency.
- If you are using bouillion powder, then either dissolve it in water before making the roux or make the roux withw ater and once it starts simmering add the bouillion cube or powder. Mix nicely to evenly combine. Ignore this step if you are using stock or broth.
- Use a good quality broth for best results.
Nutrition
We follow a strict NO SPAM Policy
