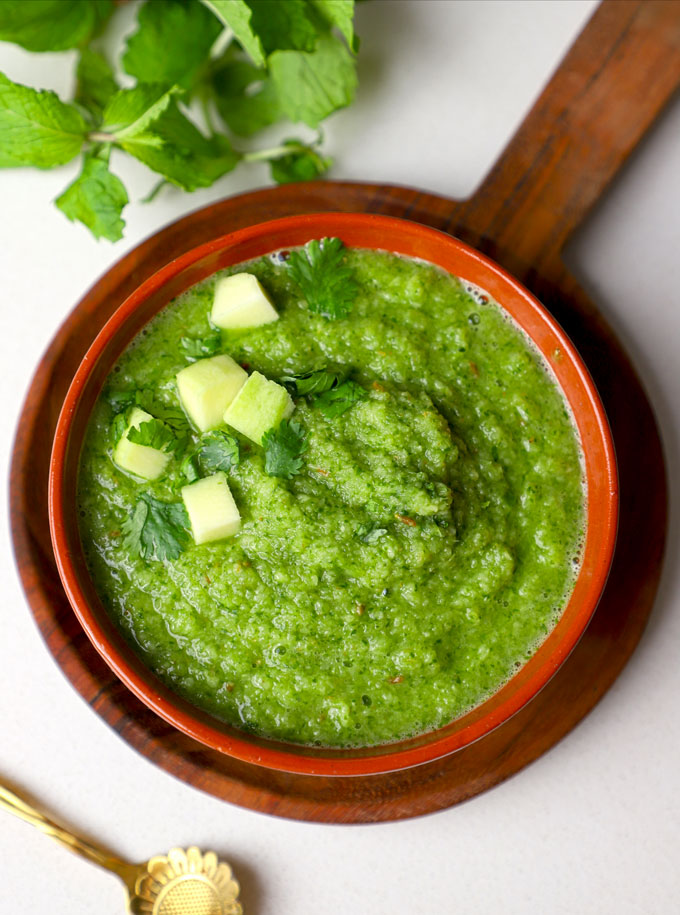
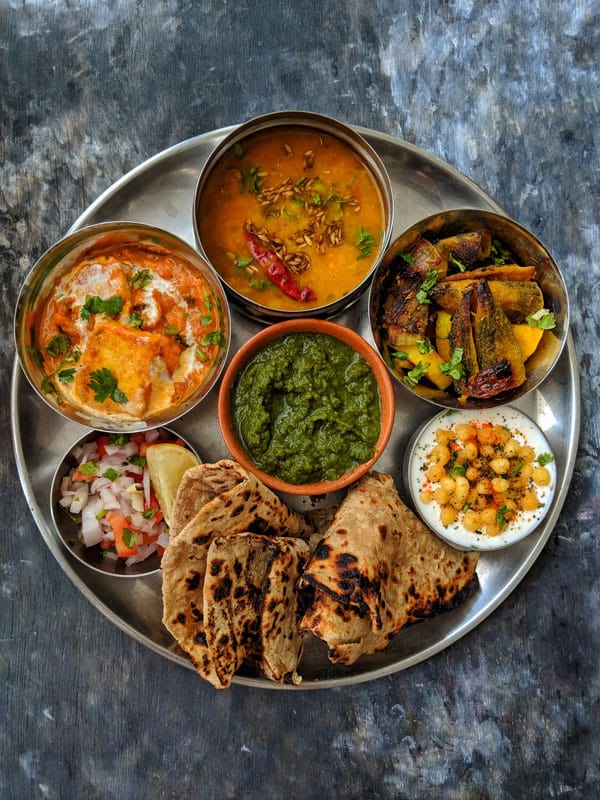
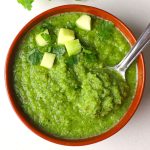
Tangy, spicy, and slightly sweet, this seasonal green mango chutney celebrates raw mangoes (kacchi kairi). It takes just minutes to make but can transform a meal from good to memorable.
Estimated reading time: 5 minutes
- Ingredients You’ll Need
- How To Make Mango Chutney
- Serving Suggestion
- Mango Chutney Recipe Variations
- Green Mango Chutney Recipe
Few condiments capture the bold and varied flavours of Indian cuisine like a well-made chutney—and green mango chutney , or Kairi ki Chutney , is one of the most beloved of them all.
Green mango chutney has long been associated with summer, when raw mangoes are abundant in Indian markets. This chutney not only takes advantage of this seasonal produce but also provides a cooling, digestive-friendly addition to heavy meals during the hot months.
In various regions of India, raw mango chutney takes on unique forms. In the north, it’s often blended with mint and coriander.
Why You’ll Love This Chutney Recipe
- low calorie and rich in fibre
- nut and gluten free
- requires no cooking
- meal prep friendly
- contains no dairy
- has zero oil
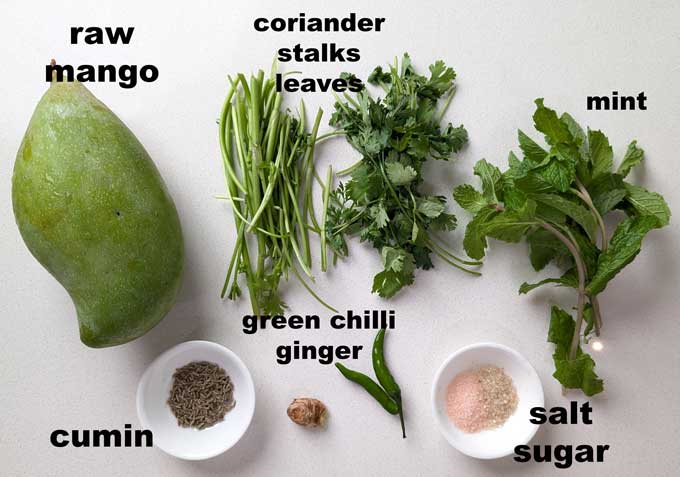
Ingredients You’ll Need
- Green Mango is the raw and unripe mango, which has a tangy taste.
- Fresh coriander and mint leaves for that bright green colour and refreshing flavour.
- Green Chilies for the spicy kick. Adjust the quantity as per personal preference.
- A small piece of ginger for the spicy and earthy taste.
- Cumin Powder or seeds for the nutty flavour.
- Sugar is optional. It helps to balance the tartness of mango and heat of chillies
- Water , as needed to blend the chutney ingredients.
How To Make Mango Chutney
Step 1: Prepare the Ingredients
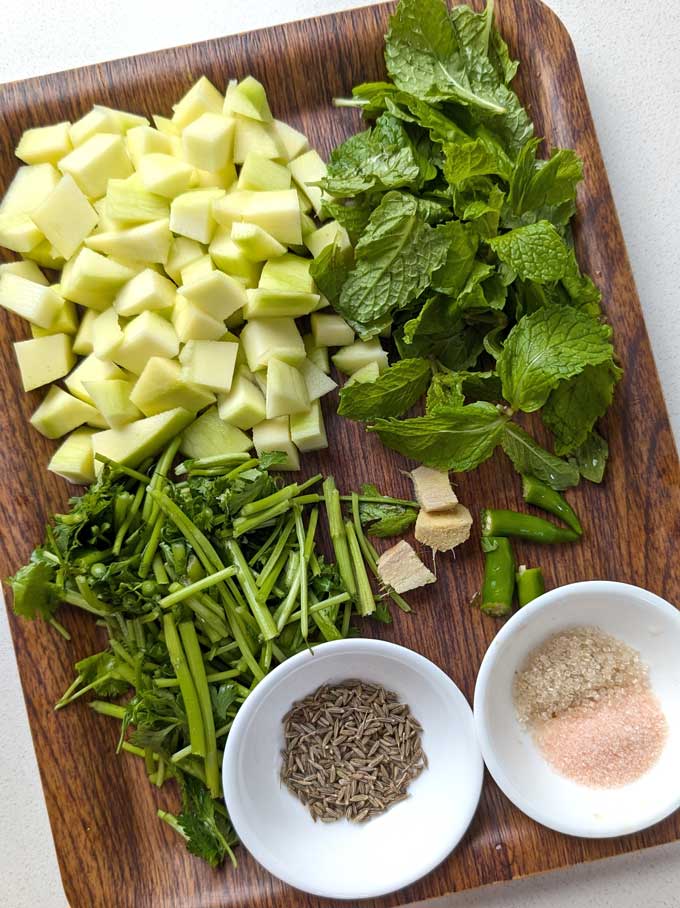
- Wash and peel the mango.
- Cut the pulp away from the seed and chop it into small pieces. Taste the raw mango to get an idea of the sourness.
- Rinse the coriander and mint leaves thoroughly to remove any grit. Roughly chop the ginger and green chili.
Step 2: Toast the Cumin
- Dry roast 1 teaspoon of cumin seeds in a pan over low heat until they turn golden and aromatic. This step enhances the flavor significantly and is worth the extra minute.
Step 3: Blend
- In a blender or food processor, combine all the chutney ingredients.
- Add a few tablespoons of water to help everything blend smoothly.
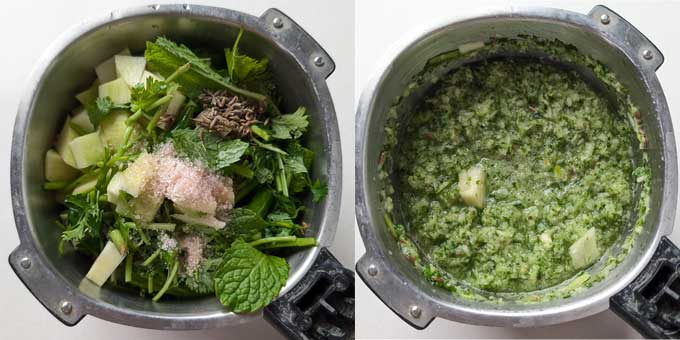
- Pulse until you get a smooth or slightly coarse texture, depending on your preference. Taste and adjust seasoning — add more salt, sugar, or chilli if needed.

Step 4: Serve or Store
- Transfer the chutney to a bowl. It can be served immediately, but chilling it for 30 minutes allows the flavours to deepen.
- Store in the refrigerator for up to a week.
Serving Suggestion
Green mango chutney can be enjoyed in endless ways:
- As a dip for samosas, pakoras, kachoris, or any Indian snack
- Alongside dal-rice or khichdi to add a zesty contrast
- Spread on sandwiches or in wraps for a refreshing kick
- With grilled meats or kebabs , like paneer tikka or chicken skewers
Mango Chutney Recipe Variations
Depending on the region or your taste, green mango chutney can take on many delicious forms:
1.Bengali Style (Aam-er Chutney):
This version of mango chutney is sweet and is often cooked down to a jam-like consistency with sugar, fennel seeds, and dry red chilies.
2.South Indian Style
Add a tempering of mustard seeds, urad dal, curry leaves, and dry red chilli in hot oil, and pour over the chutney for a crunchy finish.
3.Bihari Style
Here, garlic is added for a rustic, spicy chutney often eaten with litti or sattu parathas.
4.Raw and Chunky
Skip the blender and use a mortar and pestle or finely chop ingredients by hand for a coarse, chunky chutney with more texture.
More Green Mango Recipes
- Aam Panna
- Aam Ki Launji
- Instant Aam Chunda
- Instant Mango Pickle
- Punjabi Aam Ka Achaar
Get all my Mango Recipes here

Ingredients
- ▢ 1 medium size raw mango
- ▢ 1 Cup coriander stalks and leaves
- ▢ 8 sprigs mint leaves
- ▢ ½ inch ginger, chopped
- ▢ 2 green chillies (medium spicy)
- ▢ 1 teaspoon cumin seeds
- ▢ 1 teaspoon granulated white sugar
- ▢ ½ teaspoon salt or to taste
Instructions
- Wash and peel the mango. Cut the pulp away from the seed and chop it into small pieces. Taste the raw mango to get an idea of the sourness. Rinse the coriander and mint leaves thoroughly to remove any grit. Roughly chop the ginger and green chili.
- Dry roast 1 teaspoon of cumin seeds in a pan over low heat until they turn golden and aromatic. This step enhances the flavour significantly and is worth the extra minute.
- In a blender or food processor, combine all the chutney ingredients. Add a few tablespoons of water to help everything blend smoothly.
- Pulse until you get a smooth or slightly coarse texture, depending on your preference. Taste and adjust seasoning — add more salt, sugar, or chilli if needed.
- Transfer the chutney to a bowl. It can be served immediately, but chilling it for 30 minutes allows the flavours to deepen. Store in the refrigerator for up to a week.
Recipe Notes:
- Choose the right mango : Look for firm, unripe green mangoes with a tangy bite and no sweetness. Balance is key : Taste as you go. Green mangoes vary in tartness, so you may need to adjust the sugar or salt. Fresh herbs matter : Always use fresh mint and coriander for the brightest flavour.
Nutrition
We follow a strict NO SPAM Policy
Green Mango Chutney Recipe
Equipment
- Blender
Ingredients
- 1 medium size raw mango
- 1 Cup coriander stalks and leaves
- 8 sprigs mint leaves
- ½ inch ginger, chopped
- 2 green chillies (medium spicy)
- 1 teaspoon cumin seeds
- 1 teaspoon granulated white sugar
- ½ teaspoon salt or to taste
Instructions
- Wash and peel the mango. Cut the pulp away from the seed and chop it into small pieces. Taste the raw mango to get an idea of the sourness. Rinse the coriander and mint leaves thoroughly to remove any grit. Roughly chop the ginger and green chili.
- Dry roast 1 teaspoon of cumin seeds in a pan over low heat until they turn golden and aromatic. This step enhances the flavour significantly and is worth the extra minute.
- In a blender or food processor, combine all the chutney ingredients. Add a few tablespoons of water to help everything blend smoothly.
- Pulse until you get a smooth or slightly coarse texture, depending on your preference. Taste and adjust seasoning — add more salt, sugar, or chilli if needed.
- Transfer the chutney to a bowl. It can be served immediately, but chilling it for 30 minutes allows the flavours to deepen. Store in the refrigerator for up to a week.
Notes
- Choose the right mango : Look for firm, unripe green mangoes with a tangy bite and no sweetness. Balance is key : Taste as you go. Green mangoes vary in tartness, so you may need to adjust the sugar or salt. Fresh herbs matter : Always use fresh mint and coriander for the brightest flavour.
Nutrition
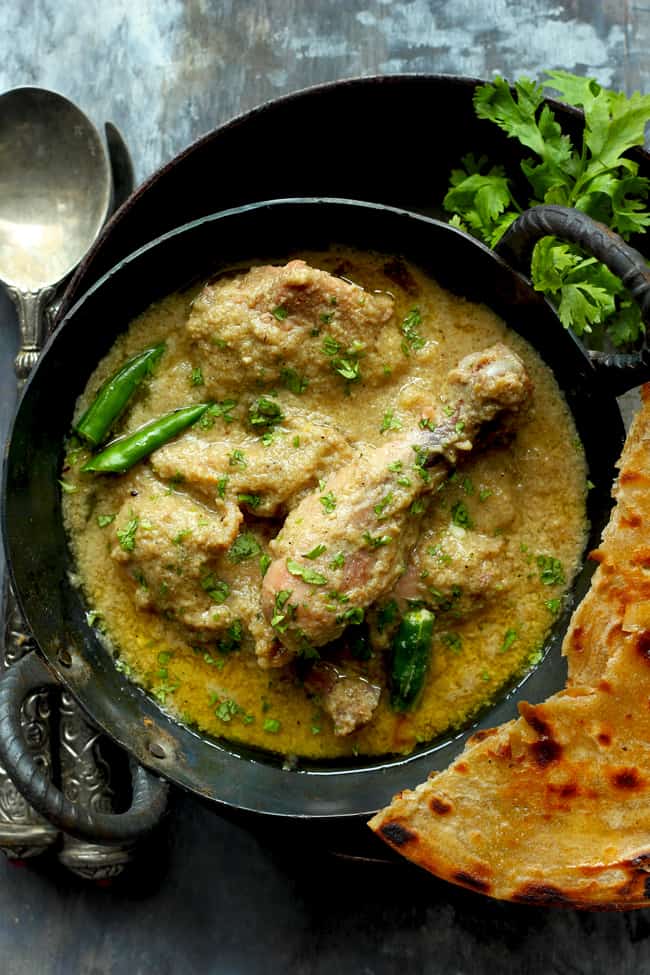
My homemade korma paste is the secret formula for this restaurant-style chicken korma recipe.
Estimated reading time: 4 minutes
- About Korma Curry
- Homemade Korma Curry Paste
- Curry Paste Video
- My Tried and True Tips
- How To Make Korma Curry
- Serving Suggestion
- Chicken Korma Recipe
About Korma Curry
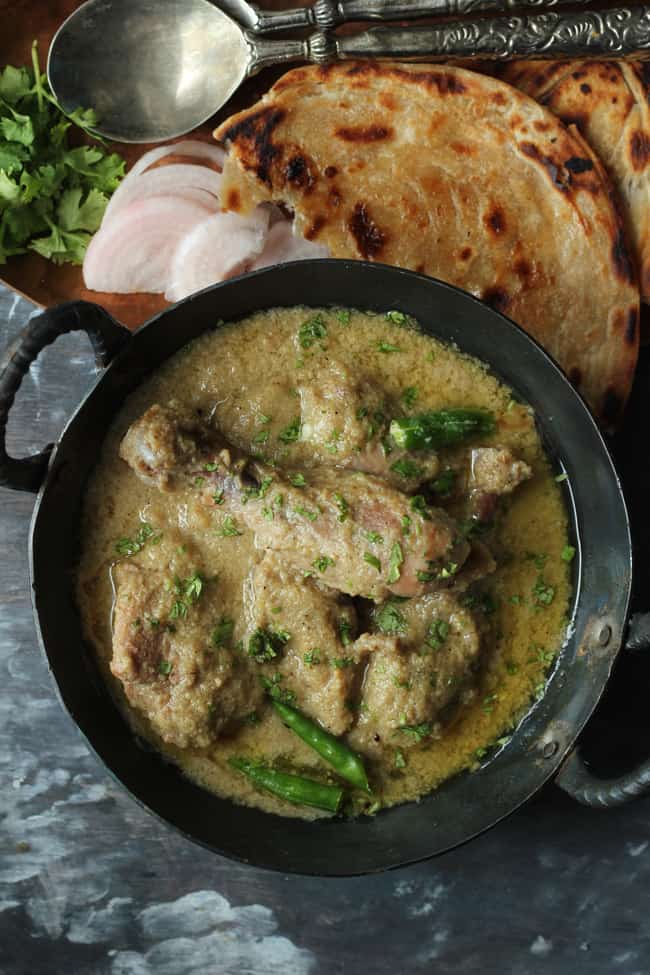
Korma is a mildly spiced thick gravy widely popular in the Indian subcontinent. It is a typical Mughlai-style curry. Unlike other Indian curries, korma has a subtle flavour of spices, creamy gravy, and a rich, tantalizing aroma. Usually, turmeric and red chilli are not used in a korma gravy.
Since I learned this chicken korma recipe, there has been no turning back. It compliments almost every Indian flatbread perfectly and is always the show-stopper of my dinner parties.
You will also find a few finger-licking good, instant pot-friendl y korma recipes in my debut cookbook – The 100 Best Curry .
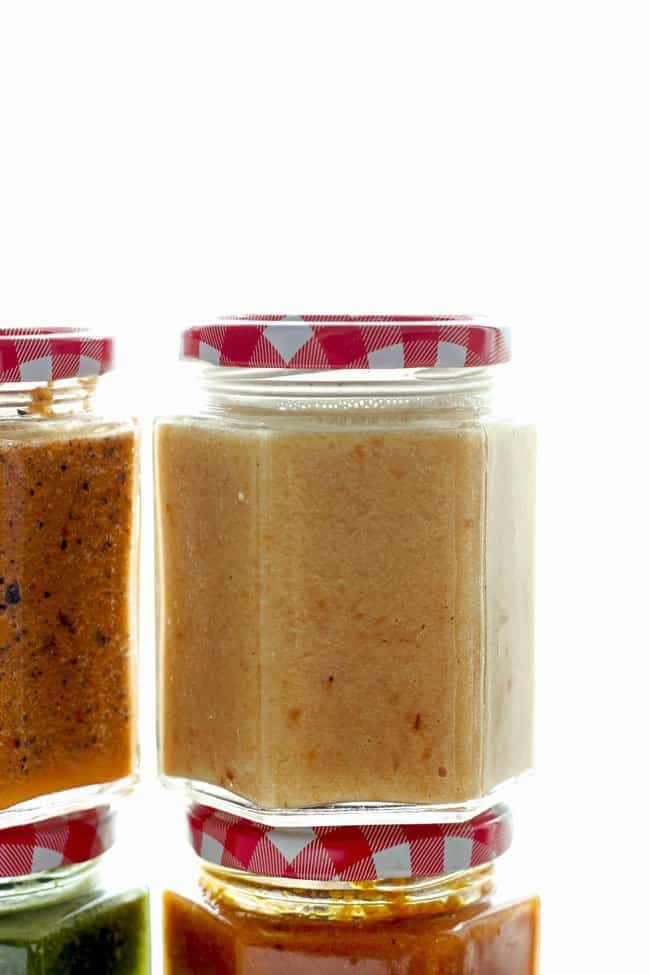
Homemade Korma Curry Paste
Did you know that only 6 ingredients ( onion, green chilli, ginger, garlic, ghee, and curd ) are required to make korma curry paste?
This homemade korma masala will satisfy all your indulgent curry cravings without hassle. Apart from making chicken korma, this curry paste can be used for marinating meats or making vegetarian korma. You can store it for one week in the refrigerator.
Curry Paste Video
My Tried and True Tips
- Chicken: T he best choice would be bone-in chicken pieces . The chicken bones lend a delicious flavour to the curry. You can use a combination of boneless chicken thigh and the leg piece.
- Marination: It is a key step in the chicken korma recipe. I prefer marinating the chicken for 6 – 8 hours or overnight. Rub the marinate nicely over the chicken and massage the chicken pieces for 5 – 10 minutes with the marinade.
- Curry Paste: A good korma curry gets its texture, taste, and aroma from the fried onion korma masala. Hence, make the masala at home or use a good quality readymade korma paste.
- Searing: Fry the marinated chicken pieces for 10 – 15 minutes or till they are pale white over low heat. Do not rush this process. It ensures that the chicken pieces are juicy.
- Gravy: The chicken korma has a luscious, creamy gravy. Hence, do not add too much water.
How To Make Korma Curry
Step 1) Marinade the chicken pieces in a thick curd, ginger-garlic paste, salt, and garam masala mixture for 5 – 6 hours.
Step 2) Follow my korma curry paste recipe to make the masala at home. You can marinate the chicken and prepare curry paste a day before making the chicken korma.
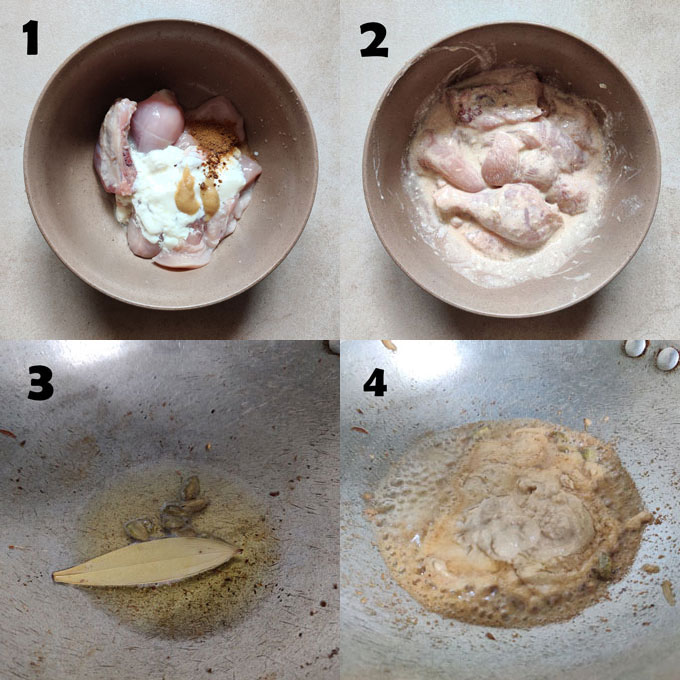
Step 3) Heat ghee in a heavy bottom casserole. Add the bay leaf and the crushed cardamom pods. Cook for a few seconds to release the aroma of spices.
Step 4) Add the korma masala, marinated chicken pieces, and marinade. Fry over low heat till they turn pale white and tender. This usually takes 10 – 15 minutes.
Step 5) Season with salt, green chillies, and garam masala.

Step 6) Cover and cook the chicken over low heat till the pieces are 80% cooked. To make little gravy add ½ Cup of water. Simmer uncovered till it thickens and the chicken is fully cooked. Keep stirring at regular intervals.
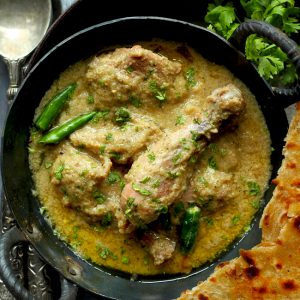
Garnish Chicken Korma with fresh coriander leaves.
Serving Suggestion
Chicken Korma is best enjoyed with paratha, naan , or roomali/tandoori roti. The creamy gravy compliments most of the Indian flatbread perfectly.
However, you can serve chicken korma with basmati rice, jeera rice , or saffron rice.
More Indian Chicken Recipes
- Chicken Pulao
- Butter Chicken
- Mughlai Egg Curry
- Sunday Chicken Curry
- Punjabi Egg Curry Masala
- Chicken Chettinad Masala
Ingredients
- ▢ 1 kilogram skinless, bone-in chicken pieces
Ingredients for marinade
- ▢ ½ Cup thick curd ( get recipe )
- ▢ 2 tablespoon ginger-garlic paste ( get recipe )
- ▢ 1 teaspoon garam-masala ( see recipe )
- ▢ 1 teaspoon salt
Ingredients for Gravy
- ▢ 1 Cup korma curry paste see recipe
- ▢ ¼ Cup ghee
- ▢ 1 bay leaf
- ▢ 2 – 3 green cardamom
- ▢ Salt to taste
- ▢ 2 – 3 green chillies
- ▢ ½ teaspoon garam-masala see recipe
- ▢ ½ Cup water
Instructions
- Clean, wash, and pat dry the chicken pieces. Prick the chicken pieces a few times with a fork.
- Combine curd, ginger-garlic paste, salt, and garam masala in a bowl. Mix nicely to make a smooth lump-free paste.
- Add chicken pieces to the marinade paste. Rub the chicken pieces with the marinade nicely. Keep the marinated chicken in the refrigerator overnight or for at least 5 – 6 hours.
- Prepare the korma curry paste following my recipe .
- To make chicken korma, heat ghee in a heavy bottom casserole. Add the bay leaf and the crushed cardamom pods. Cook for a few seconds to release the aroma of spices.
- Now add the marinated chicken pieces, korma curry paste along with the marinade. Fry over low heat till they turn pale white and tender. This usually takes 10 – 15 minutes.
- Season with salt, green chillies, and the garam masala. Cover and cook the chicken over low heat till the pieces are tender.
- To make little gravy add ½ Cup of water. Simmer the curry uncovered over low heat till it thickens. Keep stirring at regular intervals.
- Garnish Chicken Korma with fresh coriander leaves.
- Serve Chicken Korma warm with naan or tandoori roti.
Recipe Notes:
- Try to use the thick and fresh curd for marinating the chicken. Avoid curd with a sour flavor.
- Whisk the curd and other ingredients nicely before marinating the chicken.
- Water is always added towards the end of the process when the chicken pieces are almost cooked. After adding water do not cook the chicken pieces for too long.
Nutrition
We follow a strict NO SPAM Policy
