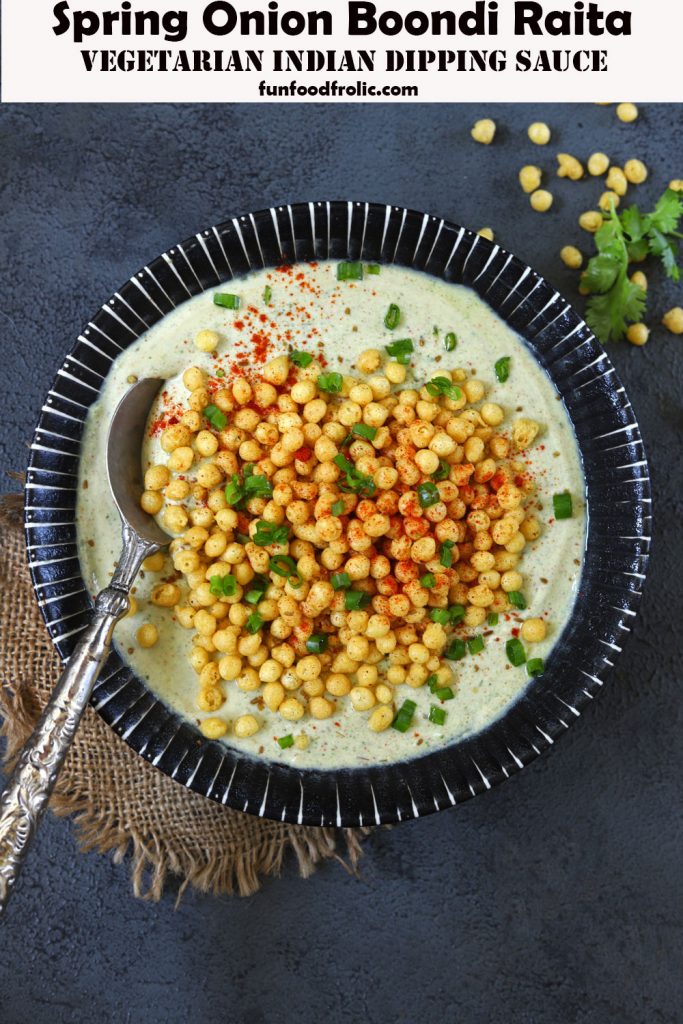
This is a special Boondi raita recipe with a refreshing green twist. Flavoured with green herbs – it is the easiest Indian side dish for pulao and curries. Be sure to watch the video!
- What is ‘Boondi Raita’?
- Ingredients For Raita
- The Green Herb Paste
- Watch Boondi Raita Video
- Serving Suggestion
- More Indian Raita Recipes
- Green Boondi Raita Recipe
What is ‘Boondi Raita’?
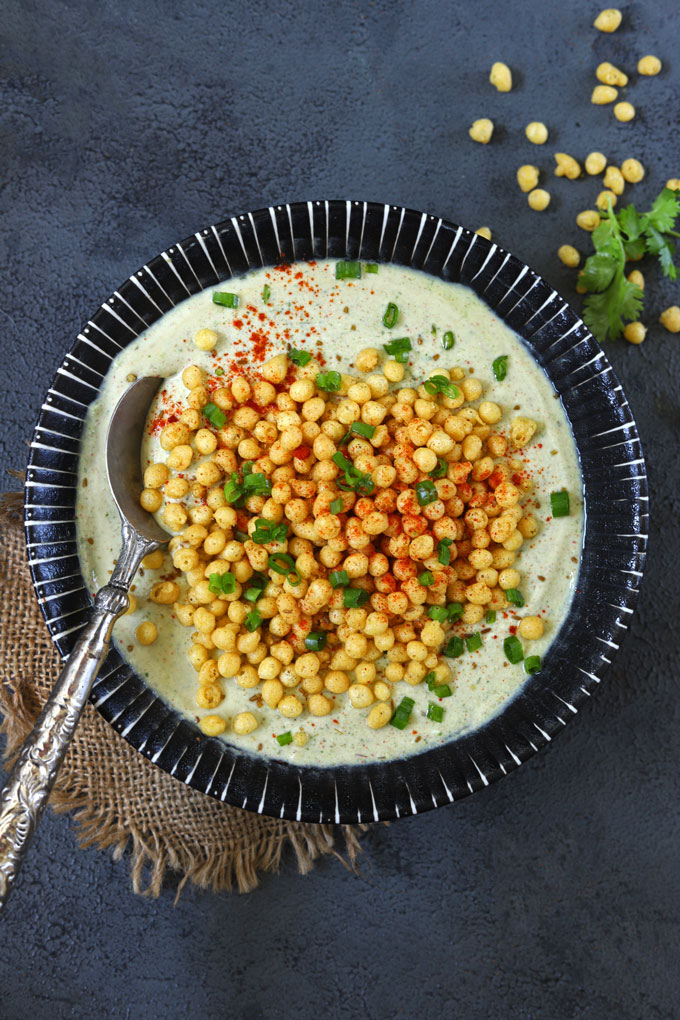
Boondi Raita is one of the most popular Indian side dishes. It is served with a variety of Indian main course meals as a dipping sauce. You can call it a sweet, mildly spicy, refreshing dip made with curd, spices, salt, sugar, and Boondi.
I am sharing a unique Boondi Raita recipe with the flavour of fresh herbs. It is one of my favourite raita recipes, because of its soothing colour and refreshing taste. There is no cooking involved, and all you need is 20 minutes.
Ingredients For Raita
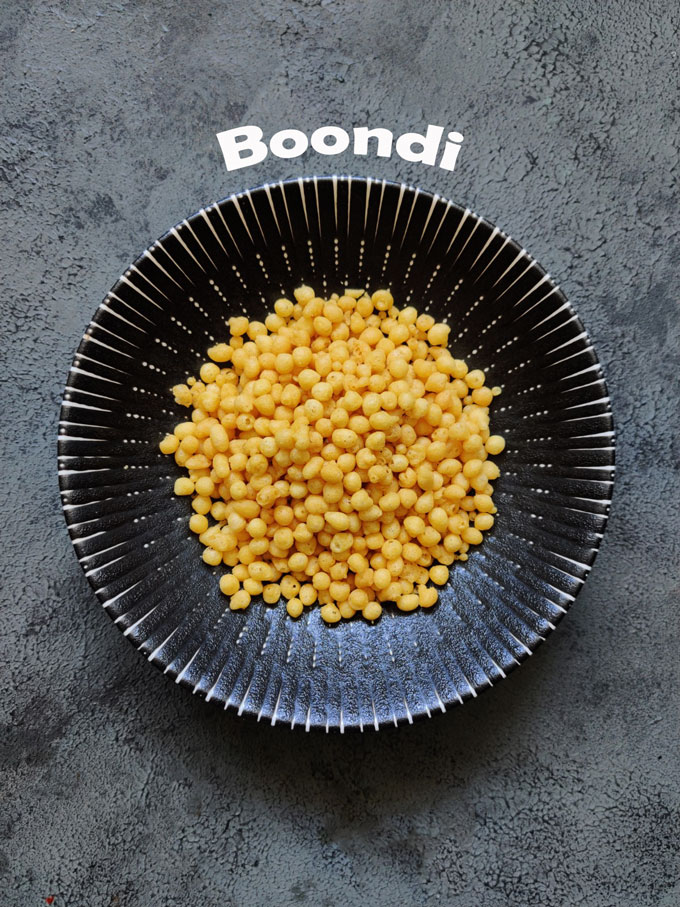
- Boondi : The key ingredient of this raita recipe is Boondi. The word ‘Boondi’ is a Hindi term for tiny crispy fried gram flour balls. It is a ready-to-use ingredient, easily available in supermarkets or grocery stores under the section of Indian dry snacks. You can use boondi to make Rajasthani Kadhi or murmura namkeen .
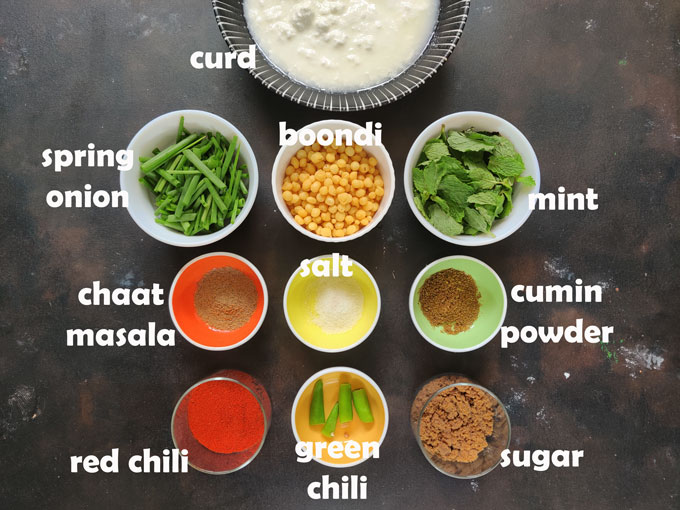
- Curd: Plain, unsweetened curd or thick Greek yoghurt. For vegan raita, use dairy-free yoghurt.
- Spices: Chaat Masala, Roasted Cumin Powder, Red Chilli Powder, Salt. Adjust the quantity of spices according to your taste preference.
- Sugar: A dash of sweetness helps to balance the heat of spices and green chillies. I prefer granulated white sugar or jaggery powder.
- Water or Milk: If the raita seems too thick, you can adjust the consistency by adding ¼ cup of plain water or room temperature milk for the creaminess.
The Green Herb Paste
I use a refreshing herb paste to flavour the curd and give it an appealing bright green colour. This paste is a combination of spring onion stalks, mint leaves, curd, and green chilli .
Adding the green paste to the Boondi raita is an optional step. Usually, the boondi raita served at restaurants does not contain any green paste.
Watch Boondi Raita Video
Serving Suggestion
This green boondi raita tastes delicious with aloo ke gutke or potato roast . My favourite meal combination is aloo ki sabzi , boondi raita, and the palak puri or methi paratha .
For Indian main course dishes like vegetable pulao , chicken pulao , paneer pulao , or chana masala this green raita is a perfectly refreshing, cooling side dish.
Storage: Make sure not to leave raita at room temperature for more than 2 – 3 hours as the curd becomes sour. It is best to store the leftover raita in the refrigerator.
More Indian Raita Recipes
- Baingan Raita
- Pineapple Raita
- Pahadi Cucumber Raita
- Mint Pomegranate Raita

Ingredients
Ingredients For Green Paste:
- ▢ ½ Cup mint leaves
- ▢ 1 Cup spring onion stalks, chopped
- ▢ 2 green chili, chopped
Other Ingredients For Raita:
- ▢ ⅓ Cup boondi balls
- ▢ 1 Cup water, hot
- ▢ 2 Cup curd or yogurt
- ▢ 1 tablespoon Chaat Masala
- ▢ 1 tablespoon cumin powder (jeera powder)
- ▢ 1 teaspoon red chili powder
- ▢ ½ teaspoon salt or to taste
- ▢ 1 tablespoon brown sugar or jaggery powder
Ingredients For Garnish:
- ▢ 1 tablespoon Boondi balls
- ▢ 1 teaspoon spring onion, chopped
Instructions
- Soak Boondi in hot water for 5 – 6 minutes. Later, drain on a colander. Gently stir with a spoon and allow to cool completely.
- Roughly chop the spring onion green stalks. Discard the spring onion bulb.
- In a blender combine the mint leaves, green stalks, green chili, and 1 tablespoon thick curd. Make a smooth paste. Set aside until required.
- Whisk curd till smooth and lump free, Use a wire whisk or hand mixer for the purpose.
- Add spices, salt, sugar, and whisk again until smooth.
- Next, add green paste to the masala curd. Whisk to evenly combine with the curd.
- Add softened Boondi balls into the raita. Mix nicely. Keep raita in the refrigerator until ready to serve.
- Garnish raita with boondi and chopped spring onion. Serve Boondi Raita chilled.
Recipe Notes:
- Make sure to use thick, unflavoured curd or yogurt for making the raita.
- If the raita seems too thick, add ¼ cup water or milk, whisk nicely to get the spoon dropping, smooth consistency.
- Do not add a spring onion bulb (onion) to the green paste. Only the green stalks are used. You can make the green paste with a combination of coriander and mint as well.
Nutrition
We follow a strict NO SPAM Policy

Green Boondi Raita Recipe
Equipment
- Mixing Bowl
- Blender
Ingredients
Ingredients For Green Paste:
- ½ Cup mint leaves
- 1 Cup spring onion stalks, chopped
- 2 green chili, chopped
Other Ingredients For Raita:
- ⅓ Cup boondi balls
- 1 Cup water, hot
- 2 Cup curd or yogurt
- 1 tablespoon Chaat Masala
- 1 tablespoon cumin powder (jeera powder)
- 1 teaspoon red chili powder
- ½ teaspoon salt or to taste
- 1 tablespoon brown sugar or jaggery powder
Ingredients For Garnish:
- 1 tablespoon Boondi balls
- 1 teaspoon spring onion, chopped
Instructions
- Soak Boondi in hot water for 5 - 6 minutes. Later, drain on a colander. Gently stir with a spoon and allow to cool completely.
- Roughly chop the spring onion green stalks. Discard the spring onion bulb.
- In a blender combine the mint leaves, green stalks, green chili, and 1 tablespoon thick curd. Make a smooth paste. Set aside until required.
- Whisk curd till smooth and lump free, Use a wire whisk or hand mixer for the purpose.
- Add spices, salt, sugar, and whisk again until smooth.
- Next, add green paste to the masala curd. Whisk to evenly combine with the curd.
- Add softened Boondi balls into the raita. Mix nicely. Keep raita in the refrigerator until ready to serve.
- Garnish raita with boondi and chopped spring onion. Serve Boondi Raita chilled.
Video
Notes
- Make sure to use thick, unflavoured curd or yogurt for making the raita.
- If the raita seems too thick, add ¼ cup water or milk, whisk nicely to get the spoon dropping, smooth consistency.
- Do not add a spring onion bulb (onion) to the green paste. Only the green stalks are used. You can make the green paste with a combination of coriander and mint as well.
Nutrition
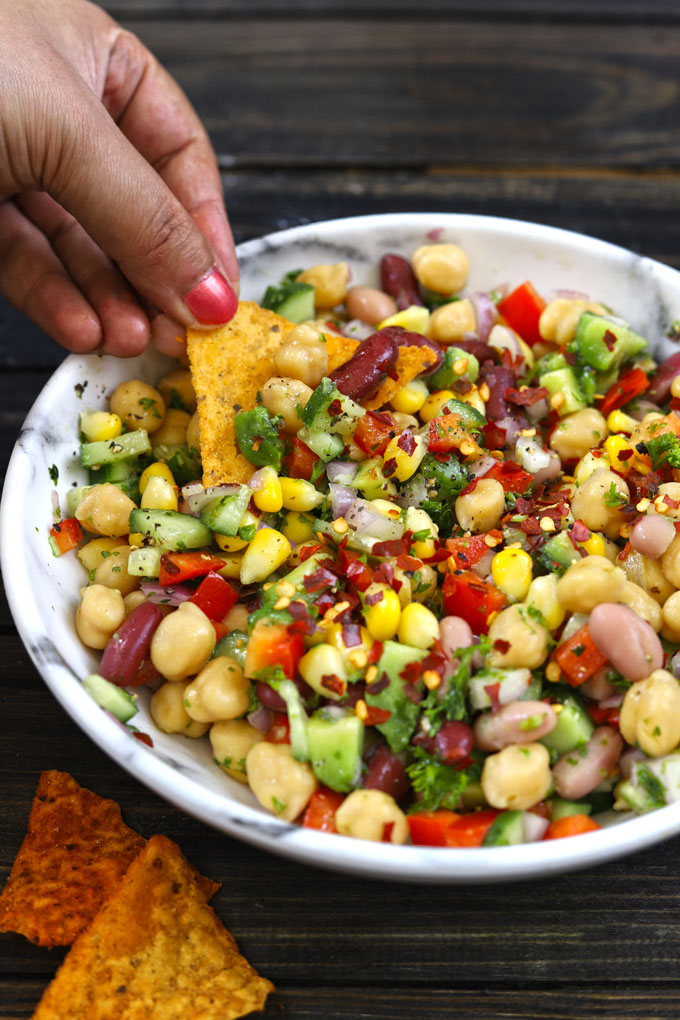
Colourful, crunchy, wholesome, and healthy are the right words to define this Mexican-style Mixed Beans Salad! This salad is probably the most delicious way to use that can of beans sitting in your pantry.

- About Beans
- Ingredients Required
- Canned vs. Home-Cooked Beans
- How To Cook Beans
- FAQs Related To Beans Salad
- More Salad Recipes
- Mixed Beans Salad Recipe
About Beans
Beans are the powerhouse of plant-based vegan protein and have a significant amount of soluble fibre, iron, and vitamins. From making rajma curry to chicken burrito bowl , you can survive on beans across the globe.
Here are a few reasons to include a variety of beans in your diet:
- most of the beans are low in fat
- fantastic vegan protein and gluten-free
- help in controlling blood sugar and cholesterol
- beans are fulfilling, versatile, and easy to cook
Ingredients Required
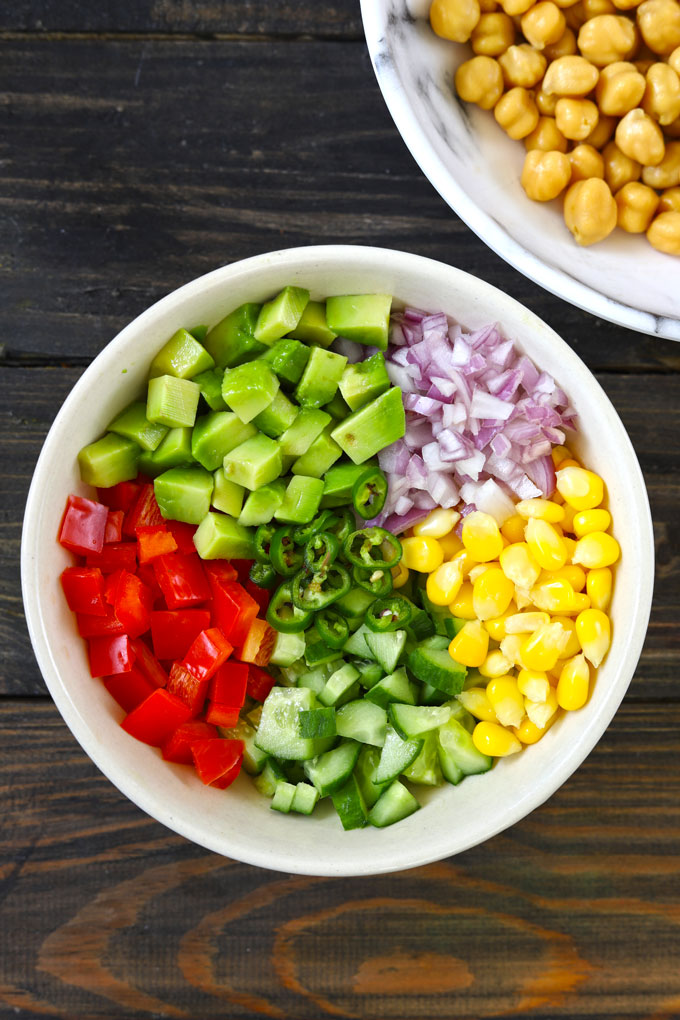
- Canned Beans: I use a mix of garbanzo (chickpeas), red kidney beans, and white beans or cannellini beans.
- Vegetables: Red Onion, Bell Pepper, Cucumber, Sweet Corn, and Avocado.
- Herbs & Seasoning: To dress the salad, I use one green chilli, lemon juice, virgin olive oil, and fresh cilantro.
Canned vs. Home-Cooked Beans
Canned Beans are easy to use, time-saving, and are readily available in all grocery stores. In contrast, dried beans cooked at home are inexpensive, easy to store, and free from all starch, preservatives, or excess salt.
For a healthier choice, it is always best to cook dry beans from scratch at home. Home-cooked beans are less mushy or overcooked. Hence, the best choice to make a salad.
How To Cook Beans
Dried beans take about 20 minutes to cook in an Instant Pot .
- Wash the dried beans thoroughly to remove dirt. Soak them for 6 hours in water. Later, drain water from the soaked beans. Add beans into the IP with enough water to cover the beans.
- Set the IP to pressure cook mode for 20 minutes at standard pressure. Once done, allow the pressure to release naturally, and your beans are ready!
- Allow them to cool completely in a metal colander before adding to the salad. You can cook the beans on a stovetop as well.
From chickpeas, garbanzo, kidney beans, and cannellini to black beans, and green beans, you can use any variety and combination of beans to make this salad.
Canned beans are pre-cooked so you can eat them straight away from the tin. Then, rinse off the extra salt, and they are good to go!
Yes, if you are using canned beans for your salads, drain and rinse them with cold water to cut the excess sodium content to ensure that the beans don’t alter the taste of your salad.

More Salad Recipes
- Lentil Salad
- Orange Salad
- Chickpea Salad
- Summer Fruit Salad
- Mango Shrimp Salad
- Classic Macaroni Salad
- Pineapple Pasta Salad
Get all my Salad Recipes here and you can watch the videos on Instagram .
If you try this recipe and love it, please leave a comment and a rating. This helps us grow and reach other food lovers like you.

Ingredients
- ▢ ½ cup canned garbanzo beans or chickpeas
- ▢ ½ cup canned red kidney beans
- ▢ ½ cup canned cannellini beans
- ▢ ½ cup chopped red onion
- ▢ ½ cup finely diced red bell pepper
- ▢ ½ cup finely diced cucumber
- ▢ ½ cup diced ripe avocado
- ▢ ½ cup sweet corn
- ▢ 1 finely chopped green chilli
- ▢ ¼ cup chopped fresh cilantro
Ingredients For Salad Dressing
- ▢ ¼ cup extra virgin olive oil
- ▢ Juice of one lemon
- ▢ 1 teaspoon crushed garlic
- ▢ 1 teaspoon Dijon mustard
- ▢ Salt and black pepper to taste
Instructions
- To begin making the Mixed Beans Salad, drain all the canned beans in a metal seive or colander. Rinse with water. Set aside for beans to dry completely.
- Chop all the vegetables and keep in the fridge.
- To prepare the dressing for the salad. Add all the ingredients for dressing in a bottle with the lid. Tightly close the lid and shake the bottle so all the ingredients get well combined.
- To prepare the salad, in a bowl combine all the chopped vegetables along with the beans. Pour the dressing over the salad and gently toss.
- Garnish with freshly chopped cilantro.
- Serve the Mixed Bean Salad immediately with nachos.
Recipe Notes:
- Meal Prep: You can prepare a large batch of dressing and use it for other salads as well. Or if you are using home cooked beans, cook a large batch for the week’s meal prep.
- Beans: You can use canned beans or home cooked beans for the salad. Store the leftover beans for 4 – 5 days in the fridge.
- Make Ahead: You can easily make this salad 2 – 3 hours before serving and store in the fridge. Last minute, pour the dressing and add fresh herbs to freshen it up.
- Leftover Beans: You can use leftover beans in stew, soups, or for making hummus, refried beans and chilli.
Nutrition
We follow a strict NO SPAM Policy
