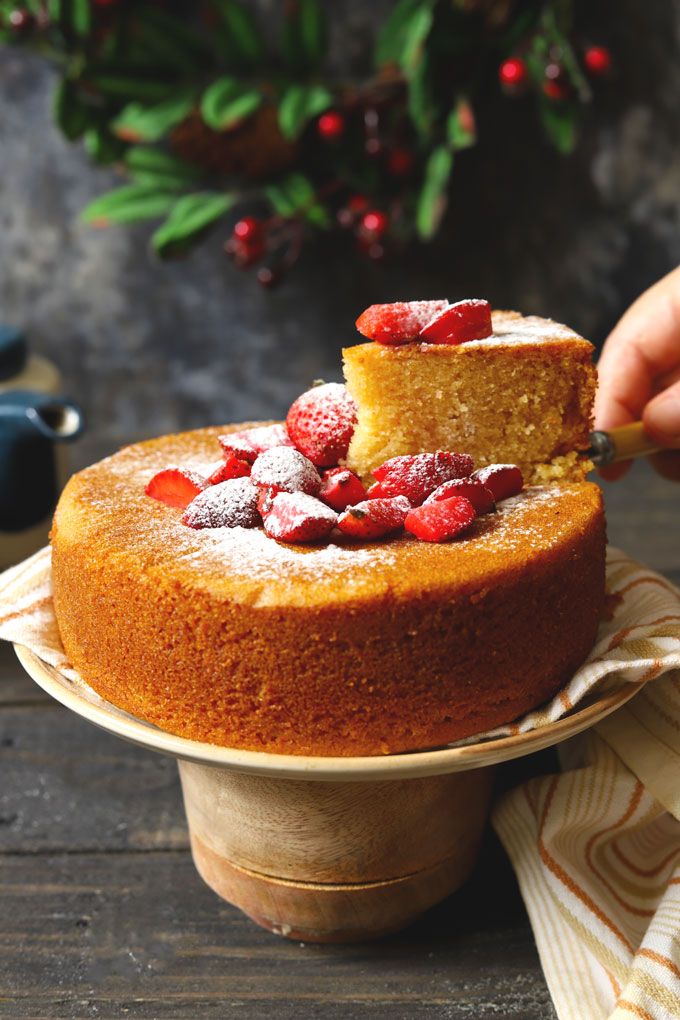
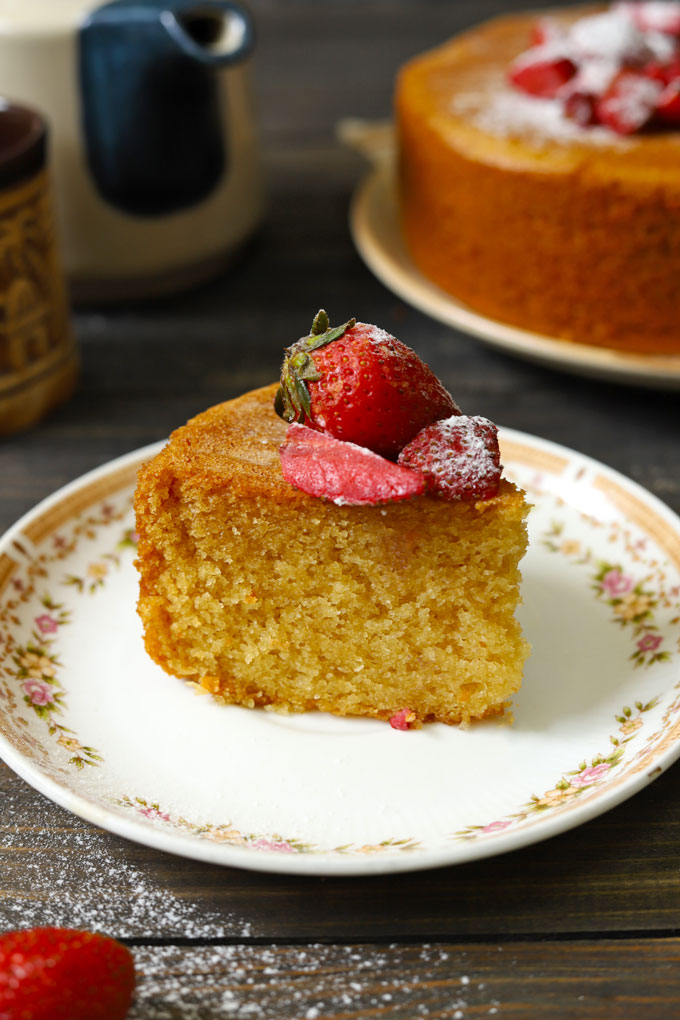
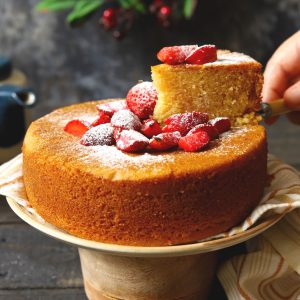
This is a soft, moist, vanilla flavour eggless Sponge Cake. Serve it with whipped cream and fresh fruits for teatime. Be sure to watch the video!
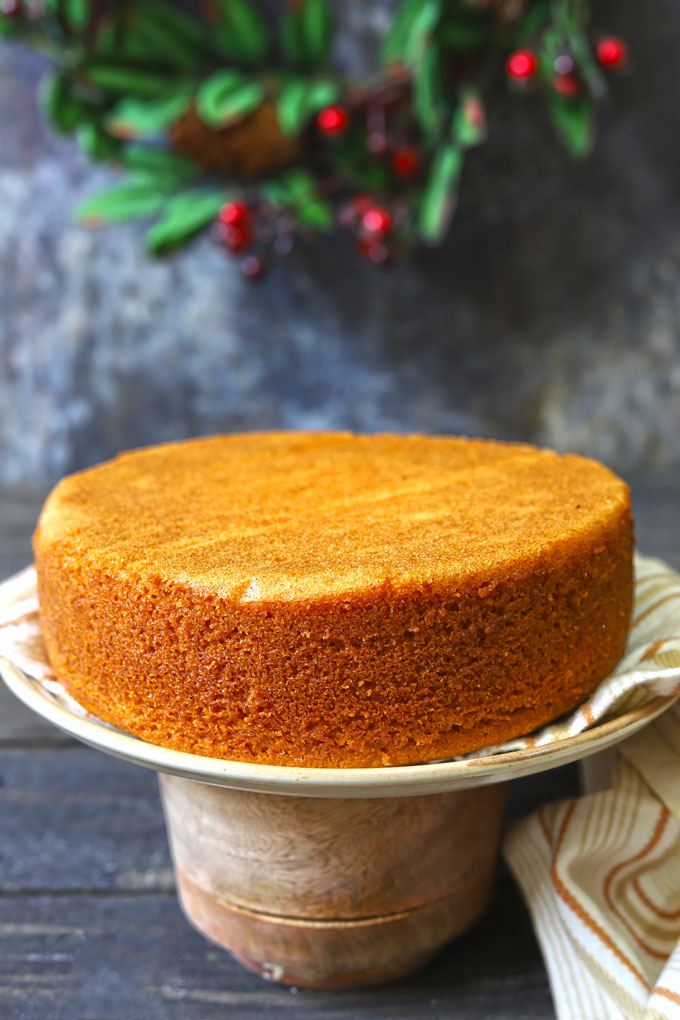
Vanilla Sponge Cake is a classic baking recipe you will always find in grandma’s recipe diary. It is a versatile cake you can serve in a million creative ways.
August – September is always a transitional month for me.
It’s not quite autumn, but it feels like summer is over, so I can spend some quality baking time in the kitchen without worrying about the melting butter and sweltering heat.
I love the warmth and comfort of old-fashioned teatime cakes. Instead of layering cakes with beautiful piping details, I like to keep them simple.
What You Need
You need 8 ingredients, 8-inch round cake tin, and a hand mixer to make eggless vanilla sponge cake.
- All-Purpose Flour: I have used basic all-purpose flour and not cake flour.
- Condensed Milk: This is an eggless cake. Hence, we are using condensed milk. I have used Nestle Sweetened Condensed Milk.
- Butter: The butter gives this sponge cake a rich buttery classic taste.
- Sugar : I add only 3 tablespoons of powdered sugar because the condensed milk is already sweet. You can use regular powdered sugar or castor sugar. Don’t use icing sugar.
- Vanilla : Adding vanilla flavour is optional.
- Other ingredients: Milk, Baking Powder, Baking Soda
Equipment : A hand mixer or a stand mixer with a whisk attachment is a must for making the batter for vanilla sponge cake. Else, it would be best if you used a lot of muscle power to get that perfect airy cake batter.
Baking Tin: You can bake this cake in a round or square tin. Or, if you are planning to layer the cake with frosting, divide the batter into two 8-inch cake tins and bake.
Watch Sponge Cake Video
My Tried & True Tips
My 1 Cup = 250 ml liquid and 200-gram flour. Whereas 1 tablespoon = 15 ml and 1 teaspoon = 5 ml. The condensed milk tin I bought was 400 grams. I used exactly half of it.
Ensure all ingredients are at room temperature before making the cake batter.
I have used salted butter hence skipping adding salt separately. If you use unsalted butter, add ¼ teaspoon salt to the flour.
I highly recommend using a hand mixer or stand mixer to achieve a light, fluffy, and airy cake batter.
After 30 minutes, cover the tin with aluminium foil if the top of the cake is browning too fast.
In my 52-litre capacity OTG, this eggless sponge cake takes precisely 45 minutes. I would suggest checking it after 30 minutes by inserting a toothpick.
Do not invert a piping hot cake after immediately bringing it out of the oven. Let it sit in the cake tin for 10 – 15 minutes or till it becomes lukewarm before inverting.
Serving Suggestion
There are a million ways to serve a sponge cake. It is the most versatile cake recipe.
A few of my favourite easy ways to serve a sponge cake are:
- dust it with icing sugar
- layer with fresh berries or fruits
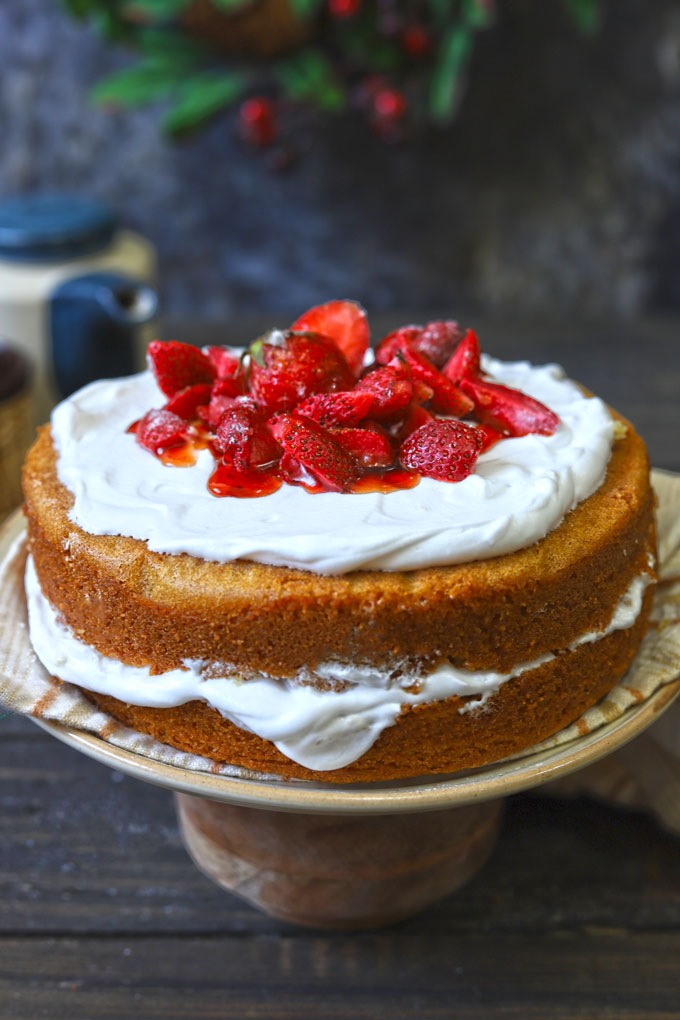
- make a victoria sponge with a layer of whipped cream and fruit compote
or serve it without any add-ons with a cup of tea
More Eggless Cake Recipes
- Eggless Peach Cake
- Eggless Orange Cake
- Eggless Semolina Cake
- Eggless Chocolate Cake
- Eggless Tutti Frutti Cake
- Strawberry Cheesecake
- Eggless Whole Wheat Cake
f ollow us on Youtube or Instagram for video recipes.
If you try this recipe and love it, please leave a comment and a rating. This helps us grow and reach other food lovers like you.
Ingredients
1 Cup = 250 ml
1 tablespoon = 15 ml
Dry Ingredients:
- ▢ 1 cup (200 gram) all purpose flour (maida)
- ▢ 1 ½ teaspoon baking powder
- ▢ 1 teaspoon baking soda
- ▢ 3 tablespoon powdered white sugar
Liquid Ingredients:
- ▢ ¼ cup (60 gram) unsalted butter, softened
- ▢ 1 cup milk, at room temperature
- ▢ 200 ml condensed milk, at room temperature
- ▢ 1 teaspoon vanilla essence
Instructions
- Preheat your oven at 170 degree celsius. Grease a 8 inch round cake tin with little butter or line the base with parchment paper.
- To prepare the eggless sponge cake, first mix together flour, baking soda, powder together in a mixing bowl. Set aside.
- In another mixing bowl cream butter using a hand mixer or stand mixer at medium speed still creamy in texture. Gradually add the condensed milk and whisk well using the hand mixer for 1 minute.
- Now add sugar and vanilla essence, one last time whisk with the hand mixer for 1 – 2 minutes at medium speed.
- Add ⅓ of the flour mixture in the liquid ingredients along with ½ cup of milk. Cut and fold to form a lump-free batter. Add remaining flour and milk. Once again, cut and fold the batter till smooth, evenly combined, and no streaks of flour remain.
- Pour the batter in the greased tin. Bake for 35 – 40 minutes in the middle rack of the oven. After 30 minutes cover the tin with an aluminum foil if the top of the cake is browning too fast. At this stage, insert a toothpick and check the cake for doneness as well.
- Once baked, remove the cake from the oven, let it sit in the tin for the next 10 – 15 minutes. After cooling down a bit invert the sponge cake onto a wire rack and let it cool down completely at room temperature.
- You can serve eggless sponge cake at room temperature or slightly chilled.
How To Decorate Sponge Cake:
- To layer the sponge cake, cut it horizontally from the middle into two equal halves. In the bottom half add the generous amount of whipped and spread it with the back of the spoon. Over the layer of cream add one or two spoonful of strawberry compote and some sliced fruits.
- Cover this layer with the upper half of the cake like a sandwich. Layer the upper half as well with cream, cherry compote and sliced fruits.
- Keep the cake in the fridge for sometime before serving. I feel after getting chilled it tastes more delicious and the flavors are well soaked by the sponge cake.
Recipe Notes:
- Make sure all the ingredients are at room temperature before making the cake batter.
- I have used salted butter hence skipped adding salt in the flour. If you are using unsalted butter add ¼ teaspoon salt in the flour.
- I highly recommend using a hand mixer or stand mixer to achieve a light, fluffy, and airy cake batter.
- After 30 minutes cover the tin with an aluminum foil if the top of the cake is browning too fast.
- In my 52-liter capacity OTG, this eggless sponge cake takes exact 45 minutes. I would suggest checking it after 30 minutes by inserting a toothpick.
- Do not try to invert a piping hot cake after immediately bringing it out from the oven. Let it sit in the cake tin for 10 – 15 minutes or till it becomes lukewarm before inverting.
Nutrition
We follow a strict NO SPAM Policy

Eggless Sponge Cake Recipe
Equipment
- Mixing Bowl
- Hand Mixer
- Round Cake Tin
- Oven
Ingredients
1 Cup = 250 ml
1 tablespoon = 15 ml
Dry Ingredients:
- 1 cup (200 gram) all purpose flour (maida)
- 1 ½ teaspoon baking powder
- 1 teaspoon baking soda
- 3 tablespoon powdered white sugar
Liquid Ingredients:
- ¼ cup (60 gram) unsalted butter, softened
- 1 cup milk, at room temperature
- 200 ml condensed milk, at room temperature
- 1 teaspoon vanilla essence
Instructions
- Preheat your oven at 170 degree celsius. Grease a 8 inch round cake tin with little butter or line the base with parchment paper.
- To prepare the eggless sponge cake, first mix together flour, baking soda, powder together in a mixing bowl. Set aside.
- In another mixing bowl cream butter using a hand mixer or stand mixer at medium speed still creamy in texture. Gradually add the condensed milk and whisk well using the hand mixer for 1 minute.
- Now add sugar and vanilla essence, one last time whisk with the hand mixer for 1 - 2 minutes at medium speed.
- Add ⅓ of the flour mixture in the liquid ingredients along with ½ cup of milk. Cut and fold to form a lump-free batter. Add remaining flour and milk. Once again, cut and fold the batter till smooth, evenly combined, and no streaks of flour remain.
- Pour the batter in the greased tin. Bake for 35 - 40 minutes in the middle rack of the oven. After 30 minutes cover the tin with an aluminum foil if the top of the cake is browning too fast. At this stage, insert a toothpick and check the cake for doneness as well.
- Once baked, remove the cake from the oven, let it sit in the tin for the next 10 - 15 minutes. After cooling down a bit invert the sponge cake onto a wire rack and let it cool down completely at room temperature.
- You can serve eggless sponge cake at room temperature or slightly chilled.
How To Decorate Sponge Cake:
- To layer the sponge cake, cut it horizontally from the middle into two equal halves. In the bottom half add the generous amount of whipped and spread it with the back of the spoon. Over the layer of cream add one or two spoonful of strawberry compote and some sliced fruits.
- Cover this layer with the upper half of the cake like a sandwich. Layer the upper half as well with cream, cherry compote and sliced fruits.
- Keep the cake in the fridge for sometime before serving. I feel after getting chilled it tastes more delicious and the flavors are well soaked by the sponge cake.
Video
Notes
- Make sure all the ingredients are at room temperature before making the cake batter.
- I have used salted butter hence skipped adding salt in the flour. If you are using unsalted butter add ¼ teaspoon salt in the flour.
- I highly recommend using a hand mixer or stand mixer to achieve a light, fluffy, and airy cake batter.
- After 30 minutes cover the tin with an aluminum foil if the top of the cake is browning too fast.
- In my 52-liter capacity OTG, this eggless sponge cake takes exact 45 minutes. I would suggest checking it after 30 minutes by inserting a toothpick.
- Do not try to invert a piping hot cake after immediately bringing it out from the oven. Let it sit in the cake tin for 10 - 15 minutes or till it becomes lukewarm before inverting.
Nutrition
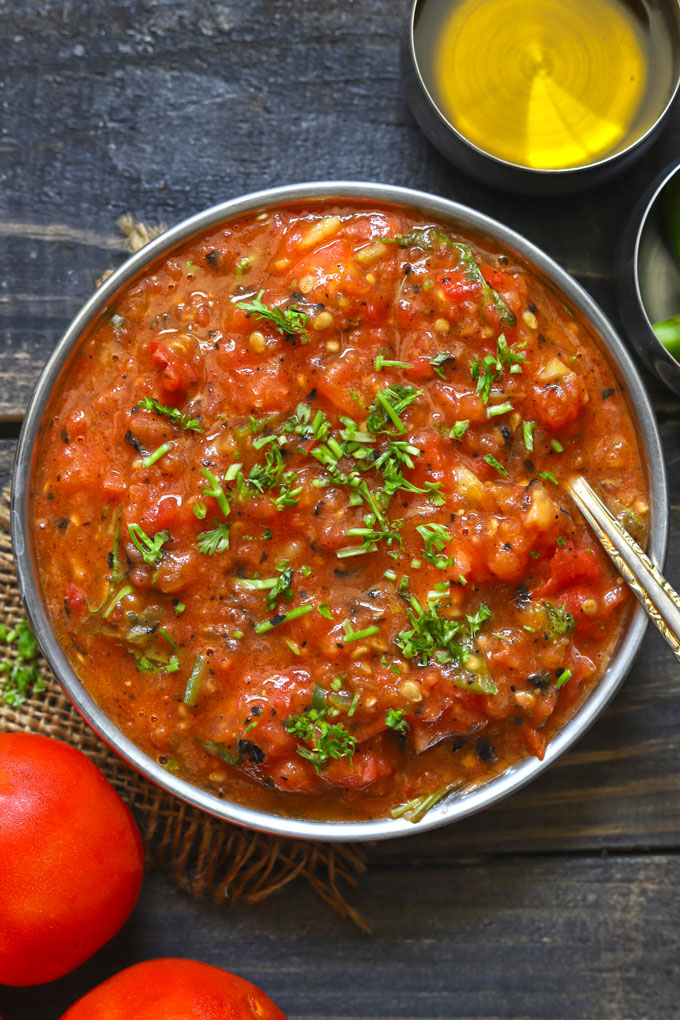
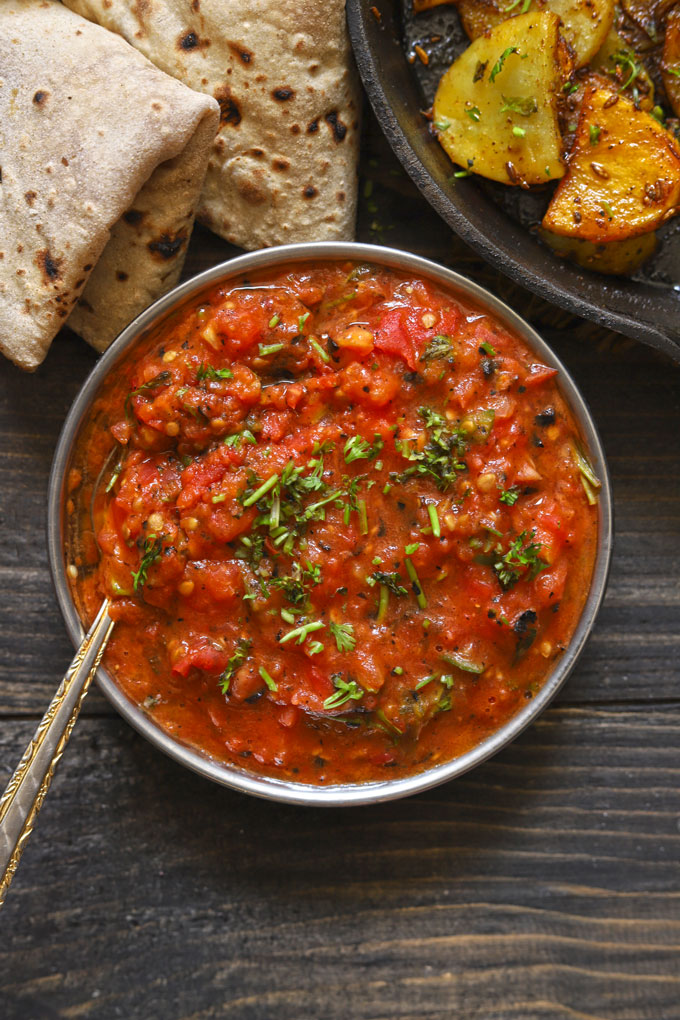
This is a North India-style roasted tomato chutney recipe with a delicious smokey flavour. It is also known as bhune tamatar ki chutney. Be sure to watch the video!
- About Tomato Chutney
- Ingredients Required
- How To Make Chutney
- Watch Tomato Chutney Video
- Serving Suggestion
- More Indian Chutney Recipes
- Roasted Tomato Chutney Recipe
About Tomato Chutney
Roasted Tomato Chutney is popular in North India, especially in Uttar Pradesh. It is a flavoursome summer affair.
When there is a lesser variety of seasonal vegetables available in the market, simple, homemade condiments like tamatar ki chutney add great variety to the everyday menu .
The word ‘bhune’ is a Hindi term for anything that is roasted . The tomatoes and chillies are roasted over a direct flame to get the smokey flavour in the chutney. The fire-roasted tomatoes give chutney its name – bhune tamatar ki chutney.
I sometimes feel it is the Indian take on the Mexican tomato salsa . Who knows, maybe the recipe was inspired by the authentic salsa.
Ingredients Required
You need only 5 ingredients to make this tomato chutney.
- Fresh Tomato – use ripe and juicy tomatoes. You can use them to make tomato salad also.
- Green Chilli – helps in cutting down the acidity of the tomatoes.
- Fresh Coriander – makes the chutney refreshing and aromatic
- Salt to taste
- Mustard Oil – gives a spicy and savoury flavour to the chutney.
How To Make Chutney
It takes less than 20 minutes to make this roasted tomato chutney at home from scratch. Let’s see how to do it in two simple steps.
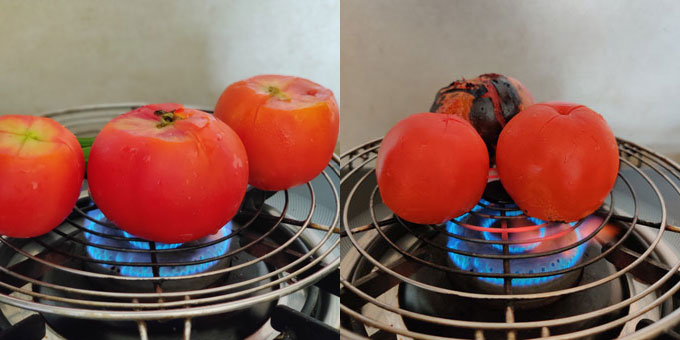
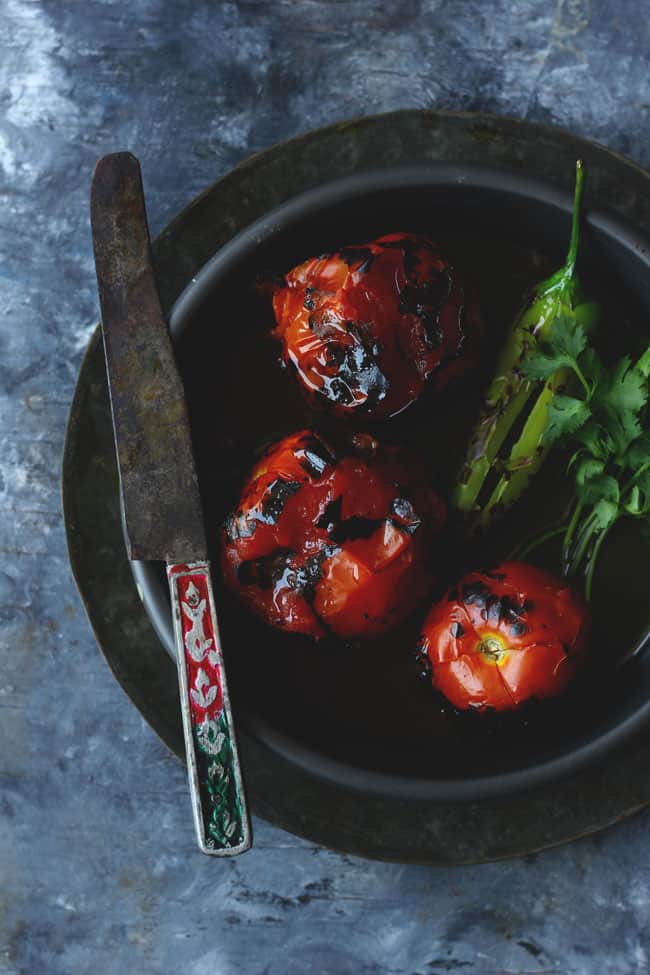
Roasting: It is the key step in making this tamatar chutney. Tomatoes and green chillies roasted/grilled over the direct fire flame give chutney an intense smokey flavour. You can grill them in a BBQ as well.
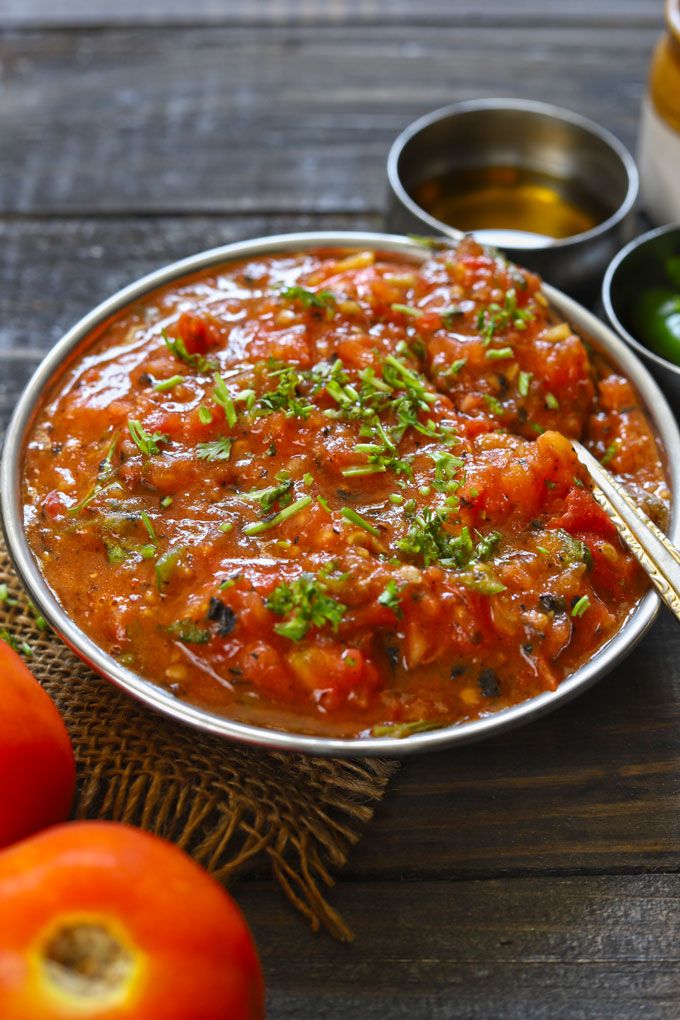
Mixing: Remove the charred skin of the tomatoes. Roughly chop the roasted tomatoes, green chilli, and coriander for a rustic texture. Mix with salt and mustard oil. Or you can process them together in a food processor.
Watch Tomato Chutney Video
Serving Suggestion
Bhune Tamatar Ki Chutney is one multi-purpose Indian dip that can be served in many ways.
You can serve it as a side dish with Indian main-course curry or dal. Or serve it with masala potato fry and paratha for a hearty meal.
In my house, we love to devour this flavoursome chutney with either arhar or masoor dal , and jeera rice . A delectable, comforting meal combination for summer days.
Roasted Tomato Chutney can also be served as a dip with snacks and munchies. It is one of the quickest, tastiest condiments that can be done in no time.
More Indian Chutney Recipes
- Mint Chutney
- Coconut Chutney
- Sweet Mango Chutney
- Apple Raisin Chutney
If you try this recipe and love it, please leave a comment and a rating. This helps us grow and reach other food lovers like you.

Ingredients
- ▢ 2 – 4 medium-size tomato
- ▢ 1 – 2 green chili
- ▢ Salt to taste
- ▢ ¼ Cup chopped fresh coriander
- ▢ 2 tablespoon mustard oil (sarson oil)
Instructions
- Rinse the tomato with water. Pat dry with a kitchen towel. On top of each tomato, make a cross or an ‘x’ mark using a sharp knife ( refer to the recipe video ).
- To roast the tomato, you can keep them directly over the flame or use a wire mesh. You can roast the tomato on a bbq grill as well.
- Roast the tomatoes till the skin is charred. Keep on turning tomatoes while roasting.
- Once roasted, transfer the tomatoes to a bowl filled with cold water. This step helps in removing the skin of the tomatoes easily. Remove the charred skin of each tomato.
- Combine roasted tomato, chilli, salt, and coriander in a food processor. Pulse to get a combine and get a coarse texture. You can manually chop them as well.
- Add mustard oil and mix nicely. Taste and adjust the seasoning accordingly.
- Transfer roasted tomato chutney to a clean jar and store in the fridge or serve immediately.
Recipe Notes:
- Along with tomatoes, you can roast green chilies as well.
- Tomatoes and green chilies roasted/grilled over the direct fire flame gives chutney an intense smokey flavor. You can grill them in a BBQ as well.
- You can either chop the ingredients or pulse in a food processor. The idea is to get a chunky and coarse chutney instead of a smooth paste.
- You can store this chutney in the fridge for a week.
Nutrition
We follow a strict NO SPAM Policy
