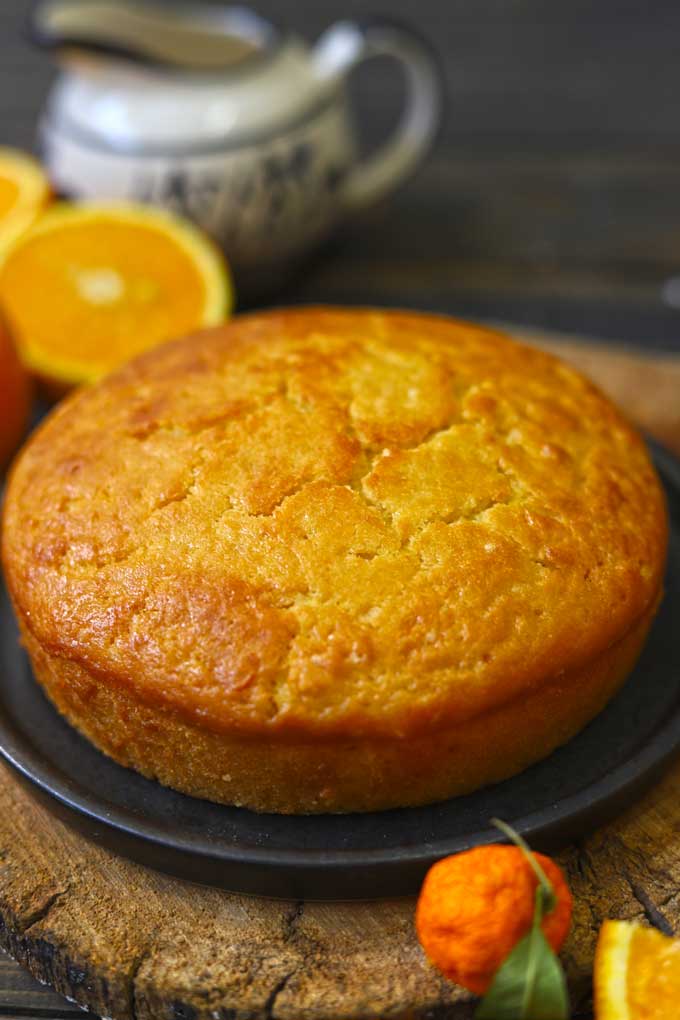
Loaded with the flavour of fresh oranges, this is the easiest orange cake recipe without eggs or butter.
- Right Oranges For The Cake
- Hina’s Tried and True Tips
- Cake Decoration
- Watch Orange Cake Video
- Eggless Orange Cake Recipe
This orange cake is the best thing that can happen on a teatime. The tanginess of oranges juice, the subtle sweet notes, and the bitterness of citrus zest make this cake a perfect teatime treat.
Oranges are the true summer delight. They are full of flavour and juice, perfect for a cake recipe like this one, making refreshing iced tea , light and crunchy salad , or a big batch of orange marmalade .
Foolproof Baking Recipes
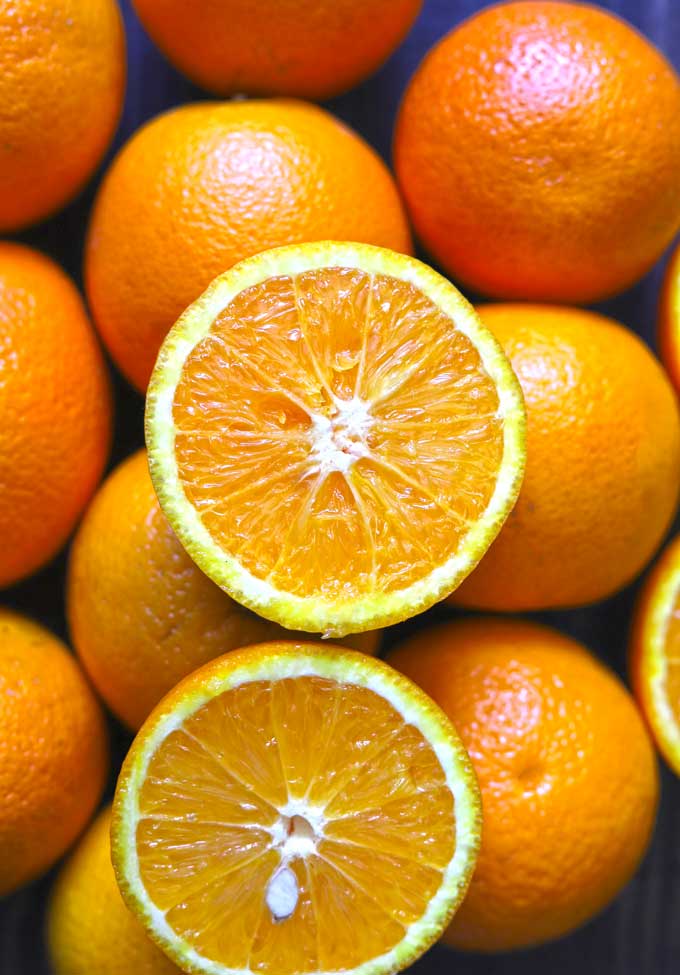
Right Oranges For The Cake
The common orange or the navel orange is the best for making this eggless orange cake.
In India, the navel orange is sold as imported orange , or Australian orange can be used. Avoid using the local variety of mandarin orange (Santara or Nagpur orange) for this cake recipe. The mandarin orange is tough to juice, and the skin is bitter.
The Kinnow orange from the Northern region of India is also a good choice for this cake recipe. They are very similar to navel oranges. On many occasions, I have baked this cake with Kinnow oranges from my hometown in Uttarakhand.
But always use FRESH ORANGES for making this cake .
Hina’s Tried and True Tips
There are a few points in this teatime cake recipe where one needs to be very careful to avoid D-I-S-A-S-T-E-R.
- Dry Ingredients: It is important to combine dry ingredients nicely so that baking powder and soda are mixed evenly with the flour.
- Olive Oil: I prefer extra virgin olive oil for my cake recipes. The olive oil gives a moist and light texture to the cake. If you do not have olive oil, use any flavourless oil such as – canola oil, rice bran oil, or refined oil.
- Orange Juice: The one key ingredient that can make or break your cake is orange juice and zest. Stick to fresh orange juice for making this cake. Avoid using tetra-pack orange juice. And you cannot miss the orange zest.
- Room Temperature: Make sure all the ingredients, especially curd/yogurt is at room temperature before preparing the cake batter. Do not add cold or straight-out-of-the-fridge ingredients to the batter.
- Do Not OVER MIX: This cake batter does not require hours of whisking or mixing . Once everything is moistened and combined well, stop mixing. Folding the cake batter for a longer duration does not make it light and fluffy it does exactly the opposite.
- Baking Tin: From a bundt pan, or rectangular loaf pan to a simple round cake tin, you can bake the orange cake in either of these baking pans. Make sure to grease the pan well or line it with parchment paper.
- Baking Time: Baking a delicate fruit cake like this one for a long time is a crime. If the toothpick inserted in the centre comes out clean with minimal crumbs, that is the signal to pull out the cake from the oven.
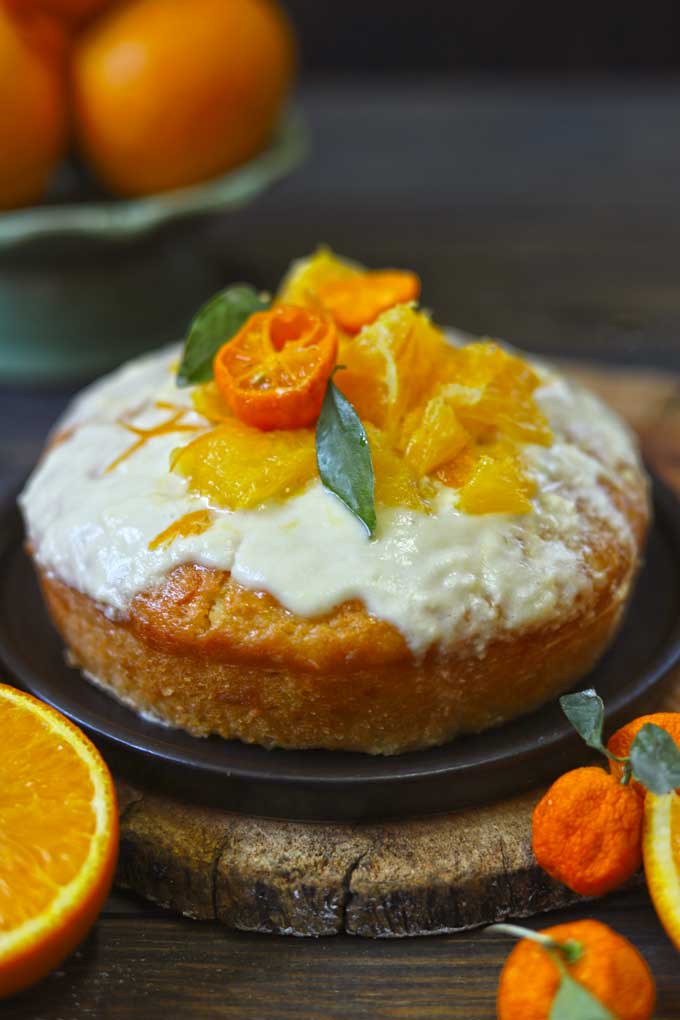
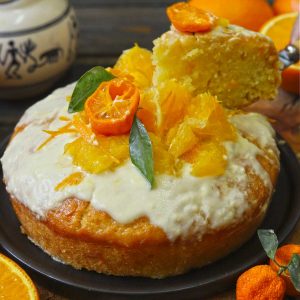
Cake Decoration
I have layered the cake with simple heavy whipping cream and fresh oranges. You can simply dust it with icing sugar or glaze it with orange-sugar syrup. Either way, it tastes delicious and will become your favourite teatime cake.
Watch Orange Cake Video
Love fruits in your desserts? Try this Thai Mango Sticky Rice , summer special Vegan Peach Cake , Lemon Pound Cake , or the No Bake Strawberry Cheesecake .
follow me on Youtube or Instagram for latest recipes.
Ingredients
1 Cup = 250 ml, 1 Tablespoon = 15 ml
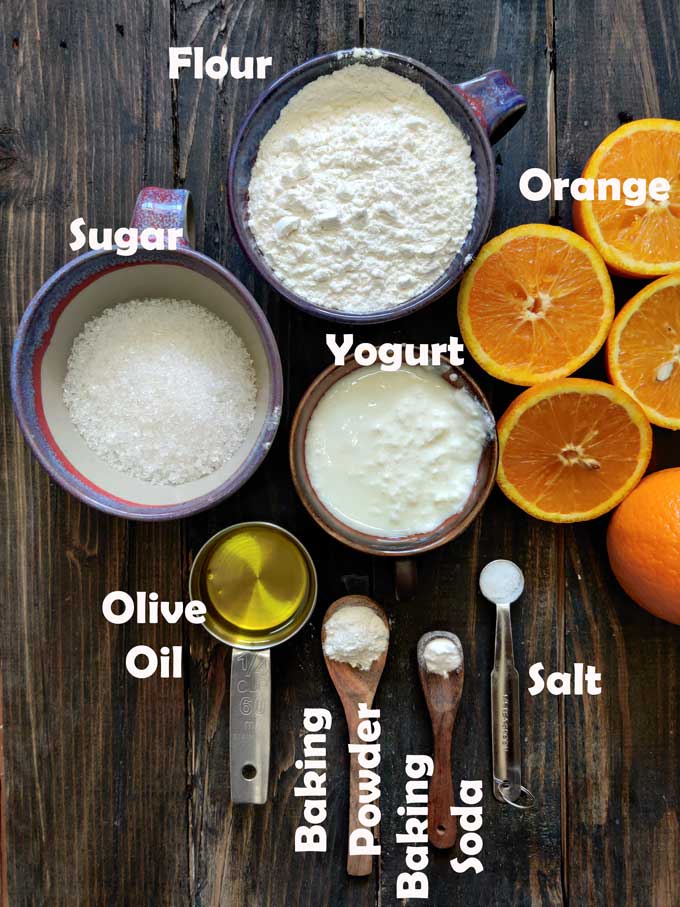
- ▢ 1 Cup (120 gram) all-purpose flour (maida)
- ▢ ½ cup (100 gram) granulated white sugar
- ▢ ½ teaspoon baking powder
- ▢ ⅛ teaspoon baking soda
- ▢ ¼ teaspoon salt
- ▢ ½ Cup (120 ml approx) orange juice (see recipe note)
- ▢ ¼ Cup plain yogurt or curd, at room temperature
- ▢ ¼ Cup olive oil
- ▢ 1 teaspoon orange zest
Instructions
- Preheat oven to 180 degrees C.elcius Grease a 7-inch round cake pan with butter and dust it with a tablespoon of flour. Set aside.
- Combine flour, baking powder, soda, salt, sugar in a large mixing bowl.
- Whisk together yogurt, olive oil, and juice in a bowl for 5 minutes or until combined well.
- Add the liquid mixture into the dry ingredients. Fold the batter using a rubber spatula. Make sure no flour streaks remain in the batter. Do not overmix the batter.
- Once the batter is combined pour it into the greased baking tin.
- Bake in the preheated oven for about 50 minutes in the middle rack or until a tester comes out clean.
- Transfer the cake to a wire rack. Allow to cool down completely before slicing or decorating. The cake should not be warm to touch.
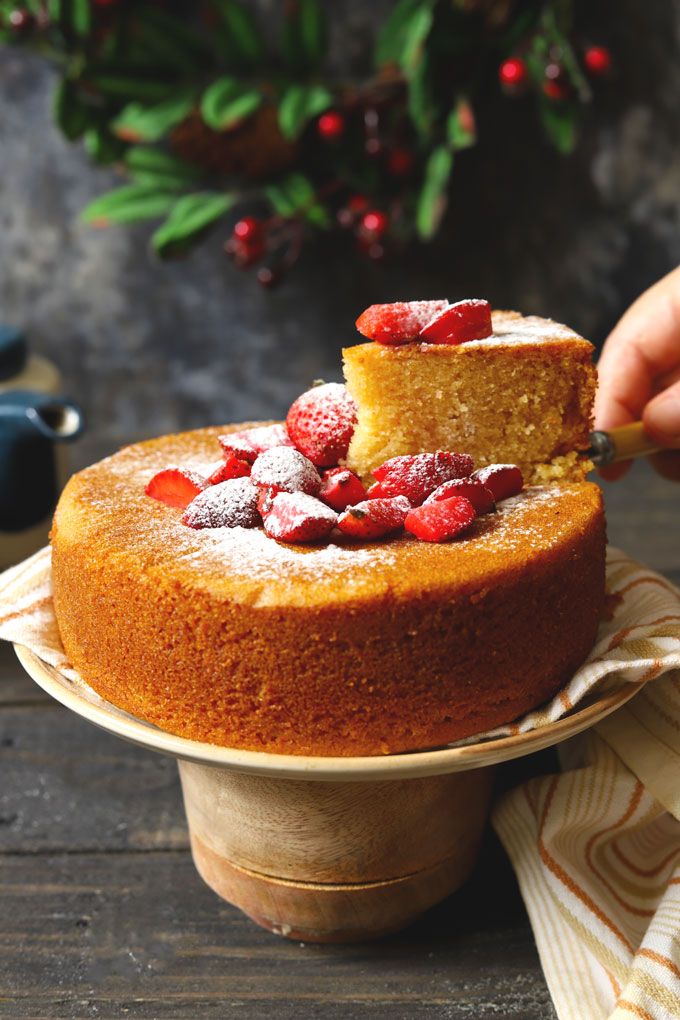
- Dust with confectioners’ sugar or layer with heavy whipping cream.
- Serve eggless orange cake sliced with fresh oranges.
Recipe Notes:
- The olive oil gives a moist and light texture to the cake. If you do not have olive oil, use any flavorless oil such as – canola oil, rice bran oil, or refined oil.
- Quantity of orange juice for cake batter may vary from ½ Cup to 1 Cup depending upon the quality of the flour and type of measuring cup . I would suggest starting with ½ Cup of orange juice if the cake batter seems too dry add more. The kind of flour I use requires 1 Cup of orange juice.
- Make sure all the ingredients especially curd/yogurt is at room temperature before preparing the cake batter.
- This cake batter does not require hours of whisking or mixing. Do not over mix the cake batter.
- If the toothpick inserted in the center comes out clean with minimal crumbs, that is the signal to pull out the cake from the oven.
Nutrition
We follow a strict NO SPAM Policy

Eggless Orange Cake Recipe
Equipment
- Mixing Bowl
- Oven
- Cake Tin
Ingredients
1 Cup = 250 ml, 1 Tablespoon = 15 ml
- 1 Cup (120 gram) all-purpose flour (maida)
- ½ cup (100 gram) granulated white sugar
- ½ teaspoon baking powder
- ⅛ teaspoon baking soda
- ¼ teaspoon salt
- ½ Cup (120 ml approx) orange juice (see recipe note)
- ¼ Cup plain yogurt or curd, at room temperature
- ¼ Cup olive oil
- 1 teaspoon orange zest
Instructions
- Preheat oven to 180 degrees C.elcius Grease a 7-inch round cake pan with butter and dust it with a tablespoon of flour. Set aside.
- Combine flour, baking powder, soda, salt, sugar in a large mixing bowl.
- Whisk together yogurt, olive oil, and juice in a bowl for 5 minutes or until combined well.
- Add the liquid mixture into the dry ingredients. Fold the batter using a rubber spatula. Make sure no flour streaks remain in the batter. Do not overmix the batter.
- Once the batter is combined pour it into the greased baking tin.
- Bake in the preheated oven for about 50 minutes in the middle rack or until a tester comes out clean.
- Transfer the cake to a wire rack. Allow to cool down completely before slicing or decorating. The cake should not be warm to touch.
- Dust with confectioners’ sugar or layer with heavy whipping cream.
- Serve eggless orange cake sliced with fresh oranges.
Video
Notes
- The olive oil gives a moist and light texture to the cake. If you do not have olive oil, use any flavorless oil such as – canola oil, rice bran oil, or refined oil.
- Quantity of orange juice for cake batter may vary from ½ Cup to 1 Cup depending upon the quality of the flour and type of measuring cup . I would suggest starting with ½ Cup of orange juice if the cake batter seems too dry add more. The kind of flour I use requires 1 Cup of orange juice.
- Make sure all the ingredients especially curd/yogurt is at room temperature before preparing the cake batter.
- This cake batter does not require hours of whisking or mixing. Do not over mix the cake batter.
- If the toothpick inserted in the center comes out clean with minimal crumbs, that is the signal to pull out the cake from the oven.
Nutrition
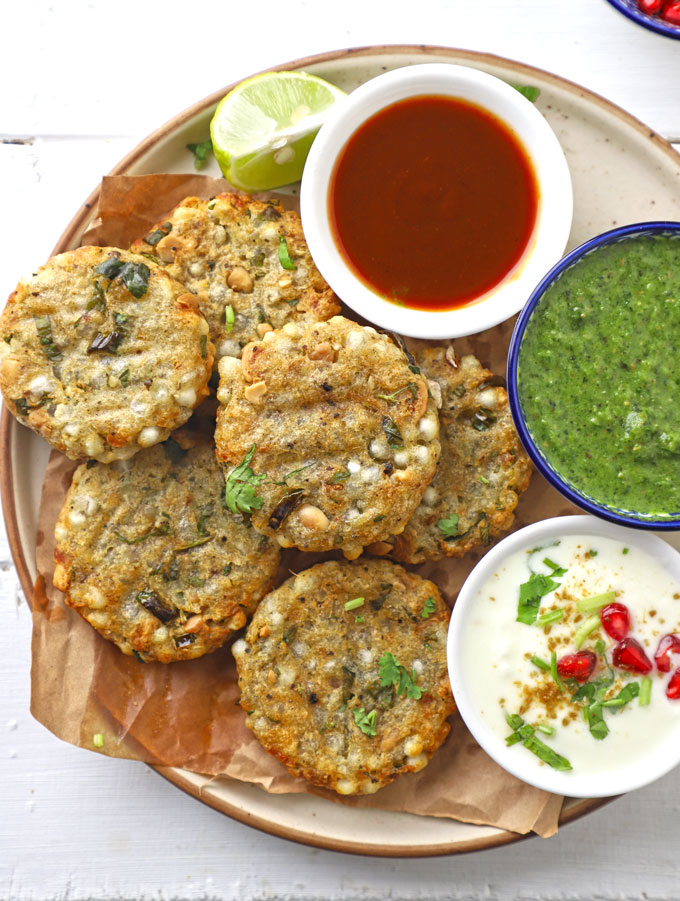
Meet the Sabudana Vada: India’s favourite vegetarian snack made with sago (tapioca pearls) and potatoes.
- What is Sabudana made of?
- What is Sabudana Vada?
- Watch Sabudana Vada Video
- How To Air Fry Sabudana Vada
- Hina’s Tried and True Tips
- Frequently Asked Questions
- Sabudana Vada Recipe
What is Sabudana made of?
Sabudana is the Hindi term for tapioca pearls. It is also known as sago. Sabudana is a plant-based ingredient made with starch from tapioca roots. Later, the starch is processed to form tiny grain-like spherical pearls to make sabudana.
Sago is widely used in Southeast Asian countries to make desserts, pudding, bubble tea, or snacks. In India Cuisine, sago pearls are commonly used to make various dishes. Many people consume it while observing Hindu fasts such as Navratri, Ganesh Chaturthi, because it contains no grains.
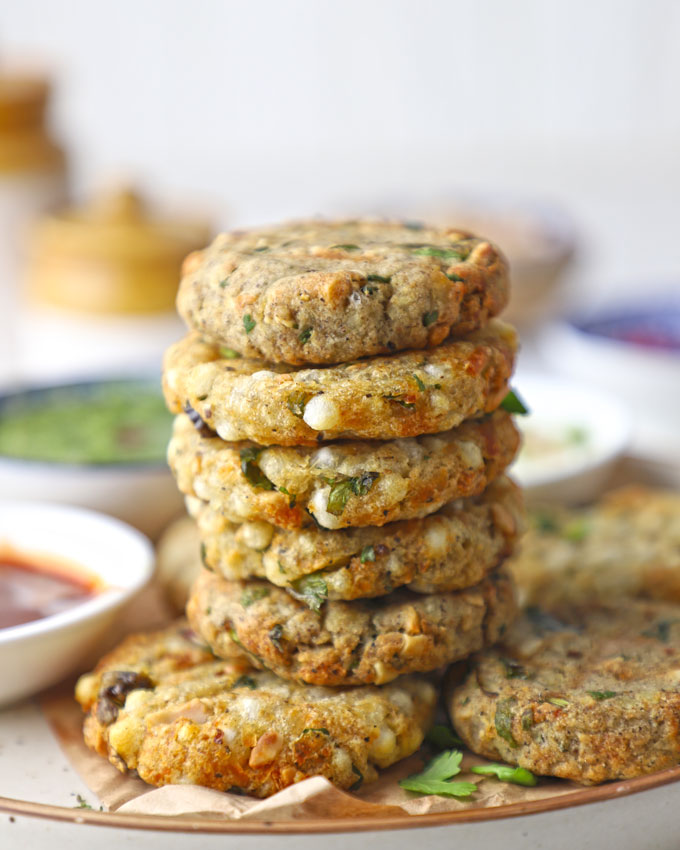
What is Sabudana Vada?
Sabudana cutlet is a widely popular vegetarian Indian snack. It is dairy and gluten free. You can serve it as a teatime snack or for breakfast with spicy green chutney , toasted bread, and a cup of masala tea .
There are many versions of the sabudana vada recipe. In a Marathi Style, sabudana cutlet lot of crushed peanuts, roasted cumin powder, and grated ginger are added.
Whereas, in a typical North Indian style sabudana cutlet, we add loads of chopped onion, spices, and fresh coriander.
Watch Sabudana Vada Video
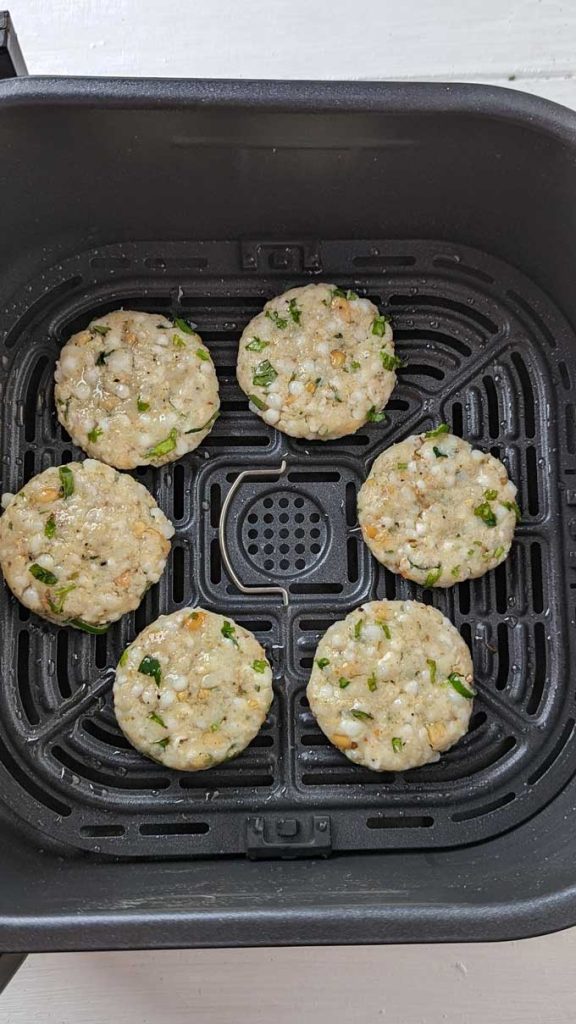
How To Air Fry Sabudana Vada
To air fry, the vada, brush the air fryer basket with a teaspoon of ghee.
- Preheat the air fryer to 180-degree celsius. Once the air fryer is ready, arrange sabudana vada on the basket. Do not overcrowd the basket.
- Air Fry the vada for 20 minutes. Flip them after 10 minutes for even browning and cooking.
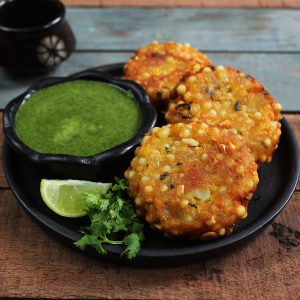
Once ready, serve farali sabudana vada with chutney.
Hina’s Tried and True Tips
Follow these tried and tested tips to say goodbye to all the woes related to the sabudana cutlet.
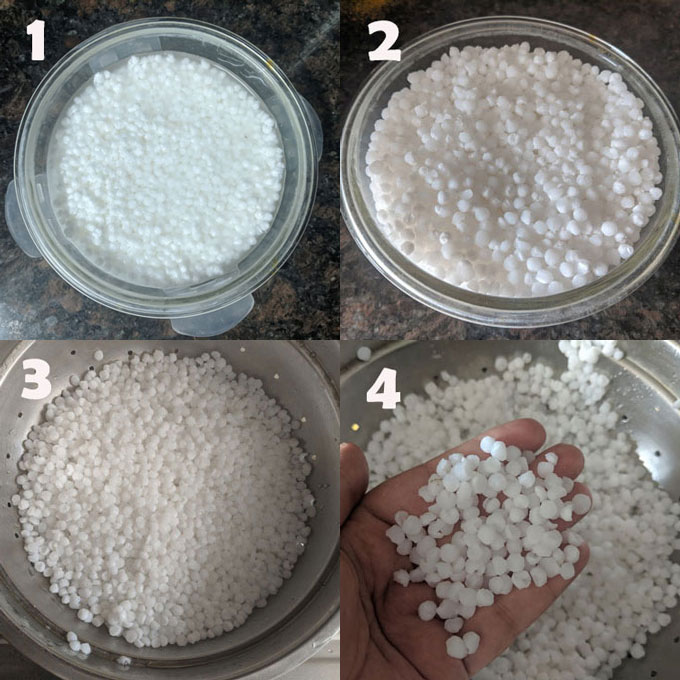
Soaking Sabudana : It is best to soak sago overnight or for at least 5 – 6 hours. The ratio of 1:1 (sago to water) always works for me. Too much water while soaking sago makes it mushy and water clogged, resulting in a not-so-crisp cutlet.
Boiled Potato: I prefer to boil the potatoes well in advance, allow to cool, remove the skin, and keep them in the fridge. The chilled, firm potatoes do some kind of magic to the texture of the cutlet, turning them into crisp goodness.
Peanuts: Use roasted peanuts without skin to add to the vada mixture. Crush the peanut using a rolling pin or mixer to make a coarse powder.
Cutlet Shape: If you are not too keen to shape the cutlet into the perfect round, simply pinch a small portion of the dough mixture using your fingers and gently drop it in hot ghee for frying. The bite-size sabudana pakodi tastes exquisite.
To test if the oil is ready for frying, drop a pinch of the vada mixture into the hot oil. If the oil is hot enough, the vada mixture will immediately float on the surface rather than sticking to the bottom of the pan.
Once you add vada to hot oil , reduce the heat to medium. If the vada is fried at very high heat, they get burnt from the outside instead of turning crisp and remain uncooked from the inside.
Do not overcrowd the pan while frying sabudana vada. Fry them in small batches. I would not suggest flipping vada multiple times while frying. Once it turns crisp from one side, flip it once, and cook from the other side.
Whenever there is excess moisture in the vada mixture, it has more chances to break while frying. Even if the oil is not heated at the right temperature, vada will absorb more oil and fall apart while frying.
It’s important to soak sabudana with just enough water to cover it. You can soak it for 5 – 6 hours or overnight. After 6 hours, you will find perfectly puffed-up sabudana pearls ready to make vada or sabudana khichdi. Also, ensure to drain all the excess water, if any, from the soaked sago.
Yes, absolutely. You can keep soaked sabudana in the fridge for up to 2 – 3 days in an airtight container.
Looking for more Indian cutlets? Try these classic Vegetable Cutlets , crispy and unique Cheese Rava Cutlet , or the Corn Paneer Cutlet .
follow me on Youtube or Instagram for latest recipes.
Ingredients
- ▢ 1 Cup sago (sabudana or tapioca pearls)
- ▢ 4 medium-size potato, boiled and mashed
- ▢ ¼ Cup roasted peanuts, crushed
- ▢ 1 tablespoon grated ginger
- ▢ 2 tablespoon chopped coriander
- ▢ 1 green chili, finely chopped
- ▢ Salt to taste
- ▢ 1 teaspoon turmeric powder (optional)
- ▢ 1 teaspoon red chili powder
- ▢ 1 teaspoon cumin powder
- ▢ 2 Cup vegetable oil, for deep frying
Instructions
- To prepare the Sabudana Vada, soak the tapioca pearls (sabudana), in 1 cup of water for about 4 – 5 hours or overnight.
- Next day, transfer the soaked sago into a metal colander to drain all excess water.
- To prepare the mixture for the vada, in a large mixing bowl combine boiled potato, soaked sabudana, ginger, chili, peanuts, coriander, salt, and spices.
- Mix thoroughly while mashing the mixture with your finger to form a smooth non-sticky dough-like mixture for the vada.
- Heat oil for deep frying in a pan over medium flame.
- While the oil is heating, divide the mixture into small sized balls. Next, flatten the balls to half inch or so thickness gently using fingers.
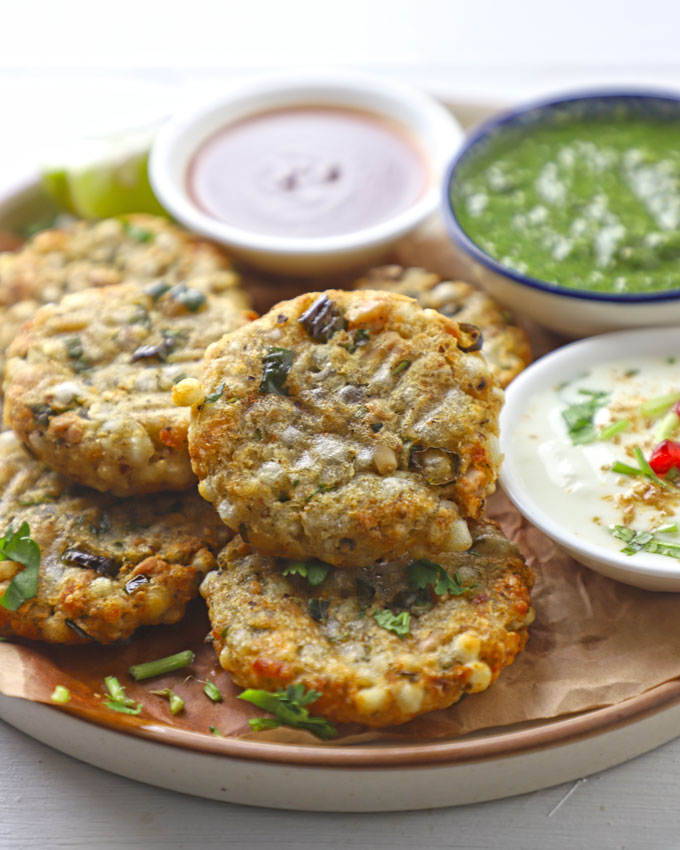
- Shallow fry or deep-fry the vada in small batches in hot oil till golden brown and crisp from both the sides.
- Drain Sabudana Vada on an oil absorbent paper.
- Serve Sabudana Vada with green chutney and a cup of tea.
Recipe Notes:
- It is best to soak sago overnight or for at least 5 – 6 hours. The ratio of 1:1 (sago to water) always works for me.
- Do not overcrowd the pan while frying sabudana vada. Fry them in small batches.
- Do not fry the vada at very high heat. It will burn from the outside and remain uncooked from the inside. Resulting in a chewy, bitter-tasting vada.
- To make a sabudana vada for vrat (fasting), all you need is – sabudana (tapioca pearls), boiled potatoes, green chili, fresh coriander, rock salt/sendha namak (optional), cumin powder, black pepper, crushed peanuts, and ghee .
Nutrition
We follow a strict NO SPAM Policy
