This is an egg-free, one-bowl chocolate chip scones recipe with perfectly crumbly, bakery-style taste and texture.

- About Scones
- The Magical One-Bowl Scone Recipe
- Ingredients Required
- How To Make Scones From Scratch
- My Two Foolproof Tips
- Eggless Chocolate Chip Scones Recipe
About Scones
Scones are a delicious baked treat originating from Scotland. In my opinion, scones are something between a cookie and a muffin. The crumbly outer texture reminds me of a perfect cookie and the softer interior is more like a muffin. I love them to the core.
But in different parts of the World, a scone comes in different shapes, flavours, and sizes. And each version is equally delicious!
The Magical One-Bowl Scone Recipe
This is a truly American-style chocolate chip scone recipe packed with all-purpose flour, butter, and buttermilk. It requires only one bowl or if I say honestly, a food processor.
I dump all the ingredients in the food processor, few pulses, and a perfect dough of scones is ready to bake. Trust me, it is way less mess on the kitchen counter and only one bowl to clean.

Ingredients Required
You need a handful of pantry staples to make chocolate chip scones at home.
- APF (all purpose flour) works perfectly fine for this scone recipe.
- Baking Agents – Baking Soda and Baking Powder
- Cold Butter: You need ice-cold butter to make scone dough. Not softened, melted, or room temperature butter. Those little lumps of cold butter in the dough while baking melt into crumbly goodness.
- Buttermilk: Not heavy cream or milk, you need buttermilk for this scone recipe. Use the readymade buttermilk, or make a small batch for making the scones ( see recipe notes ).
- Vanilla Sugar: I like the flavour of granulated white sugar with the hint of vanilla in my scones. Feel free to use plain white sugar or light brown sugar.
- Chocolate Chips : Dark, unsweetened chocolate chips are my first choice for this scone recipe. And I add a lot of them so that I get dozens of chocolate chips in each piece of scone.

How To Make Scones From Scratch
Mix Dry Ingredients: Add all the dry ingredients including sugar to the bowl of a food processor. Pulse for 10 – 20 seconds to combine.
Cut in Cold Butter: Cut the cold butter into small cubes and add to the processor. Pulse at medium speed for 20 – 30 seconds to combine butter and dry ingredients. They should look like lumpy bread crumbs. You can use a pastry cutter or finger as well for this purpose.
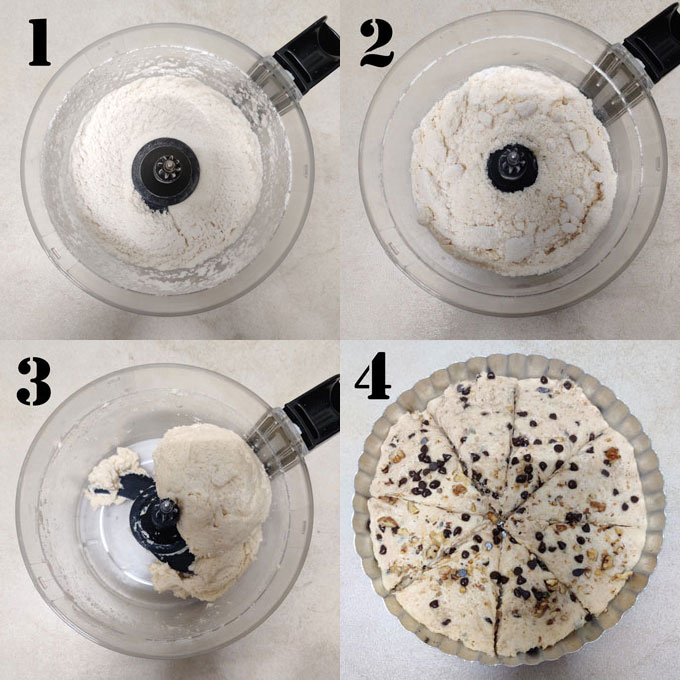
Prepare Dough: Add chocolate chips, chopped walnuts in the butter-flour mix. Turn on the food processor, simultaneously add buttermilk in small batches. Within a few, the dough starts coming together. Stop mixing!
Chill: Transfer the scone dough to a bowl. Cover with cling foil and keep it in the refrigerator for 5 – 10 minutes. Meanwhile, line a pie dish or baking sheet with parchment paper. Preheat oven to 180 degrees Celcius.
Shape Scones: Transfer the scone dough to a lightly flour-dusted surface or directly onto the baking sheet. Press into an 8-inch disc and, with a sharp knife cut into 8 wedges of equal size like a triangle or pie slice.
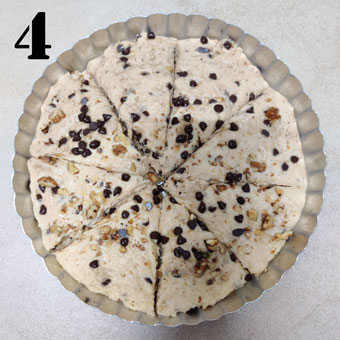
Brush Scones: Before baking, brush scones with melted butter, and sprinkle brown sugar on top for caramelization.
Bake for 20 – 25 minutes or until golden brown around the edges and lightly browned on top. Larger scones take closer to 25 minutes. Remove from the oven and cool for a few minutes before transferring to a wire rack.

My Two Foolproof Tips
Tip 1) Do not overwork scone dough. You will end up with dry and sandpapery scones. In the food processor also, the dough requires not more than 5 minutes to come together. Do no pulse it for long.
Tip 2) The scone dough should be cold while placing in the oven. At any time during the process if the dough feels sticky or warm, keep it in the refrigerator for a few minutes.
Storage Suggestion
Serve scones chocolate sauce, vanilla icing, or dusted with sugar, either way, they are a perfect companion for an afternoon cup of tea.
Store them at room temperature for 2 days in an airtight container or in the refrigerator for 5 – 6 days. If you are in a hot and humid climatic condition, transfer scones to the refrigerator after 24 hours.
You can freeze the scone dough as well.
- Transfer the shaped scones to a freezer-friendly plate. Freeze for 1 hour. Once relatively frozen, you can layer them in a freezer-friendly bag or container, placing parchment paper in between each layer.
- Bake from frozen, adding a few minutes to the bake time in the recipe below. Or thaw overnight, then bake as directed.
More Baking Recipes
- Date Walnut Bread
- Chewy Granola Bars
- Chocolate Brownies
- Lemon Pound Cake
- Apple Muffin With Oats
- Tea Masala Spiced Pumpkin Cake

Ingredients
1 Cup = 250ml liquid, 200 g flour
- ▢ 2 cups all purpose flour
- ▢ ⅓ cup granulated white vanilla sugar
- ▢ 1 teaspoon baking powder
- ▢ ½ teaspoon baking soda
- ▢ ¼ teaspoon Salt
- ▢ 100 gram cold butter, cut into small cubes
- ▢ ½ cup buttermilk you may require even lesser
- ▢ ½ cup chopped walnuts
- ▢ ½ cup dark, unsweetened chocolate chips
- ▢ 2 tablespoon light brown sugar, for sprinkling on top
Instructions
- Combine the flour, white sugar, baking powder, salt, and baking soda in a food processor. Pulse for 10 – 20 seconds.
- Add the butter and rub it flour and butter gently with your fingers until it has a bread crumb like texture. This can be done in a food processor as well. Pulse the butter and dry ingredients for 20 – 30 seconds minutes.
- Add chocolate chips, walnuts, and buttermilk in small batches. Bring the dough together with your hands. If the dough is still too crumbly, stir in more buttermilk a tiny splash at a time, but try to avoid over mixing. In a food processor, it comes together in a minute.
- Transfer the scone dough to a bowl. Cover with a cling foil and keep it in the refrigerator for 5 – 10 minutes. Meanwhile, line a pie dish or baking sheet with parchment paper. Preheat oven at 180 degrees Celcius.
- Transfer the dough into the pie dish and pat it into an 8-inch (20 cm) round with a thickness of ½ inch. Use a pastry scraper or knife to divide the dough into 8 big size wedges or 12 sleek wedges. Brush the tops of each wedge with the melted butter & generously sprinkle with light brown sugar.
- Bake the scones for 20 – 25 minutes, or until the tops are golden brown. Re-cut the slices immediately with a pastry cutter if need be.
- Cool the scones completely on a rack before storing. Serve with a drizzle of vanilla icing or a dusted with sugar.
Recipe Notes:
- Do not add all the buttermilk at a time. Use as much as required to bring the dough together.
- Scone dough is a bit sticky. If it is difficult to handle sprinkle a teaspoon of flour.
- Do not knead the dough or pulse for too long in a food processor once it comes together.
- For making buttermilk , combine 1 Cup lukewarm or room temperature milk with 1 teaspoon vinegar. Stir to combine and set aside for 10 – 15 minutes. Once the milk curdles and whey separates, use it for making scone batter as required.
Nutrition

We follow a strict NO SPAM Policy

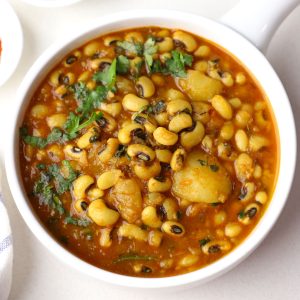
Eggless Chocolate Chip Scones Recipe
Equipment
- Food Processor
- Baking Sheet
- Oven
Ingredients
1 Cup = 250ml liquid, 200 g flour
- 2 cups all purpose flour
- ⅓ cup granulated white vanilla sugar
- 1 teaspoon baking powder
- ½ teaspoon baking soda
- ¼ teaspoon Salt
- 100 gram cold butter, cut into small cubes
- ½ cup buttermilk you may require even lesser
- ½ cup chopped walnuts
- ½ cup dark, unsweetened chocolate chips
- 2 tablespoon light brown sugar, for sprinkling on top
Instructions
- Combine the flour, white sugar, baking powder, salt, and baking soda in a food processor. Pulse for 10 - 20 seconds.
- Add the butter and rub it flour and butter gently with your fingers until it has a bread crumb like texture. This can be done in a food processor as well. Pulse the butter and dry ingredients for 20 - 30 seconds minutes.
- Add chocolate chips, walnuts, and buttermilk in small batches. Bring the dough together with your hands. If the dough is still too crumbly, stir in more buttermilk a tiny splash at a time, but try to avoid over mixing. In a food processor, it comes together in a minute.
- Transfer the scone dough to a bowl. Cover with a cling foil and keep it in the refrigerator for 5 – 10 minutes. Meanwhile, line a pie dish or baking sheet with parchment paper. Preheat oven at 180 degrees Celcius.
- Transfer the dough into the pie dish and pat it into an 8-inch (20 cm) round with a thickness of ½ inch. Use a pastry scraper or knife to divide the dough into 8 big size wedges or 12 sleek wedges. Brush the tops of each wedge with the melted butter & generously sprinkle with light brown sugar.
- Bake the scones for 20 - 25 minutes, or until the tops are golden brown. Re-cut the slices immediately with a pastry cutter if need be.
- Cool the scones completely on a rack before storing. Serve with a drizzle of vanilla icing or a dusted with sugar.
Notes
- Do not add all the buttermilk at a time. Use as much as required to bring the dough together.
- Scone dough is a bit sticky. If it is difficult to handle sprinkle a teaspoon of flour.
- Do not knead the dough or pulse for too long in a food processor once it comes together.
- For making buttermilk , combine 1 Cup lukewarm or room temperature milk with 1 teaspoon vinegar. Stir to combine and set aside for 10 – 15 minutes. Once the milk curdles and whey separates, use it for making scone batter as required.
Nutrition
This is a bold and spicy Punjabi-style lobia masala recipe that you can easily make in an instant pot in 30 minutes.
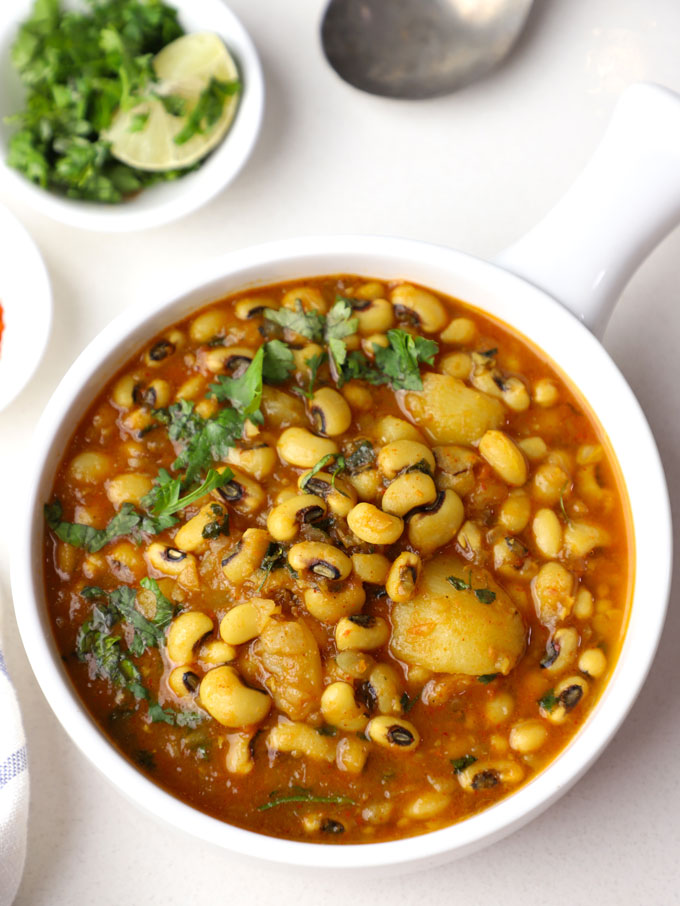
About Lobia Masala Curry
Black-eyed peas are a versatile legume commonly used in Indian cooking. In the local dialect, they are called Lobia or Chawli.
Rich in protein, fibre, and essential nutrients, lobia is a nutritious choice for vegetarians and vegans. I love to use it in my salads , curries, and stews.
Masala, on the other hand, refers to a blend of spices that forms the base of a curry, it is the heart and soul of an Indian Cuisine.
A lobia curry is made in different styles across India. I am sharing a Punjabi-style lobia masala curry that is robust, flavoursome, and can be easily made in a pressure cooker or instant pot .
This Lobia Masala is:
- vegan
- nut-free
- gluten-free
- one pot dish
- meal prep friendly
- wholesome and fulfilling
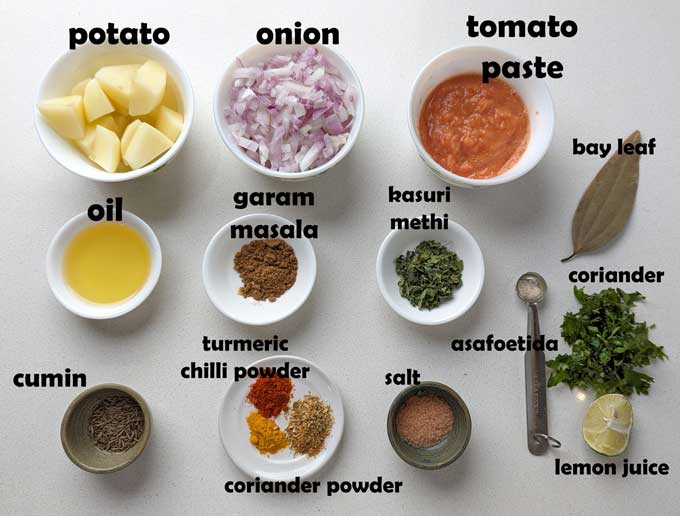
Ingredients Required
- Lobia or black-eyed peas should be soaked for 5 – 6 hours and then used for making this curry. If you are using canned beans, drain all the liquid from the can and rinse the beans with water before adding to the curry.
- Light, flavourless vegetable refined oil is ideal for cooking this curry.
- Tomato Paste is a blend of fresh tomatoes, ginger, garlic, and Kashmiri red chillies.
- Chopped Red Onion is the key ingredient in making masala for Indian curries.
- Adding potatoes to the lobia curry is optional. It does not affect the taste of the dish.
- Spice Powders – red chilli powder, turmeric powder, coriander powder, garam masala
- Whole Spices – cumin, bay leaf, kasuri methi
- Asafoetida (hing) helps in digesting the beans and reduces the chances of bloating.
- Salt, Fresh Coriander Leaves, Lemon
How To Make Lobia Masala
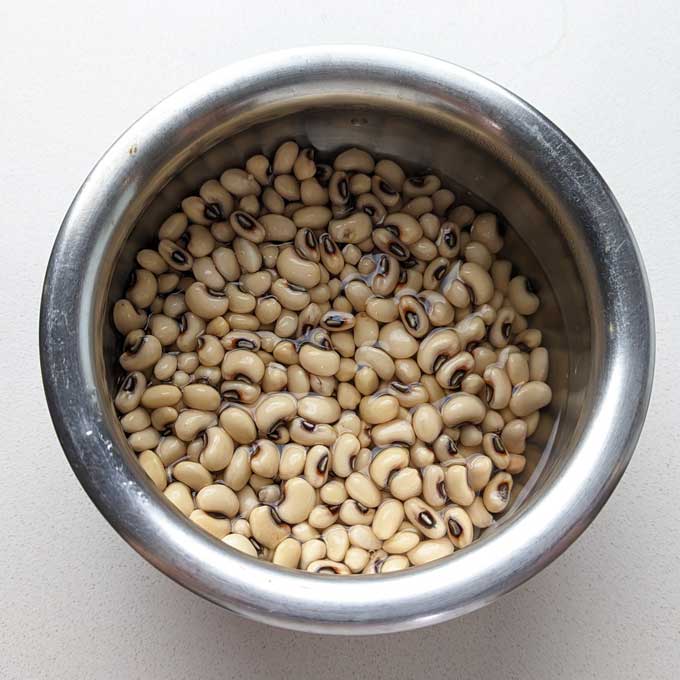
Soaking Beans
- Rinse black-eyed peas 2 – 3 times with water or until it runs clear.
- Soak beans in clean water for 5 – 6 hours. This reduces the cooking time, aids in digestion, and makes beans absorb the flavour of curry.
Make Tomato Paste
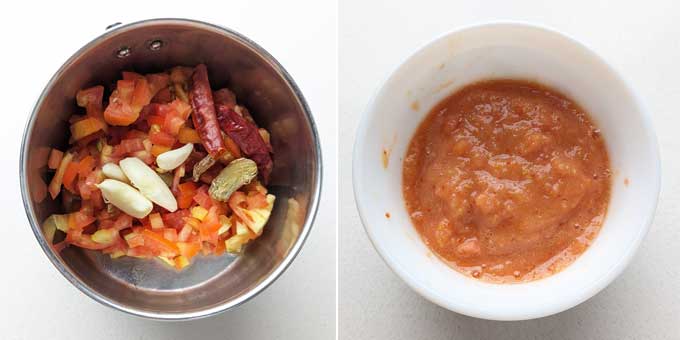
- Blend diced fresh tomatoes, ginger, garlic and dried red chillies to a smooth paste using 1 – 2 tablespoons of water. Keep it aside.
- This tomato blend can be used in a variety of curry recipes like veg keema curry , or matar paneer.
Saute Mode
- Turn on the Instant Pot and select the “ Sauté ” function – Set time of 5 minutes.
- Heat oil in the pot and add cumin seeds and bay leaf. Allow them to splutter.
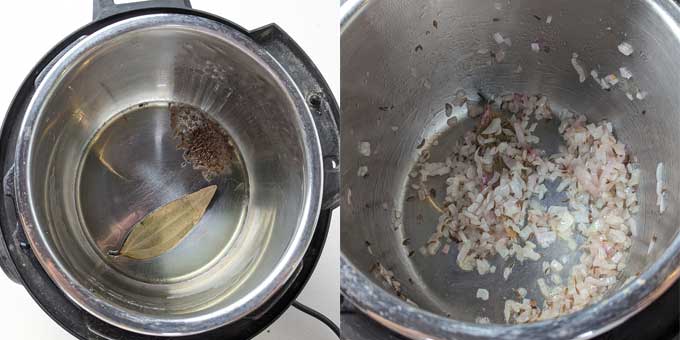
- Then, add finely chopped onions and sauté until they turn light golden.
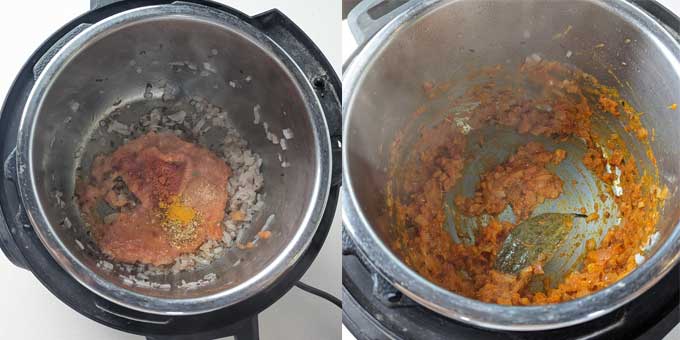
- Add tomato paste, red chilli powder, turmeric powder, coriander powder, and salt. Sauté for a minute until the raw aroma dissipates and thick masala is formed.
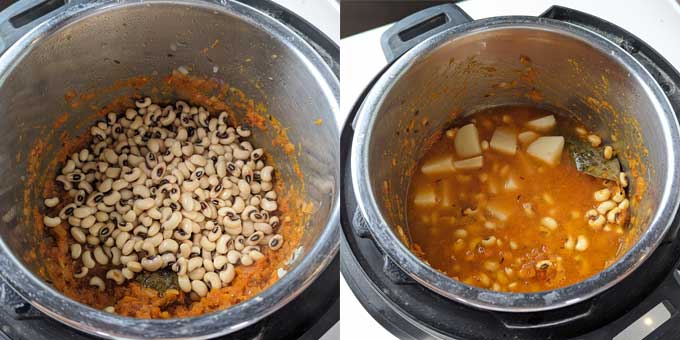
- Add soaked beans and potatoes. Discard the soaking water. Saute for a minute to coat each bean with the masala.
- Now, add water, keeping in mind that the lobia will absorb some liquid during cooking. Stir one last time.
Pressure Cook Mode
- Select the “ Pressure Cook ” mode and cook on high pressure for 10 minutes.
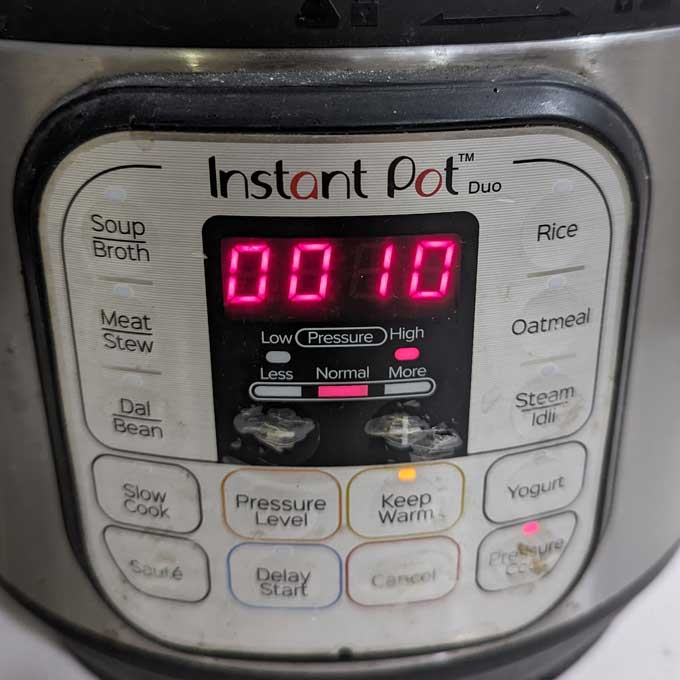
- Allow the steam to release naturally from the instant pot after the cooking time is over.
Finishing Touch
- Carefully open the lid, and set SAUTE MODE for 5 minutes.

- Add garam masala, lemon juice, and chopped coriander. Gently stir to combine.
- Simmer lobia masala in saute mode for 2 – 3 minutes. Taste and add more seasoning if required.
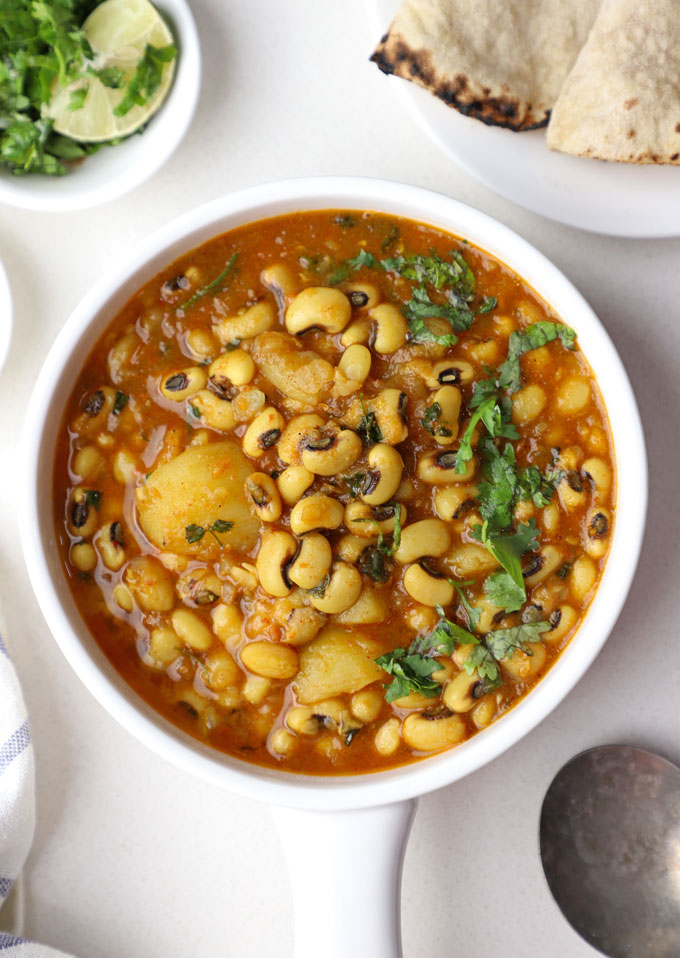
Serving Suggestion
Lobia Masala is a main-course dish . It tastes best with basmati rice, peas pulao , jeera rice , or any type of light Indian flatbread like wheat roti, rice flour chapati or paratha.
To make a complete Indian meal, you can serve lobia curry with side dishes like boondi raita , and kachumber salad .
Store the leftover curry in the refrigerator for 2 – 3 days. Then, reheat in a microwave or stovetop before eating.
More Instant Pot Recipes
- Dum Aloo
- Lentil Stew
- Chana Saag
- Matar Paneer
- Chicken Pulao
- Mushroom Masala Curry
Ingredients
- ▢ 1 Cup lobia (black eyed peas)
- ▢ 2 tablespoon vegetable refined oil
- ▢ 1 bay leaf (tej patta)
- ▢ 1 teaspoon cumin seeds (jeera)
- ▢ ¼ teaspoon hing (asafoetida)
- ▢ 1 medium size onion, finely chopped
- ▢ 1 teaspoon coriander powder
- ▢ 1 teaspoon cooking salt or to taste
- ▢ ½ teaspoon turmeric powder
- ▢ ½ teaspoon red chilli powder
- ▢ 1 medium size potato, peeled and diced into small cubes
- ▢ 2 cup water
- ▢ ½ teaspoon Garam Masala
- ▢ ½ lemon
- ▢ handful of fresh coriander leaves, chopped
Ingredients For Tomato Paste
- ▢ 1 large size tomato, diced
- ▢ 4 garlic cloves
- ▢ 1 inch ginger, peeled
- ▢ 2 Kashmiri dried red chilli
Instructions
Soak Beans
- Rinse black-eyed peas 2 – 3 times with water or until it runs clear. Soak beans in clean water for 5 – 6 hours. This reduces the cooking time, aids in digestion, and makes beans absorb the flavour of curry.
Prepare Tomato Paste
- Blend diced fresh tomatoes, ginger, garlic and dried red chillies to a smooth paste using 1 – 2 tablespoons of water. Keep it aside.
Prepare Lobia Masala Curry
- Turn on the Instant Pot and select the “ Sauté ” function – Set time of 5 minutes.
- Heat oil in the pot and add cumin seeds and bay leaf. Allow them to splutter.
- Then, add finely chopped onions and sauté until they turn light golden.
- Add tomato paste, red chilli powder, turmeric powder, coriander powder, and salt. Sauté for a minute until the raw aroma dissipates and thick masala is formed.
- Add soaked beans and potatoes. Discard the soaking water. Saute for a minute to coat each bean with the masala.
- Now, add water, keeping in mind that the lobia will absorb some liquid during cooking. Stir one last time.
- Select the “ Pressure Cook ” mode and cook on high pressure for 10 minutes. Allow the steam to release naturally from the instant pot after the cooking time is over.
- Carefully open the lid, and set SAUTE MODE for 5 minutes.
- Add garam masala, lemon juice, and chopped coriander. Gently stir to combine. Simmer lobia masala in saute mode for 2 – 3 minutes. Taste and add more seasoning if required.
- Serve Lobia Masala warm with basmeti rice.
Recipe Notes:
- If you are using canned beans, drain all the liquid from the can and rinse the beans with water before adding to the curry. With canned beans no need to pressure cook the curry. After adding beans, simmer the curry in SAUTE MODE for 6 – 8 minutes for the beans to absorb the flavour.
- This is a medium spicy curry. You can increase or decrease the number of red chillies as per personal preference.
- If after cooking the lobia masala is too much spicy for your liking, add a splash of coconut milk and simmer the curry for 2 – 3 minutes.
- You can cook it in a stovetop pressure cooker also over low heat in 3 whistles.
Nutrition
We follow a strict NO SPAM Policy
