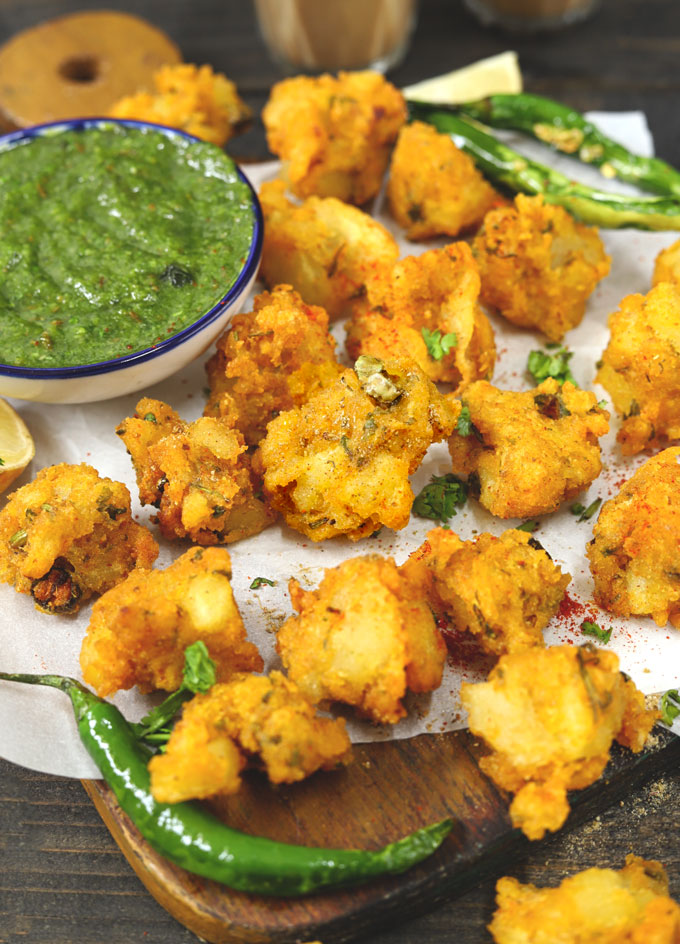
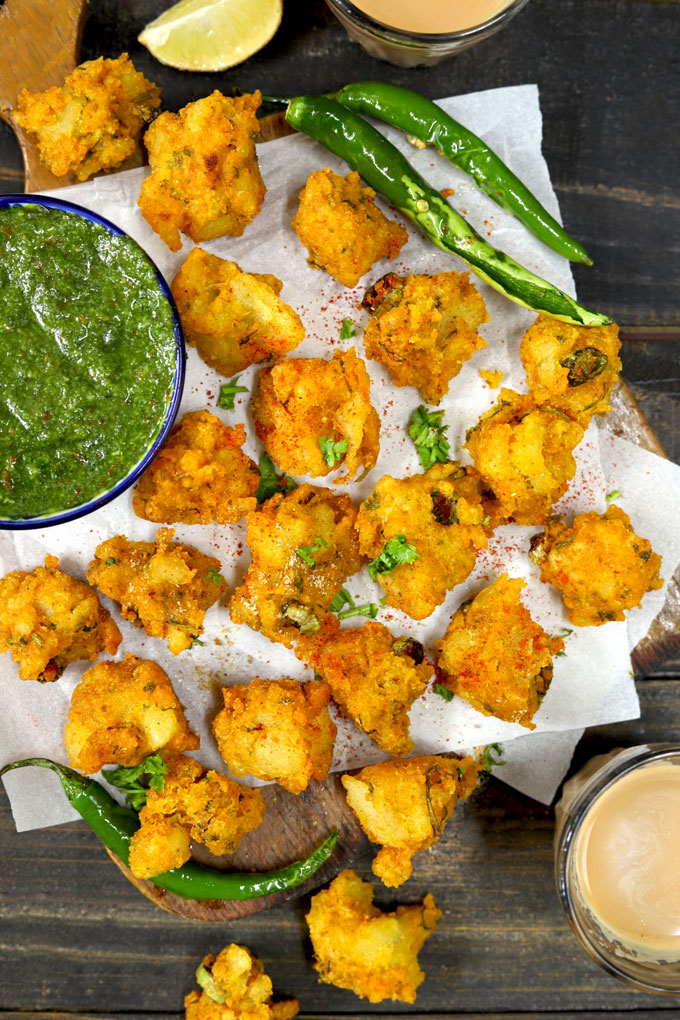
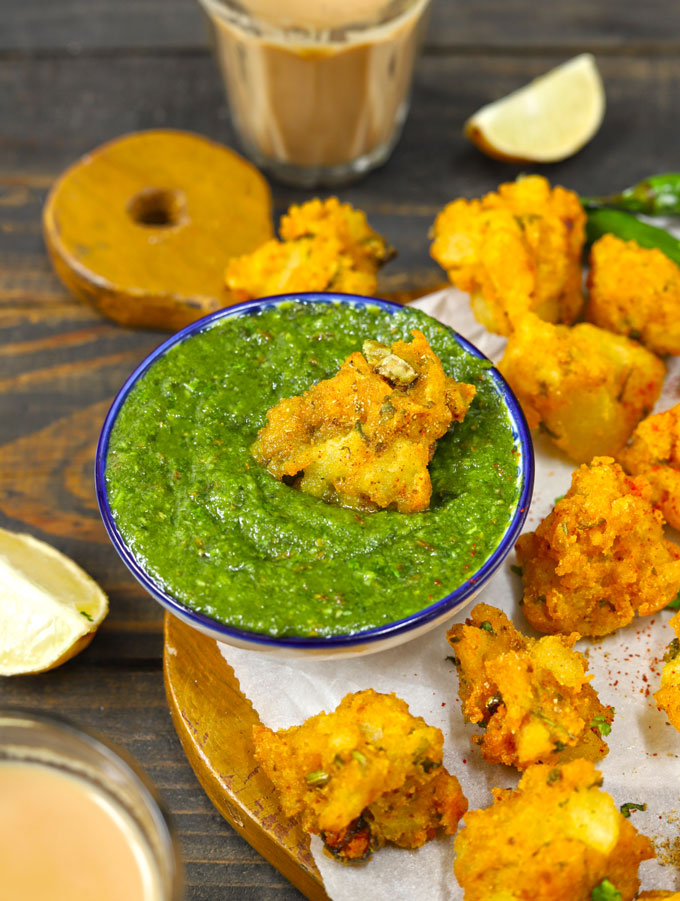
I am sharing a family favourite aloo pakora recipe , also known as Fulori. They are extra crunchy, vegan, and deliciously addictive . Be sure to watch the video!
- What is ‘Aloo Pakora’?
- Fuluri Style Aloo Pakora
- Ingredients Required
- Vrat Special Aloo Pakora
- Watch Aloo Pakora Video
- Serving Suggestion
- More Indian Snack Recipes
- Aloo Pakora Recipe
What is ‘Aloo Pakora’?
Aloo Pakora is a vegetarian Indian potato fritter. ‘ Aloo’ is the Hindi term for potatoes, and ‘pakora’ is for deep-fried fritters. It is one of the most popular Indian snacks.
The key ingredients of aloo pakora are potatoes, gram flour (besan), salt, and spices.
Recently, this Indian snack has been on the favourite list of chefs and food lovers all over the World. Reason:
- gluten-free
- easy to customize
- vegan and vegetarian
- crispy, crunchy, and tasty
- perfect finger food with spicy dips
Fuluri Style Aloo Pakora
This aloo pakora recipe is inspired by the Fuluri. It is a Bengali-style potato fritter.
Later after a discussion with many other food lovers, I learned that fuluri is enjoyed in many cities of India as a snack. And has different regional names – aloo pakora, aloo fulori, fuluri, phuluri, and many more.
If you also happen to know another regional name of this dish, please share it with us in the comment section.
How is aloo ki fulori any different from the regular aloo pakora?
To my knowledge, fulori is prepared with a combination of different flours (gram flour, buckwheat flour, rice flour) vegetables, and potatoes, and is tiny, bite-size. Whereas, aloo pakora is made by dipping round slices of potato in gram flour batter and then deep-fried.
In simple words, both are two different ways to enjoy the goodness of deep-fried potatoes with spicy chutney for a teatime snack.
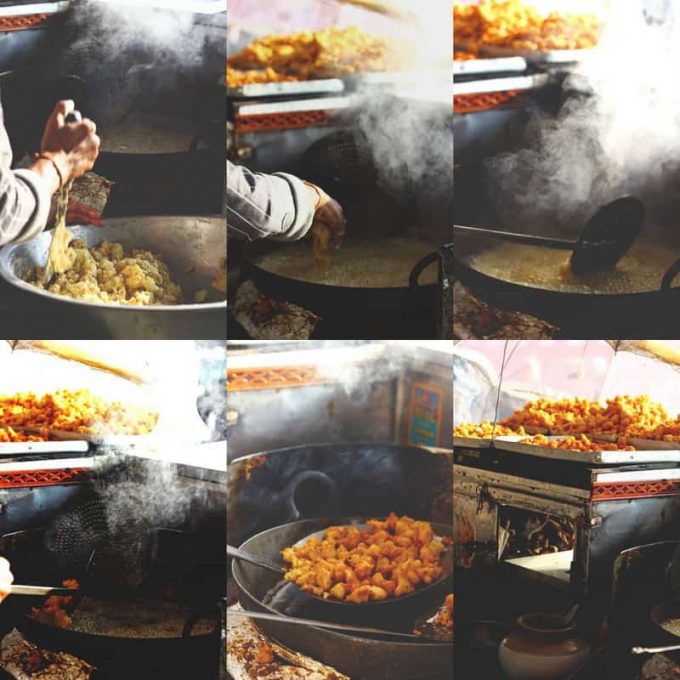
I learned this aloo fulori recipe when we were enjoying a countryside lifestyle in the Kumaon hills. At the railway station in our town, there used to be one tiny food cart selling these coin-sized fritters.
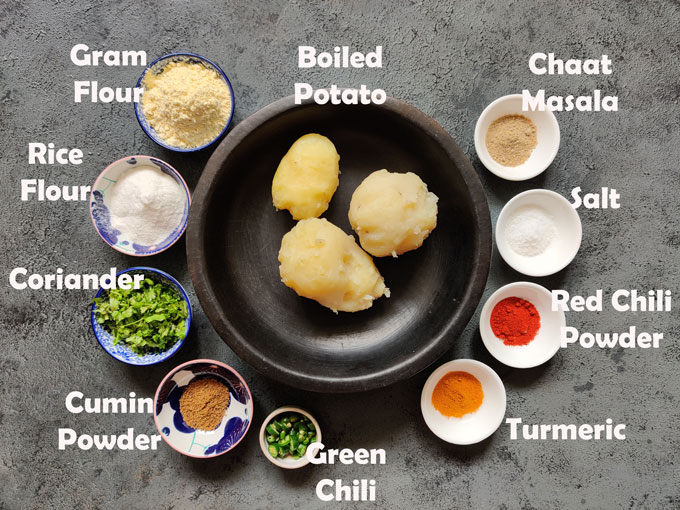
Ingredients Required
- Potato: Boiled and roughly mashed potato with lumps. Make sure the potatoes are not watery. Hard-boiled, unsweetened potatoes are the best.
- Gram Flour : It is the key ingredient of any Indian pakora recipe. Also known as besan or chickpea flour. A plant-based, vegan, gluten-free flour with a nutty taste.
- Rice Flour: It gives a crunch to the pakora. Substitute rice flour with all-purpose flour or corn starch.
- Spices: Red Chili Powder, Turmeric, Chaat Masala, Cumin Powder
- Green Chili : Gives spiciness to the pakora. Use mildly spicy chillies like cayenne, jalapeno, or any variety of large, subtly warming chilies.
- Fresh Coriander: Adds freshness
- Cooking Oil: For deep frying pakora vegetable oil, refined oil, canola oil, or mustard oil are a perfect choice.
- Optional Ingredients: Onion (finely chopped), Ginger (grated)

Vrat Aloo Kuttu Pakora
Vrat Special Aloo Pakora
If you want to try the sattvic style aloo pakora recipe for Navratri fast then follow these tips.
Use only buckwheat flour. Do not add gram flour or rice flour.
Abstain from adding – onion, garlic, turmeric, gram flour, vegetable oil, and regular table salt (instead use rock salt).
All you need to do is combine boiled potato with buckwheat flour (kuttu atta), rock salt, fresh coriander, and green chilli. Combine the ingredients nicely as suggested in the pakora recipe. Then deep fry in the ghee (clarified butter) till crisp and golden from the outside and fully cooked from the inside. Serve them with farali chutney of your choice.
Watch Aloo Pakora Video
Serving Suggestion
A cup of masala chai and pakora are the two Indian teatime favourites. It is one of the best finger foods that can be enjoyed easily while on the go or at a street food joint. All you need on the side is a spicy Indian chutney.
Aloo Pakora or any other vegetable pakora tastes delicious with green chutney . It is a must-serve dipping sauce with fried fritters.
Pakora tastes good with a refreshing, cooling dipping sauce like tzatiki or mint yogurt dip.
More Indian Snack Recipes
- Corn Chaat
- Veg Cutlet
- Peanut Chaat
- Potato Chips
- Matar Kachori
- Aloo Tikki Chaat
- Cheese Chilli Bajji
- Potato Bread Roll
If you try this recipe and love it, please leave a comment and a rating. This helps us grow and reach other food lovers like you.

Ingredients
- ▢ 3 – 4 potato, boiled
- ▢ ⅓ Cup gram flour (besan)
- ▢ 2 tablespoon rice flour
- ▢ 1 tablespoon green chili, chopped
- ▢ 1 teaspoon turmeric
- ▢ 1 teaspoon red chili powder
- ▢ 2 teaspoon Chaat masala
- ▢ 1 teaspoon cumin powder (jeera powder)
- ▢ ¼ Cup fresh coriander, chopped
- ▢ 1 teaspoon salt or to taste
- ▢ 2 Cup refined oil or mustard oil, deep frying
Instructions
- First, boil the potato in a pressure cooker for 2 whistles over medium heat. Or boil them in a microwave.
- We do not require watery or mushy potatoes. Boiled potatoes need to have a firmness to them. Remove the skin of the potatoes and allow them to cool so that they become easy to handle.
- Transfer boiled potato to a bowl. Roughly mash them using a fork or potato masher.
- Heat oil in a deep frying pan over medium flame.
- Add remaining ingredients except for oil to the mashed potatoes. Combine all the ingredients together. Do not mash potatoes for too long or too hard. Once all the ingredients are combined well, stop mixing.
- Once mixed, take a pinch or coin size portion of pakora mixture and slide it into the hot oil. Don’t bother much about the shape of the fritters. Use the tip of your fingers to pinch a portion and then drop it into the frying pan.
- Fry aloo pakora in small batches till crisp and golden from all the sides.
- Transfer fried pakora into a plate lined with a paper towel or colander to absorb the excess oil.
- Serve Aloo Pakora hot sprinkled with chaat masala along with green chutney .
Recipe Notes:
- For this aloo pakora recipe, I boil the potatoes the previous day or the night before and keep them in the refrigerator. It saves a lot of time, and potatoes are much easier to handle.
- Do not bother about the shape of the pakora, they are bite-size and uneven. Do not make them too big.
- For deep frying, canola oil, rice bran oil, mustard oil, or vegetable oil are perfect.
Nutrition
We follow a strict NO SPAM Policy

Aloo Pakora Recipe
Equipment
- Mixing Bowl
- Deep Frying Pan
Ingredients
- 3 - 4 potato, boiled
- ⅓ Cup gram flour (besan)
- 2 tablespoon rice flour
- 1 tablespoon green chili, chopped
- 1 teaspoon turmeric
- 1 teaspoon red chili powder
- 2 teaspoon Chaat masala
- 1 teaspoon cumin powder (jeera powder)
- ¼ Cup fresh coriander, chopped
- 1 teaspoon salt or to taste
- 2 Cup refined oil or mustard oil, deep frying
Instructions
- First, boil the potato in a pressure cooker for 2 whistles over medium heat. Or boil them in a microwave.
- We do not require watery or mushy potatoes. Boiled potatoes need to have a firmness to them. Remove the skin of the potatoes and allow them to cool so that they become easy to handle.
- Transfer boiled potato to a bowl. Roughly mash them using a fork or potato masher.
- Heat oil in a deep frying pan over medium flame.
- Add remaining ingredients except for oil to the mashed potatoes. Combine all the ingredients together. Do not mash potatoes for too long or too hard. Once all the ingredients are combined well, stop mixing.
- Once mixed, take a pinch or coin size portion of pakora mixture and slide it into the hot oil. Don’t bother much about the shape of the fritters. Use the tip of your fingers to pinch a portion and then drop it into the frying pan.
- Fry aloo pakora in small batches till crisp and golden from all the sides.
- Transfer fried pakora into a plate lined with a paper towel or colander to absorb the excess oil.
- Serve Aloo Pakora hot sprinkled with chaat masala along with green chutney .
Video
Notes
- For this aloo pakora recipe, I boil the potatoes the previous day or the night before and keep them in the refrigerator. It saves a lot of time, and potatoes are much easier to handle.
- Do not bother about the shape of the pakora, they are bite-size and uneven. Do not make them too big.
- For deep frying, canola oil, rice bran oil, mustard oil, or vegetable oil are perfect.
Nutrition
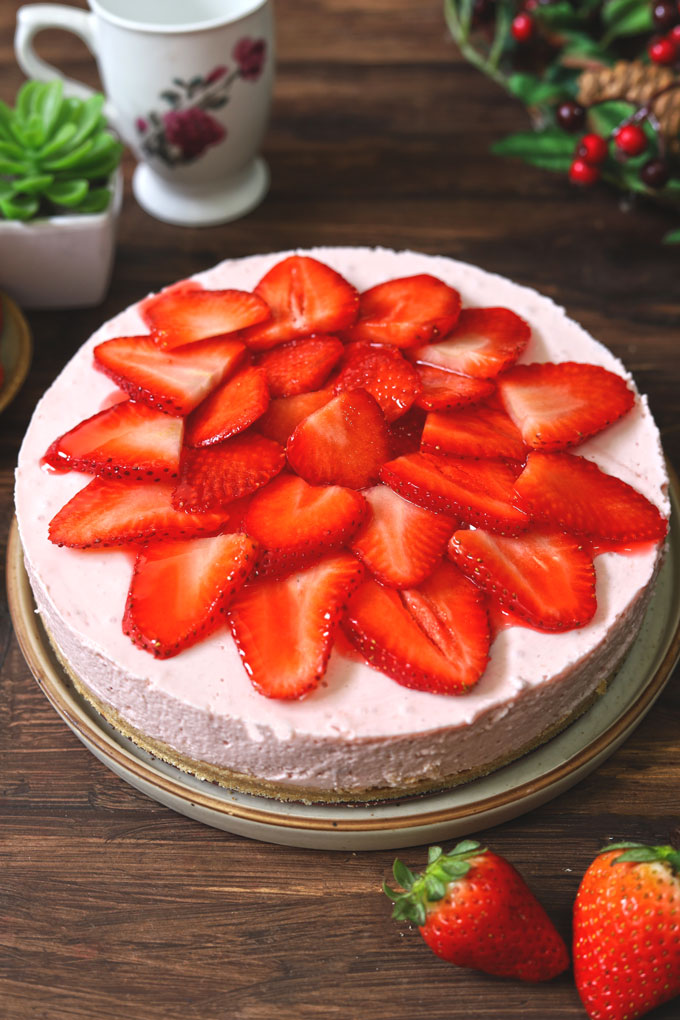
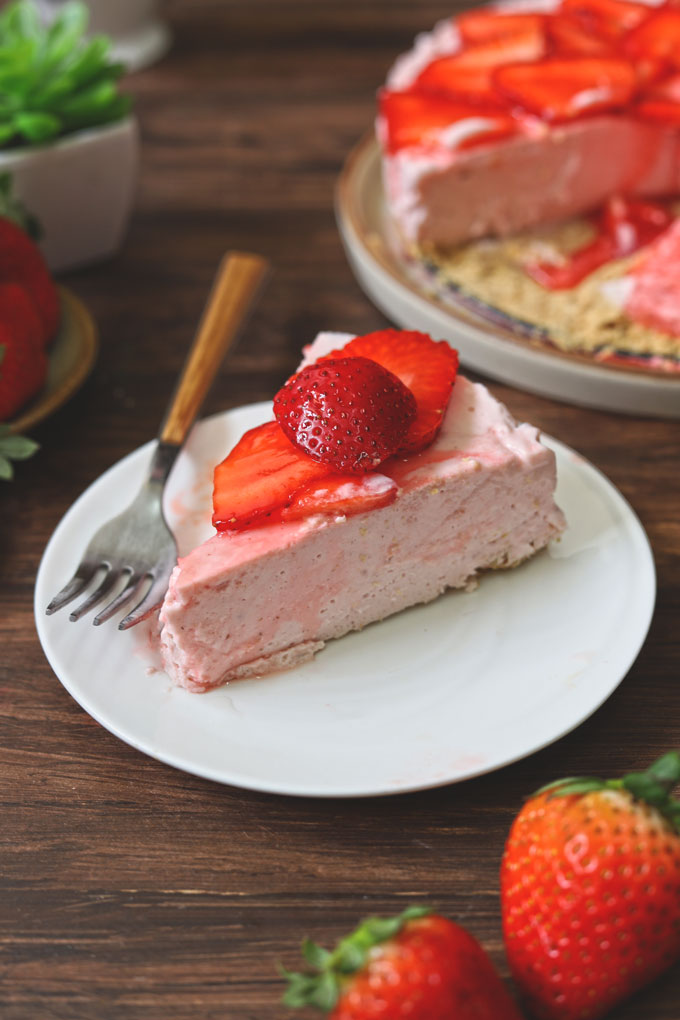
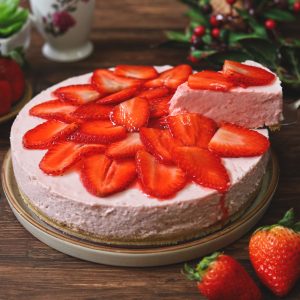
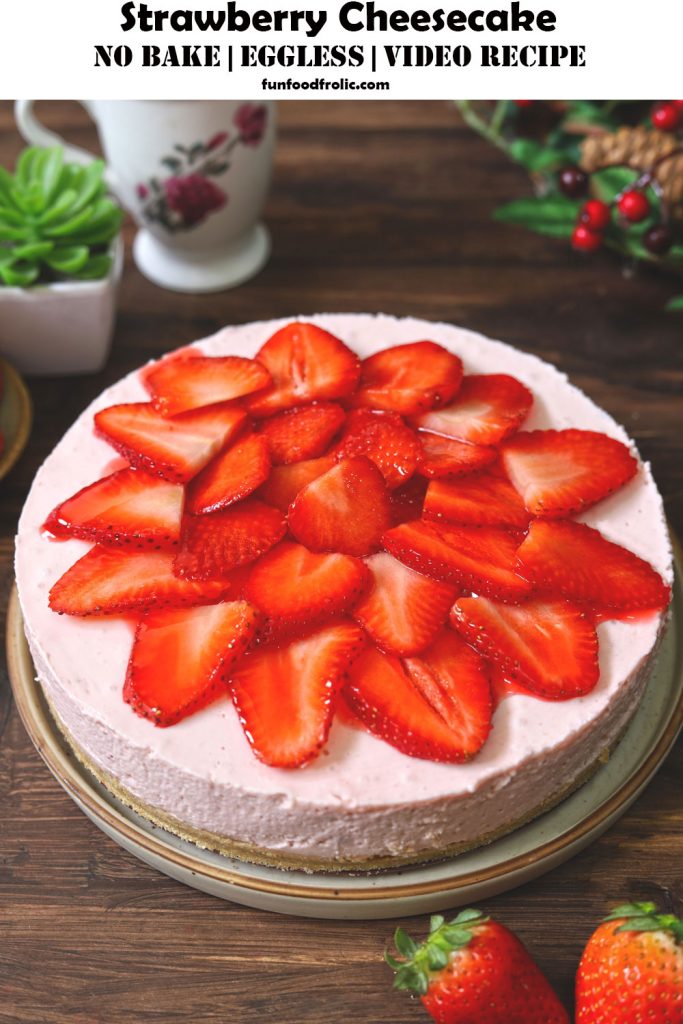
A creamy and dreamy, melt-in-your-mouth no-bake strawberry cheesecake bursting with fresh strawberry flavour. This no-bake cheesecake is one of the easiest desserts for a crowd. Be sure to watch the video!
Concept of No-Bake Cheesecake
If you are not keen on baking an elaborate, traditional cheesecake but want to indulge in the creamy goodness – this no-bake strawberry cheesecake recipe is made for you.
The DIY base of digestive cookies and butter, topped with a creamy, egg-free, no-bake cake made with – hung curd/cream cheese, cream, sugar, and strawberries.
What is the difference between baked and no-bake cheesecake?
There are no eggs in the no-bake cheesecake. The structure of the cheesecake is set using gelatin. In contrast, the baked cheesecake has eggs and baked using the water bath technique in the oven.
Over the years, no-bake cheesecake has become a widely popular party dessert.
They are super easy to make, do not require oven or pro baking skills, and are perfect for feeding a large crowd or for potluck get-togethers .
Ingredients Required
What makes this no-bake strawberry cake even more desirable is the simple ingredient list.
For Cheesecake Base:
- Biscuit: Use the best available digestive cookies or graham crackers. I use Marie Gold Biscuit.
- Butter: Melted butter (unsalted) is perfect for combining with crushed cookies to make the base.
I do not add sugar to the cake base.
For Cheesecake :
- Strawberry: Use sweet, ripe, fresh, or frozen strawberries. Thaw frozen ones at room temperature before making the cake.
- Sugar: Use granulated white sugar.
- Cheese: Many no-bake cheesecake recipes use cream cheese. I use thick, hung curd or yogurt, which has a consistency of cream cheese or quark cheese.
- Cream: I have tried this strawberry cheesecake with heavy whipping cream and regular low-fat cream on different occasions. I like the texture better with heavy cream. In India, Mother Dairy or D’lecta Cream is perfect for making this cake.
- Gelatin : It is a key ingredient to set the cheesecake as it is a no-bake cake. For a purely vegetarian cake, use China Grass or Agar Agar instead of gelatin.
Equipment: A blender and the 9-inch Spring Form Tin .
The Hung Curd
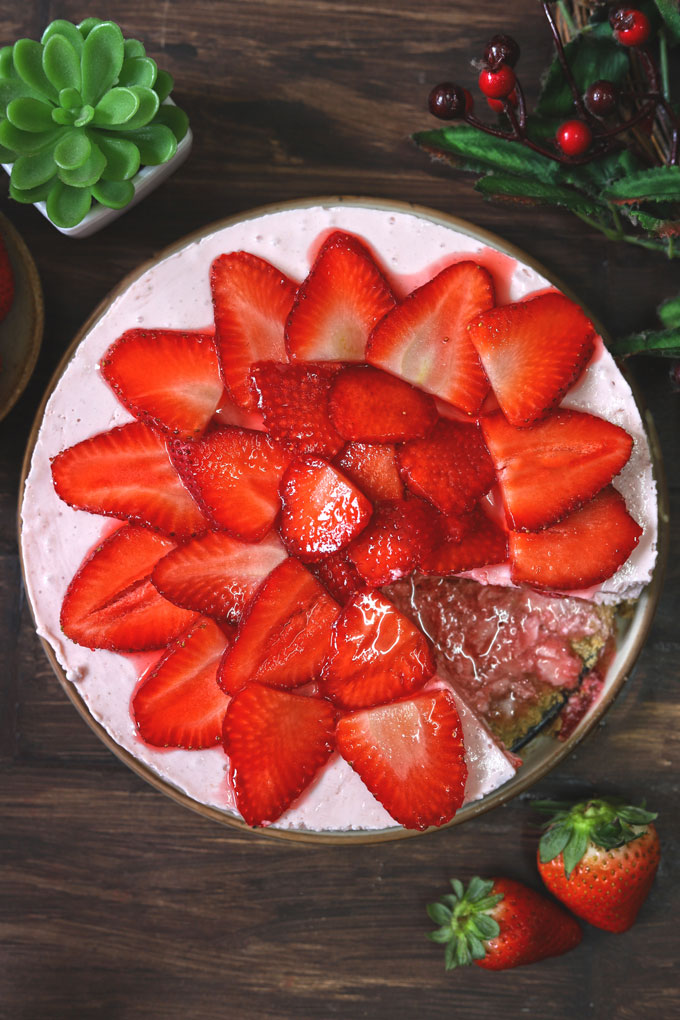
The USP of this no-bake strawberry cheesecake recipe is the light and airy texture.
The star ingredient responsible for the light texture of the cheesecake is hung curd.
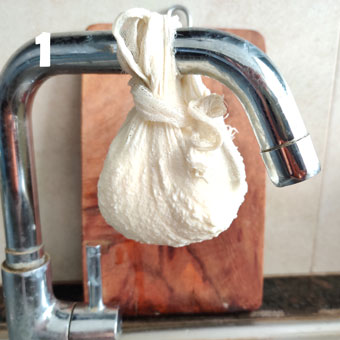
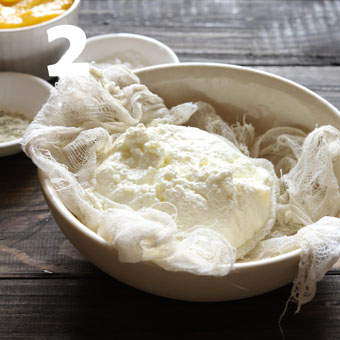
Tie the regular curd or yogurt in a clean muslin cloth for 1 – 2 hours to drain all the water (whey) and get a soft cheese-like curd. In the native dialect, the hung curd is known as ‘ chakka ‘ .
During the hours when the curd is hung, it gradually transforms personality from humble slurry liquid to soft cheese, which melts in the mouth.
The curd’s texture becomes similar to cream cheese, or fresh goat cheese minus salt and heaviness.
Watch Strawberry Cheesecake Video
Cheesecake Recipe Variations
Flavour : From ripe mango, blueberry, and raspberry to peaches, you can make this no-bake cheesecake with any desired fresh fruit flavour.
Gluten-Free: Use gluten-free cookies or crackers for the base of the cake. There is no flour or starch in the cheesecake.
Topping: Fresh Strawberries, whipped cream, strawberry syrup, or a homemade strawberry sauce are perfect for this cheesecake topping.
My Tried & True Tips
Crust: Always use the low sugar/digestive biscuits for the base. Why? This helps to control the sweetness in the cake. I prefer not to add any sugar to the base.
Filling: Use a blender to combine the filling ingredients including sugar. Never add the granulated sugar without blending to the filling. It will not dissolve.
Gelatin: Sieve or filter the melted gelatin while adding it to the cake filling. This way there will be no gelatin lumps in the filling.
Blend the cake filling one more time after adding the gelatin to mix nicely.
Make sure all ingredients are at room temperature before adding the gelatin. Do not add gelatin to cold ingredients.
Refrigerate: The no-bake cheesecake needs a good chilling time in the refrigerator to set perfectly. I chill the base for 30 minutes. And the cheesecake filling for 4 – 5 hours or best overnight.
Storing Suggestion
The No Bake Strawberry Cheesecake remains fresh, light, and delicious in the refrigerator for 3 – 4 days. Store it in a container with a lid to keep the flavours fresh.
After 4 days, the base of the cake starts turning a bit soggy.
Do not leave no-bake cheesecake at room temperature for more than 30 – 40 minutes. The filling starts melting.
More Strawberry Recipes
Teatime Strawberry Cake
3-Ingredient Strawberry Jam
If you try this recipe and love it, please leave a comment and a rating. This helps us grow and reach other food lovers like you
Ingredients
1 Cup = 250 ml. 1 tablespoon = 15 ml. 1 teaspoon = 5ml
Ingredients For Base
- ▢ 150 gram low sugar digestive biscuits or graham crackers (approx 30 Marie Biscuits)
- ▢ 100 gram melted butter
Ingredients For Filling
- ▢ 2 Cup chopped strawberries
- ▢ ½ Cup granulated white sugar
- ▢ 1 Cup heavy whipping cream
- ▢ 3 Cup plain curd or yogurt (approx 700 gram)
- ▢ 4 ½ teaspoon gelatin
- ▢ ¼ Cup room temperature water
Ingredients For Topping
- ▢ 2 Cup sliced strawberry
- ▢ ¼ Cup Strawberry Sauce
Instructions
Prepare Hung Curd:
- Place a muslin cloth or clean kitchen cloth over the sieve. Pour curd in the cloth, tie the muslin cloth at a higher point in the kitchen ( I use my kitchen sink tap ) with a bowl placed below it to collect whey water. This way all the excess liquid will drain out from the yogurt.
- The end result will be thick soft cheese like hung curd. This takes 1 hour.
Prepare Base:
- To prepare the base of the cake crush the biscuits to a fine powder in a blender. You can do the same in a food processor or a ziplock bag as well. Add melted butter to the blender. Pulse the mixture one more time to combine and moisten the biscuit powder.
- Spread the biscuit and butter mixture evenly at the bottom of a springform cake. Press using a bowl or glass to spread evenly at the base of the Spring Form Tin. Keep in the refrigerator to set fr 30 minutes or while you prepare the filling.
Prepare Filling
- Combine gelatin with water and set aside to bloom. It will become like a set jelly after 5 minutes. Reheat in a microwave for 1 – 2 minutes. Stir and it will become a transparent liquid.
- Blend together strawberry and sugar. Reserve ¼ Cup sauce for decoration.
- Add hung curd, cream to the remaining strawberry sauce. Blend to combine nicely.
- Add the gelatin liquid into the filling and blend to combine evenly. The filling is ready!
Assemble The Cake
- Bring out the biscuit base from the refrigerator. Pour the cheesecake filling. Tap the cake tine gently on the kitchen counter once or twice to release the trapped air.
- Keep the cheesecake in the refrigerator covered for 4 – 5 hours or till is nicely set. I prefer chilling it overnight.
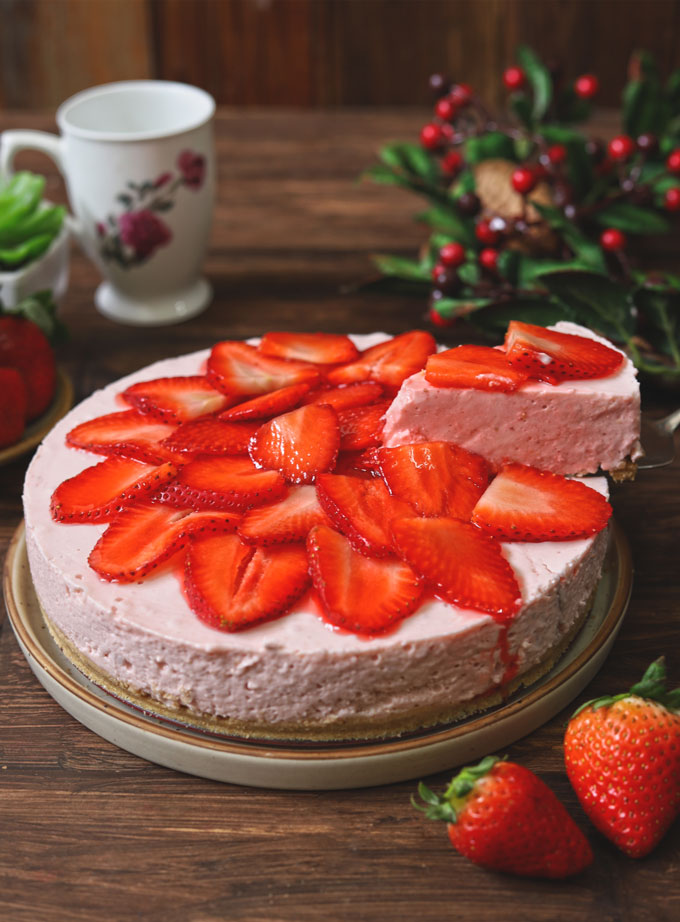
- Garnish strawberry cheesecake with sliced strawberry and reserved sauce.
- No Bake Strawberry Cheesecake is ready to slice and serve.
Recipe Notes:
- You can use frozen strawberries as well. Thaw them before adding them to the filling.
- Do not add granulated sugar without blending to the filling.
- You can use cream cheese instead of hung curd in the same quantity.
- Please use a Blooming Process to use the gelatin for setting the filling.
- The cake setting time may differ. So please do not slice the cake and continue chilling it until it is completely set.
Nutrition
We follow a strict NO SPAM Policy
