Looking for a vegetarian alternative to corn chowder? Try this creamy corn soup recipe that is both gluten and nut-free. Be sure to watch the video!
Estimated reading time: 3 minutes
- Ingredients You’ll Need
- Creamy Corn Soup Recipe
During the corn season, this soup is on regular rotation in our everyday meal menu. I hope it becomes a favourite for you as well! This vegetarian corn soup is a comforting bowl of creamy goodness.
Delicious to the core, so easy to make, and perfect for the kids as well. The whole family can enjoy this creamy corn soup for dinner or a light lunch.
Recipe Highlights
- pure vegetarian
- gluten and nut-free
- family-friendly meal
- wholesome and nourishing
Ingredients You’ll Need
- Corn: Sweet Corn Kernels. You can use frozen, canned, or peel them from the whole cob. I prefer using corn kernels from the cob for a deep flavour in the soup.
- Potato add creaminess to the soup. Avoid using sweet potatoes.
- Onion for its sharp taste to balance out the sweetness of corn and potato.
- Garlic: Adjust the quantity as per your personal taste preference. Skip if you are allergic.
- Celery and Thyme gives a deep flavour and aroma to the soup.
- Butter: Compliments the sweetness of the corn and gives a rich, buttery flavour to them. Feel free to use olive oil or coconut oil for a vegan corn soup.
- Cream provides a perfect finishing touch to the soup. Coconut milk is the best vegan alternative.
- Other Ingredients: Salt, pepper, stock , green onion, or chives
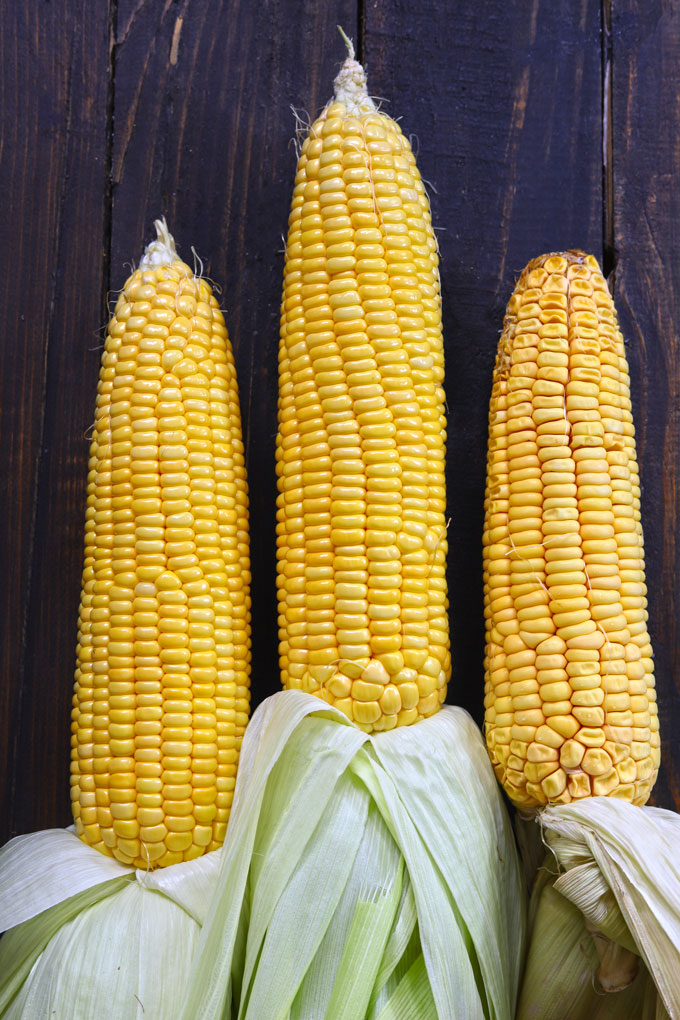
Corn on Cob vs Frozen Corn
I prefer using corn kernels freshly cut off the cob for this soup recipe. Why?
- The fresh corn kernels not only taste better but also the leftover cob when added to the soup, gives it a deep, rich, flavour. Whereas, the frozen corn lacks that natural sweet flavour plus there are no cobs for the stock. In my opinion, this creamy corn soup tastes best when made with corn kernels off the cob.
Watch Corn Soup Video
Serving Suggestion
You’ll be surprised to know that this creamy corn soup can be served warm or cold . Yes, you can serve it chilled as a cold appetizer or like a warm comforting soup.
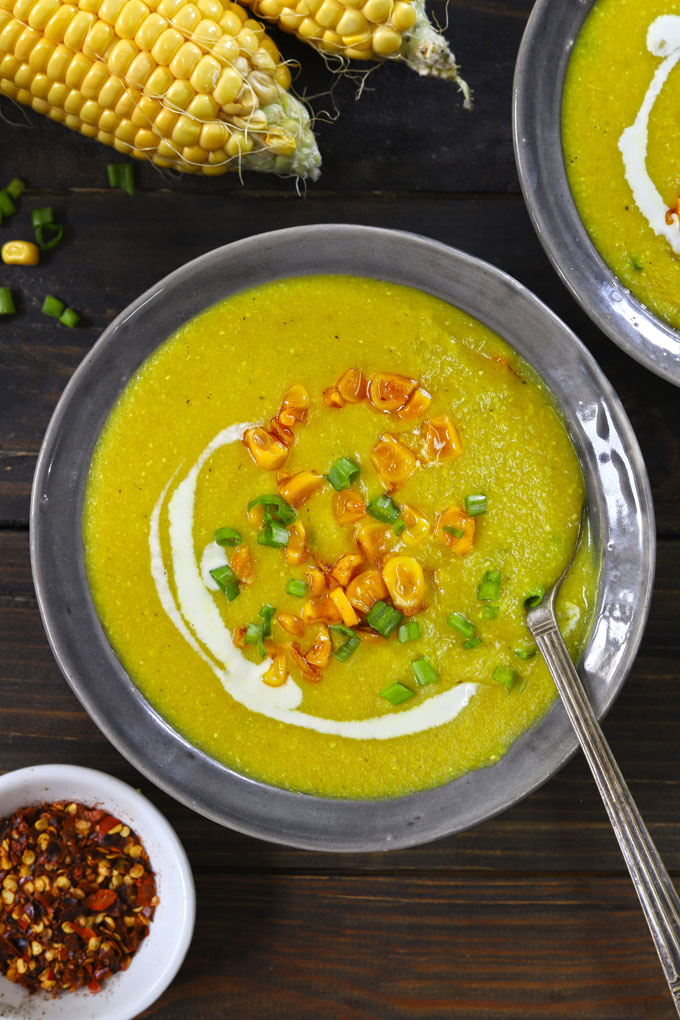
When it comes to garnishing the soup possibilities are endless – from roasted corn kernels, green onion, chives, parsley, fried bacon, olive oil, to thyme . Instead of extra virgin olive oil, you can drizzle chilli oil or infused garlic oil to enhance the flavour of the corn soup.
More Vegetable Soup Recipes
- Mushroom Soup
- Green Peas Soup
- Cauliflower Soup
- Vegetable Thukpa
- Broccoli Almond Soup
- Creamy Zucchini Soup
- Vegetable Barley Soup
- Tomato Couscous Soup

Ingredients
- ▢ 2 ears of corn (corn on cob)
- ▢ 2 tablespoon olive oil
- ▢ 1 tablespoon finely minced garlic
- ▢ 2 sprigs thyme
- ▢ 2 tablespoon celery stalk, finely chopped
- ▢ 1 medium size onion, chopped
- ▢ 1 small size potato, peeled and diced
- ▢ 6 Cup vegetable stock ( see recipe )
- ▢ 1 teaspoon Salt
- ▢ ½ teaspoon black pepper
- ▢ ¼ Cup cream
Ingredients For Garnish:
- ▢ 2 tablespoon green onion
- ▢ 2 tablespoon buttered corn
- ▢ 2 tablespoon cream
Instructions
- Cut the corn kernels off the cob. Collect the corn kernels in a bowl. Cut the corn cob into two halves (4 pieces in total). Keep them aside to add to the soup later.
- Heat butter in a saucepan. Add garlic, celery, onion, and fry for 1 – 2 minutes to release the aroma of the ingredients and infuse their flavor into the butter.
- Add diced potato, thyme, and corn kernels. Saute them for 5 – 6 minutes.
- Add water, salt, and give the soup a good stir. Gently place the cob in the soup. Simmer the soup over low heat for 20 – 25 minutes. Discard the scum/foam floating on top of the soup gently using a ladle. Cover and simmer the soup over low heat for 15 – 20 minutes or till corn and potatoes are tender.
- Transfer the soup to a blender or using an immersion blender grind it to a smooth consistency. If the soup is too hot to handle, wait for a few minutes. Using a sieve filter the blended soup, discard the corn pulp, and transfer back the creamy soup to the saucepan. Turn on the heat to the lowest setting.
- Add cream. Season with salt, pepper according to taste, and stir to combine. Simmer the corn soup for 5 – 6 minutes. Turn off the heat.
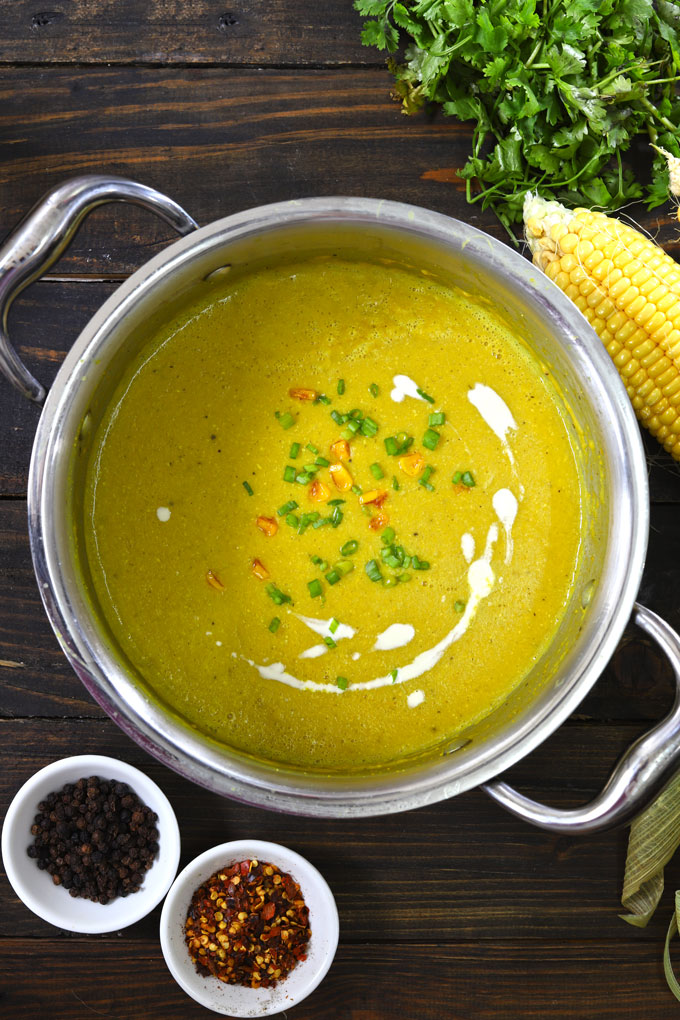
- Garnish corn soup with green onion, roasted corn, and cream.
- Serve creamy corn soup warm with bread.
Recipe Notes:
- If you are using frozen corn for this soup recipe. Then add vegetable stock instead of water.
- The corn soup becomes thick after a few hours or after storing in the refrigerator. While reheating, add little cream or stock, and simmer over low heat.
- You can store this soup in the refrigerator for 1 week.
Nutrition
We follow a strict NO SPAM Policy

Creamy Corn Soup Recipe
Equipment
- Saucepan
- Blender
Ingredients
- 2 ears of corn (corn on cob)
- 2 tablespoon olive oil
- 1 tablespoon finely minced garlic
- 2 sprigs thyme
- 2 tablespoon celery stalk, finely chopped
- 1 medium size onion, chopped
- 1 small size potato, peeled and diced
- 6 Cup vegetable stock ( see recipe )
- 1 teaspoon Salt
- ½ teaspoon black pepper
- ¼ Cup cream
Ingredients For Garnish:
- 2 tablespoon green onion
- 2 tablespoon buttered corn
- 2 tablespoon cream
Instructions
- Cut the corn kernels off the cob. Collect the corn kernels in a bowl. Cut the corn cob into two halves (4 pieces in total). Keep them aside to add to the soup later.
- Heat butter in a saucepan. Add garlic, celery, onion, and fry for 1 - 2 minutes to release the aroma of the ingredients and infuse their flavor into the butter.
- Add diced potato, thyme, and corn kernels. Saute them for 5 - 6 minutes.
- Add water, salt, and give the soup a good stir. Gently place the cob in the soup. Simmer the soup over low heat for 20 - 25 minutes. Discard the scum/foam floating on top of the soup gently using a ladle. Cover and simmer the soup over low heat for 15 - 20 minutes or till corn and potatoes are tender.
- Transfer the soup to a blender or using an immersion blender grind it to a smooth consistency. If the soup is too hot to handle, wait for a few minutes. Using a sieve filter the blended soup, discard the corn pulp, and transfer back the creamy soup to the saucepan. Turn on the heat to the lowest setting.
- Add cream. Season with salt, pepper according to taste, and stir to combine. Simmer the corn soup for 5 - 6 minutes. Turn off the heat.
- Garnish corn soup with green onion, roasted corn, and cream.
- Serve creamy corn soup warm with bread.
Video
Notes
- If you are using frozen corn for this soup recipe. Then add vegetable stock instead of water.
- The corn soup becomes thick after a few hours or after storing in the refrigerator. While reheating, add little cream or stock, and simmer over low heat.
- You can store this soup in the refrigerator for 1 week.
Nutrition
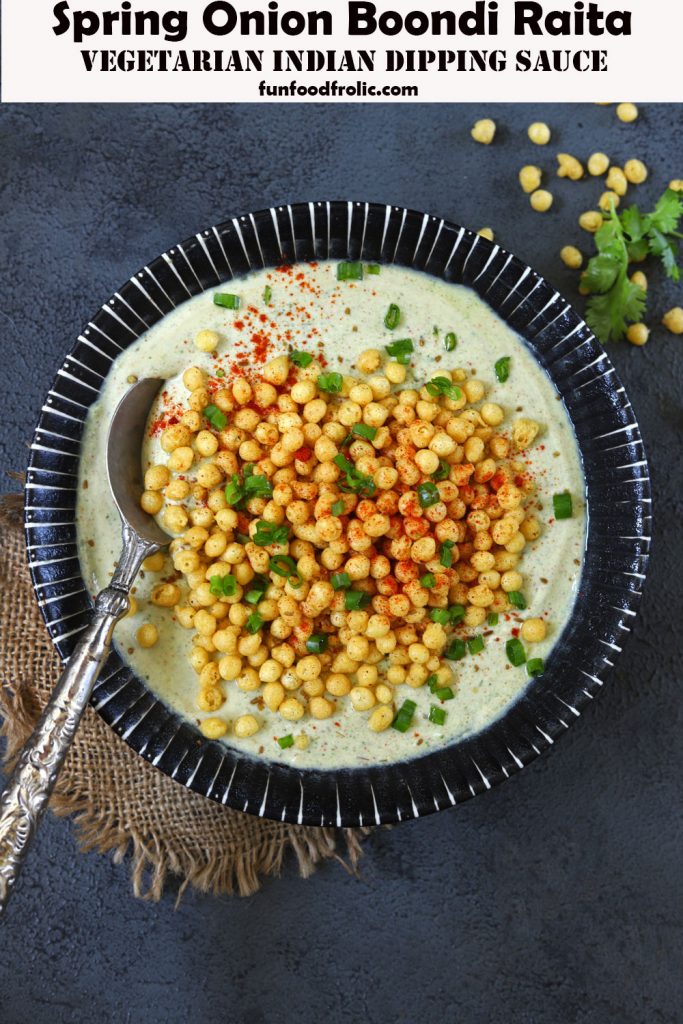
This is a special Boondi raita recipe with a refreshing green twist. Flavoured with green herbs – it is the easiest Indian side dish for pulao and curries. Be sure to watch the video!
- What is ‘Boondi Raita’?
- Ingredients For Raita
- The Green Herb Paste
- Watch Boondi Raita Video
- Serving Suggestion
- More Indian Raita Recipes
- Green Boondi Raita Recipe
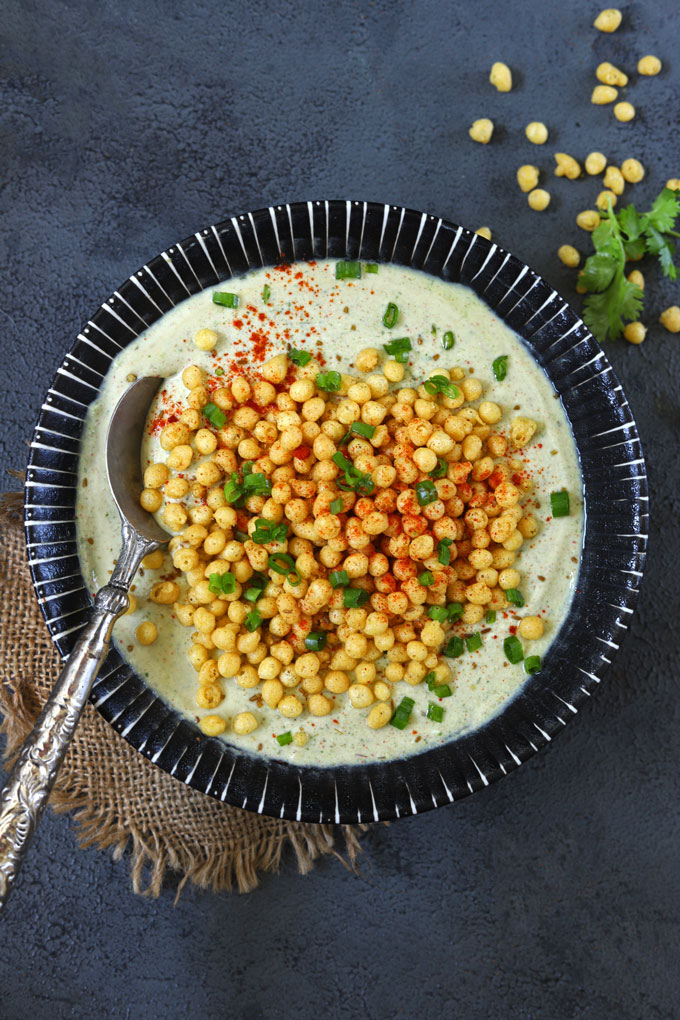
What is ‘Boondi Raita’?
Boondi Raita is one of the most popular Indian side dishes. It is served with a variety of Indian main course meals as a dipping sauce. You can call it a sweet, mildly spicy, refreshing dip made with curd, spices, salt, sugar, and Boondi.
I am sharing a unique Boondi Raita recipe with the flavour of fresh herbs. It is one of my favourite raita recipes, because of its soothing colour and refreshing taste. There is no cooking involved, and all you need is 20 minutes.
Ingredients For Raita
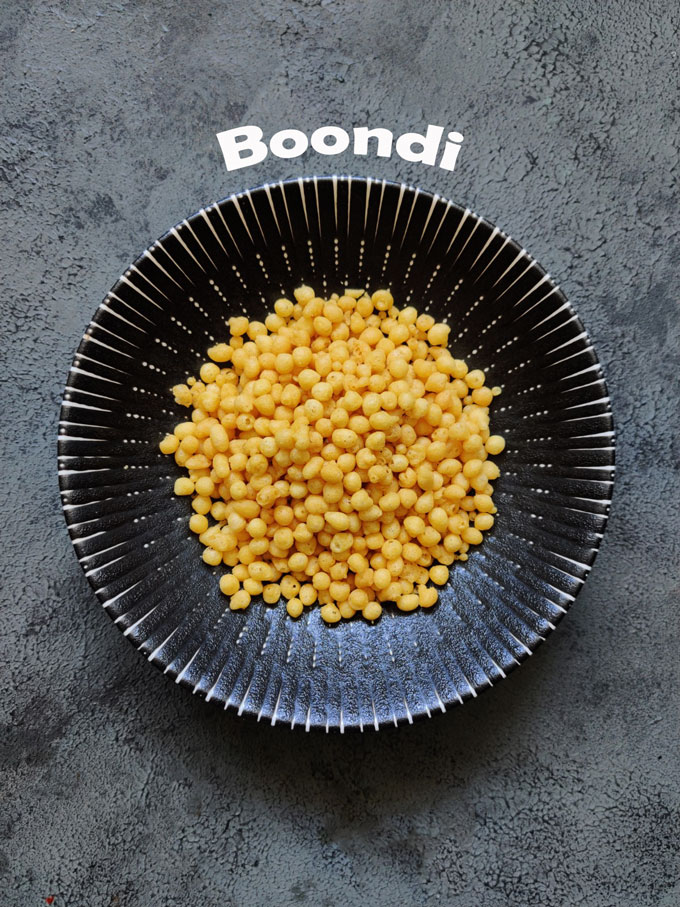
- Boondi : The key ingredient of this raita recipe is Boondi. The word ‘Boondi’ is a Hindi term for tiny crispy fried gram flour balls. It is a ready-to-use ingredient, easily available in supermarkets or grocery stores under the section of Indian dry snacks. You can use boondi to make Rajasthani Kadhi or murmura namkeen .
- Curd: Plain, unsweetened curd or thick Greek yoghurt. For vegan raita, use dairy-free yoghurt.
- Spices: Chaat Masala, Roasted Cumin Powder, Red Chilli Powder, Salt. Adjust the quantity of spices according to your taste preference.
- Sugar: A dash of sweetness helps to balance the heat of spices and green chillies. I prefer granulated white sugar or jaggery powder.
- Water or Milk: If the raita seems too thick, you can adjust the consistency by adding ¼ cup of plain water or room temperature milk for the creaminess.
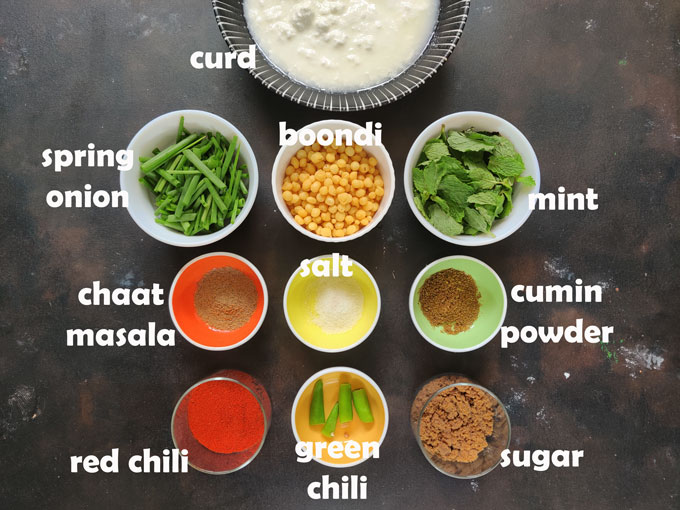
The Green Herb Paste
I use a refreshing herb paste to flavour the curd and give it an appealing bright green colour. This paste is a combination of spring onion stalks, mint leaves, curd, and green chilli .
Adding the green paste to the Boondi raita is an optional step. Usually, the boondi raita served at restaurants does not contain any green paste.
Watch Boondi Raita Video
Serving Suggestion
This green boondi raita tastes delicious with aloo ke gutke or potato roast . My favourite meal combination is aloo ki sabzi , boondi raita, and the palak puri or methi paratha .
For Indian main course dishes like vegetable pulao , chicken pulao , paneer pulao , or chana masala this green raita is a perfectly refreshing, cooling side dish.
Storage: Make sure not to leave raita at room temperature for more than 2 – 3 hours as the curd becomes sour. It is best to store the leftover raita in the refrigerator.
More Indian Raita Recipes
- Baingan Raita
- Pineapple Raita
- Pahadi Cucumber Raita
- Mint Pomegranate Raita

Ingredients
Ingredients For Green Paste:
- ▢ ½ Cup mint leaves
- ▢ 1 Cup spring onion stalks, chopped
- ▢ 2 green chili, chopped
Other Ingredients For Raita:
- ▢ ⅓ Cup boondi balls
- ▢ 1 Cup water, hot
- ▢ 2 Cup curd or yogurt
- ▢ 1 tablespoon Chaat Masala
- ▢ 1 tablespoon cumin powder (jeera powder)
- ▢ 1 teaspoon red chili powder
- ▢ ½ teaspoon salt or to taste
- ▢ 1 tablespoon brown sugar or jaggery powder
Ingredients For Garnish:
- ▢ 1 tablespoon Boondi balls
- ▢ 1 teaspoon spring onion, chopped
Instructions
- Soak Boondi in hot water for 5 – 6 minutes. Later, drain on a colander. Gently stir with a spoon and allow to cool completely.
- Roughly chop the spring onion green stalks. Discard the spring onion bulb.
- In a blender combine the mint leaves, green stalks, green chili, and 1 tablespoon thick curd. Make a smooth paste. Set aside until required.
- Whisk curd till smooth and lump free, Use a wire whisk or hand mixer for the purpose.
- Add spices, salt, sugar, and whisk again until smooth.
- Next, add green paste to the masala curd. Whisk to evenly combine with the curd.
- Add softened Boondi balls into the raita. Mix nicely. Keep raita in the refrigerator until ready to serve.
- Garnish raita with boondi and chopped spring onion. Serve Boondi Raita chilled.
Recipe Notes:
- Make sure to use thick, unflavoured curd or yogurt for making the raita.
- If the raita seems too thick, add ¼ cup water or milk, whisk nicely to get the spoon dropping, smooth consistency.
- Do not add a spring onion bulb (onion) to the green paste. Only the green stalks are used. You can make the green paste with a combination of coriander and mint as well.
Nutrition
We follow a strict NO SPAM Policy
