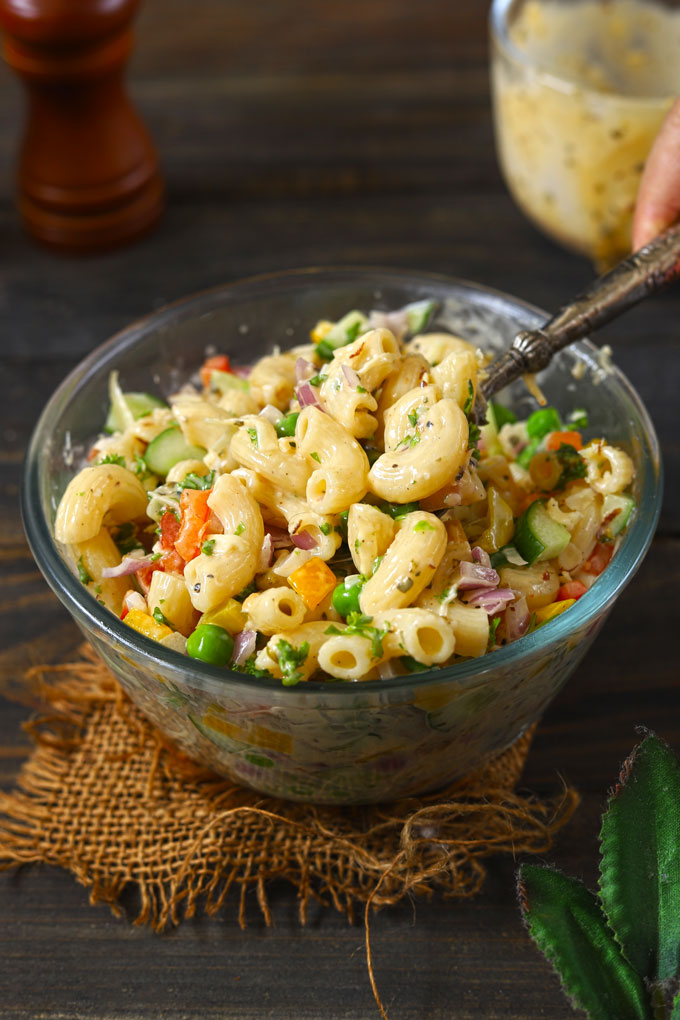
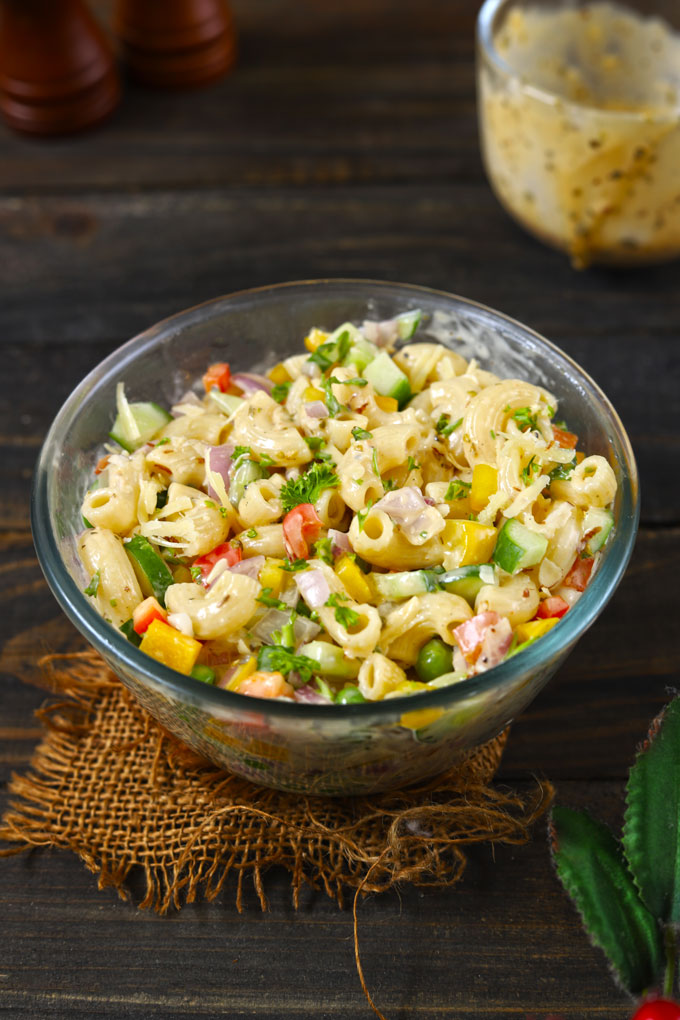
Macaroni Salad has my favourite elbow pasta, fresh summer veggies, cheese, and a creamy dressing that makes everything taste so good.
Estimated reading time: 4 minutes
- Vegetables for Salad
- Protein Addition
- The Salad Dressing
- Serving Suggestion
- Classic Macaroni Salad Recipe
Have you ever wished to chow loads of pasta with veggies? This simple macaroni salad is the answer to all your carb-laden dreams wrapped with colorful vegetables. This salad recipe could be a game-changer for all the macaroni that’s stashed away in your kitchen waiting for a cheat day to arrive.
It is a vegetarian, kid-friendly salad that is perfect for outdoor picnics or as a BBQ side dish for large gatherings.
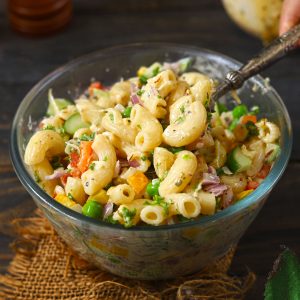
Make it a few hours before serving, keep it in the fridge to chill and last-minute simply serve in style.
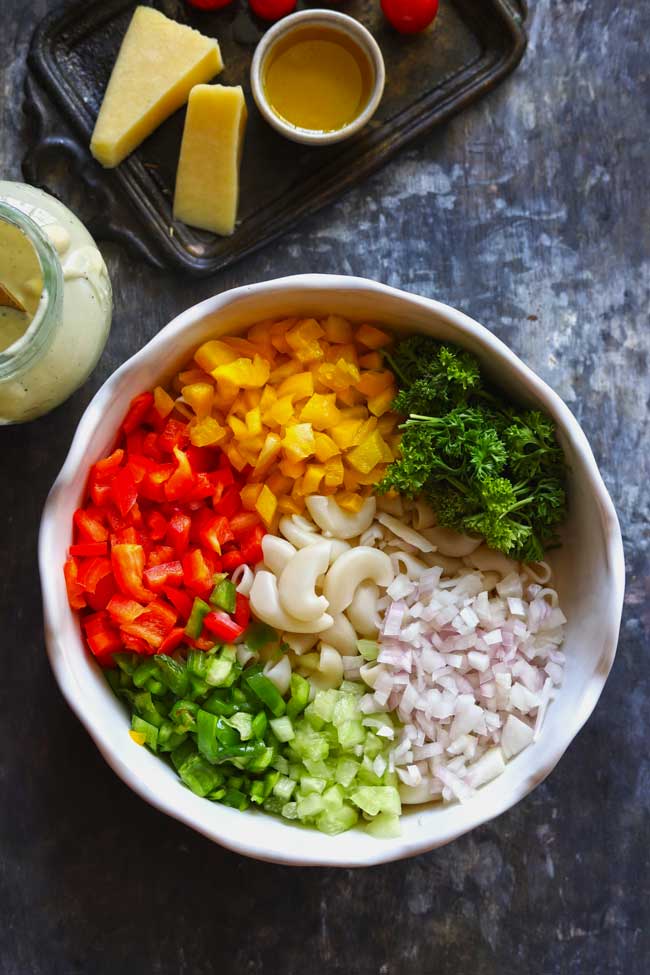
Vegetables for Salad
As with any salad, the golden rule is to use fresh and crunchy vegetables.
You can add some greens like parsley, coriander, kale, baby spinach, mint, or basil leaves. Basil leaves pair very well with any kind of pasta salad.
For a sweet and savory pasta salad, pineapple , apple, or blueberries are also a great addition.
Protein Addition
In case you want to add some kind of protein to your pasta salad, then here are a few interesting choices:
- Add in some cooked tofu chunks or some extra firm fried tofu to the salad (vegan)
- Try macaroni salad with eggs it tastes amazing
- Small cubes of boiled chicken or slices of cooked sausages can be added
- Garnish with some fried crisp bacon for a great texture and taste
- If you are a seafood lover, add pan-grilled prawns to the salad
The Salad Dressing
The deal-breaker for this heavenly pasta salad is a finger-licking good dressing.
Hope you know about my 6 Homemade Salad Dressing Recipes . We have used the classic Italian dressing for this macaroni salad. Or you can use my vegan cashew sauce as a base for the dressing to make a dairy-free pasta salad.
Here is what you need for making the salad dressing:
- white wine vinegar
- plain mayonnaise
- extra virgin olive oil
- parmesan cheese
- crushed/grated or garlic powder
- salt and black pepper
- lemon juice
- oregano
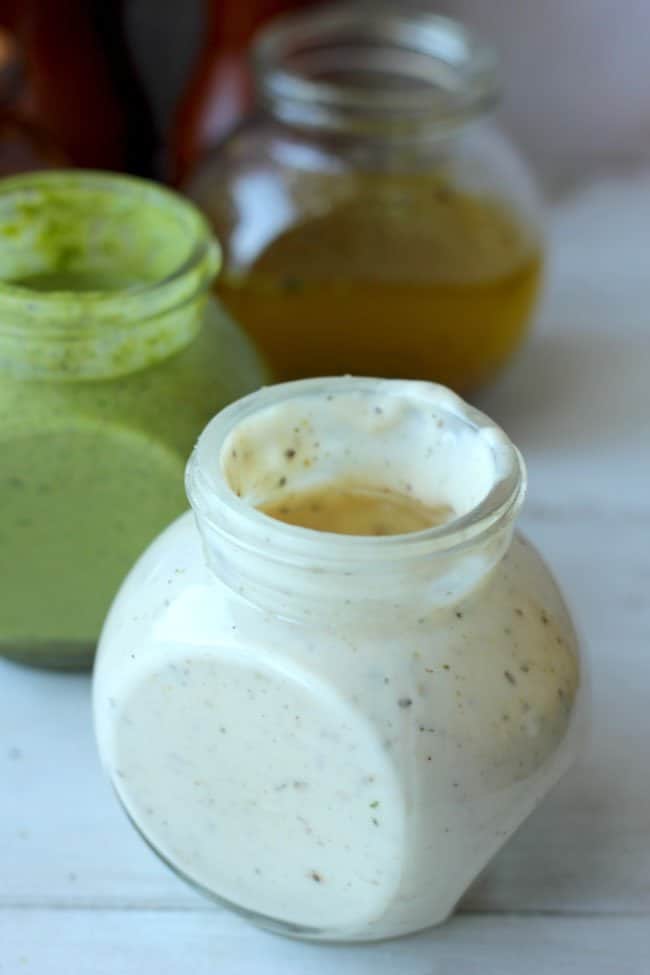
Italian Salad Dressing
Serving Suggestion
One really doesn’t need an excuse to make this pasta salad because it’s that addictive. But if you’re looking for inspiration, here are some ideas:
Serve macaroni salad as a side with some whole wheat sandwiches for office lunch or for kid’s school lunchbox (it’s guaranteed to come back licked clean).
Take it on a summer family picnic or potluck . Pasta Salad makes an excellent choice for the high tea party.
More Vegetarian Pasta Recipes
- Basil Pesto Pasta
- Makhani Sauce Pasta
- Garlic Mushroom Pasta
- Vegetable Stir-Fry Pasta
- Pasta with Cherry Tomatoes
- 20 Minute Red Sauce Spaghetti
- Instant Pot Pumpkin Sauce Pasta
Ingredients
- ▢ 400 gram elbow macaroni
- ▢ 1 Cup fine chopped red onion
- ▢ 1 Cup fine chopped red bell pepper
- ▢ 1 Cup fine chopped yellow bell pepper
- ▢ 1 Cup fine chopped cucumber
- ▢ 1 Cup green peas, boiled or steamed (fresh or frozen )
- ▢ 1 Cup fine chopped capsicum
- ▢ ¼ Cup fine chopped parsley or basil
- ▢ Salt to taste
Ingredients For Dressing:
- ▢ 1 Cup plain mayonnaise
- ▢ 1 Cup grated parmesan cheese
- ▢ ¼ Cup extra virgin olive oil
- ▢ 1 tablespoon white vinegar or wine vinegar
- ▢ Juice of half a lemon
- ▢ 2 garlic cloves, crushed or grated
- ▢ 1 teaspoon dried oregano
- ▢ Salt and pepper to taste
Instructions
- Cook macaroni according to package directions in the salted water. Once cooked al-dente, transfer to a strainer, rinse with cold water and set aside to cool down completely.
- Chop all the vegetables, herbs and transfer to a salad mixing bowl.
Prepare Dressing:
Whisk mayo, cheese, garlic, oregano and vinegar in a bowl until combined nicely.
Add the olive oil and whisk the dressing once again to mix nicely. Taste and season with salt and pepper accordingly.
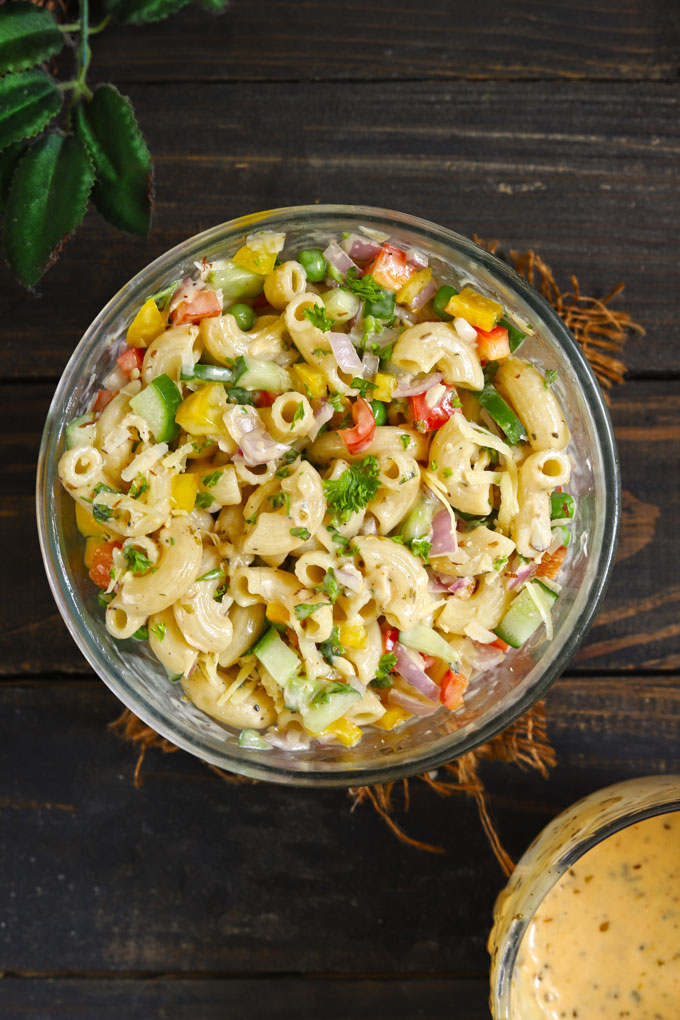
Combine vegetables, herbs and boiled pasta in a salad bowl. Toss gently.
Pour prepared dressing over the salad and toss gently to coat pasta with the dressing.
Taste and add more salt/pepper if required. Keep the salad in the fridge until ready to serve.
Serve vegetable macaroni salad chilled.
Recipe Notes:
- The dressing should be of pouring consistency. Hence, if required add more olive oil to get the liquid consistency.
- Do not combine vegetables with warm macaroni. The vegetables will get steamed and lose their crunch.
- The salad dressing can be prepared in advance and stored in the fridge for 2 – 3 days.
- Let the salad chill in the refrigerator for 1 – 2 hours before serving. Mix gently once again before serving.
- If the macaroni salad is stored in the fridge in an airtight container, it can last for 3 – 5 days. Avoid adding salt before refrigeration so that vegetables don’t release their juices and the salad remains fresh. At room temperature, salad packed with cheese and mayonnaise spoil very fast. It is best to consume it within 2 hours. You can use the leftover boiled macaroni pasta to make my Indian-style masala macaroni stir fry pasta or the classic minestrone soup .
Nutrition
We follow a strict NO SPAM Policy

Classic Macaroni Salad Recipe
Equipment
- Salad Mixing Bowl
Ingredients
- 400 gram elbow macaroni
- 1 Cup fine chopped red onion
- 1 Cup fine chopped red bell pepper
- 1 Cup fine chopped yellow bell pepper
- 1 Cup fine chopped cucumber
- 1 Cup green peas, boiled or steamed (fresh or frozen )
- 1 Cup fine chopped capsicum
- ¼ Cup fine chopped parsley or basil
- Salt to taste
Ingredients For Dressing:
- 1 Cup plain mayonnaise
- 1 Cup grated parmesan cheese
- ¼ Cup extra virgin olive oil
- 1 tablespoon white vinegar or wine vinegar
- Juice of half a lemon
- 2 garlic cloves, crushed or grated
- 1 teaspoon dried oregano
- Salt and pepper to taste
Instructions
- Cook macaroni according to package directions in the salted water. Once cooked al-dente, transfer to a strainer, rinse with cold water and set aside to cool down completely.
- Chop all the vegetables, herbs and transfer to a salad mixing bowl.
Prepare Dressing:
Whisk mayo, cheese, garlic, oregano and vinegar in a bowl until combined nicely.
Add the olive oil and whisk the dressing once again to mix nicely. Taste and season with salt and pepper accordingly.
Combine vegetables, herbs and boiled pasta in a salad bowl. Toss gently.
Pour prepared dressing over the salad and toss gently to coat pasta with the dressing.
Taste and add more salt/pepper if required. Keep the salad in the fridge until ready to serve.
Serve vegetable macaroni salad chilled.
Video
Notes
- The dressing should be of pouring consistency. Hence, if required add more olive oil to get the liquid consistency.
- Do not combine vegetables with warm macaroni. The vegetables will get steamed and lose their crunch.
- The salad dressing can be prepared in advance and stored in the fridge for 2 - 3 days.
- Let the salad chill in the refrigerator for 1 - 2 hours before serving. Mix gently once again before serving.
- If the macaroni salad is stored in the fridge in an airtight container, it can last for 3 - 5 days. Avoid adding salt before refrigeration so that vegetables don’t release their juices and the salad remains fresh. At room temperature, salad packed with cheese and mayonnaise spoil very fast. It is best to consume it within 2 hours. You can use the leftover boiled macaroni pasta to make my Indian-style masala macaroni stir fry pasta or the classic minestrone soup .
Nutrition
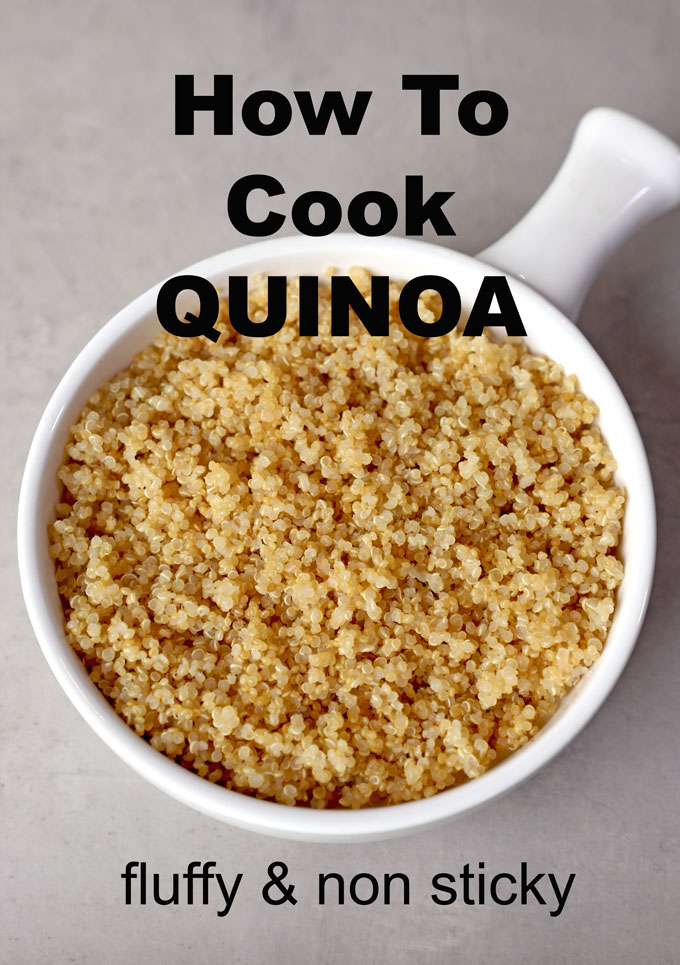
Learn how to cook quinoa that is non sticky and fluffy at home—it just requires a little attention to detail. That’s the secret sauce.
Estimated reading time: 4 minutes
- Why Quinoa Can Turn Out Sticky?
- How to Cook Non-Sticky Quinoa
- Bonus Tips for Even Better Quinoa
- Serving Ideas for Quinoa
- How To Cook Quinoa
Quinoa has earned a permanent place in the kitchens of health-conscious foodies, vegetarians, vegans, and busy home cooks alike. It is incredibly versatile, packed with plant-based protein, naturally gluten-free, and cooks faster than rice.
But here’s the thing: as simple as quinoa sounds, many people still struggle to get that perfect light and fluffy texture. Have you ever ended up with a pot of soggy, sticky quinoa that looks more like porridge than a wholesome grain? You’re not alone.
Why Quinoa Can Turn Out Sticky?
First, let’s talk about what usually goes wrong. Quinoa is actually a seed, not a grain, and it has a natural coating called saponin. It has a bitter taste and can create a soapy or mushy texture if not rinsed properly.
On top of that, many people either:
- Use too much water to cook
- Skip the soaking and resting phase
- Forget to fluff it at the end
All of these small missteps can result in sticky or clumpy quinoa.
How to Cook Non-Sticky Quinoa
1.Rinse and Soak Your Quinoa
This is non-negotiable. Quinoa is naturally coated in saponin, which is bitter and creates a sticky texture. To get rid of it:
- Place the quinoa in a fine mesh strainer.
- Rinse under cold running water for 30 seconds to a minute.
- Use your fingers or a spoon to move the grains around while rinsing.
- Soak it in clean water for at least 30 minutes. It helps in digestion.
2.Toast It in a Dry Pan (Optional but Game-Changing)
Want a subtle nutty flavour and an extra-fluffy quinoa? Toast your soaked (and well-drained) quinoa in the same pot you’ll cook it in.
- Set the pan over medium heat.
- Stir the quinoa frequently for 2 – 3 minutes, until it smells toasted.
Toasting drives off extra moisture and enhances the flavour.
3.Use the Right Water Ratio
The golden rule for fluffy quinoa is a 1:2 ratio — one part quinoa to two parts water or broth.
- Add 2 cups of water (or stock for more flavour) to the pan.
- Add salt and olive oil if desired.
- Bring to a boil over medium-high heat.
4.Simmer Low and Slow—No Peeking!
Once your quinoa reaches a rolling boil:
- Reduce the heat to low and cover the pan with a tight-fitting lid.
- Let it simmer gently for exactly 15 minutes.
- Don’t stir and don’t lift the lid.
Let the steam do its job. Stirring during cooking activates starches and encourages clumping. You can cook it in a stovetop, conventional pressure cooker or on instant pot in pressure cook mode .
5.Let It Sit Off the Heat
Once the timer goes off, resist the urge to dig in. Turn off the heat and let the pot sit, covered, for another 5 to 6 minutes. This resting time allows the steam to finish cooking the quinoa and separate the grains naturally.
6.Fluff with a Fork—Not a Spoon
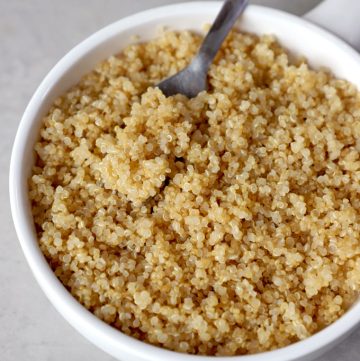
Uncover the pan and fluff the quinoa gently with a fork. The fork helps lift and separate the grains without mashing them together.
What you’ll see is beautiful, fluffy quinoa—each grain light, tender, and ready to go.
Bonus Tips for Even Better Quinoa
- Flavour It Early : Use stock/broth instead of water, add bay leaves, or garlic in the cooking liquid.
- Don’t Skip the Toasting : It’s optional, but you’ll notice a big difference in taste and texture.
- Use the Right Pot : A medium, heavy-bottomed saucepan with a good lid works best for even cooking.
Serving Ideas for Quinoa
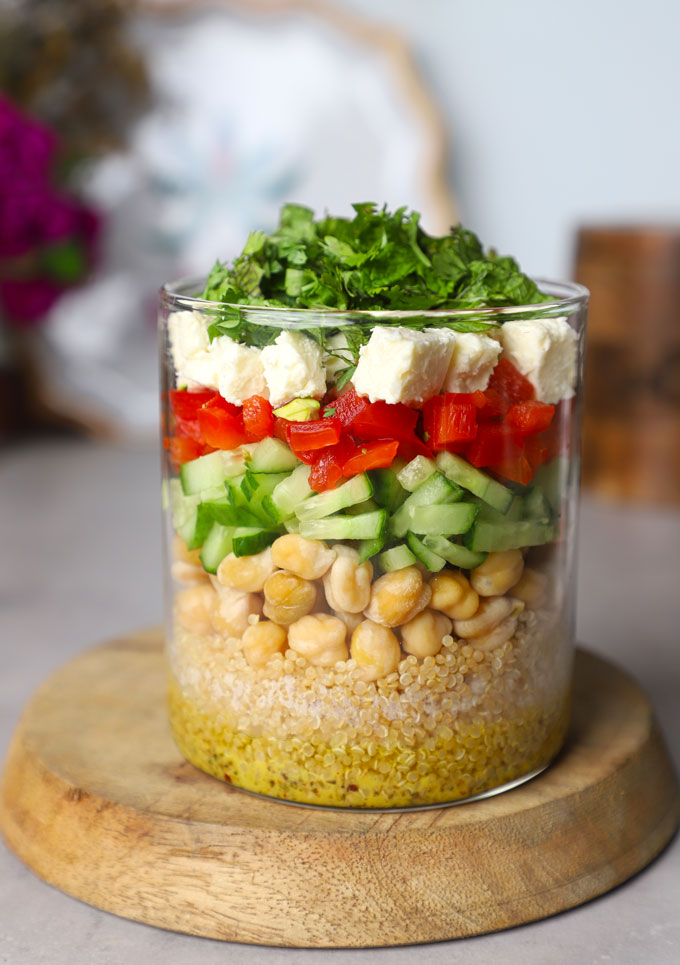
Once you’ve mastered this technique, the possibilities are endless. Use your fluffy quinoa in:
- Mediterranean Quinoa Salad or Pumpkin Salad
- Quinoa Fried Rice as a healthy rice alternative
- Indian Desserts like kheer with almond milk and apple .
- One Pot Mexican Quinoa with beans and roasted vegetables.
- Stuffed peppers or sweet potatoes with quinoa.
Ingredients
- ▢ 1 Cup quinoa
- ▢ 2 Cup water
- ▢ ½ teaspoon olive oil
- ▢ ½ teaspoon salt or to taste
- ▢ 1 bay leaf (optional)
Instructions
- Place the quinoa in a fine mesh strainer. Rinse under cold running water for 30 seconds to a minute to get rid of saponin.
- Soak it in clean water for at least 30 minutes. It helps in digestion.
- Set a heavy bottom pan over medium heat. Drain all the water from the soaked quinoa. Add it to the pan. Stir the quinoa frequently for 2 – 3 minutes, until it smells nutty and toasted. Do not leave it unattended as it might burn fast.
- Add 2 cups of water (or stock for more flavour) to the pan. Add salt and a olive oil if desired. Bring to a boil over medium-high heat.
- Once your quinoa reaches a rolling boil, reduce the heat to low and cover the pan with a tight-fitting lid. Let it simmer gently for exactly 15 minutes. Don’t stir and don’t lift the lid. Stirring during cooking activates starches and encourages clumping.
- Once the timer goes off, resist the urge to dig in. Turn off the heat and let the pot sit, covered, for another 5 to 6 minutes. This resting time allows the steam to finish cooking the quinoa and separate the grains naturally.
- Uncover the pan and fluff the quinoa gently with a fork. The fork helps lift and separate the grains without mashing them together.
- What you’ll see is beautiful, fluffy quinoa—each grain light, tender, and ready to go. At this stage, you can use it immediately or allow it cool down and store in the refrigerator for 4 – 5 days.
Nutrition
We follow a strict NO SPAM Policy
