Learn how to make Cheese Rava Cutlet, a kid-approved recipe made with suji, and cheese. Perfect for a quick and tasty snack! Be sure to watch the video!
Estimated reading time: 3 minutes
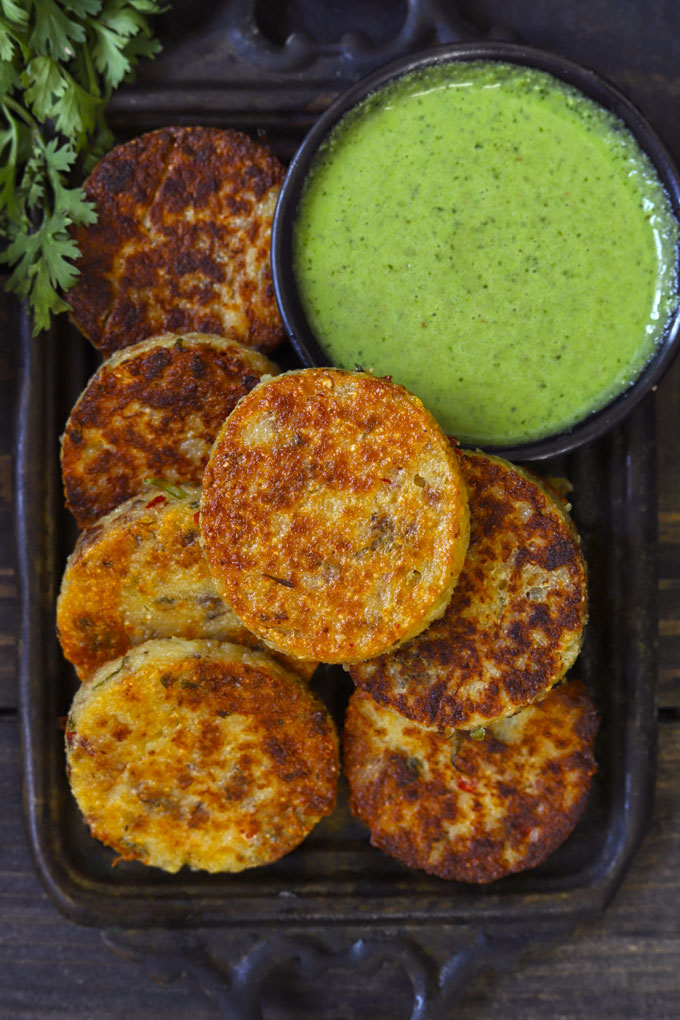
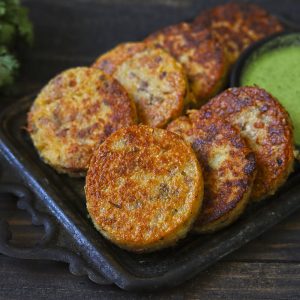
Cheese Rava Cutlet is a vegetarian Indian snack. These cutlets have a crisp exterior and a mouth melting cheesy interior.
You need a few basic staples like fine quality semolina (rava), milk, spices, and cheese to make these cutlets from scratch at home.
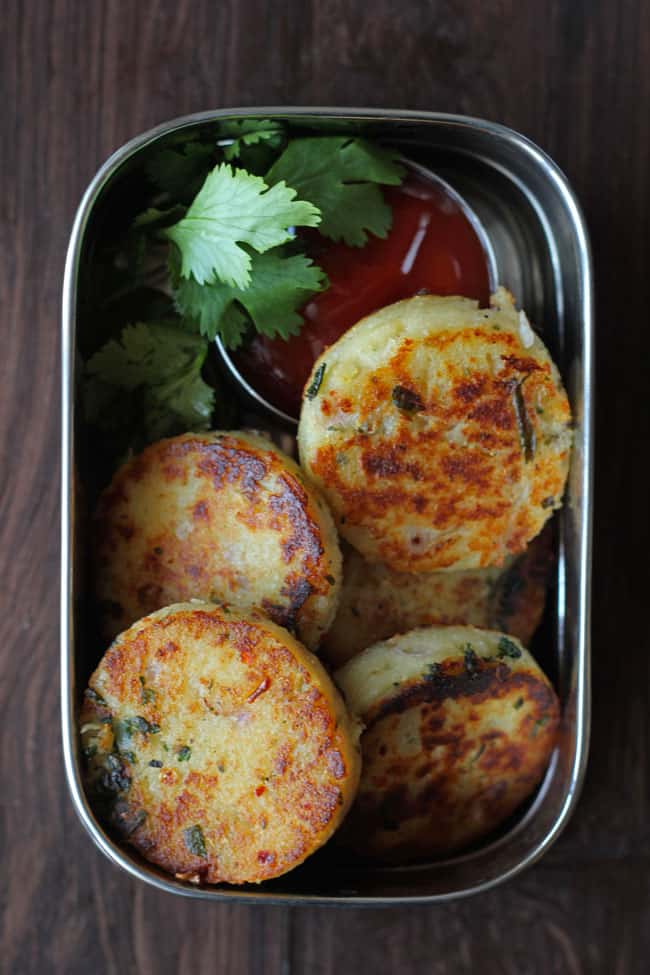
The best part is you can make these rava cutlets in advance, store them in the refrigerator, and pan-fry before serving.
And I almost forgot that you could cook these rava cutlets in an air-fryer or in the oven. So now you have three alternatives – pan fry, air-fry, and bake , to make tasty and crunchy crispy cutlets at home in no time.
Reasons To LOVE Rava Cutlet
- kid-approved recipe
- highly customizable
- easy to make and store
- can be made 2 – 3 days in advance
- you can pan-fry, air-fry, or bake them
Watch Suji Cutlet Video
Serving Suggestion
Rava Cutlet tastes delicious with a spicy dipping sauce like a green Mint Chutney , roasted tomato chutney , or spicy mango dip .
My Tried & True Tips
- Allow cheese to melt in the milk before adding the semolina (rava).
- Never ever add salt while boiling the milk . The milk might curdle. Also, the cheese has some saltiness, so add the salt accordingly.
- Add the semolina in small batches to nicely mix the batter. Continuously stir the milk while adding the semolina. This trick helps in avoiding any lumps in the mixture.
- Be patient and allow the semolina mixture to set on the baking tray. This might take 30 minutes to 1 hour. If you are in a hurry, keep the baking tray with cutlet mixture in the freezer for a quick turnaround result.
- If you have a jar of good quality bread crumbs , coat the cutlets with them and pan fry them. I am sure you will love these cutlets even more.
More Cutlet Recipes
- Oats Cutlet
- Vegetable Cutlet
- Masoor Dal Cutlet
- Sabuadana Cutlet
- Corn Paneer Cutlet
Ingredients
- ▢ 1 ½ Cup Milk
- ▢ ½ Cup chopped onion
- ▢ ½ Cup grated cheese
- ▢ 1 tablespoon chopped coriander
- ▢ 1 Cup rava/sooji (Semolina)
- ▢ 1 teaspoon Italian Herbs (organo and chilli flakes)
- ▢ 1 teaspoon black pepper or to taste
- ▢ Salt to taste
- ▢ 2 – 3 tablespoon cooking oil
Instructions
- Boil milk in a pan. Add cheese cubes, chopped onion, Italian seasoning and stir to combine.
- Once the cheese is melted, slowly add the semolina. Continuously stir the mixture. Turn off the heat.
- Now add the salt, pepper, and coriander. Continuously stir the mixture until it reaches a thick spreading consistency. Set aside.
- Grease a square tray with butter.
- Spread the semolina mixture on the tray. Keep the thickness of half inch. Gently press it with the spatula.
- Set it aside for one hour or till it is set. You can also keep it in the fridge for 30 minutes.
- Cut the cutlets into the desired shapes using a knife or a cookie cutter.
- You can serve them as it is or pan fry for a crispy texture. You can store these cutlets in the fridge for a week. Reheat or pan fry whenever required.
- To pan fry the rava cutlets, heat 2 tablespoon of oil in a pan.
- Fry the cutlets till they turn crisp from both the sides.
- Serve Cheese Rava Cutlets warm with your favorite chutney or ketchup.
Recipe Notes:
- Without pan-frying these cutlets can be stored in the fridge for 3 – 4 days. Whenever required bring then out and pan-fry.
- Allow the cheese to melt nicely in the milk before adding semolina.
- Never add salt while boiling the milk or before adding semolina. The milk will curdle.
Nutrition
We follow a strict NO SPAM Policy

Cheese Rava Cutlet
Ingredients
- 1 ½ Cup Milk
- ½ Cup chopped onion
- ½ Cup grated cheese
- 1 tablespoon chopped coriander
- 1 Cup rava/sooji (Semolina)
- 1 teaspoon Italian Herbs (organo and chilli flakes)
- 1 teaspoon black pepper or to taste
- Salt to taste
- 2 - 3 tablespoon cooking oil
Instructions
- Boil milk in a pan. Add cheese cubes, chopped onion, Italian seasoning and stir to combine.
- Once the cheese is melted, slowly add the semolina. Continuously stir the mixture. Turn off the heat.
- Now add the salt, pepper, and coriander. Continuously stir the mixture until it reaches a thick spreading consistency. Set aside.
- Grease a square tray with butter.
- Spread the semolina mixture on the tray. Keep the thickness of half inch. Gently press it with the spatula.
- Set it aside for one hour or till it is set. You can also keep it in the fridge for 30 minutes.
- Cut the cutlets into the desired shapes using a knife or a cookie cutter.
- You can serve them as it is or pan fry for a crispy texture. You can store these cutlets in the fridge for a week. Reheat or pan fry whenever required.
- To pan fry the rava cutlets, heat 2 tablespoon of oil in a pan.
- Fry the cutlets till they turn crisp from both the sides.
- Serve Cheese Rava Cutlets warm with your favorite chutney or ketchup.
Video
Notes
- Without pan-frying these cutlets can be stored in the fridge for 3 - 4 days. Whenever required bring then out and pan-fry.
- Allow the cheese to melt nicely in the milk before adding semolina.
- Never add salt while boiling the milk or before adding semolina. The milk will curdle.
Nutrition
Looking for a healthy and tasty breakfast recipe? Try Oats Chilla – a savoury and protein-packed Indian pancake. Be sure to watch the video!
Estimated reading time: 3 minutes
- My Tried and True Tips
- Watch Oats Chilla Video
- Serving Suggestion
- Oats Chilla Recipe
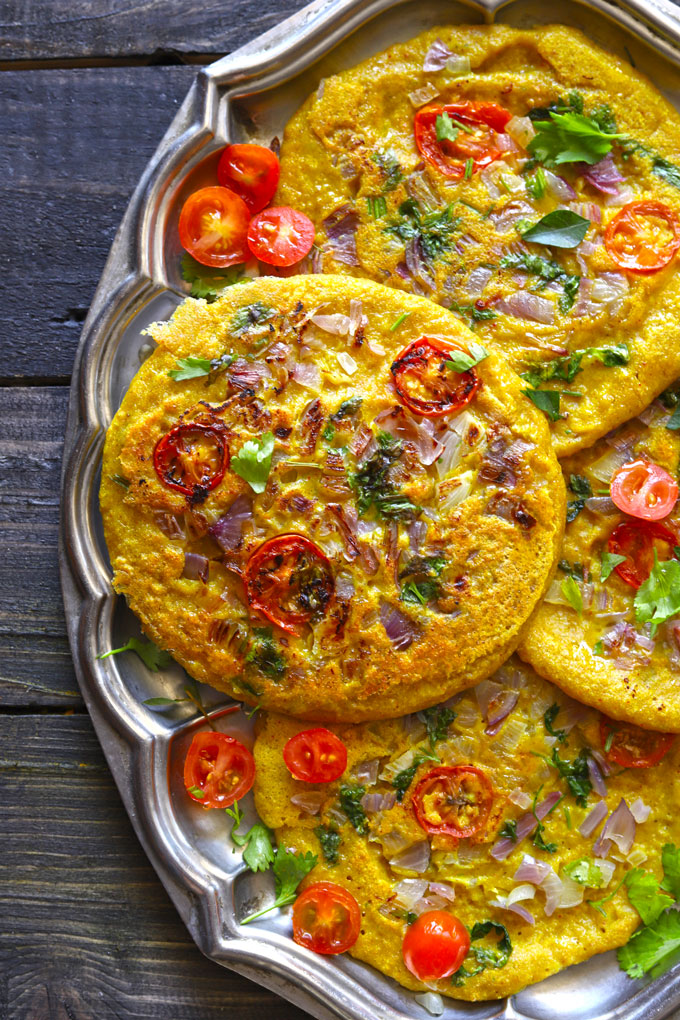
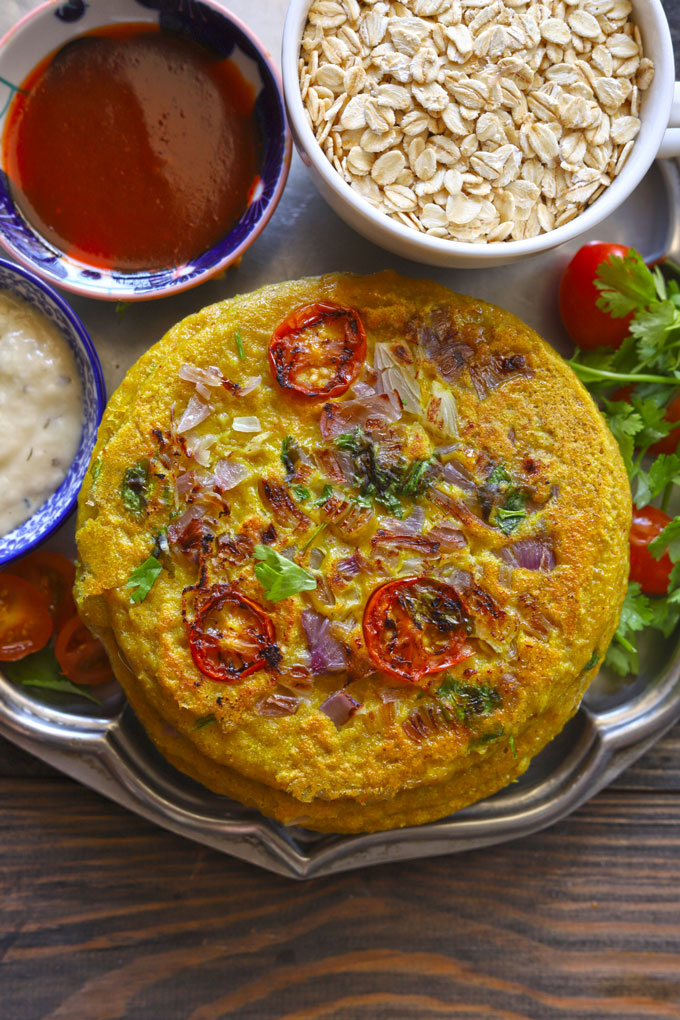
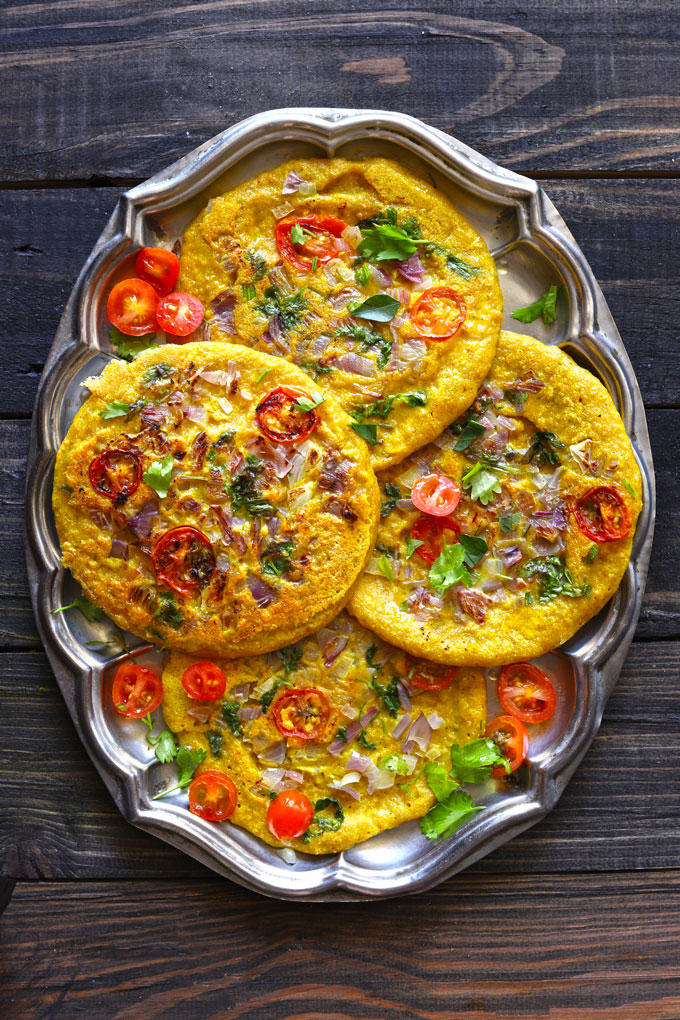
Oats Chilla is a healthy, vegan, gluten-free Indian breakfast recipe. It has moong dal, oats, vegetables, and all kinds of good nutrients required to start your day.
For those new to the dish, ‘chilla’ or ‘cheela’ is the Indian term for savoury, egg-free pancakes or crepes. There are a variety of chilla recipes. Like besan chilla , dal cheela , and so on.
Recipe Highlights
- healthy, wholesome, fulfilling
- gluten-free & vegan
- highly customizable
- meal-prep friendly
- easy to prepare
The Chilla Batter
This gluten-free oats chilla batter is made with two key ingredients:
- Oats : I use quick breakfast oats for making the chilla batter.
- Yellow Moong Dal: The yellow moong dal adds a protein quotient to the chilla and gives it a crisp texture.
This is a meal-prep-friendly batter . You can store it in the refrigerator for 2 – 3 days. Then, please bring it to room temperature before making the chilla.
My Tried and True Tips
- Soaking moong dal is essential to make a smooth dal chilla batter.
- Grind soaked moong dal to a smooth consistency. It should not be coarse or lumpy.
- Always use a cast-iron skillet for making roti, dosa, or cheela.
- It is very important to let chilla turn crisp from one side. Then, flip it to cook from the other side. Oats Chilla is not flipped again and again . Only twice ( refer to recipe video ). Once crisp from the base, flip and cook from the topping side.
Watch Oats Chilla Video
Serving Suggestion
The indulgent Indian breakfast recipes are the things of the weekend. For busy weekdays, meal-prep-friendly breakfast recipes like oats moong dal chilla are on my list.
You can serve oats chilla with a variety of side dishes like mint raita or masala curd, green chutney or pickle , masala potato fry or any other dipping sauce of your choice
More Healthy Oats Recipes
- Oats Soup
- 4 Overnight Oats
- Apple Oats Muffin
- Homemade Oat Milk
- Oats Apple Pancakes
- Moong Dal Oats Khichdi
- Gluten-Free Oats Cutlet
- Mango Oats Breakfast Smoothie

Ingredients
Ingredients For Batter:
- ▢ 1 Cup yellow moong dal
- ▢ ½ Cup instant oats or whole oats
- ▢ 1 teaspoon fenugreek (methi) seeds
- ▢ 1 green chilli
- ▢ 1 tablespoon roughly chopped ginger
- ▢ Salt to taste
- ▢ ½ teaspoon red chili powder
- ▢ ½ teaspoon turmeric powder
- ▢ 1 teaspoon cumin (jeera) powder
- ▢ ¼ Cup cooking oil
Ingredients For Topping:
- ▢ 1 Cup finely chopped onion
- ▢ 1 Cup finely chopped tomato
- ▢ ¼ Cup finely chopped coriander
Instructions
Prepare Batter:
- To prepare the Oats Moong Dal Chilla, first make powder of oats in mixer. Transfer to a bowl and set aside.
- Wash and soak yellow moong dal and fenugreek seeds in water for 4 – 5 hours. After soaking, drain the water from the yellow moong dal.
- In the mixer, grind the soaked moong dal to a fine paste along with green chili, ginger using ¼ cup water. Make sure not to use more than ¼ Cup of water.
- In a mixing bowl combine together powdered oats, moong dal paste, spices, and salt. Whisk to make a smooth, lump-free batter. The batter will be similar to the consistency of a dosa batter or pancake batter.
Prepare Chilla (Pancake):
- Once batter is ready, heat a non stick pan over medium heat. Grease the pan with a teaspoon or so of cooking oil.
- Pour a ladle full of batter on the pan and spread it in a circular motion to form a pancake style chilla. Sprinkle chopped onion, tomato, coriander on the chilla.
- Drizzle little oil around the chilla, cook it until you notice the edges are getting brown and leaving the pan easily. Flip and cook on the other side for a few seconds
- Once Oats Moong Dal Chilla is crisp on both sides, transfer it to a plate and proceed to make the chillas with the remaining batter.
- Serve the Oats Moong Dal Chilla with green chutney/pickle for the wholesome breakfast or lunch.
Recipe Notes:
- Soaking moong dal is very essential to make a smooth dal chilla batter. Grind soaked moong dal to a smooth consistency.
- The pancake batter should be smooth and of spoon dropping consistency .
- It is very important to let chilla turn crisp from one side. Then, flip it to cook from the other side. Moong Dal Chilla is not flipped again and again .
- DO NOT try to remove dal chilla forcefully from the pan to flip. The chilla will break apart and would turn mushy.
- You can store the chilla batter in the refrigerator for 2 – 3 days. Bring it to room temperature before using.
- Chilla Recipe Variations You can customize dal cheela by adding spices, seasoning like garlic, ginger, fresh herbs, and add-on toppings such as grated cheese or chopped vegetables. Or you can make dal cheela without oats with a delicious dosa-style potato stuffing or with masala paneer .
Nutrition
We follow a strict NO SPAM Policy
