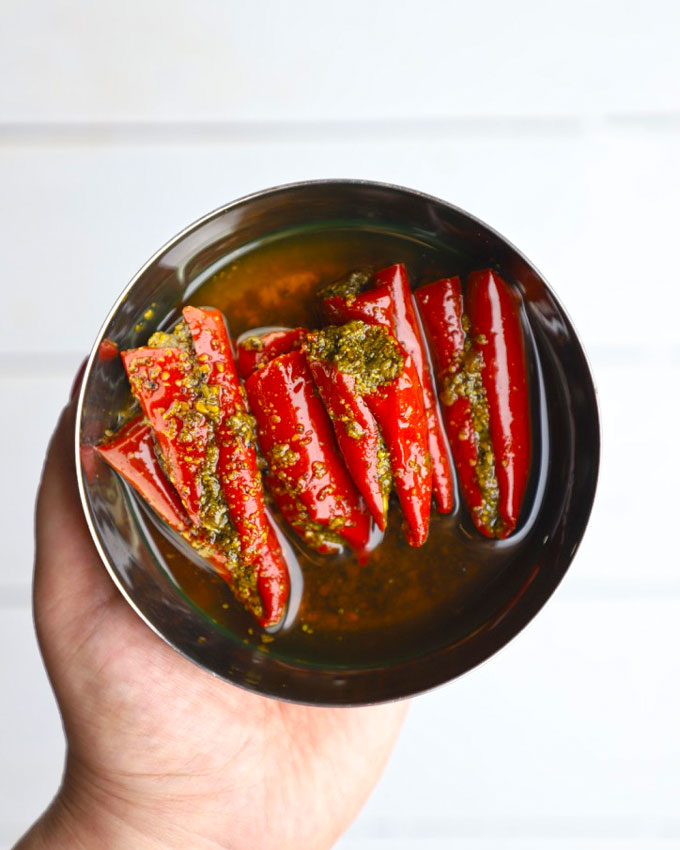
Bharwa Lal Mirch Ka Achar is a spicy, masala-stuffed red chilli pickle. I am sharing all the secret tips to make classic mirch ka achar from North India.
About Red Chilli Pickle
For a country obsessed with food, pickles are an integral part of our cuisine. We have pickle recipes for every season, mood, and produce.
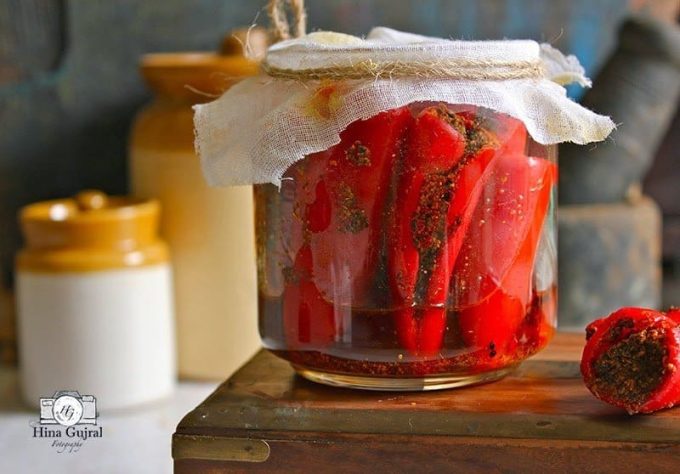
The bright and big red chillies are known as ‘lal mirch’ in Hindi. Hence, the name of the pickle – lal mirch ka achar. The red chilli pickle is spicy, tangy, sour, and mildly sweet. It is one of the most popular Indian pickles.
Lal Mirch Ka Achar takes 3 to 4 days under the warm sun rays to get ready for consumption and has a shelf life of 1 year.
Fun Fact: Like many other Indian pickles, this is a vegan and gluten-free pickle recipe.
The Red Chillies
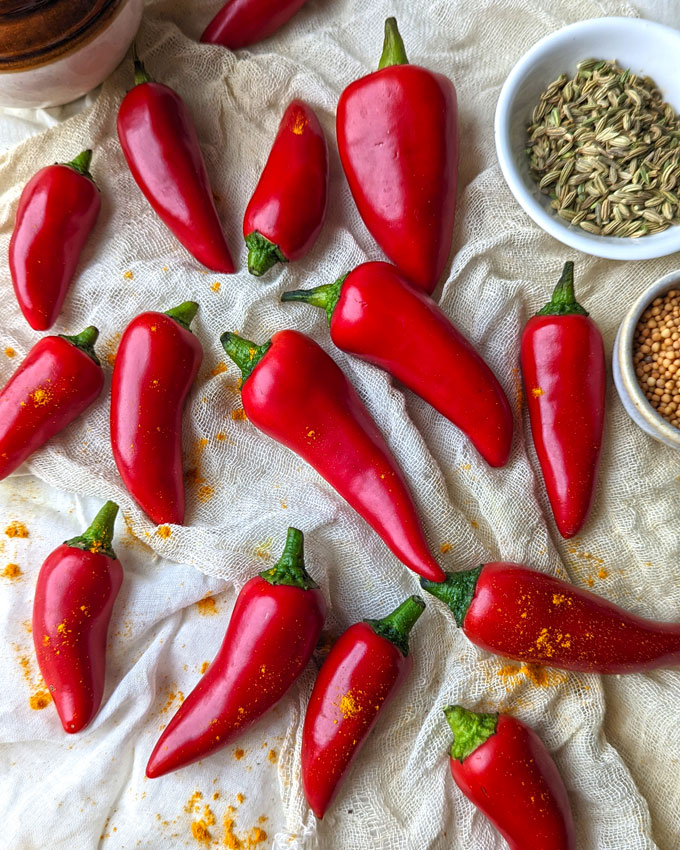
This pickle recipe requires big, bright, blemish-free, mild to medium spicy fresh red chillies. In India, these red chillies are available only during the winter season, i.e. from November to March or early summer.
It is tough to get hold of big red chillies during the off-season. Hence, lal mirch ka achar is one of the best ways to preserve them.
Do not use small, spicy red chillies for making pickles.
Ingredients Required
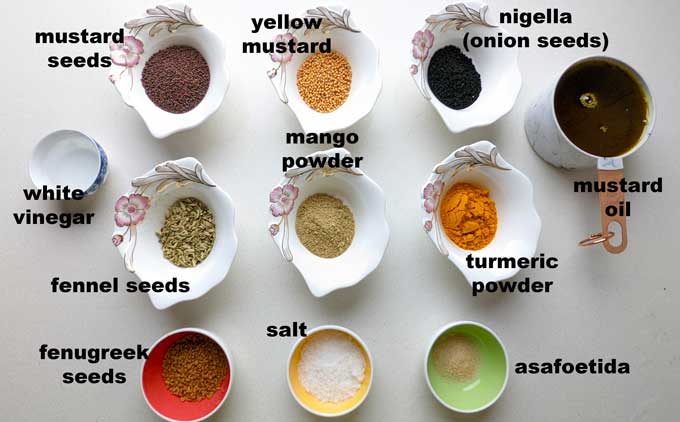
- Whole Spices: Black Mustard Seeds (rai), Yellow Mustard Seeds (sarson), Nigella Seeds (Kalonji), Fennel Seeds (saunf), Fenugreek Seeds (methi dana).
- Spice Powders: Dry Mango Powder (amchur), Turmeric Powder, Asafoetida (hing).
- Mustard Oil: This red chilli pickle has no substitute for mustard oil. It gives the pickle a sharp, spicy, pungent aroma and taste.
- White Vinegar: It acts as a preservative. You can add lemon juice instead of vinegar.
How To Make
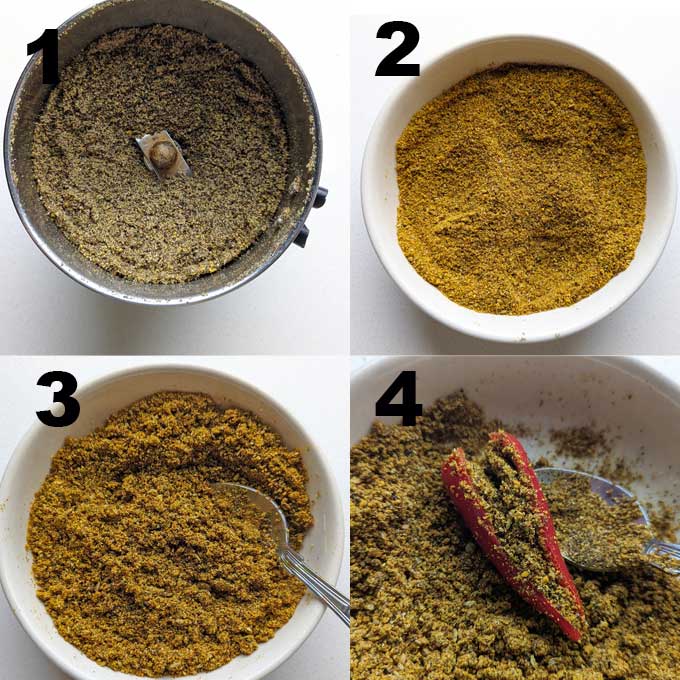
Step 1) Combine all the seeds and grind them to a powder using a mixer grinder ( image 1 ).
Step 2) Transfer it to a bowl; add salt, mango powder, turmeric powder, red chilli powder, and asafoetida ( image 2 ). Mix nicely. Taste, and if required, add more salt.
Step 3) Add vinegar and mix the masala ( image 3 ). It is now ready for stuffing the red chillies.
Step 4) To prepare red chillies for the pickle, wash them and wipe them with a kitchen towel. Air dry the chillies to ensure they have no water after washing.
Step 5) Remove the crown of the chillies. Slit them lengthwise and scoop out white seeds and pith. Use a spoon for the purpose or wear gloves. Discard the seeds ( images 1 & 2 ).
Step 6) Stuff each red chilli with the pickle masala ( image 3 ). Use your fingers to stuff the masala inside the chillies.
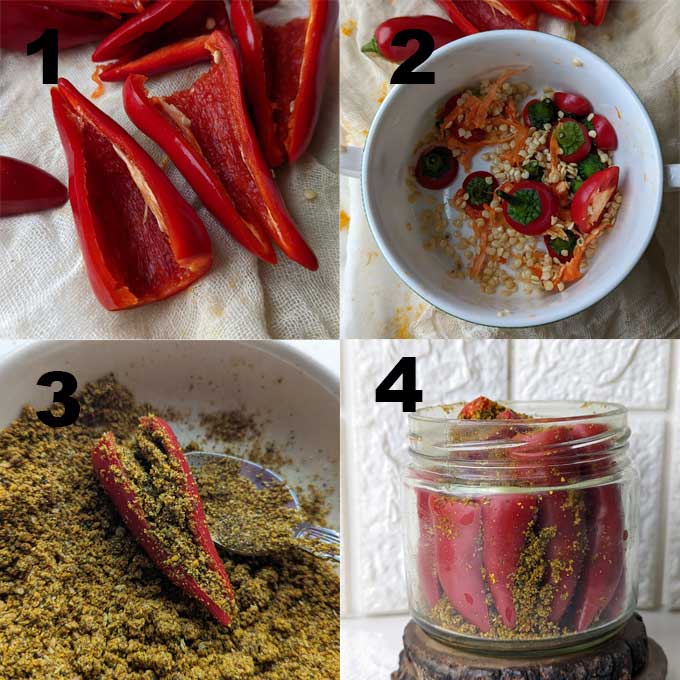
Step 7) Once all red chillies are stuffed, transfer them to a sterilized jar. Make sure they are tightly packed in the jar ( image 4 ).
Step 8) Heat mustard oil in a pan. Once the oil starts smoking, turn off the heat. Allow it to cool down to room temperature.
Step 9) Pour cooled-down mustard oil over the red chilli pickle.

Step 10) Seal the jar with a muslin or other breathable cloth. Place it under the warm sun for 3 to 4 days. Daily, shift the pickle jar as per the sun’s rays during different hours of the day and bring it inside after sunset. Shake lal mirch ka achar two to three times during these 4 days.
After 3 days, you can check the red chilli pickle for doneness.
Storage Suggestion
It is always best to use a clean, sterilized glass or ceramic jar with a tight-fitting lid to store pickles. Red Chilli Pickle has a shelf life of 1 year.
If you are lucky enough to get a warm, bright sun, keep the pickle jar in the sun once in a while. Bring it inside after 3 – 4 hours of sunlight. This practice increases the shelf life of the pickle.
Store lal mirch ka achar at room temperature . Or you can keep it in the refrigerator to increase its shelf life.
Use a clean, dry spoon to scoop out the pickle.
Serving Suggestion
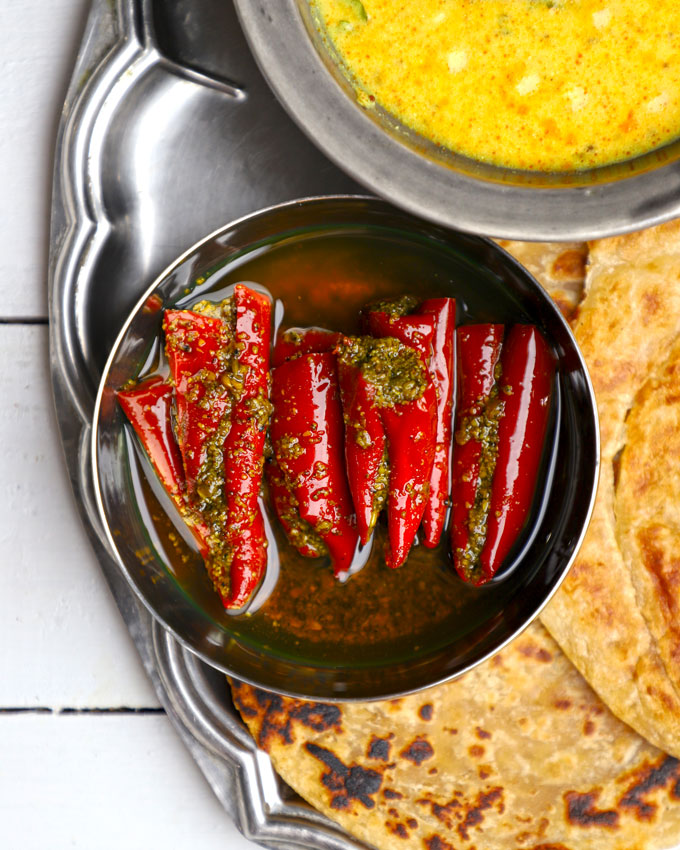
Bharwa Lal Mirch Ka Achar tastes best with methi paratha , mathri , or namak ajwain poori . You can serve it with stuffed paratha or other Indian main course dishes.
Yes, it is. Sadly, you cannot make this red chilli pickle without warm sunlight.
Yes, you can if you like the sharp taste of the mustard oil.
No, I would not recommend using tiny, thin red chillies.
The red chilli pickle tastes best only when made with mustard oil. There is no alternative to mustard oil in this pickle recipe.
More Indian Pickle Recipes
- Garlic Pickle
- Green Chili Pickle
- Instant Ginger Pickle
- Instant Mango Pickle
- Gobhi Gajar Ka Achaar
- Punjabi Aam Ka Achaar

Ingredients
- ▢ 250 gram fresh red chilies
- ▢ 4 tablespoon black mustard seeds (rai)
- ▢ 4 tablespoon fennel seeds (saunf)
- ▢ 2 tablespoon Kashmiri red chilli powder
- ▢ 2 tablespoon dry mango powder (amchur)
- ▢ 2 tablespoon salt or to taste
- ▢ 1 tablespoon nigella seeds ( kalonji)
- ▢ 1 tablespoon yellow mustard seeds (sarson) nigella seeds
- ▢ 1 tablespoon turmeric powder
- ▢ ½ tablespoon fenugreek seeds (methi dana)
- ▢ 2 teaspoon hing (asafoetida)
- ▢ 2 tablespoon white vinegar
- ▢ 1 Cup mustard oil (sarson oil)
Instructions
- Combine all the seeds and grind them to a powder using a mixer grinder.
- Transfer it to a bowl, add salt, mango powder, turmeric powder, red chilli powder, and asafoetida. Mix nicely. Taste, and if required, add more salt.
- Add vinegar and mix the masala. It is now ready for stuffing the red chillies.
- Start with cleaning and preparing red chillies for the pickle. Wash the red chillies and wipe them with a kitchen towel. Air dry the chillies to ensure they have no water after washing.
- Wear kitchen gloves if your skin is sensitive to chilies. With a sharp knife, cut off the crown of the chilli and slit it lengthwise halfway through, leaving it intact from the lower end.
- Scoop out white seeds and pith. Use a spoon for the purpose or wear gloves. Discard the seeds and white pith.
- Stuff each red chilli with the pickle masala. Use your fingers to stuff the masala inside the chillies.
- Once all red chillies are stuffed, transfer them to a sterilized jar. Make sure they are tightly packed in the jar.
- Heat mustard oil in a pan. Once the oil starts smoking, turn off the heat. Allow it to cool down to room temperature.
- Pour cooled-down mustard oil over the red chilli pickle.
- Seal the jar with a muslin or other breathable cloth. Place it under the warm sun for 3 to 4 days. Daily, shift the pickle jar as per the sun’s rays during different hours of the day and bring it inside after sunset. Shake lal mirch ka achar two to three times during these 4 days.
- After 3 days, you can check the red chilli pickle for doneness. If the skin of the red chillies has become thin, then the pickle is ready. Else, keep it under the sun for a few more days.
- Store lal mirch ka achar for one year at room temperature.
Recipe Notes:
- Always keep water away from pickles even a single droplet of water is enough to spoil the entire pickle.
- Safeguard it from all kinds of moisture, whether it is a wet spoon, water splashes, or a humid climate. Once the pickle comes in contact with water content, it will develop fungus.
- To check if the Red Chili Pickle is done, taste the red chillies. If there is crunchiness in the red chillies, then some more days will be needed for the pickle to mature. The skin of the red chillies should soften due to the heat from the sunlight.
- Once the pickle is matured, you can start serving it with your meals. You can also store it in the refrigerator or keep the jar in a cool dry place.
Nutrition
We follow a strict NO SPAM Policy

Bharwa Lal Mirch Ka Achar Recipe
Equipment
- Blender
- Mixing Bowl
Ingredients
- 250 gram fresh red chilies
- 4 tablespoon black mustard seeds (rai)
- 4 tablespoon fennel seeds (saunf)
- 2 tablespoon Kashmiri red chilli powder
- 2 tablespoon dry mango powder (amchur)
- 2 tablespoon salt or to taste
- 1 tablespoon nigella seeds ( kalonji)
- 1 tablespoon yellow mustard seeds (sarson) nigella seeds
- 1 tablespoon turmeric powder
- ½ tablespoon fenugreek seeds (methi dana)
- 2 teaspoon hing (asafoetida)
- 2 tablespoon white vinegar
- 1 Cup mustard oil (sarson oil)
Instructions
- Combine all the seeds and grind them to a powder using a mixer grinder.
- Transfer it to a bowl, add salt, mango powder, turmeric powder, red chilli powder, and asafoetida. Mix nicely. Taste, and if required, add more salt.
- Add vinegar and mix the masala. It is now ready for stuffing the red chillies.
- Start with cleaning and preparing red chillies for the pickle. Wash the red chillies and wipe them with a kitchen towel. Air dry the chillies to ensure they have no water after washing.
- Wear kitchen gloves if your skin is sensitive to chilies. With a sharp knife, cut off the crown of the chilli and slit it lengthwise halfway through, leaving it intact from the lower end.
- Scoop out white seeds and pith. Use a spoon for the purpose or wear gloves. Discard the seeds and white pith.
- Stuff each red chilli with the pickle masala. Use your fingers to stuff the masala inside the chillies.
- Once all red chillies are stuffed, transfer them to a sterilized jar. Make sure they are tightly packed in the jar.
- Heat mustard oil in a pan. Once the oil starts smoking, turn off the heat. Allow it to cool down to room temperature.
- Pour cooled-down mustard oil over the red chilli pickle.
- Seal the jar with a muslin or other breathable cloth. Place it under the warm sun for 3 to 4 days. Daily, shift the pickle jar as per the sun’s rays during different hours of the day and bring it inside after sunset. Shake lal mirch ka achar two to three times during these 4 days.
- After 3 days, you can check the red chilli pickle for doneness. If the skin of the red chillies has become thin, then the pickle is ready. Else, keep it under the sun for a few more days.
- Store lal mirch ka achar for one year at room temperature.
Notes
- Always keep water away from pickles even a single droplet of water is enough to spoil the entire pickle.
- Safeguard it from all kinds of moisture, whether it is a wet spoon, water splashes, or a humid climate. Once the pickle comes in contact with water content, it will develop fungus.
- To check if the Red Chili Pickle is done, taste the red chillies. If there is crunchiness in the red chillies, then some more days will be needed for the pickle to mature. The skin of the red chillies should soften due to the heat from the sunlight.
- Once the pickle is matured, you can start serving it with your meals. You can also store it in the refrigerator or keep the jar in a cool dry place.
Nutrition
Paneer Jalfrezi is a delicious, one-pot Indian stir fry (sabzi) with cottage cheese (paneer) and vegetables. It is a quick, vegetarian dish that takes less than 30 minutes. Be sure to watch the video!

About Jalfrezi
In recent years, vegetable jalfrezi has gained quite a rank in the popularity charts of vegetarian Indian dishes.
The word ‘Jalfrezi’ or ‘Jhalfrezi’ or ‘zalfrezi’ is a combination of two words Jhal + Pharezi. Jhal is a Bengali word for spicy, and Pharezi in Urdu means suitable for diet . Hence, a spicy stir fry of vegetables is suitable for eating.
The dish was mainly developed during the colonial era to suit the British palate.
Over the years, the vegetable jalfrezi has become highly popular because it’s easy to adapt and customize. Plus, the taste hints at spices yet not so much chili or heat. Perfect for a novice Indian food lover.
Hence, today vegetable jalfrezi can be spotted on the menu of many Indian restaurants worldwide. It is one of those modern Indian dishes that are loved for their uncomplicated process and BIG flavours.

What is Paneer Jalfrezi?
Paneer Jalfrezi is a version of vegetable jalfrezi with the addition of Indian cottage cheese (paneer) along with bell peppers. It is a fantastic gluten-free, vegetarian side dish.
Recipe Variations:
- You can skip paneer and make vegetable jalfrezi with vegetables such as cauliflower, potato, bell peppers, onion, and capsicum .
- You can make the dish saucier by adding 1 Cup of water or vegetable stock.
- Or make vegan jalfrezi by adding tofu chunks along with vegetables of your choice.
My Reasons To LOVE Jalfrezi
I will give you not one but many reasons to love this dish.
- naturally gluten-free & vegetarian
- one-pot dish
- ready in 30 minutes
- highly customizable
- meal-prep friendly
How To Make Jalfrezi
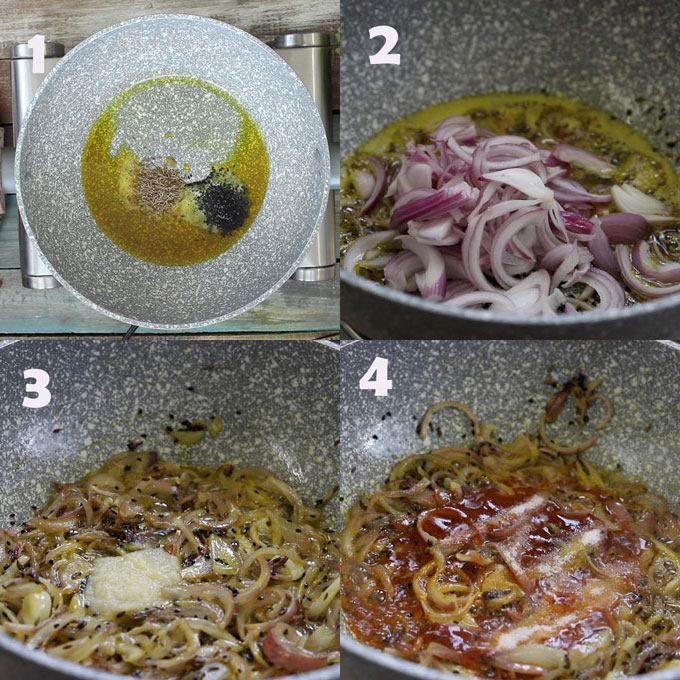
- Heat oil in a wok or stir-fry pan over medium flame.
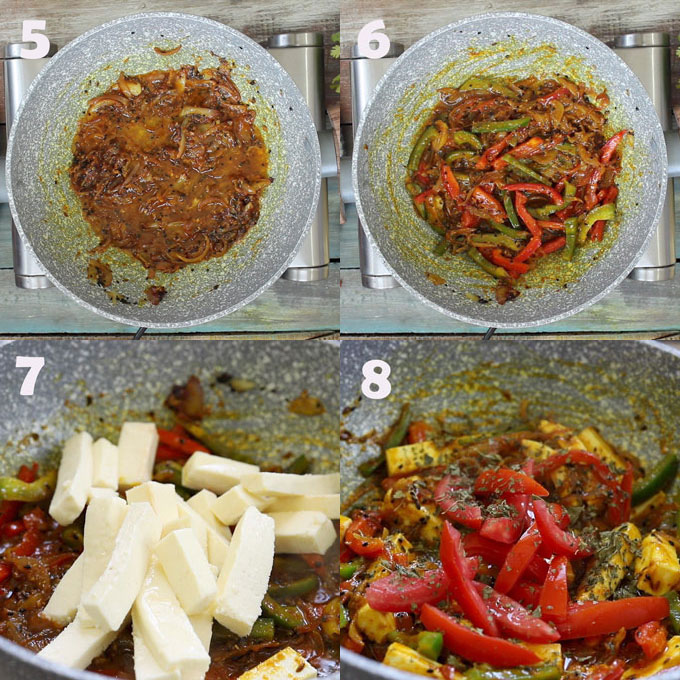
- Add cumin seeds and nigella seeds. Cook for 10 seconds. Add sliced onion, and fry till onion softens. Add ginger-garlic paste and fry for a minute.
- Next, add the tomato sauce, salt, and spices. Stir to combine. Add ¼ cup of water, mix, and cook the masala over low heat for 1 – 2 minutes.
- Add the coloured bell peppers and capsicum, and fry again on high flame for 2 minutes to cook the vegetables.
- At last, add paneer strips, sliced tomato, and dried fenugreek leaves, and gently mix them until all the masalas coat all the vegetables and paneer. Continue cooking for 2-3 minutes but do not stir very frequently otherwise, the paneer will crumble.
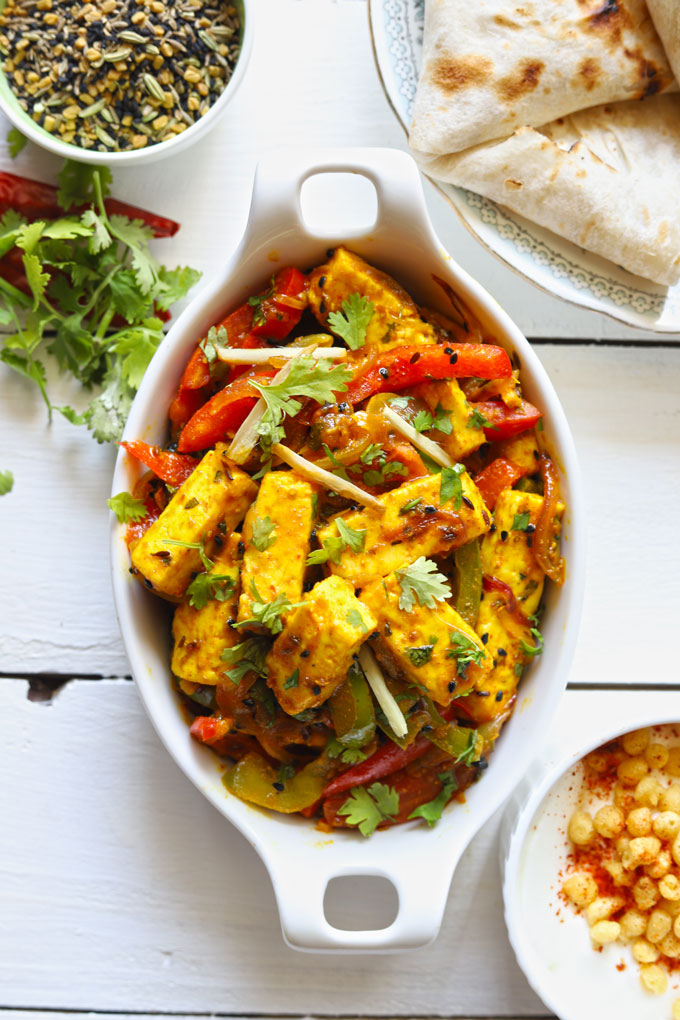
- Sprinkle sliced ginger and coriander leaves before serving.
Serving Suggestion
Paneer Jalfrezi is an Indian-style vegetarian stir fry dish. It tastes delicious with chapati, roti, or any other flatbread.
For a restaurant-style meal, serve jalfrezi with naan bread , mint raita , kachumber salad , and dal makhani .
It tastes delicious as a sandwich and tortilla wrap filling as well.
Watch Paneer Jalfrezi Video
Paneer Jalfrezi, when cooked without paneer, is called vegetable jalfrezi. You can add a variety of mixed vegetables to the jalfrezi. Both versions are cooked in tomato-based gravy and sautéed with onions, ginger, and flavourful Indian spices.
To make vegan jalfrezi, skip adding paneer (cottage cheese) or use tofu instead of paneer. Vegetable Jalfrezi without paneer is naturally vegan.
The leftover jalfrezi can be stir-fried with steamed rice to make pulao/fried rice or used as stuffing for wraps and sandwiches.
More Paneer Recipes
- Kadai Paneer
- Paneer Curry
- Grilled Paneer
- Paneer Kali Mirch
- Matar Paneer Curry
- Paneer Kofta Curry
- Paneer Butter Masala
If you try this recipe and love it, please leave a comment and a rating. This helps us grow and reach other food lovers like you.

Ingredients
- ▢ 250 Gram Paneer (cottage cheese), cut into strips
- ▢ 1 Cup sliced onion
- ▢ 1 Cup sliced red bell pepper
- ▢ 1 Cup sliced green capsicum
- ▢ 1 Cup sliced tomato (discard pulp and seeds)
- ▢ 1 Teaspoon nigella seeds (kalonji)
- ▢ 1 Teaspoon cumin seeds (jeera)
- ▢ 1 Tablespoon ginger & garlic paste ( see recipe )
- ▢ ½ Cup tomato sauce or ketchup
- ▢ Salt to taste
- ▢ 1 Teaspoon turmeric powder
- ▢ 1 Teaspoon red chilli powder or to taste
- ▢ 2 Teaspoon coriander powder
- ▢ 4 Tablespoon mustard oil or cooking oil
- ▢ 1 Tablespoon Kasuri Methi or Dried Fenugreek Leaves
Ingredients For Garnish:
- ▢ 1 Tablespoon thinly sliced ginger
Instructions
- Heat oil in a wok or stir fry pan over medium flame.
- Add cumin seeds and nigella seeds. Cook for 10 seconds. Add sliced onion, fry till onion softens. Add ginger-garlic paste and fry for a minute.
- Next, add the tomato sauce, salt, and spices. Stir to combine. Add ¼ cup of water, mix, and cook the masala over low heat for 1 – 2 minutes.
- Add the colored bell peppers, capsicum, and fry again on high flame for 2 minutes to cook the vegetables.
- At last add paneer strips, sliced tomato, dried fenugreek leaves, and gently mix them until all the masalas coat all the vegetables and paneer. Continue cooking for 2-3 minutes but do not stir very frequently otherwise paneer will crumble.
- Sprinkle sliced ginger and coriander leaves before serving.
- Serve Paneer Jalfrezi warm with chapati or naan .
Recipe Notes:
- Jalfrezi is a quick stir-fry and has a crunch to it. Hence, do not cook the vegetables for too long.
- Instead of tomato sauce, you can add tomato pasta sauce or canned tomatoes along with a teaspoon of sugar.
- Adjust the amount of red chili powder as per your taste preference. If you want to make it spicier, add sliced green chili.
- From colorful bell peppers, carrot, cauliflower to potato, you can add any vegetable of choice in jalfrezi.
- For cooking, you can use olive oil, coconut oil, mustard oil, or any other cooking oil available.
Nutrition
We follow a strict NO SPAM Policy
