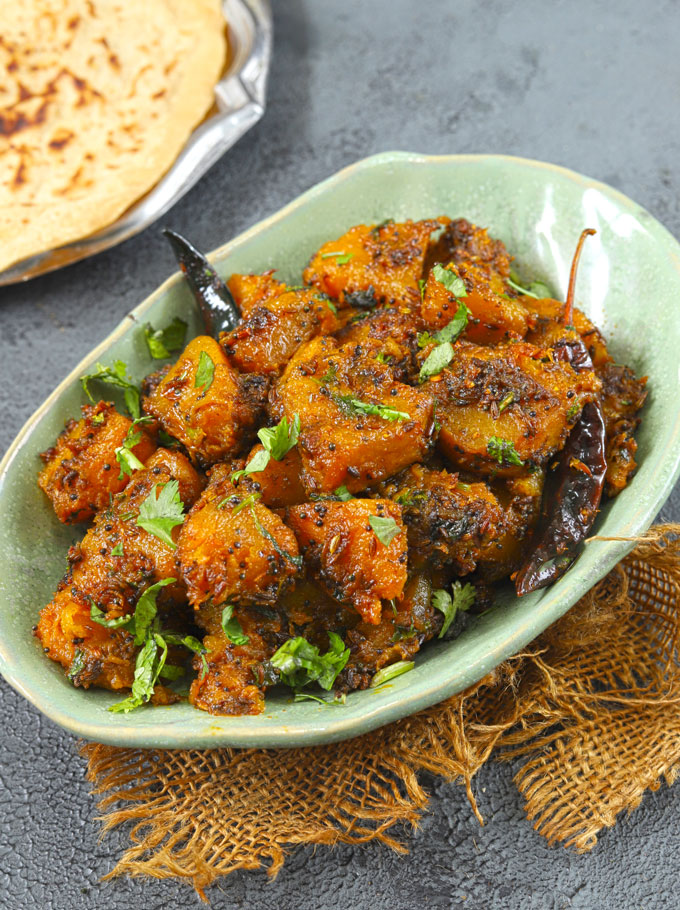
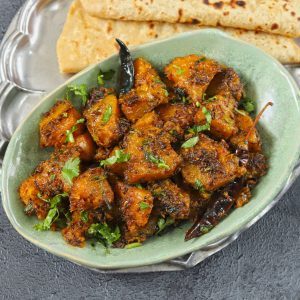
This Kaddu Ki Sabzi is also known as khatta meetha kaddu. It is my family’s favourite no onion, no garlic, gluten-free, vegan sabzi recipe. Be sure to watch the video!
What is khatta meetha kaddu?
The khatta meetha kaddu is a popular pumpkin sabzi recipe across North India. It is a sattvic style Indian sabji mainly prepared for festive feasts or with a traditional meal of aloo ki sabzi, poori, and raita.
In Northern India, it is popularly known as pethe ki sabzi or Bhandara style kaddu ki sabzi .
The combination of sweet, spicy, and savoury flavours makes this pumpkin sabzi unique.
The heat of red chillies and the warmth of spices are balanced by the sourness of mango powder and the sweetness of sugar. ‘Khatta’ is the Hindi term for sour, and ‘meetha’ is for sweetness. Hence this pumpkin sabzi got its name because of its sour and sweet flavors.
More Reasons to LOVE Kaddu Ki Sabzi
- sattvic style (no onion/garlic/tomato/ginger)
- mildly spicy ( perfect for kids )
- perfect for a packed meal
- vegan and vegetarian
- one-pot dish
- easy to digest
- gluten-free
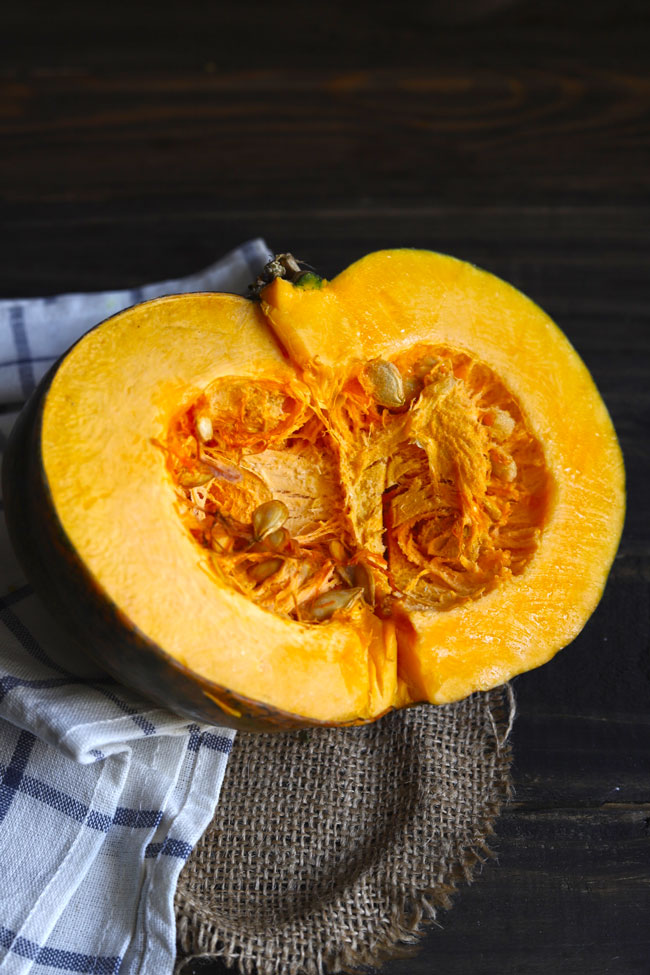
The Right Pumpkin For Sabzi
A green skin pumpkin with deep yellow pulp makes this pumpkin sabzi perfectly. Or you can pick any other ripe and yellow variety of pumpkin .
The yellow pumpkin has a natural sweetness, and with the addition of sugar, it caramelizes perfectly.
The pumpkin has to be tender and fully ripe, so it does not take too long to cook. Usually, the yellow pumpkin takes less time to cook than other varieties.
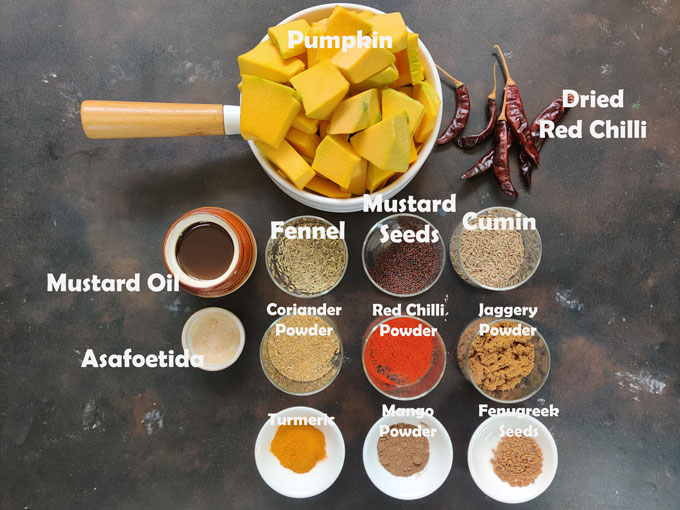
Other Ingredients For Sabzi
Apart from picking the right pumpkin, you need a few basic Indian pantry staples to make this pumpkin sabzi.
- Mustard Oil: For its pungent taste and aroma. You can use ghee as well instead of mustard oil.
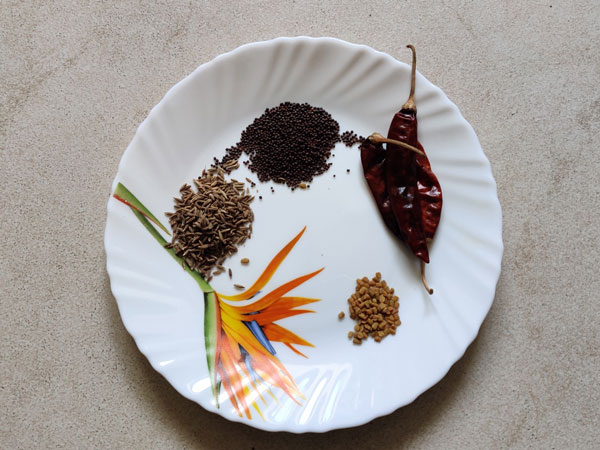
- Tempering (Tadka): Mustard Seeds, Cumin Seeds, Fennel Seeds, Fenugreek Seeds, Asafoetida, and Dry Red Chilies
- Spices: Red Chili Powder, Turmeric Powder, Coriander Powder, Salt
- Sugar: I use jaggery powder for the nutty taste and sweetness. You can substitute it with granulated white sugar or brown sugar.
- Sourness: I use dry mango powder for the sour flavour. If that is not available, use tamarind paste or extract. Avoid using lemon juice as it does not blend with the flavours of this sabzi recipe.
- Additional Ingredients: Dried Fenugreek Leaves (kasuri methi) give the sabzi a subtle aroma and warmth. Fresh coriander leaves to garnish.
How To Make Pumpkin Sabzi
Step 1) In a heavy bottom pan, heat oil till it starts smoking. Add tadka (cumin, mustard seeds, fennel, fenugreek, asafoetida, and red chillies). Fry till the seeds start spluttering.
Step 2) Add pumpkin along with the salt and spices. Stir to combine.
Step 3) Cover and cook the pumpkin over low heat for 20 – 25 minutes or until tender. Stir occasionally in between.
Step 4) Once the pumpkin turns soft, add mango powder, sugar, and Kasuri methi. Stir to combine. Let the pumpkin pieces caramelize over low heat for 5 – 10 minutes. Stir occasionally in between.
Watch Kaddu Ki Sabz Video
Serving Suggestion
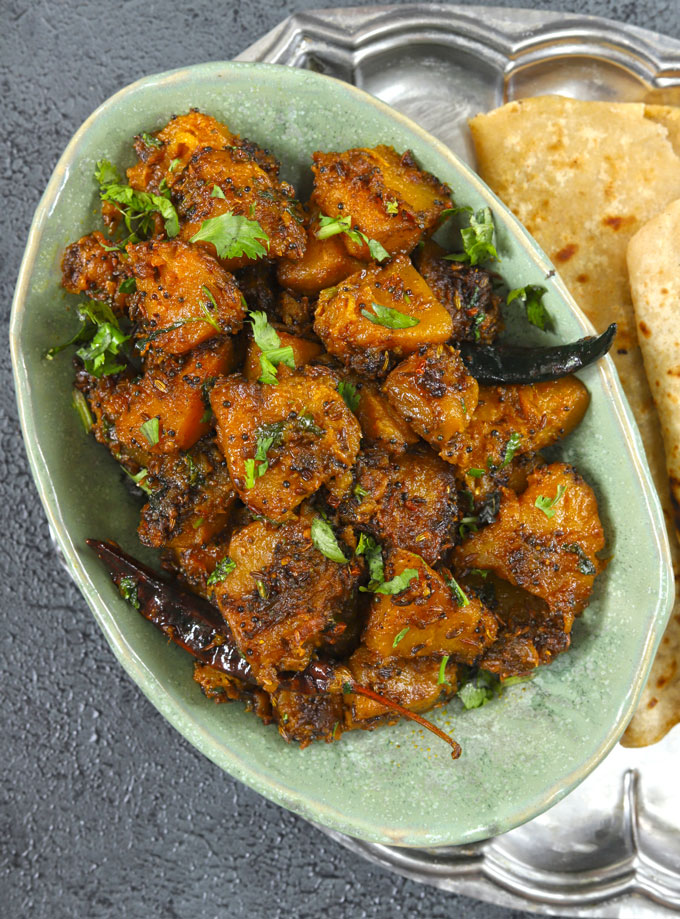
The best way to enjoy kaddu ki sabzi is with spicy, soupy Mathura style potato curry , piping hot poori , and chilled mint pomegranate raita or my special boondi raita .
Even without curry, the khatta meetha kaddu tastes delicious with simple palak puri or paratha.
Here are a few other main-course dishes to serve with kaddu ki sabzi in an Indian thali – Dhaba Style Matar Paneer , Arbi Ki Sabji , or Makhana Sabji .
You can store this kaddu ki sabzi in the refrigerator for 1 week . Reheat in a microwave or over the stovetop in a pan.
More Pumpkin Recipes
- Chai Spiced Pumpkin Cake
- Roasted Pumpkin Soup
- One-Pot Pumpkin Pasta
- Curried Pumpkin Soup
- Pumpkin Salad
If you try this recipe and love it, please leave a comment and a rating. This helps us grow and reach other food lovers like you.
Ingredients
- ▢ 500 gram yellow pumpkin, peeled and cut into cubes
- ▢ ¼ cup mustard oil
- ▢ 1 tablespoon mustard seeds (rai)
- ▢ 1 tablespoon cumin seeds (jeera)
- ▢ 1 teaspoon fennel seeds (saunf)
- ▢ ¼ teaspoon asafoetida (hing)
- ▢ ½ teaspoon fenugreek seeds (methi dana)
- ▢ 4 dry red chilies, broken into halves
- ▢ 1 teaspoon turmeric powder
- ▢ 1 teaspoon red chilli powder
- ▢ 1 teaspoon coriander powder (dhaniya powder)
- ▢ Salt to taste
- ▢ ⅛ cup water
- ▢ ¼ cup jaggery powder or white granulated sugar
- ▢ 1 tablespoon dried mango powder (amchur)
- ▢ 1 tablespoon kasuri methi (dry fenugreek leaves)
- ▢ 2 tablespoon fresh coriander, chopped
Instructions
- In a heavy bottom pan, heat mustard oil. Once the oil starts smoking, add cumin seeds, mustard seeds, fennel seeds, methi dana, asafoetida, and dry red chilli. Fry till seeds start spluttering.
- Add pumpkin along with the salt, turmeric powder, red chilli powder, coriander powder, and salt. Stir to combine.
- Cover and cook the pumpkin cubes over low heat for 20 – 25 minutes or till pumpkin is tender. Stir occasionally in between.
- Once the pumpkin turns soft, add jaggery powder, mango powder, and kasuri methi. Stir to combine.
- Let the pumpkin pieces cook over low heat for next 5 minutes. Stir occasionally in between.
- Serve Kaddu Ki Sabzi warm with poori .
Recipe Notes:
- For making kaddu ki sabzi, cut or dice the pumpkin into chunky squares.
- Always add sugar and mango powder after the pumpkin is tender or almost cooked. Adding them before might increase the cooking time.
- Add sugar and mango powder once pumpkin is cooked.
- Once the sabzi is ready, you can slightly mash it using the back of a ladle or spoon.
Nutrition
We follow a strict NO SPAM Policy

Bhandara Style Kaddu Ki Sabzi Recipe
Equipment
- Heavy Bottom Kadhai
Ingredients
- 500 gram yellow pumpkin, peeled and cut into cubes
- ¼ cup mustard oil
- 1 tablespoon mustard seeds (rai)
- 1 tablespoon cumin seeds (jeera)
- 1 teaspoon fennel seeds (saunf)
- ¼ teaspoon asafoetida (hing)
- ½ teaspoon fenugreek seeds (methi dana)
- 4 dry red chilies, broken into halves
- 1 teaspoon turmeric powder
- 1 teaspoon red chilli powder
- 1 teaspoon coriander powder (dhaniya powder)
- Salt to taste
- ⅛ cup water
- ¼ cup jaggery powder or white granulated sugar
- 1 tablespoon dried mango powder (amchur)
- 1 tablespoon kasuri methi (dry fenugreek leaves)
- 2 tablespoon fresh coriander, chopped
Instructions
- In a heavy bottom pan, heat mustard oil. Once the oil starts smoking, add cumin seeds, mustard seeds, fennel seeds, methi dana, asafoetida, and dry red chilli. Fry till seeds start spluttering.
- Add pumpkin along with the salt, turmeric powder, red chilli powder, coriander powder, and salt. Stir to combine.
- Cover and cook the pumpkin cubes over low heat for 20 - 25 minutes or till pumpkin is tender. Stir occasionally in between.
- Once the pumpkin turns soft, add jaggery powder, mango powder, and kasuri methi. Stir to combine.
- Let the pumpkin pieces cook over low heat for next 5 minutes. Stir occasionally in between.
- Serve Kaddu Ki Sabzi warm with poori .
Video
Notes
- For making kaddu ki sabzi, cut or dice the pumpkin into chunky squares.
- Always add sugar and mango powder after the pumpkin is tender or almost cooked. Adding them before might increase the cooking time.
- Add sugar and mango powder once pumpkin is cooked.
- Once the sabzi is ready, you can slightly mash it using the back of a ladle or spoon.
Nutrition
Whether you are new to using Instant Pot or are thinking of buying one, this Instant Pot 101 Guide for Beginners is what you need to help you overcome initial challenges.
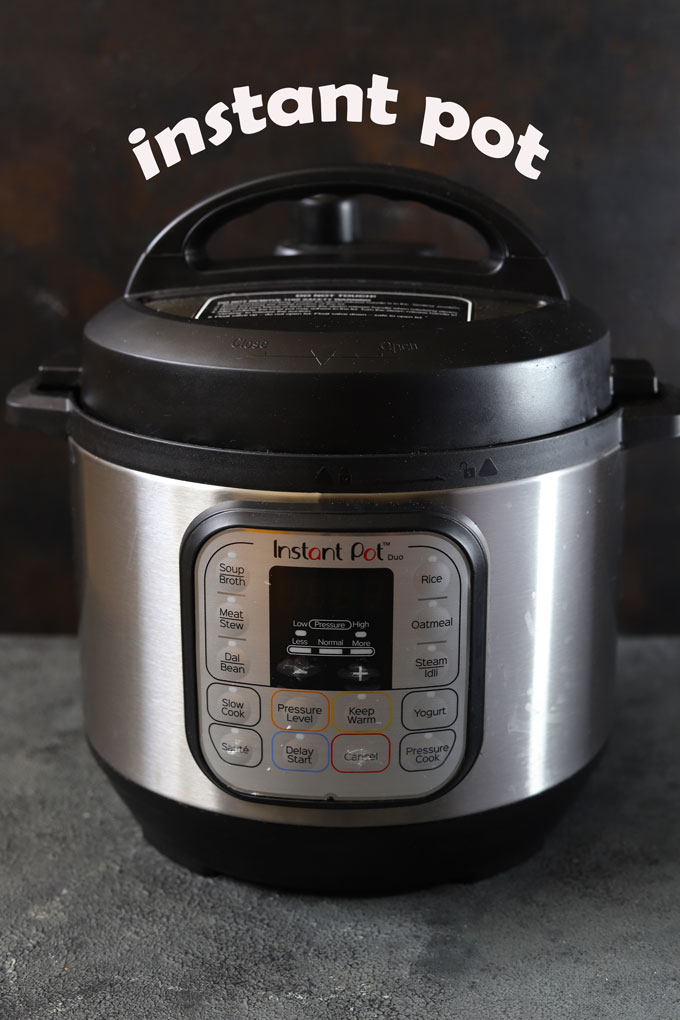
What is Instant Pot?
It is a type of electric multicooker designed to replace several kitchen appliances in one! It has various programmed functions allow you to pressure cook, steam, sauté, slow cook, and boil food quickly and conveniently.
This product was released in the market back in 2010 and has instantly captured the interest of professionals and home cooks worldwide. To date, Instant Pot offers several versions and models with up to 11 functionalities.
Reasons to LOVE Instant Pot
It might take time to get used to Instant Pot, but once you get the gist, having an Instant Pot is an absolute delight in the kitchen!
So if you still have doubts, here are some reasons why you need it!
It saves you time. One of its key advantages is cutting down the usual cooking time for many classic dishes without sacrificing quality! You can do everything in one pot, and cleaning is a breeze too! In addition, the inner cooking pot is dishwasher-friendly.
It saves you space. This is precisely why you need one if you want to clear up your kitchen space from too many appliances. It is also ideal for sharing spaces with others in apartments or dorms.
It saves you money . Instead of buying several appliances, you can invest in one Instant Pot and whip up dishes that taste like a million bucks in lesser time!
It saves you effort. We love how you can place all the ingredients in, set it up, and walk away.No constant stirring nor standing watch in front of the stovetop is needed with Instant Pot’s various programmed functions right at your fingertips.

Instant Pot Terminology
To help you get started, here are some Instant Pot 101 terminologies you need to know first.
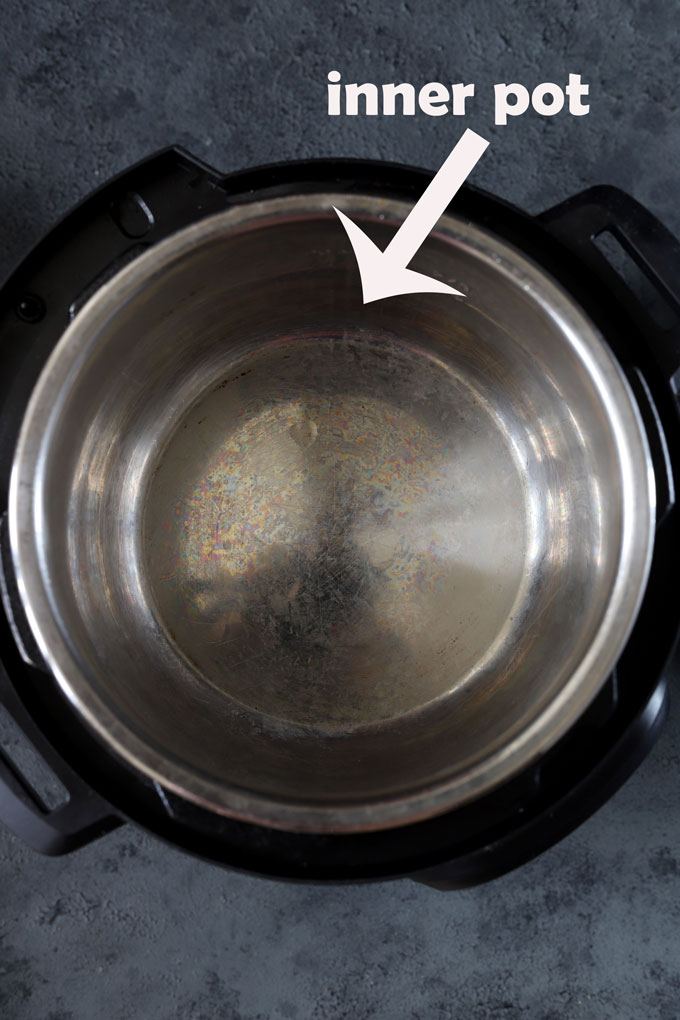
- Inner Pot – this refers to the removable stainless steel pot found inside. It is where you cook the food.
- Steam Release Knob – you will find this on the Instant Pot lid. It is used to seal or release the steam when pressure cooking. It has two options, SEALING or VENTING.
- Sealing Position – traps the steam in the pot while pressure cooking.
- Venting Position – releases the steam after you are done with pressure cooking.
- Floating Valve – this is a small round indicator found near the Steam Release Knob. If the valve is floating, it means the pot is pressurized.
- Quick Release – when you see this on the recipe instruction, it means you manually place the steam release knob in the venting position to let the steam out quickly.
- Natural Pressure Release – this, on the other hand, means you let the steam come out naturally by keeping it in a sealing position for around 10-15 minutes before removing the lid.
You can also read my detailed post about all the instant pot terminology you should know as a beginner.
How To Set Up An Instant Pot?
Unboxing – If you are using it for the first time, always read the instruction manual first.
Here’s a checklist of all the items included in the box:
- cooker base
- power cord
- pressure cooking lid
- stainless steel inner pot
- trivet/steamer rack
- measuring cup
- condensation cup
- paddle spoon/ ladle
- User Manual, Quick Reference Guide, Recipe Booklet, and Cooking Time Tables.
First, the Water Test – Once you unbox your IP, the next step is to do a water test to check its functionality.
You will find the easy-to-follow instructions in the manual. Here’s a quick run-through for you:
- Plug the power cord firmly on the base connection socket found on the back of the cooker base. Once you plug it into a power source, it should automatically turn on.
- Add 3 cups of water to the inner pot, place the lid, and then turn the knob in the sealing position. Select the pressure cooker button and press the + button to set the timer to 5 minutes.
- The cooker will preheat and pressurize before showing the timer countdown. So, do not be alarmed if it takes 10 minutes before your IP starts pressure cooking.
- Once your see L0:00 on the timer, you will hear a beep to indicate that time is up. You can either do a quick release or a natural release.
If everything works out well, you are ready to start your Instant pot journey!
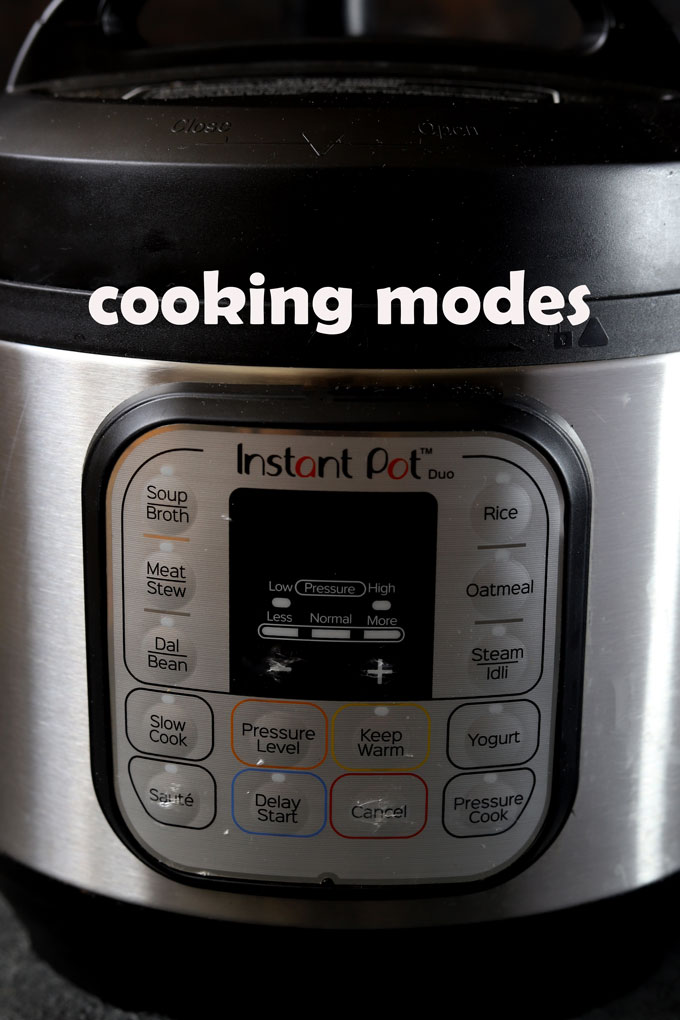
Depending on the model you bought, a 7-in-1 Instant Pot would usually have the following functions:
- Soup/ Broth
- Meat/Stew
- Bean/Chili
- Poultry
- Rice
- Multigrain
- Porridge
- Steam
- Slow Cook
- Saute
- Yoghurt
- Pressure Cook
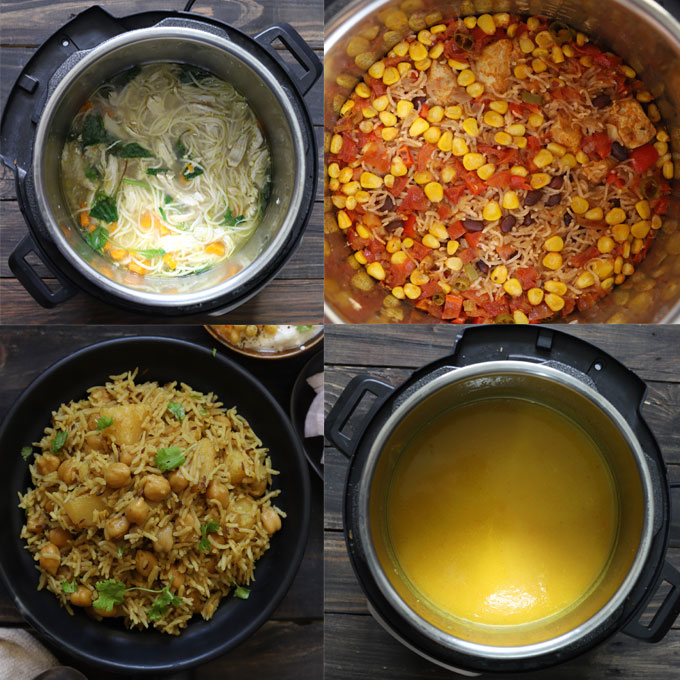
Best Instant Pot Recipes
If you are new to Instant Pot cooking, my advice is to start with simple recipes. Check out a few of my favourite instant pot recipe collections.
For Indian food lovers, or I should say curry lovers, my debut cookbook, The 100 Best Curry Recipes for your Instant Pot , is a collection of tried and tested delicious, instant pot-friendly Indian recipes.
More Instant Pot 101 Guides
Instant Pot Terminology
5 Uses of Instant Pot For Indian Cooking
Instant Pot vs Pressure Cooker: Which is Better?
We follow a strict NO SPAM Policy
