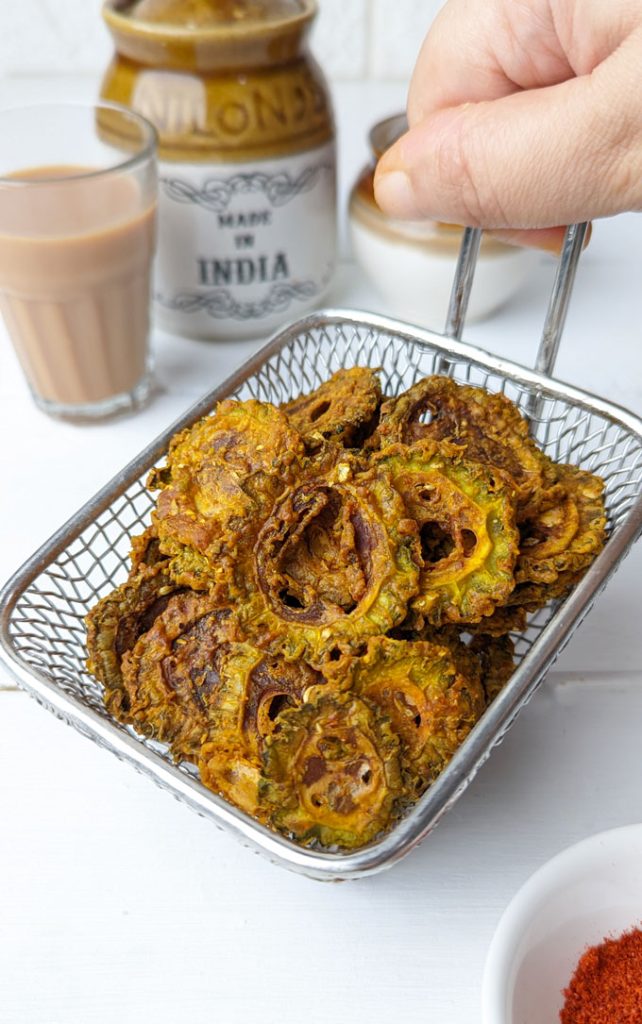
Here is a healthy air fry method to make karela chips without deep frying.
Estimated reading time: 4 minutes
- About Bitter Gourd Chips
- Ingredients You’ll Need
- How To Make Karela Chipa
- Storage Suggestion
- Air Fryer Karela Chips Recipe
About Bitter Gourd Chips
A few months back, I found a bag of karela chips on the supermarket snacks shelf. I quite liked it. Later, I discovered that bitter gourd chips are the new rage among vegan and healthy food lovers, probably because they are one of the most delicious ways to eat bitter gourd.
Karela Chips are a popular snack or a side dish in India. Our grandmothers have been making pickles, sabzi , and chips using bitter gourd for decades. Bitter Gourd has tons of health benefits:
- it is a fantastic antioxidant
- it helps in reducing blood sugar
- it is low in calories and high in fibre
- a perfect ingredient for a gluten-free, vegan, plant-based diet
- it is a rich source of Vitamins, Minerals and several other nutrients
- regular consumption improves the immune system and respiratory health
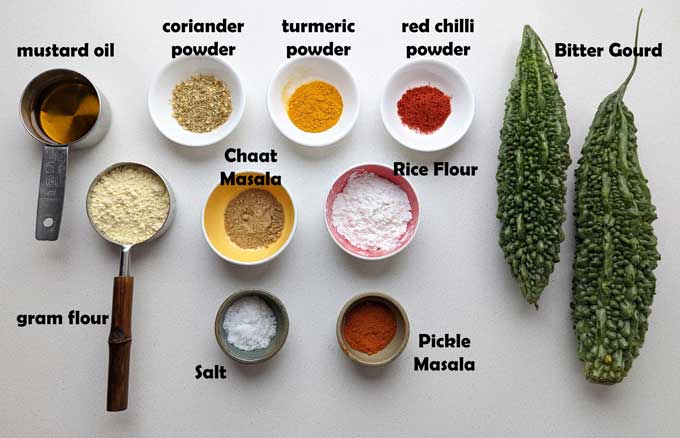
Ingredients You’ll Need
- Bitter Gourd: Use the fresh, green, blemish-free bitter gourd for making chips.
- Flour: I use gram flour (besan) and rice flour. You can substitute them with tempura flour, all-purpose flour, and cornstarch.
- Seasoning: Red Chilli Powder, Turmeric Powder, Coriander Powder, Chaat Masala, Garlic Powder, Pickle Masala , and Salt. You can season karela chips with spices and herbs of your choice.
- Oil: I use mustard oil for its pungent aroma and sharp taste to tone down the bitterness of gourd. You can use coconut oil, sesame oil, or vegetable oil.
How To Make Karela Chipa
Step 1) Using a knife or peeler, roughly scrape the skin of the bitter gourd. You can skip this step if the outer skin is very thin and tender.
Step 2) Wash bitter gourd nicely. Pat dry with a towel before slicing.
Step 3) Cut thin chips like rounds of bitter gourd using a sharp knife. Discard the seeds from the centre if you want. I leave them intact.

Step 4) Transfer sliced bitter gourd to a bowl; add flour, seasoning, salt, and oil. Mix nicely to coat each piece with the flour and seasoning ( images 1 & 2 ).
Step 5) Preheat the air fryer to 170 degrees Celcius. Spray the air fryer basket with oil.
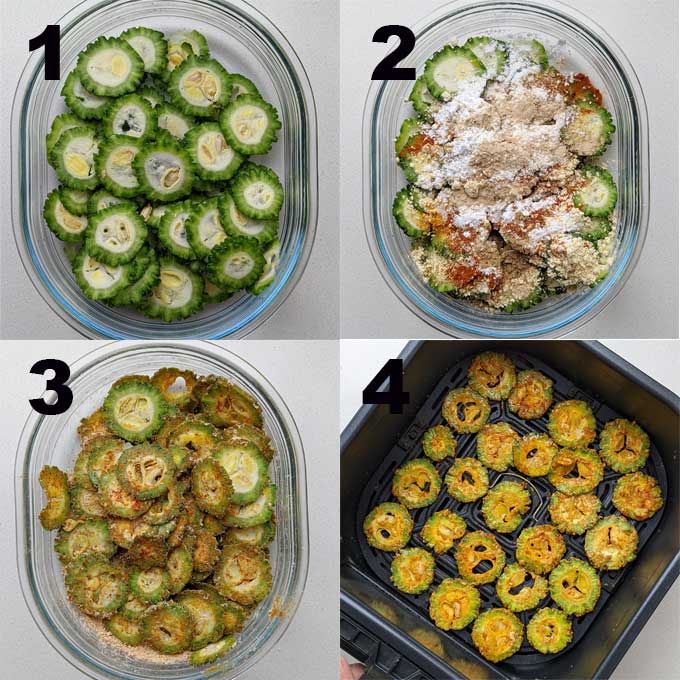
Step 6) Arrange marinated bitter gourd slices neatly on the air fryer basket without overlapping ( image 4 ).
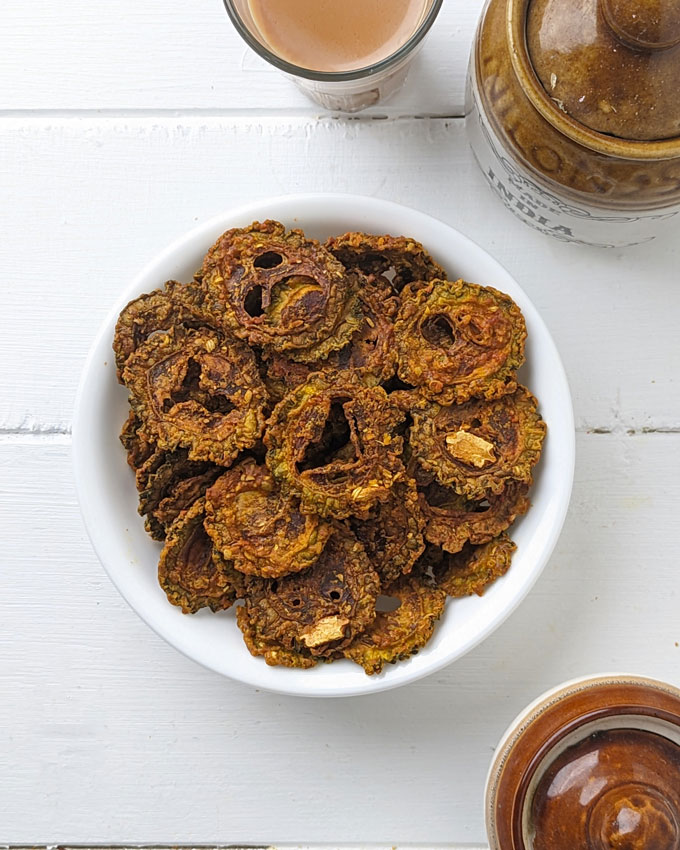
Step 7) Air Fry for 20 minutes, turning the karela chips halfway through. Or you can air fry them till the chips turn crisp.
Storage Suggestion
Allow karela chips to cool down before storing. It is best to store karela chips in an airtight container. You can serve them as a healthy munching snack or with everyday Indian meals as a side dish.
Whether you deep fry or air fry karela chips, their shelf life is less than 2 days. Hence, it is best to make them in small batches.
More Air Fryer Recipes
- Pasta Chips
- Potato Chips
- Banana Chips
- Sabudana Vada
- Crispy Chickpeas
- Sweet Potato Chaat
- Vrat Special Aloo Tikki

Ingredients
- ▢ 200 gram bitter melon (bitter gourd)
- ▢ ¼ Cup gram flour (besan)
- ▢ 2 tablespoon rice flour
- ▢ ½ teaspoon turmeric powder
- ▢ ½ teaspoon red chilli powder
- ▢ ½ teaspoon coriander powder (dhaniya powder)
- ▢ 1 teaspoon Chaat Masala
- ▢ ½ teaspoon garlic powder
- ▢ ½ teaspoon salt or to taste
- ▢ ⅛ Cup mustard oil (sarson oil)
Instructions
- Using a knife or peeler, roughly scrape the skin of the bitter gourd. You can skip this step if the outer skin is very thin and tender.
- Wash bitter gourd nicely. Pat dry with a towel before slicing.
- Cut thin chips like rounds of bitter gourd using a sharp knife. Discard the seeds from the centre if you want. I leave them intact.
- Transfer sliced bitter gourd to a bowl; add flour, seasoning, salt, and oil. Mix nicely to coat each piece with the flour and seasoning.
- Preheat the air fryer to 170 degrees Celcius. Spray the air fryer basket with oil.
- Arrange marinated bitter gourd slices neatly on the air fryer basket without overlapping.
- Air Fry for 20 minutes, turning the karela chips halfway through. Or you can air fry them till the chips turn crisp and golden.
- Serve karela chips as a snack or Indian side dish.
Recipe Notes:
- Alternatively, deep fry the karela chips in hot oil till crisp and crunchy. Transfer them to a colander. Allow to cool. Then serve and store.
- You can thinly slice the chips with a vegetable slicer or a sharp knife.
- Do not leave the karela chips in the marinate for more than 10 minutes. Else, the bitter gourd will start releasing water.
Nutrition
We follow a strict NO SPAM Policy

Air Fryer Karela Chips Recipe
Equipment
- Mixing Bowl
- Air Fryer
Ingredients
- 200 gram bitter melon (bitter gourd)
- ¼ Cup gram flour (besan)
- 2 tablespoon rice flour
- ½ teaspoon turmeric powder
- ½ teaspoon red chilli powder
- ½ teaspoon coriander powder (dhaniya powder)
- 1 teaspoon Chaat Masala
- ½ teaspoon garlic powder
- ½ teaspoon salt or to taste
- ⅛ Cup mustard oil (sarson oil)
Instructions
- Using a knife or peeler, roughly scrape the skin of the bitter gourd. You can skip this step if the outer skin is very thin and tender.
- Wash bitter gourd nicely. Pat dry with a towel before slicing.
- Cut thin chips like rounds of bitter gourd using a sharp knife. Discard the seeds from the centre if you want. I leave them intact.
- Transfer sliced bitter gourd to a bowl; add flour, seasoning, salt, and oil. Mix nicely to coat each piece with the flour and seasoning.
- Preheat the air fryer to 170 degrees Celcius. Spray the air fryer basket with oil.
- Arrange marinated bitter gourd slices neatly on the air fryer basket without overlapping.
- Air Fry for 20 minutes, turning the karela chips halfway through. Or you can air fry them till the chips turn crisp and golden.
- Serve karela chips as a snack or Indian side dish.
Video
Notes
- Alternatively, deep fry the karela chips in hot oil till crisp and crunchy. Transfer them to a colander. Allow to cool. Then serve and store.
- You can thinly slice the chips with a vegetable slicer or a sharp knife.
- Do not leave the karela chips in the marinate for more than 10 minutes. Else, the bitter gourd will start releasing water.
Nutrition
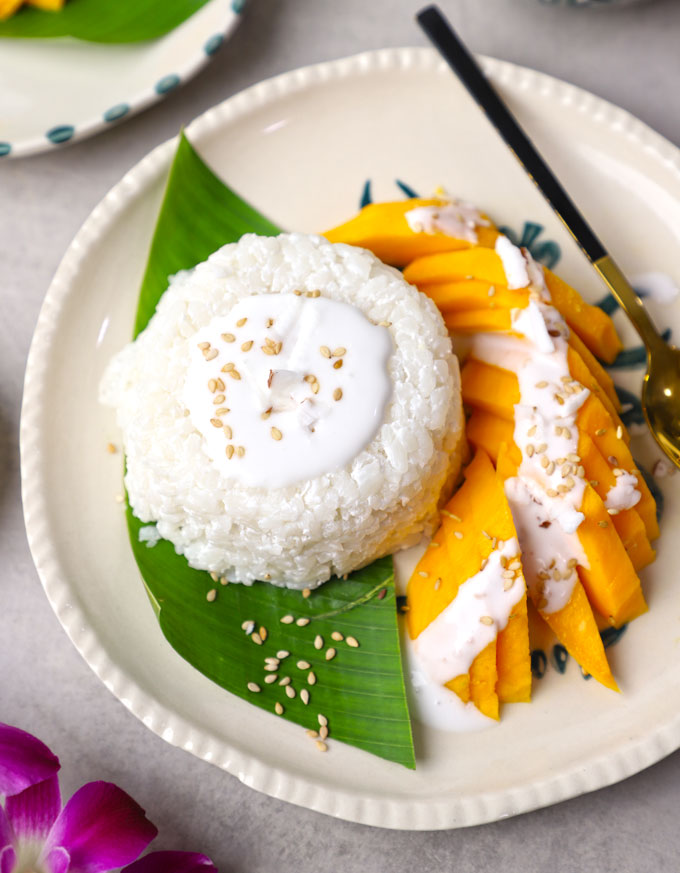
If there is one dessert that perfectly captures the essence of Thai cuisine—balancing sweet, creamy, and fragrant flavours—it’s Mango Sticky Rice. Known locally as Khao Niew Mamuang.
Estimated reading time: 6 minutes
- A Brief History
- Ingredients You’ll Need
- How To Make Mango Sticky Rice
- My Tried and True Tips
- Mango Sticky Rice Recipe
A Brief History
Mango Sticky Rice has deep roots in Thai culinary tradition , typically enjoyed during mango season, which runs from April to June. It’s often served at festivals and family gatherings, where fresh fruit is celebrated.
Although it’s most famously Thai, variations of sticky rice with fruit exist throughout Southeast Asia, including in Laos, Vietnam, and Cambodia. What sets the Thai version apart is the creamy coconut sauce and the fragnant mango.
It’s proof that the simplest ingredients, when treated with care and love, can result in something absolutely magical.
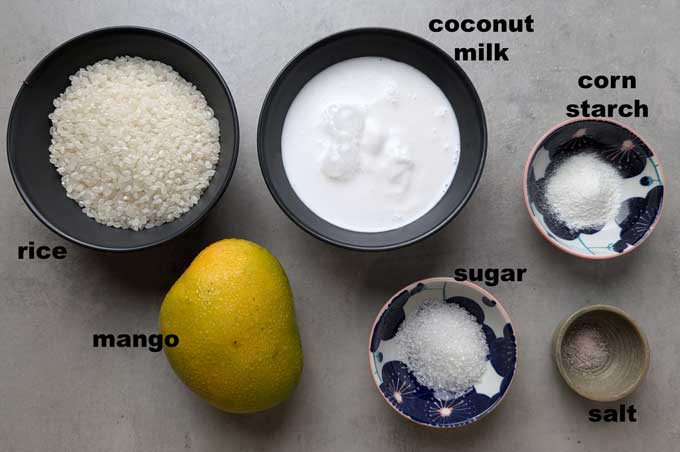
Ingredients You’ll Need
- Glutinous Short Grain Rice is a must. Sushi rice or jasmine rice won’t give the same sticky texture and taste. You should try using rice varieties like Japanese short grain rice, sona masoori, ponni rice, or the Thai short grain rice also known as sweet rice.
- Ripe Mango with a juicy, fragrant, and sweet fibre. Preferably Alphonso, Ataulfo or Champagne varieties. Do not pick mangoes with tartness, sourness, or less juiciness.
- Full Fat Coconut Milk for the best creamy sauce without using corn starch. Avoid using thin or low fat coconut milk. I use a mix of full fat coconut milk and cream for the best results.
- Granulated White Sugar , baking sugar, or the castor sugar with fine crystals will give you the best results. I do not recommend using honey or jaggery powder as the coconut milk splits while simmering with jaggery.
- Corn starch is optional if you are using a thin coconut milk and need a thick, creamy consistency.
- A pinch of salt brings the coconut sauce together.
- For Serving sprinkle toasted white sesame seeds or fried mung beans.
How To Make Mango Sticky Rice
Step 1: Soak the Rice
- Glutinous rice needs to be soaked before cooking to achieve the ideal sticky texture. Rinse rice with tap water until the water runs clear. Usually 2 times, is good enough.
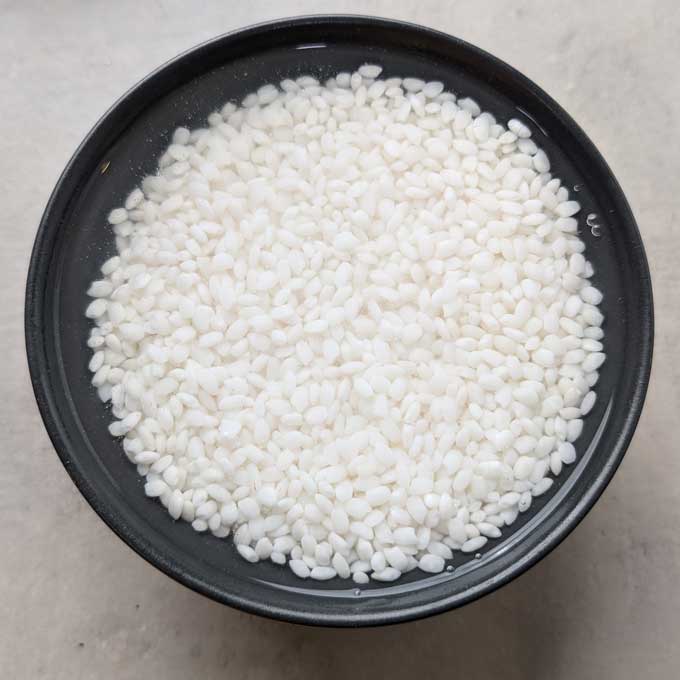
- Then, soak it in a bowl of water for at least 4 hours or overnight.
Step 2: Steam the Rice
- Unlike regular rice, sticky rice should be steamed, not boiled.
- After soaking, drain the rice and place it in a cheesecloth-lined bamboo steamer (or any steamer you have on hand).
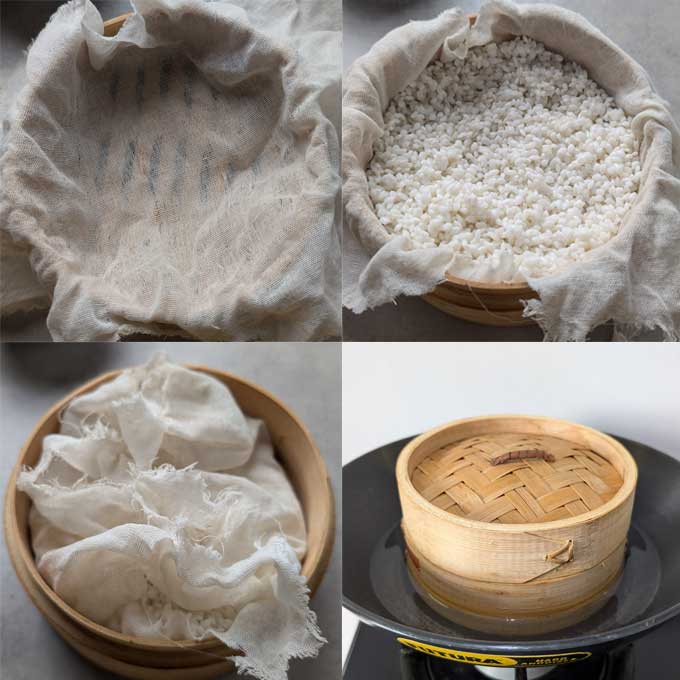
- Steam over boiling water for 20 minutes, or until the grains are tender and translucent.

Step 3: Make the Coconut Sauce
- While the rice is steaming, combine coconut milk, sugar, and salt in a saucepan. Heat gently over medium heat, stirring until the sugar dissolves and the sauce thickens a bit.
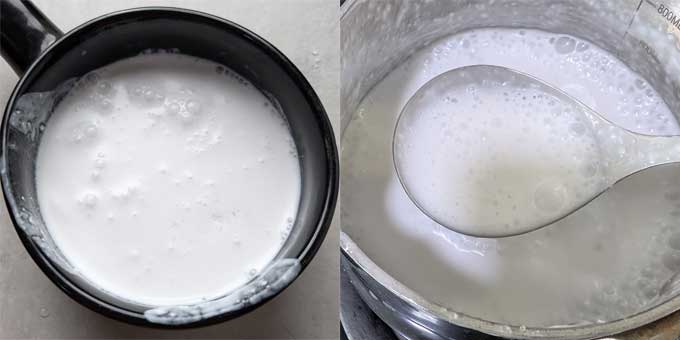
- Reserve about ¼ cup of this mixture for drizzling later.
Step 4: Combine the Rice and Sauce
- Once the rice is cooked, transfer it to a mixing bowl.
- Pour the remaining warm coconut sauce over the rice, stirring gently to coat. Let the rice absorb the sauce for 20–30 minutes.
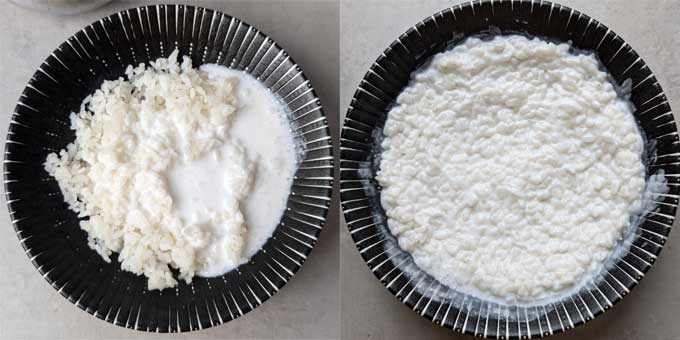
- It may look overly wet at first, but it will thicken beautifully as it sits.
Step 5: Cut the Mangoes
- Choose ripe, fragrant mangoes for the best flavour—look for fruit that gives slightly when gently pressed.
- Peel the mangoes and slice the flesh away from the pit.
- Cut into thin slices or cubes, depending on your presentation preference.
Step 6: Assemble and Serve
- Scoop a generous portion of sticky rice onto a plate.
- Arrange mango slices on the side.
- Drizzle with the reserved coconut sauce and, if desired, sprinkle with toasted sesame seeds or crunchy fried mung beans for texture.
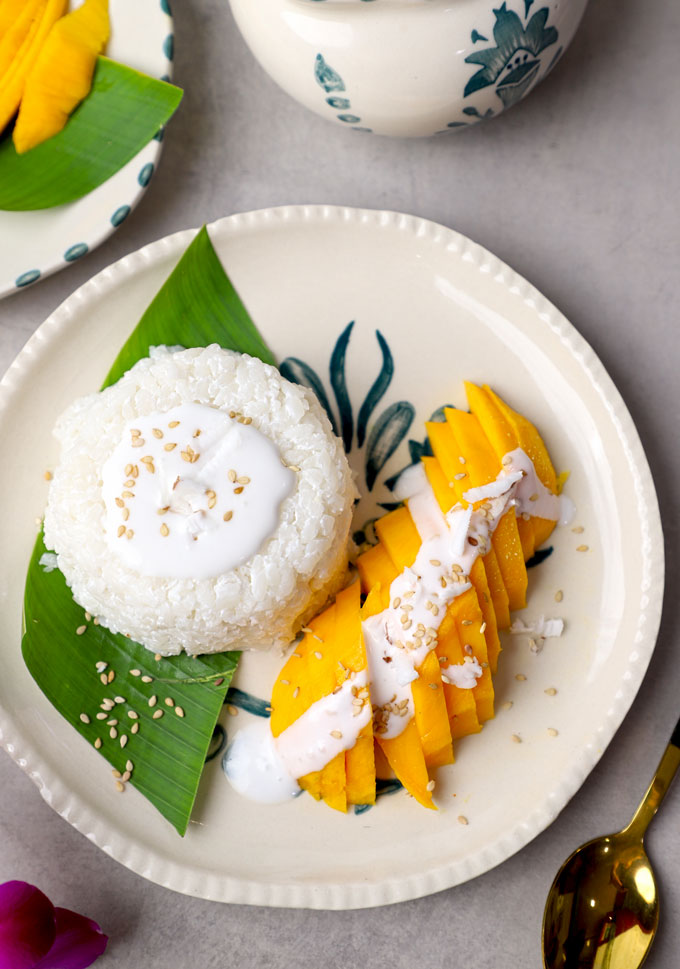
Serve it warm or at room temperature. Mango Sticky Rice is simple, comforting, and irresistibly delicious.
My Tried and True Tips
- Use the right rice : Do not make this dish with medium or long grain less starchy rice like basmati, or Jasmine. The name of the dish itself has the word ‘sticky’ in it.
- Don’t skip soaking : Soaking helps the rice cook evenly and absorb the coconut sauce properly.
- Cooking rice with sauce: Many sticky rice recipes suggest cooking rice in the coconut sauce. I feel in that method the texture of sticky rice turns out more like a rice pudding.
- Rice to sauce ratio: After cooking the rice absorbs the sauce like anything. Hence, always add the sauce double the amount of cooked rice.
- Customize sweetness : If you prefer less sugar or if the coconut milk is already sweetened, reduce the amount of sugar in the sauce to taste. Also, remember it has to be served with sweet mango. Hence, sweetness of sugar should not over power the taste of coconut or mango.
More Mango Recipes
- Mango Jam
- Mango Lassi
- Mango Milkshake
- Mango Ice Cream
- Mango Shrikhand
- Mango Chia Pudding
- Mango Oats Smoothie
Ingredients
- ▢ ⅓ Cup short grain rice
- ▢ 1 large size ripe mango, sliced
- ▢ 1 ¼ Cup thick coconut milk
- ▢ 1 tablespoon caster sugar or granulated white sugar
- ▢ ¼ teaspoon salt
Ingredients For Garnish:
- ▢ 1 teaspoon white sesame seeds
- ▢ 1 teaspoon fried mung beans
Instructions
- Rinse rice with tap water until the water runs clear. Usually 2 times, is good enough. Then, soak it in a bowl of water for at least 4 hours or overnight.
- After soaking, drain the rice and place it in a cheesecloth-lined bamboo steamer (or any steamer you have on hand).
- Steam over boiling water for 20 minutes, or until the grains are tender and translucent.
- While the rice is steaming, combine coconut milk, sugar, and salt in a saucepan. Heat gently over medium heat, stirring until the sugar dissolves and the sauce thickens a bit. Reserve about ¼ cup of this mixture for drizzling later.
- Once the rice is cooked, transfer it to a mixing bowl. Pour the remaining warm coconut sauce over the rice, stirring gently to coat. Let the rice absorb the sauce for 20–30 minutes. At this stage, you can cover and leave it at room temperature. It may look overly wet at first, but it will thicken beautifully as it sits.
- Peel the mangoes and slice the flesh away from the pit. Cut into thin slices or cubes, depending on your presentation preference.
- Scoop a generous portion of sticky rice onto a plate. Arrange mango slices on the side.
- Drizzle with the reserved coconut sauce and, if desired, sprinkle with toasted sesame seeds or crunchy fried mung beans for texture. Serve warm or at room temperature.
Recipe Notes:
- Black sticky rice : Adds a nutty, earthy flavour and looks beautiful when paired with golden mango slices. Pandan-infused rice : Add a few pandan leaves to the coconut milk for a fragrant twist. Thick Sauce : Make a thicker sauce by adding a teaspoon of cornstarch to the reserved coconut milk for an extra creamy drizzle. Or use a combination of coconut cream and full fat coconut milk. Can I keep the sauce in fridge? Yes. After cooling down, you can store it in refrigerator for a day or two. Slightly warm in a microwave or pan before mixing with the rice. Can I keep the steamed rice in refrigerator? Yes. But it becomes slightly dry and chewy.
Nutrition
We follow a strict NO SPAM Policy
