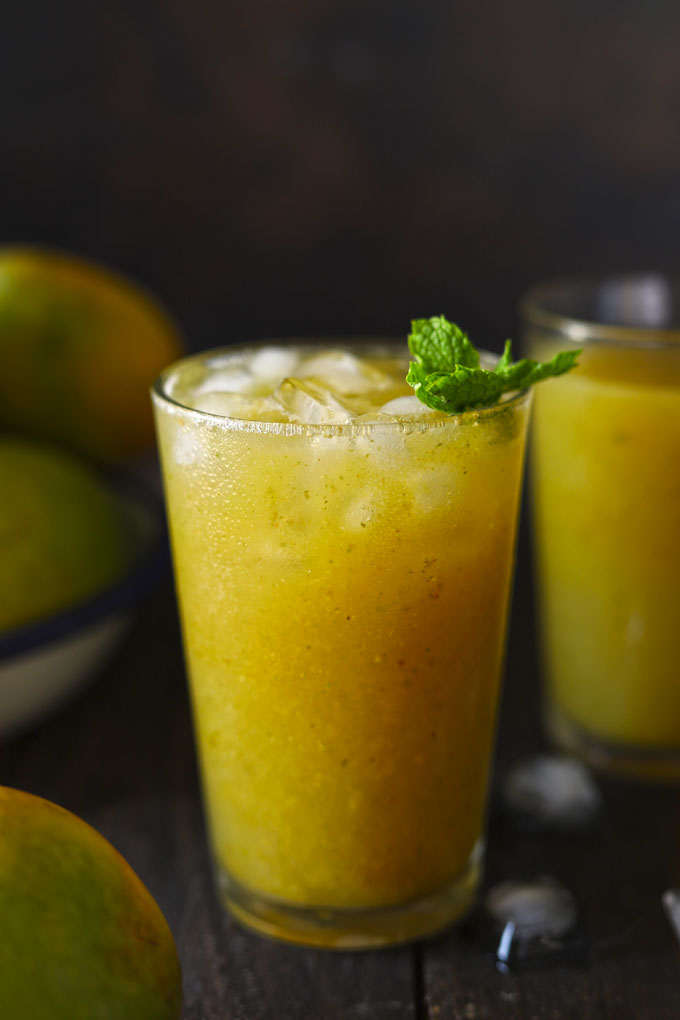
Aam Panna is a traditional Indian summer drink made with green mangoes. This mango panna recipe is easy to follow and always yields delicious results. Be sure to watch the video!
- What is Aam Panna?
- Ingredients Required
- Aam Panna Concentrate
- How To Make Panna – 3 Ways
- Watch Aam Panna Video
- More Indian Summer Drink Recipes
- Aam Panna Recipe
What is Aam Panna?
Aam Panna is a vegan, gluten-free raw (green) mango drink. It is a traditional Indian sharbat widely popular across Northern India also known as mango panha, Kairi ka apshola, or Kairi ka Panna.
Along with many other health benefits, mango panna is mainly known for its heat-resistant properties. It is a natural coolant.
The mango panna may vary from light green to yellow depending upon the variety of the mango. The best season to enjoy panna is from April to June or during the peak of the summer season.
USPs of Aam Panna:
- gluten-free
- has no nuts
- easy to store
- it has no dairy
- natural coolant

Ingredients Required
- Mango: Use unripe, green, raw mango for making aam panna. The colour of the panna may vary depending on the raw mangoes. The raw mango with a hint of sweetness is the best.
- Sugar: Use granulated white sugar or raw unprocessed sugar.
- Seasoning: Rock or Black Salt, Cumin Powder
- Fresh Mint Leaves give a refreshing aroma and taste to the panna.
Aam Panna Concentrate
The undiluted mango panna concentrate has a thick and luscious consistency. Panna Concentrate is easy to store and has a long shelf life.
Mix water in the concentrate in the desired quantity before drinking/serving the sharbat.
With the bottle of mango panna concentrate sitting in the fridge, I am always excited about the delicious sips that await me as soon I reach home.
How To Make Panna – 3 Ways
Pressure Cooker Method: Pressure cook the mangoes over medium heat for 2 – 3 whistles along with water. Remove the stone, if any, in the mangoes. Allow the mango pulp to cool. Blend the mango pulp, sugar, salt, spices, and mint until smooth.
Roasting Method: Wash and wipe the raw mangoes. Now, you can roast them directly over the gas stove flames or on the barbecue grill. Once that is done, get rid of the charred/black mango skin and the stone. Next, collect the pulp in a bowl. Blend it with sugar, spices, and mint leaves. The mango panna has a smokey taste from roasting.
Instant Pot Method: You can make this aan panna in an instant pot . Add peeled green, raw mango with water to the inner pot. Seal the lid. Set the steam valve to the Sealing position. Pressure Cook for 6 – 8 minutes. Release the steam. Collect the pulp in the inner pot. Discard the stones. Add sugar, mint leaves, and spices. Blend the sherbet using a hand blender.
The Verdict: The roasting method gives a more intense taste to mango pulp. In my opinion, if you prefer that smokey flavour and aroma, go for the roasting method. Otherwise, my pressure cooker method is highly time-saving. I tried the roasting process with kiwi ka panna last summer. And needless to say, it was delicious!
Watch Aam Panna Video
More Indian Summer Drink Recipes
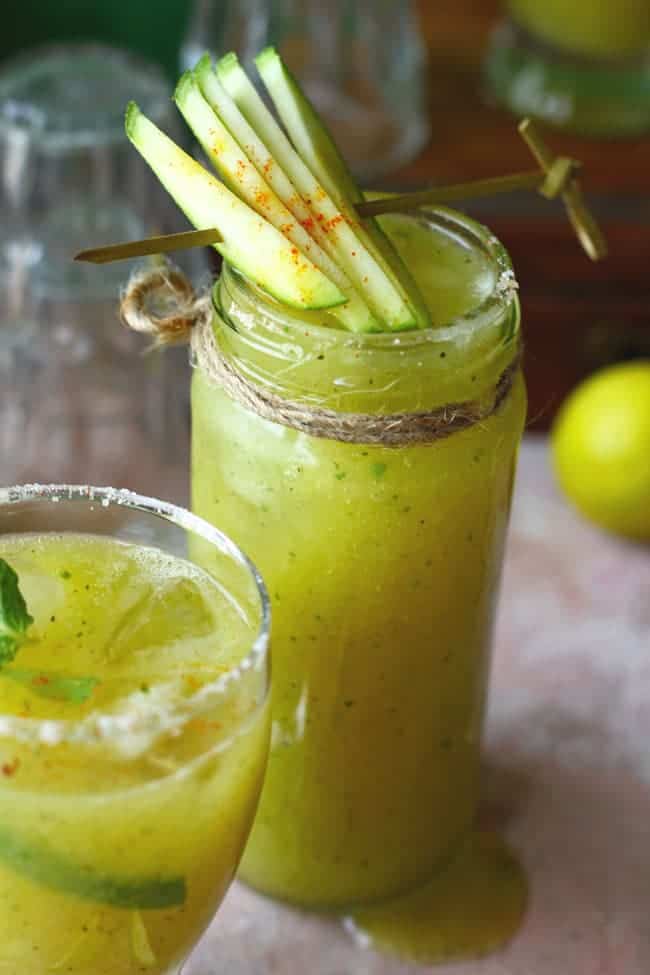
- Kiwi Panna
- Mango Lassi
- Hibiscus Tea
- Sattu Sharbat
- Sugarcane Juice
- Jamun Lemonade
Ingredients
- ▢ 500 gram raw/green mango (kaccha aam/kairi)
- ▢ 1 Cup granulated white sugar or to taste
- ▢ 2 teaspoon black rock salt (kala namak) or Chaat Masala
- ▢ 2 teaspoon roasted cumin powder (jeera powder)
- ▢ ½ Cup fresh mint leaves
- ▢ 4 Cup water
Instructions
- Rinse the mangoes nicely in water. Peel the skin of the mangoes.
- Pressure cook the mangoes over medium heat for 2 – 3 whistle along with water. Let the steam release naturally from the pressure cooker. You can do the same in an instant pot as well. Cook mangoes in pressure cook mode for 5 – 6 minutes.
- Open the lid and transfer the boiled mango pulp along with water in a bowl. Squeeze the mangoes to collect the pulp. Remove the stone, if any, in the mangoes. Allow the mango pulp to cool.
- Blend together the mango pulp, sugar, salt, spices, and mint until smooth. Taste and adjust the amount of sugar and spices accordingly.
- You can store the aam panna concentrate in the fridge in a clean bottle for a month.
- To serve, add ¼ cup aam panna concentrate in each glass. Add ice-cubes and fill the glass with chilled water. Stir to combine nicely.
- Garnish with fresh mint leaves. Serve aam panna chilled.
Recipe Notes:
- You can cook mangoes in an instant pot as well. Cook mangoes in pressure cook mode for 5 – 6 minutes.
- Instead of white sugar, you can add light brown sugar, jaggery, or sugar syrup.
- Make sure to clean and wash the mangoes nicely before cooking else aam panna might taste bitter or not suitable for consumption.
- For health benefits, aam panna is best consumed chilled or cold. Avoid drinking warm aam panna.
- Store mango panna in the fridge only and not at room temperature.
Nutrition
We follow a strict NO SPAM Policy

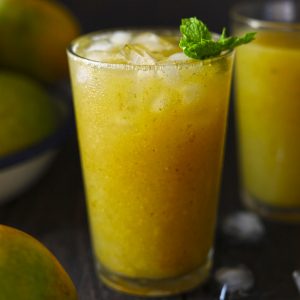
Aam Panna Recipe
Equipment
- Pressure Cooker
- Blender
Ingredients
- 500 gram raw/green mango (kaccha aam/kairi)
- 1 Cup granulated white sugar or to taste
- 2 teaspoon black rock salt (kala namak) or Chaat Masala
- 2 teaspoon roasted cumin powder (jeera powder)
- ½ Cup fresh mint leaves
- 4 Cup water
Instructions
- Rinse the mangoes nicely in water. Peel the skin of the mangoes.
- Pressure cook the mangoes over medium heat for 2 - 3 whistle along with water. Let the steam release naturally from the pressure cooker. You can do the same in an instant pot as well. Cook mangoes in pressure cook mode for 5 - 6 minutes.
- Open the lid and transfer the boiled mango pulp along with water in a bowl. Squeeze the mangoes to collect the pulp. Remove the stone, if any, in the mangoes. Allow the mango pulp to cool.
- Blend together the mango pulp, sugar, salt, spices, and mint until smooth. Taste and adjust the amount of sugar and spices accordingly.
- You can store the aam panna concentrate in the fridge in a clean bottle for a month.
- To serve, add ¼ cup aam panna concentrate in each glass. Add ice-cubes and fill the glass with chilled water. Stir to combine nicely.
- Garnish with fresh mint leaves. Serve aam panna chilled.
Video
Notes
- You can cook mangoes in an instant pot as well. Cook mangoes in pressure cook mode for 5 - 6 minutes.
- Instead of white sugar, you can add light brown sugar, jaggery, or sugar syrup.
- Make sure to clean and wash the mangoes nicely before cooking else aam panna might taste bitter or not suitable for consumption.
- For health benefits, aam panna is best consumed chilled or cold. Avoid drinking warm aam panna.
- Store mango panna in the fridge only and not at room temperature.
Nutrition
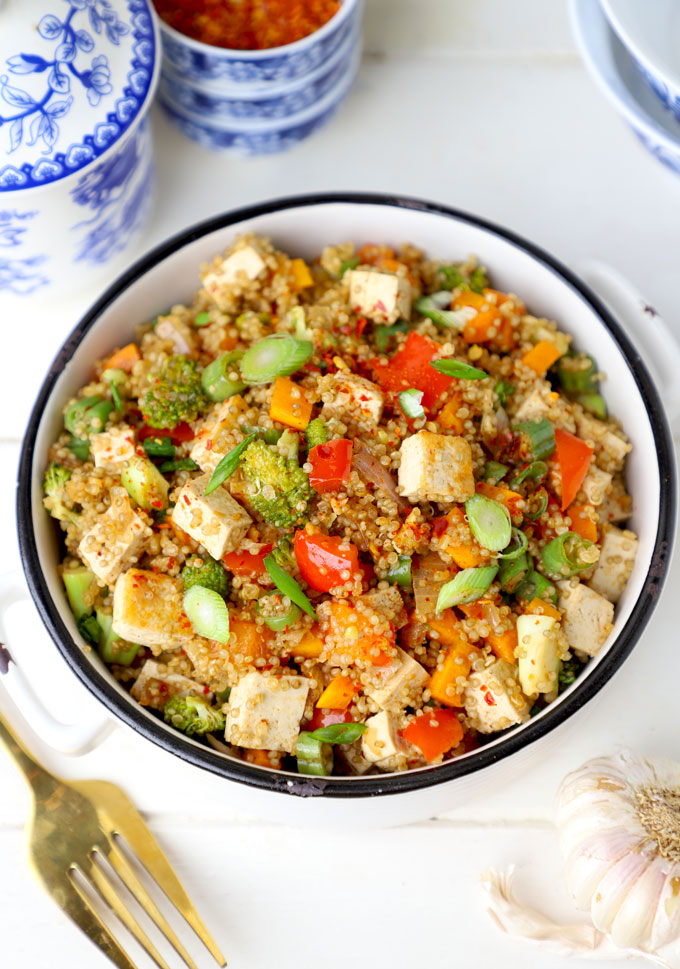
This is a quick Asian-style fried rice recipe that substitutes quinoa for rice making it a healthy and wholesome family dinner.
Estimated reading time: 6 minutes
- What makes Quinoa Fried Rice special?
- Is Quinoa better for you than rice?
- Ingredients You’ll Need
- How To Make Quinoa Fried Rice
- Serving Suggestion
- Fried Rice Recipe Variation Tips
- Quinoa Fried Rice Recipe
Who can say no to a takeout-style dish which is healthy too? Nothing like curling up on busy weeknights with a big bowl of this quinoa fried rice.
Quinoa fried rice checks all the boxes of a wholesome recipe.
What makes Quinoa Fried Rice special?
Quinoa, a superfood, is a gluten-free grain that is packed with protein, fibre, and essential nutrients. When used in fried rice, quinoa adds an extra layer of nutrition to the dish.
Additionally, this fried rice recipe has the perfect balance of protein, carbs, and fibre. Making it an excellent choice for vegetarians and vegans trying to eat a well-balanced meal. It’s a dish that satisfies both your taste buds and your nutritional needs.
There are many more reasons why I love it so much:
- vegan
- takes 30 minutes
- meal prep friendly
- gluten and nut-free
- highly customisable
- wholesome one-pot meal
- best way to recycle leftovers
Is Quinoa better for you than rice?
Quinoa is a complete protein, containing all nine essential amino acids , making it an excellent choice for vegetarians and vegans looking to increase their protein intake. You can make it a part of your daily meals if you want a filling grain that has a low glycemic index and better nutrition profile.
I love adding quinoa to salads , soups, stew or serve it as a side dish with Indian main course gravy dishes and curries.
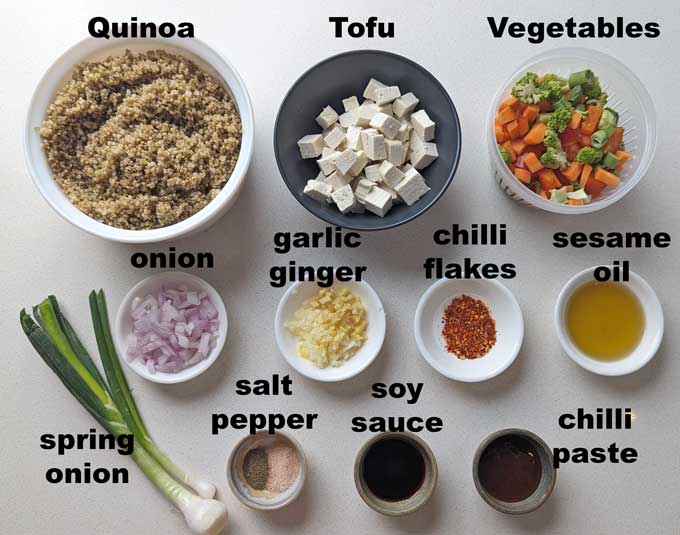
Ingredients You’ll Need
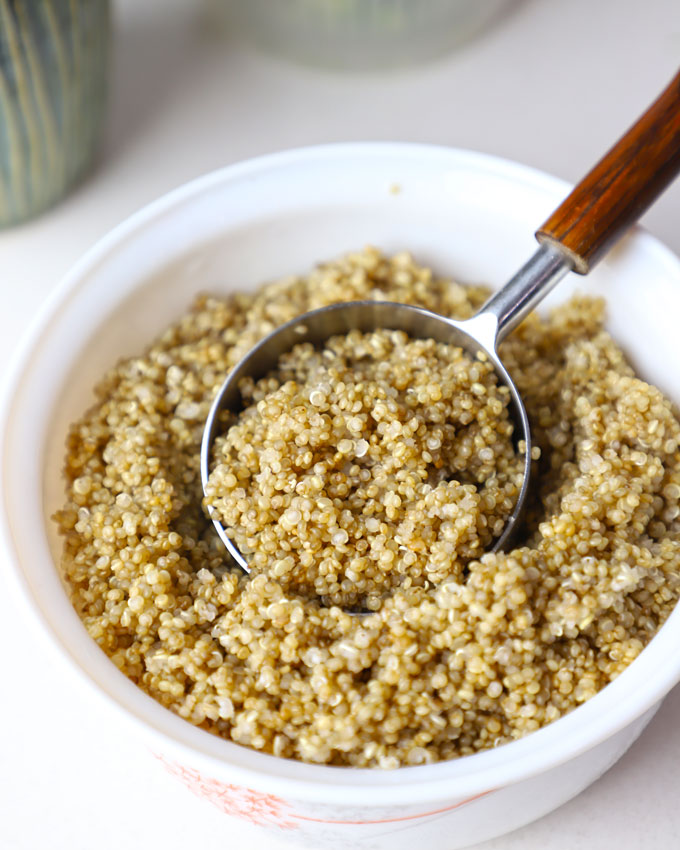
- Quinoa should be pre-cooked for this fried rice recipe.
- Vegetables: From green peas , bell peppers, cabbage, green beans, carrots, mushrooms, and snow peas to any other vegetables with a crunch is perfect for fried rice. Make sure to chop all the vegetables finely.
- Greens: Bok Choi, baby spinach, mustard leaves, basil, or green onion are some of the great nutritious additions.
- Protein: You can add chicken, egg, shrimp, paneer or tofu. Cut the protein into small bite sizes to cook quickly.
- Cooking Oil: I use only sesame oil for Asian-style cooking. The nutty taste and aroma give the quinoa fried rice an extra kick. Instead of sesame oil, you can use peanut, groundnut, or other vegetable oil.
- Herbs & Seasoning: Ginger, Garlic, and Onion are the holy grail of delicious fried rice. Season it with a good quality low sodium soy sauce, rice vinegar, chilli paste, salt, chilli flakes, and black pepper.
Stir-Fry Pan/Wok: A Chinese wok or a good stir-fry pan is essential for making fried rice.
High Heat : Stir-frying is all about high heat and fast cooking. You cannot make takeaway-style, smokey delicious fried rice on low heat. Hence, keep the stovetop heat high while stir-frying the protein, vegetables, and rice.
How To Make Quinoa Fried Rice
Prep beforehand all the vegetables, herbs, sauce, and seasoning , and place them next to your cooking stove within reach of your hands.
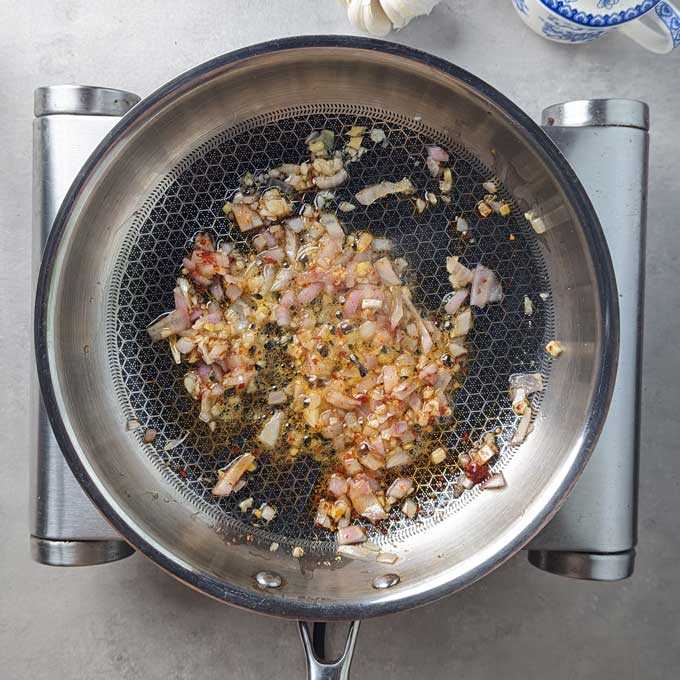
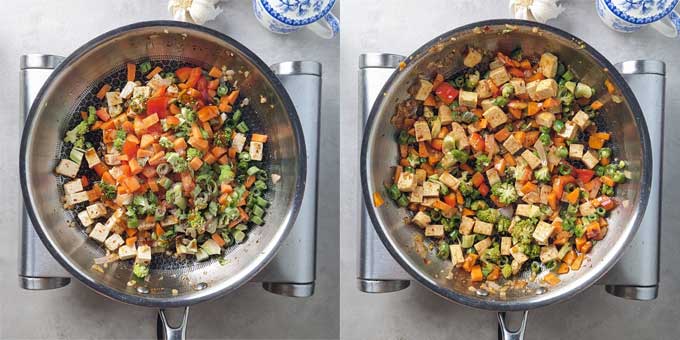
Step 1) Heat oil in a large stir-frying pan or wok over high heat. Add minced garlic, ginger, chilli flakes, and diced onion. Stir fry them for less than a minute to release their aroma.
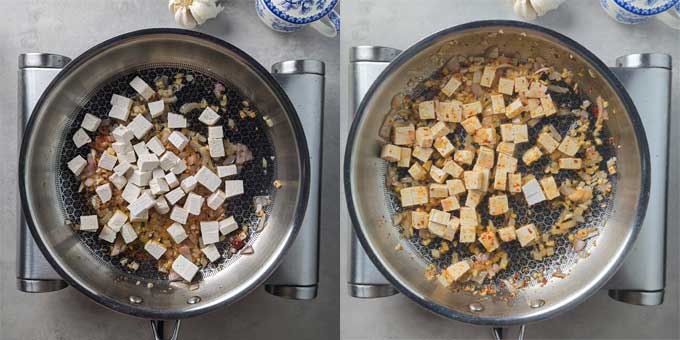
Step 2) Add the diced tofu. Stir fry till it becomes slightly crisp and golden. This takes a minute.
Step 3) Next, add mixed vegetables, salt, pepper, and sauces to the skillet. Stir fry over high heat for 40 – 50 seconds.
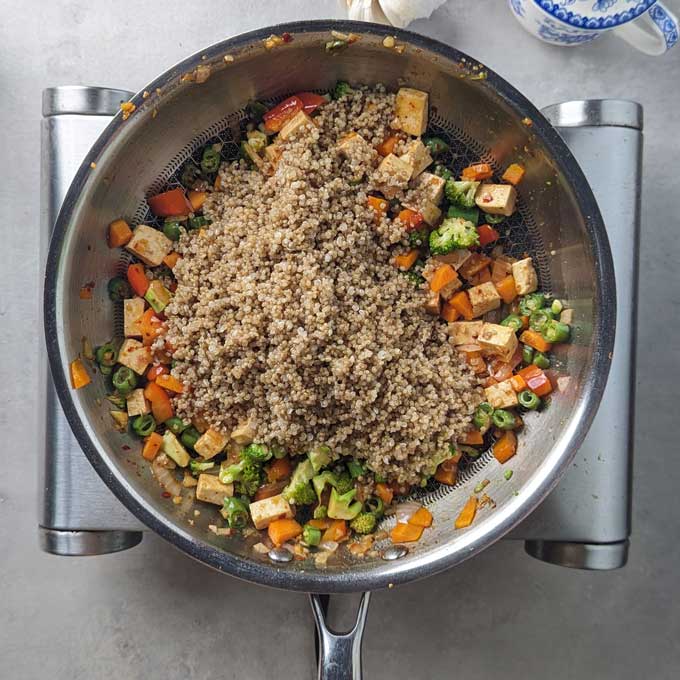
Step 4) Add the cooked quinoa to the skillet and stir fry to combine all the ingredients. Cover and cook for 1 minute for quinoa to absorb all the flavour.
Garnish fried rice with chopped green onions before serving.
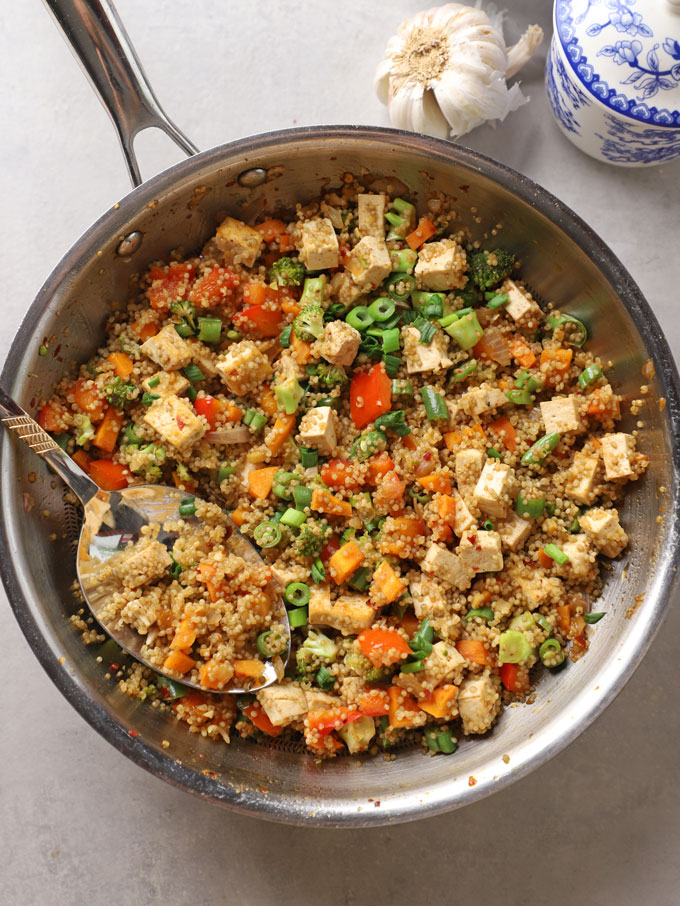
Serving Suggestion
Quinoa Fried Rice is a complete meal in itself. Enjoy it either as a standalone dish or, with a delicious accompaniment like half fried egg, drizzle of chilli oil , along with flavoursome Asian sides like kimchi , or smashed cucumber salad .
You can add whisked eggs while making the fried rice or you can top it with a half-fried egg before serving.

Fried Rice RecipeVariation Tips
- Protein Boost: Add chicken, shrimp, tofu, paneer, tempeh, mock meat, or edamame for an extra protein punch.
- Nutty Crunch: For added texture and flavour, sprinkle toasted sesame seeds or chopped peanuts over the quinoa fried rice before serving.
- Make It Gluten-Free: Make sure your soy sauce is gluten free or use tamari or coconut aminos instead of soy sauce to keep the dish gluten-free.
- Meal Prep Friendly: Quinoa fried rice makes an excellent meal prep option. Cook a big batch ahead of time and store it in the refrigerator for a week. Enjoy it throughout the week with salads or grilled proteins.
More Fried Rice Recipes
- Lemon Rice
- Coconut Rice
- Chicken Fried Rice
- Pineapple Fried Rice
- Mushroom Fried Rice
Ingredients
- ▢ 1 Cup cooked quinoa ( get recipe )
- ▢ 150 gram firm tofu, diced into small cubes
- ▢ 1 tablespoon sesame oil
- ▢ ½ tablespoon minced garlic
- ▢ ½ tablespoon minced ginger
- ▢ ½ teaspoon red chilli flakes
- ▢ 1 medium-size onion, fine chopped
- ▢ 1 Cup mixed vegetables (carrot, bell pepper, green peas, broccoli)
- ▢ 1 teaspoon cooking salt or to taste
- ▢ ¼ teaspoon black pepper or to taste
- ▢ ½ tablespoon red chilli paste
- ▢ 1 teaspoon rice vinegar
- ▢ 1 tablespoon light soy sauce
- ▢ 2 sprigs spring onion, finely chopped
Instructions
- Heat oil in a large stir-frying pan or wok over high heat. Add minced garlic, ginger, chilli flakes, and diced onion. Stir fry them for less than a minute to release their aroma.
- Add the diced tofu. Stir fry till it becomes slightly crisp and golden. This takes a minute.
- Next, add mixed vegetables, salt, pepper, and sauces to the skillet. Stir fry over high heat for 40 – 50 seconds.
- Add the cooked quinoa to the skillet and stir fry to combine all the ingredients. Cover and cook for 1 minute for quinoa to absorb all the flavour.
- Garnish fried rice with chopped green onions before serving.
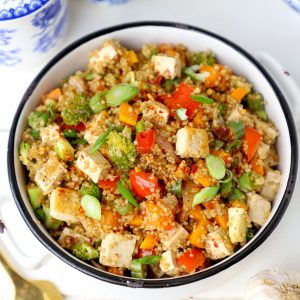
- Serve Quinoa Fried Rice warm with chilli oil or half fried egg.
Recipe Notes:
- Quinoa should be pre-cooked for this fried rice recipe. You can use millets also in this fried rice recipe instead of quinoa.
- If you are using frozen mixed vegetables, thaw them before adding to the fried rice.
- Protein should be cooked before adding vegetables to the fried rice.
- Instead of sesame oil, you can use peanut, groundnut, coconut, or other vegetable oil.
- Adjust the amount of sauces and seasoning as per your taste preference.
Nutrition
We follow a strict NO SPAM Policy
